Turning an Unused Closet into a Built-in Reading Nook

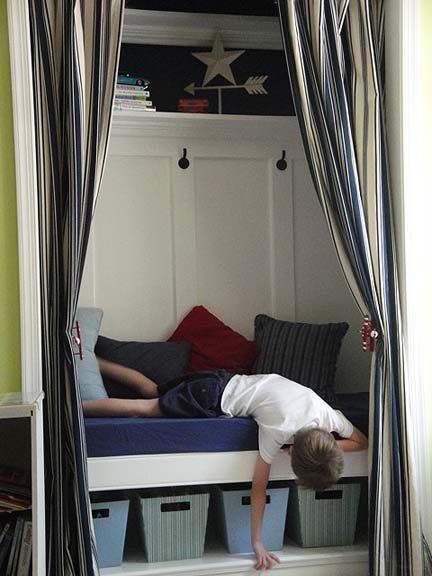
When Brittany of Pretty Handy Girl sent me this closet to reading nook transformation I couldn’t believe my eyes. If only I could explain that ever since I was like six, my dream was to have built in everything. Built in dressers and beds and window seats… ( I am not kidding, as a joke a while back I scanned in one of my dream room drawings from second grade, everything is built in check it out here) But back to Brittany’s hard work, look what she made this unused closet into: Look how incredibly beautiful it is!:
This past weekend my husband took the boys camping. A free weekend – by myself – peace and quiet!
Well, forget the quiet part, I decided to tackle another DIY project I had been thinking about for almost two years. I first got the idea after seeing this photo in Creative Home Magazine:

Kym, the homeowner, had turned her son’s closet into a private nook. I thought, no problem, I’d complete this project in an easy 2 days. Afterall, how long can renovating one 6′ x 2′ closet take? During stopping points I could squeeze in a pedicure, swim some laps and possibly have a friend over for wine and some chat one evening. Truth be told, it ended up taking a full 3 days (and nights)!
So, here is the abbreviated (press fast forward on the remote) version:
My three year old has two full size closets in his room. And, yet, his toys were always strewn around the room. Here is my “keeping it real” BEFORE picture:

Last year I took the doors off one of the closets and put up some curtains so he could have a little hideaway.
First task (after cleaning up all those toys, of course!) was removing hardware, demolition and patching holes (where I found I didn’t know my own strength.)

Phew, glad that is done. Now comes the fun part, time to build!
First I cut all my wood to size, then built two frames. One for the base and one for the bench.
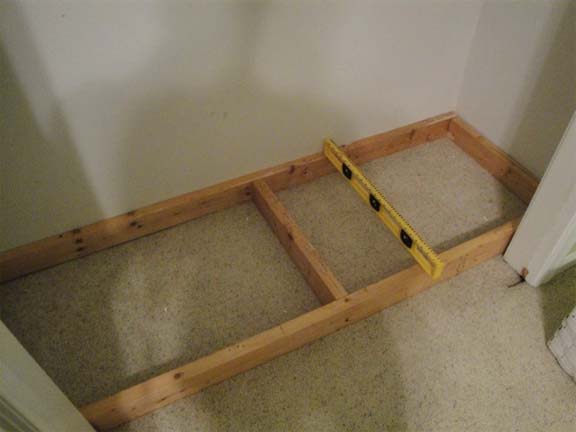
The base frame only had one center support since it didn’t have to hold much weight. The bench seat frame had two center supports at 2′ intervals.
I bought paint quality (almost smooth) plywood for the tops of the base and seat frames.
Here is a little trick I learned for scribing the profile of trim or other obstacles onto your board. In this instance, I used a compass and set the width to the same distance from the wall to the outside of my door casing. Then drew a line around the casing being careful to keep the compass perpendicular to the casing. Then you can cut out the profile with a jigsaw or coping hand saw.


Next I built the second platform the same way (with the exception of the extra center supports.) I highly recommend priming as much of the wood as you can before nailing it into place. It is easier to prime wood on sawhorses.
I pulled out my levels (both a carpenter’s level and laser level) and carefully leveled my bench platform before nailing it in. Then I used framing nails to nail the platform into the studs in the closet. (I promise to post about finding studs at a later date.)

Seriously, I really did level it! I even have the pictures to prove it! Because, at some point the right hand side of the bench must have shifted while I was nailing, which resulted in a slight slope. Shhhh, don’t tell anyone! My lesson learned is that next time I will either screw the frame in place to hold it or put a brace underneath to keep it from slipping.

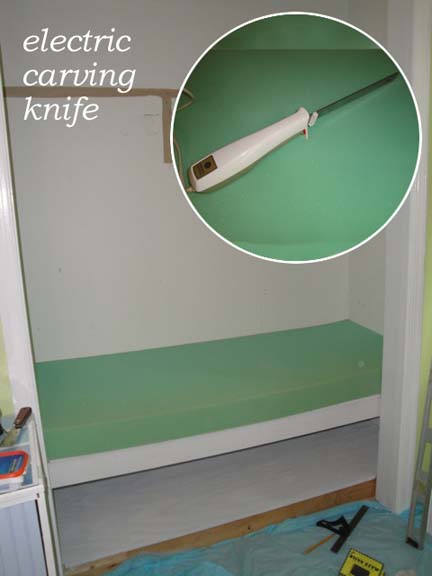
Somewhere during the process, I cut the foam cushion for the bench seat. If you haven’t heard, the best way to cut foam is with an electric carving knife! (Huge thank you to my friend and neighbor Karen for the use of her 1970’s electric carving knife.)
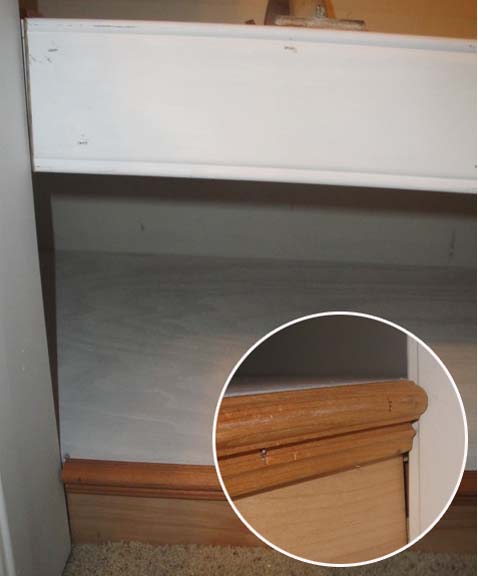
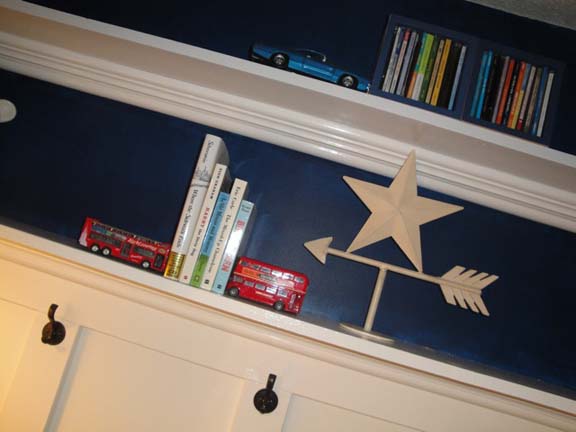
Next I installed all the moulding, wainscoting and trim. Did I mention that I bought all my trim and decorative moulding at the Habitat for Humanity ReStore? Super cheap at $.50 (yes, 50 cents!) per linear foot! My total for all the trim was $18, and I still have two 6 ft. pieces left.

Before I could prime I had to caulk all the seams. Did you know that some of the moulding in your home, especially crown moulding, is usually made up of several different pieces and then caulked to hide the edges?

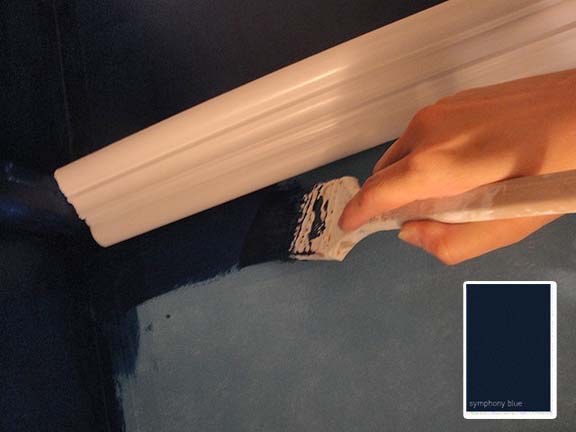
This is the Pretty Handy Girl’s tried-and-true caulking method:
- Squeeze out your bead of caulk.
- Run your finger along the bead to smooth it (then wipe your finger off on a rag.)
- Follow up with a slightly moist paper towel for a super smooth finish!
Once the caulk dried, I primed all the wood and wainscoting.
After trying some Benjamin Moore paint swatches, I settled on a deep navy blue called “Symphony Blue”. I knew I’d need to use some tinted primer before trying to paint such a dark color on the light walls. Unfortunately our Ace Hardware was out of stock. Luckily George, my friendly Ace Hardware paint consultant, told me how to mix my own.

Isn’t the marble effect pretty! I used 1 part paint to 3 parts primer and stirred it up really well.
Once everything is dry, the painting can begin. I always use two coats of paint. The only time I got away with one was by using Benjamin Moore Aura paint in our living room. But, I was going from a medium green to a slightly lighter green. Not a major change in color.
So, are you ready?? The drumroll please…


>This is amazing!! Someday maybe I'll own my own house…a house big enough to have an unused closet…and I'll be able to do this too.
>wow this is a great idea!!! It looks so organized and fun at the same time! My poor son got stuck with the smallest room in our new home and this would be a great idea for him!! Thanks for sharing you did a wonderful job!!
https://thislittleshabbychicvegangirl.blogspot.com/
>Wow… what a wonderful idea!
Nicole
>LOVE IT! Linked you on my blog, hope you don't mind, this is FANTABULOUS!
>I wish I could have a built in reading nook. Actually this will be perfect for sleepovers – I've always wanted a little nook like that, unfortunately I live in an apartment and don't have an extra closet.
Thanks for sharing! Tina "The Book Lady"
https://familyliteracyandyou.blogspot.com
https://holidaygiftsandmore.blogspot.com