Guest Room Makeover With Pewter Accents
With new lighting, paint, refinished headboard, and more, this guest room makeover provides a nice cozy space for guest. No more sleeping on the couch. Read how Virginia set up this new space for her guests.
You might also like 6 ways to make your house more visitor friendly or family heritage guest bedroom design.
Submitted By Live Love DIY
Hi! I’m Virginia! I am obsessed with decorating and DIY projects. Turning something old into something new is what inspires me. I love to find CHEAP ways to transform every room, and am constantly looking for new ideas! My blog is my place to share, be inspired, and leave a trail of all my D-I-Y shenanigans!
Guest Room Makeover
It’s official! Our guests no longer have to sleep on the couch! We’ve finally finished every last detail of our guest bedroom, and are now accepting reservations! (And to answer the question posed by a good friend of mine, yes…our humble abode is pet friendly!)
Unfortunately I don’t have any shocking before pictures to share, but with its formerly dark wooden trim and stark white walls, I can assure you this room was nothing to marvel at! However….that has ALL changed! I love this room so much now that I am officially naming it my ‘nap cubby’ until the first guest calls dibs!!
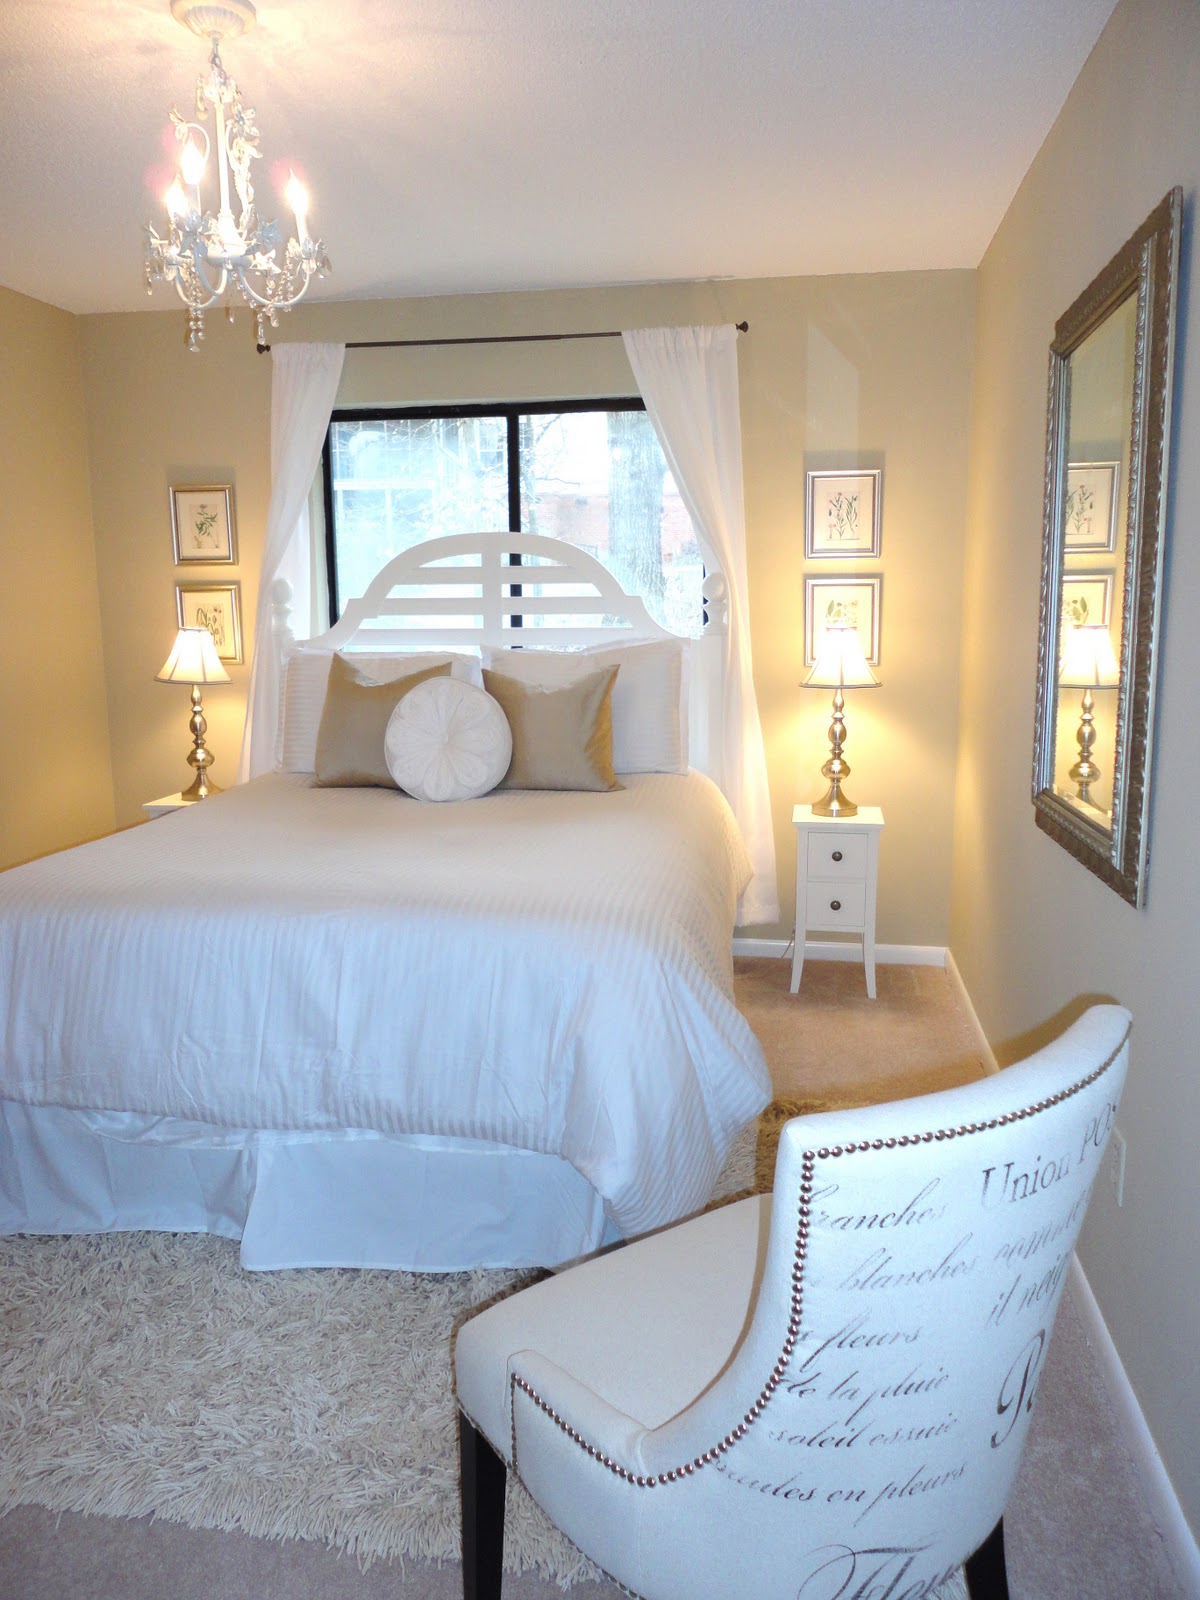
So, enough talk! Let’s peep inside! Here is the room today:

To make this room elegant yet comfortable, I chose a color palette of soft beige & crisp white. Then, I added a bit of sparkle with pewter accessories.
I found this gorgeous linen upholstered chair with french script on the back. The pewter nailheads add a special touch and work well with the mirror frame and lamps.
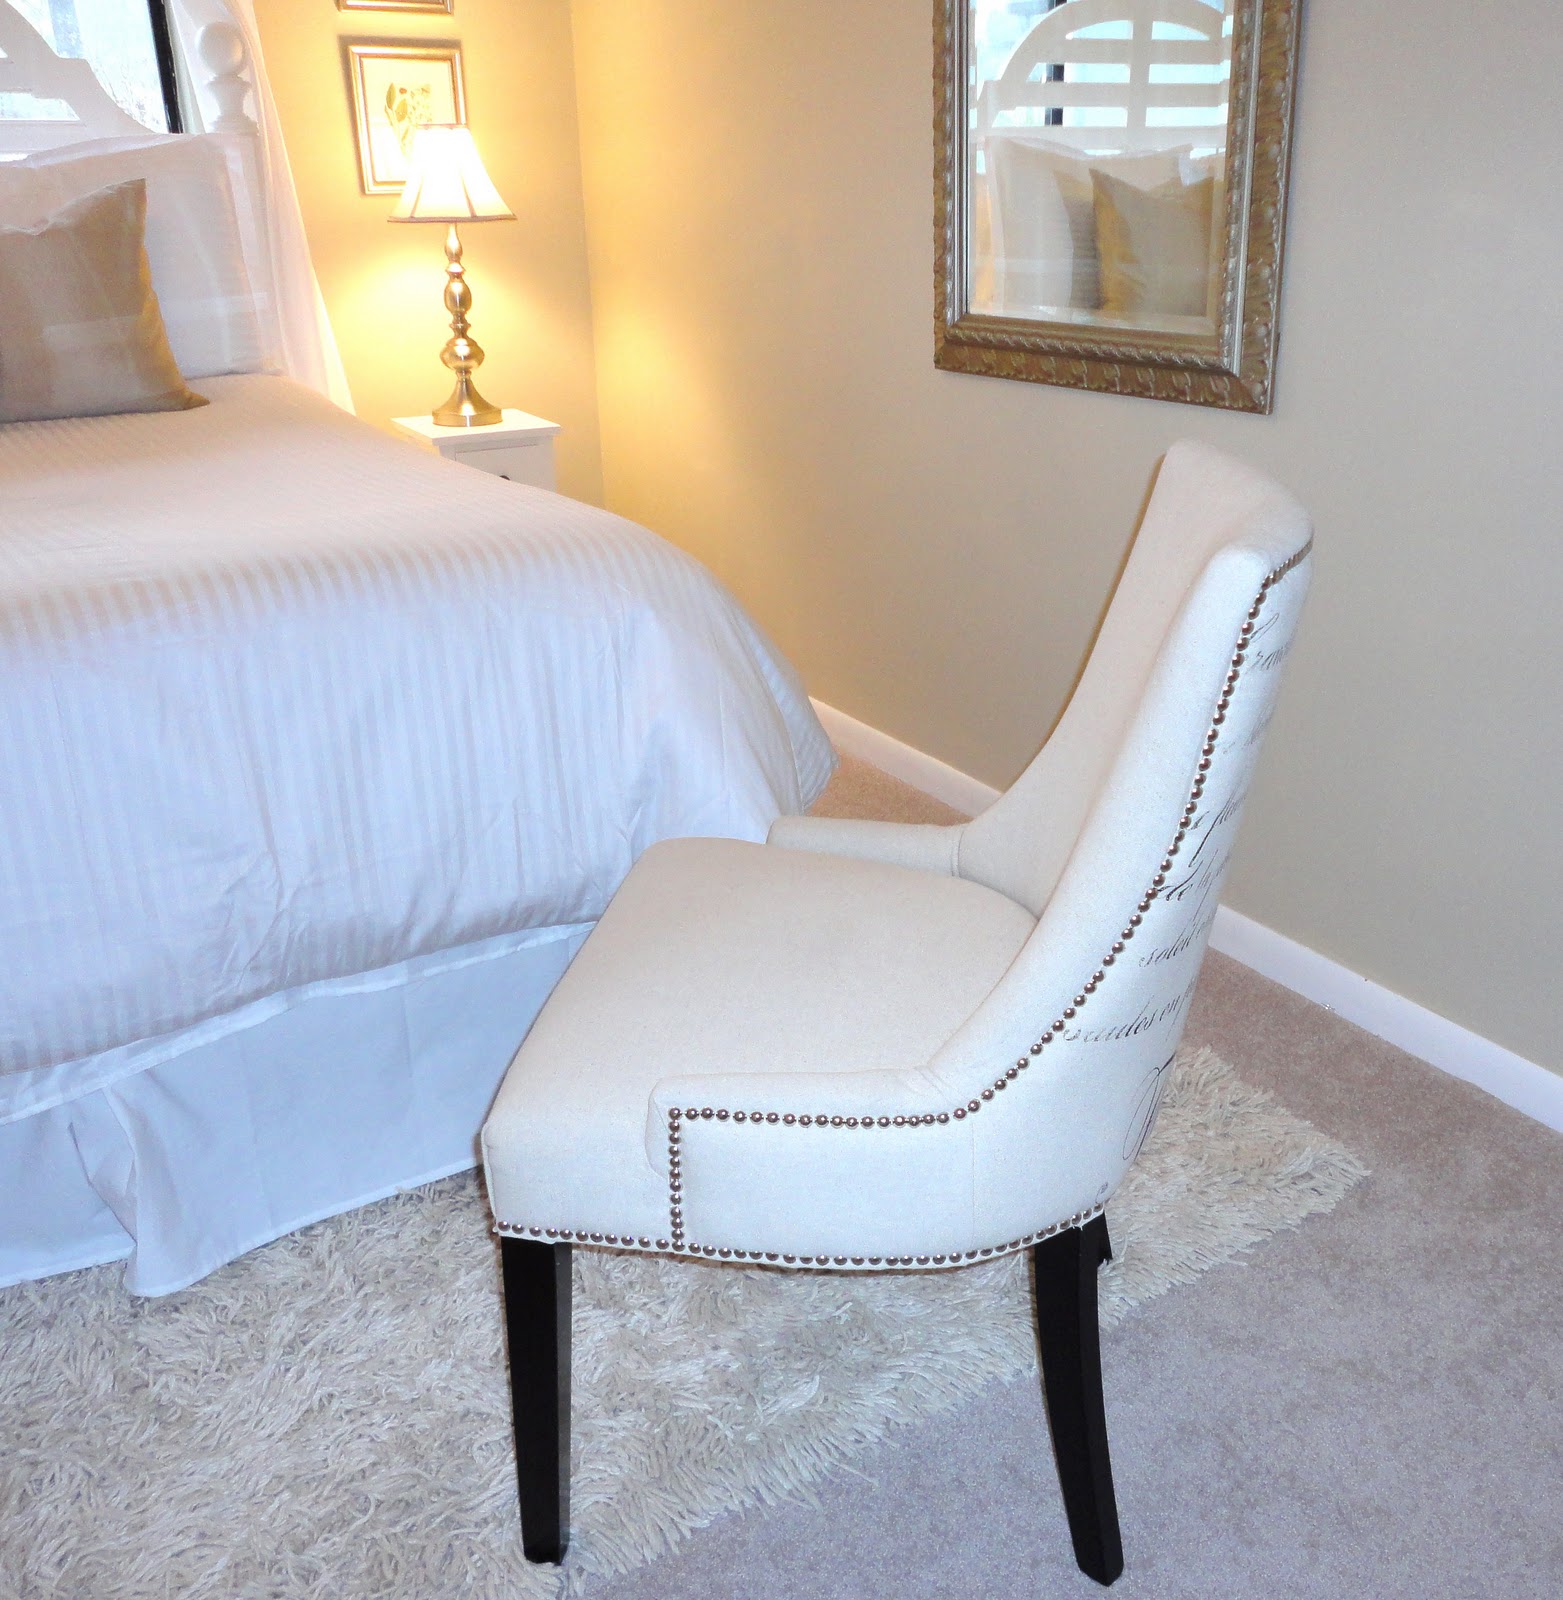
Isn’t she just lovely? (I found her at Marshall’s for quite the steal!)
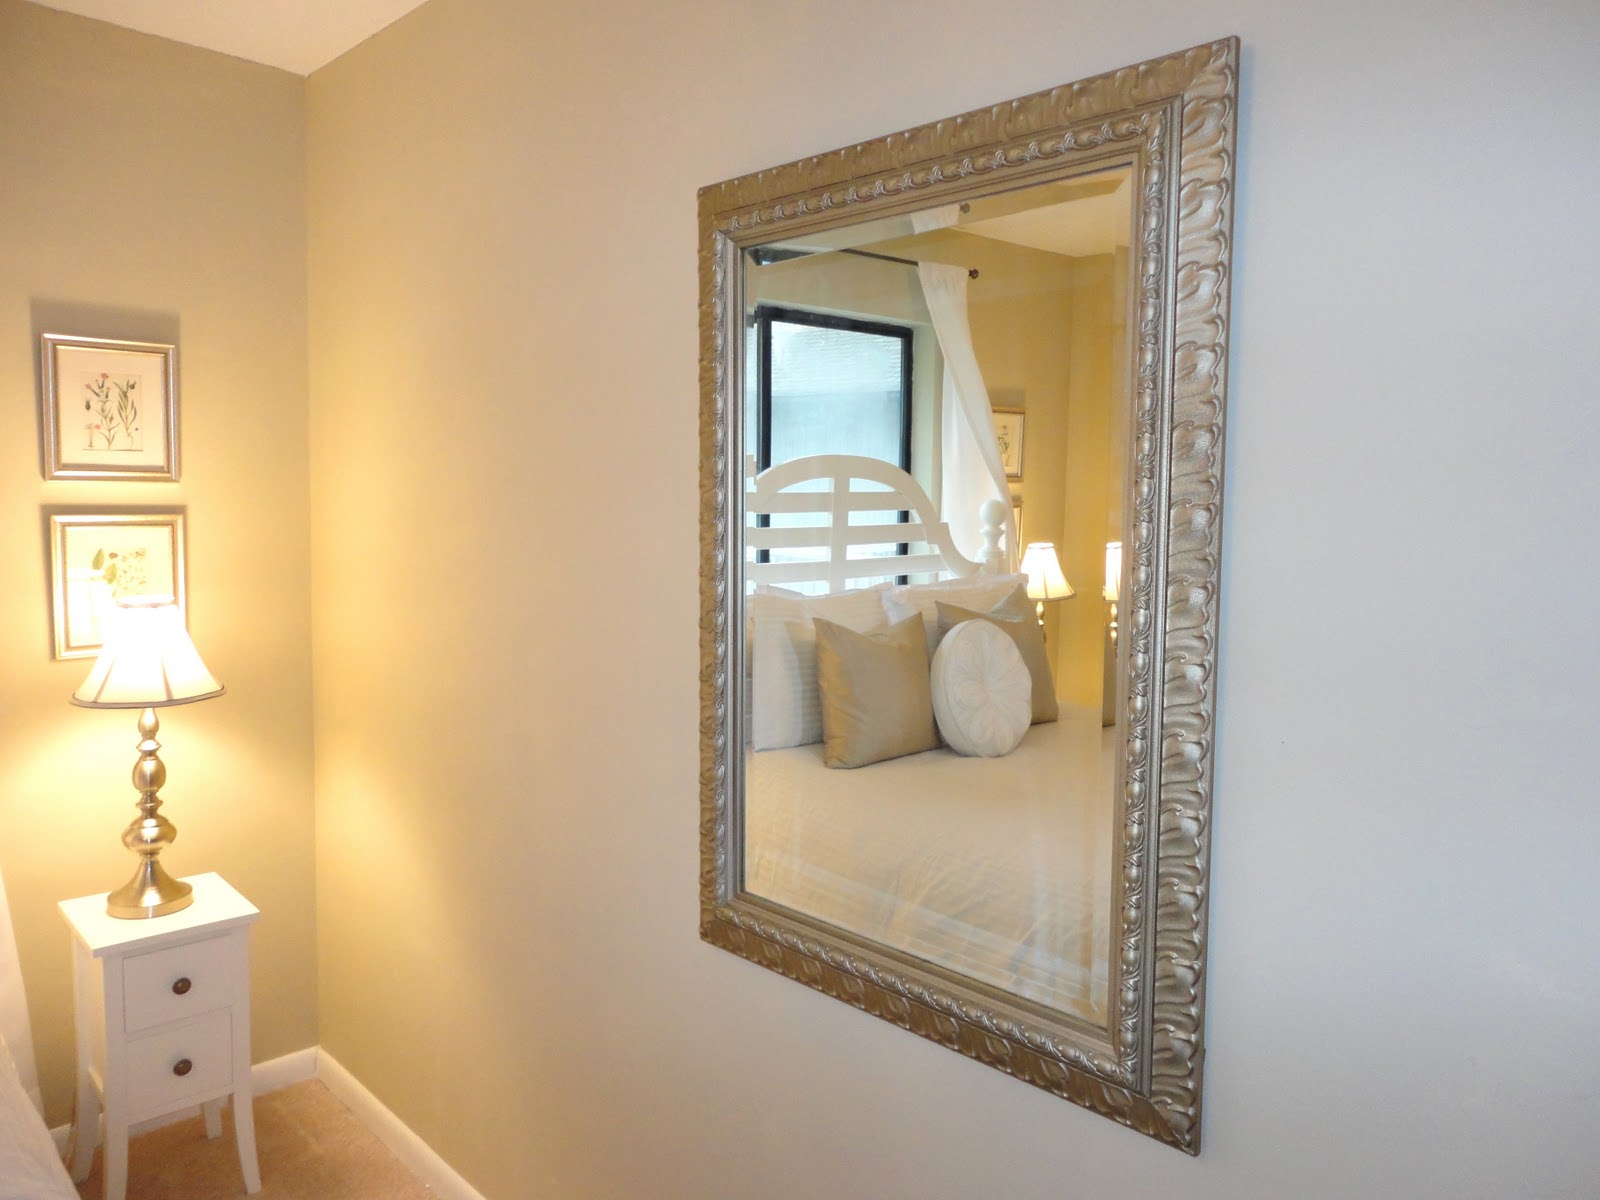
This mirror was actually a older piece we already had. It was originally a dark gold, and just didn’t work with this space, so I decided to spray paint it. I couldn’t find the right color of pewter I wanted, so instead I got one can of silver and one can of gold. I sprayed it with the silver spray paint first. Once that was dry, I stood really far back and did a couple coats of really fine spraying with the gold. The ultimate effect was really beautiful and doesn’t even look spray painted! Sometimes when you fly by the seat of your pants and get creative, you end up making something really cool! (Or you just totally screw it up and make a huge mess…which I have done MANY, MANY times!!)
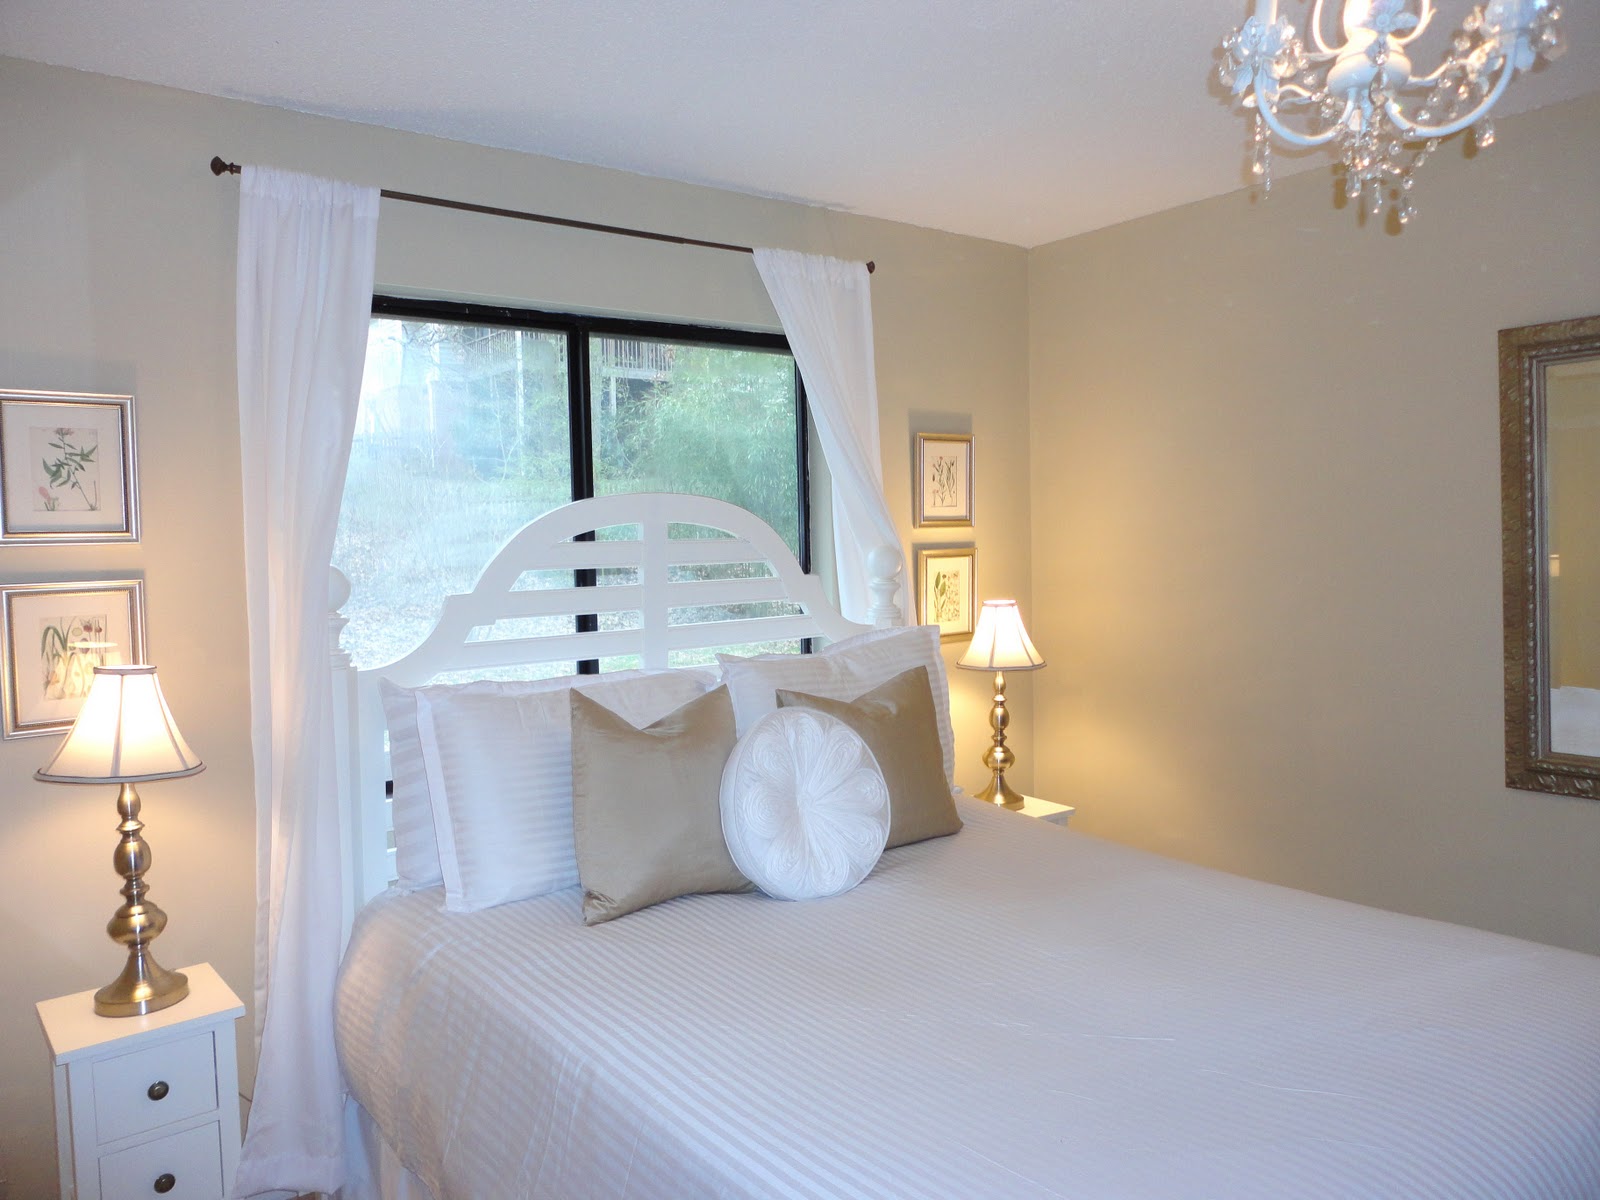
For the lighting in this room, I found 2 simple pewter lamps from Ross and a white chandelier from Home Depot. The chandelier is my favorite in the whole house…it’s elegant and romantic and adds a bit of bling to the room. For the side lamps, I found smaller lampshades so that the lamps didn’t over-power the small end tables. The end tables were actually found at a thrift store, but they were bright red and I simply (well… painstakingly) painted them with several coats of creamy white and replaced the hardware.

This headboard was a second-hand piece! I did a little hunting on my favorite site, Craigslist, and found this headboard for $40!!! Let it be known, it required a bit of work! It was fairly beaten up and was a really ugly color of wood. I patched it up with some wood filler, sanded it down, and gave it the same paint job that the side tables received! I think the end result is totally classic and works perfect in this room! (Side note: I also found the bed frame on Craigslist for $20, so using a mattress we already owned, I was able to assemble this whole bed for $60! Not bad, eh?)
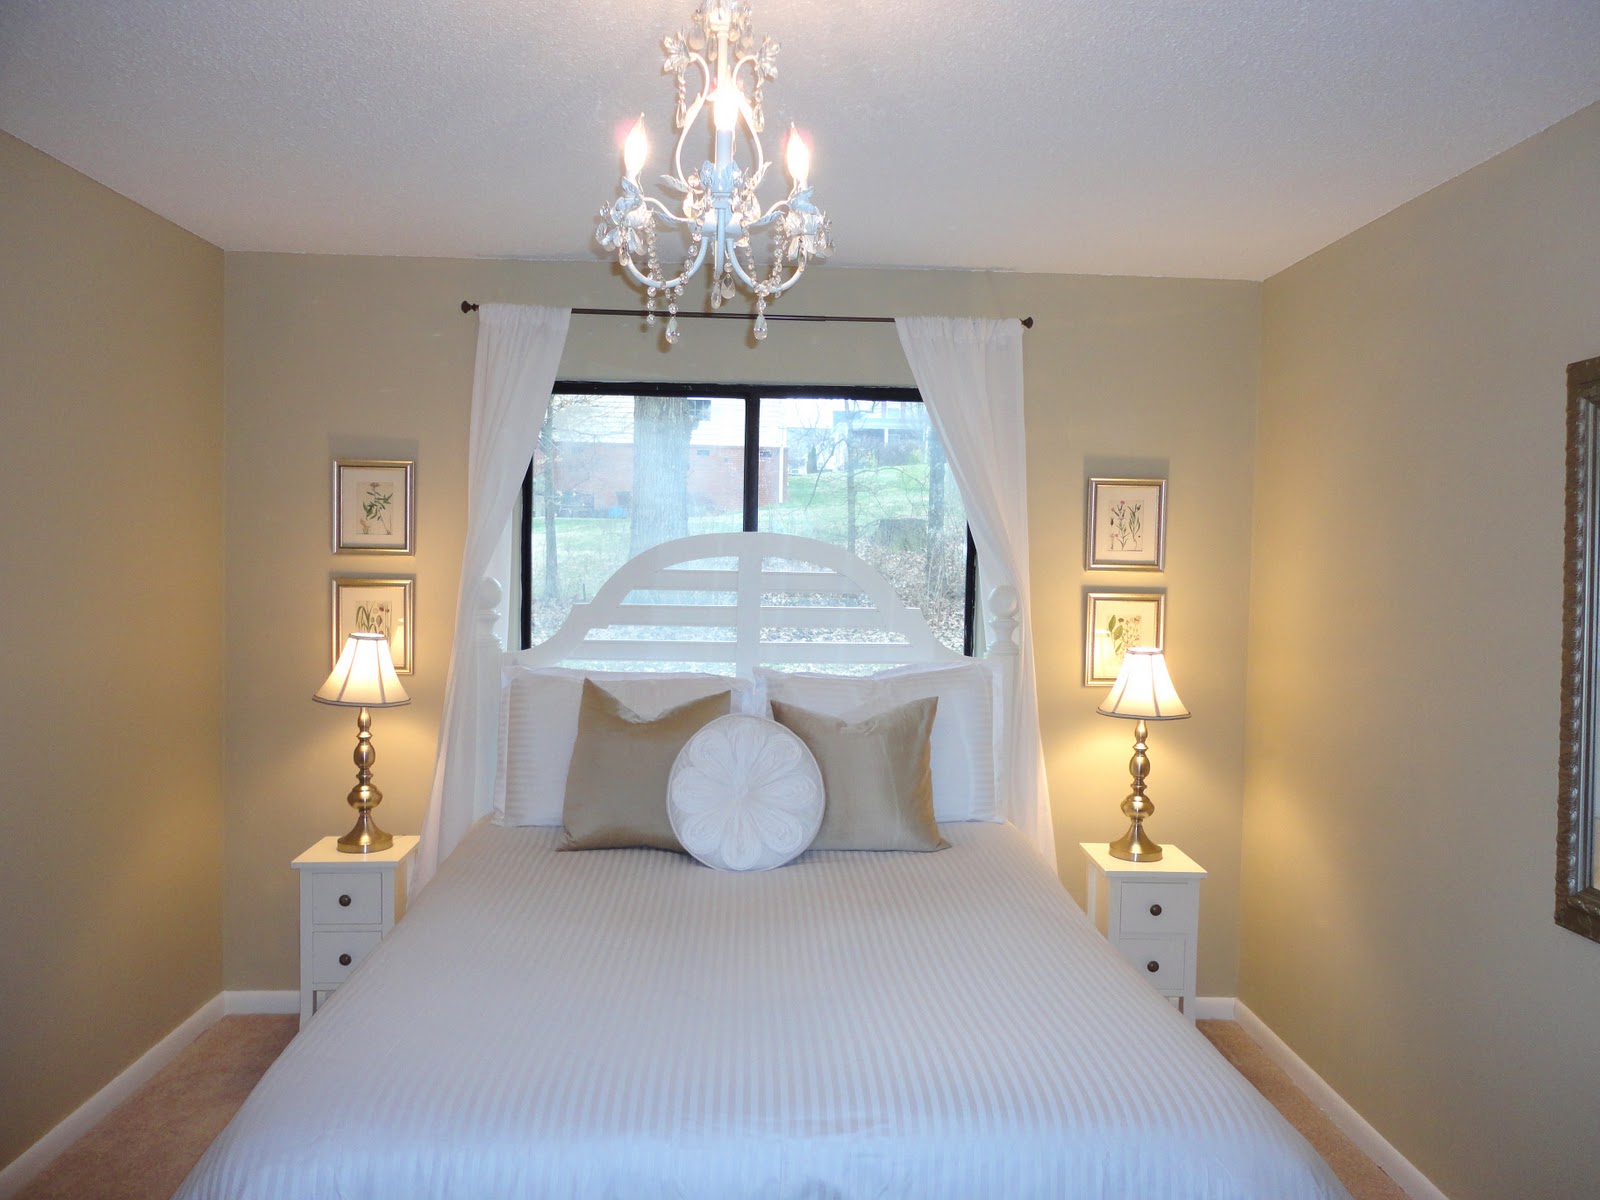
For the bedding in this room, I found everything at Target & Marshall’s. The duvet set came with 2 matching shams, and the gold taffeta pillows are real silk!! Man, do I love Target! The beautiful white round pillow in the center was found on the clearance rack at Marshall’s for $10…yes, i repeat….$10. Woohoo!!
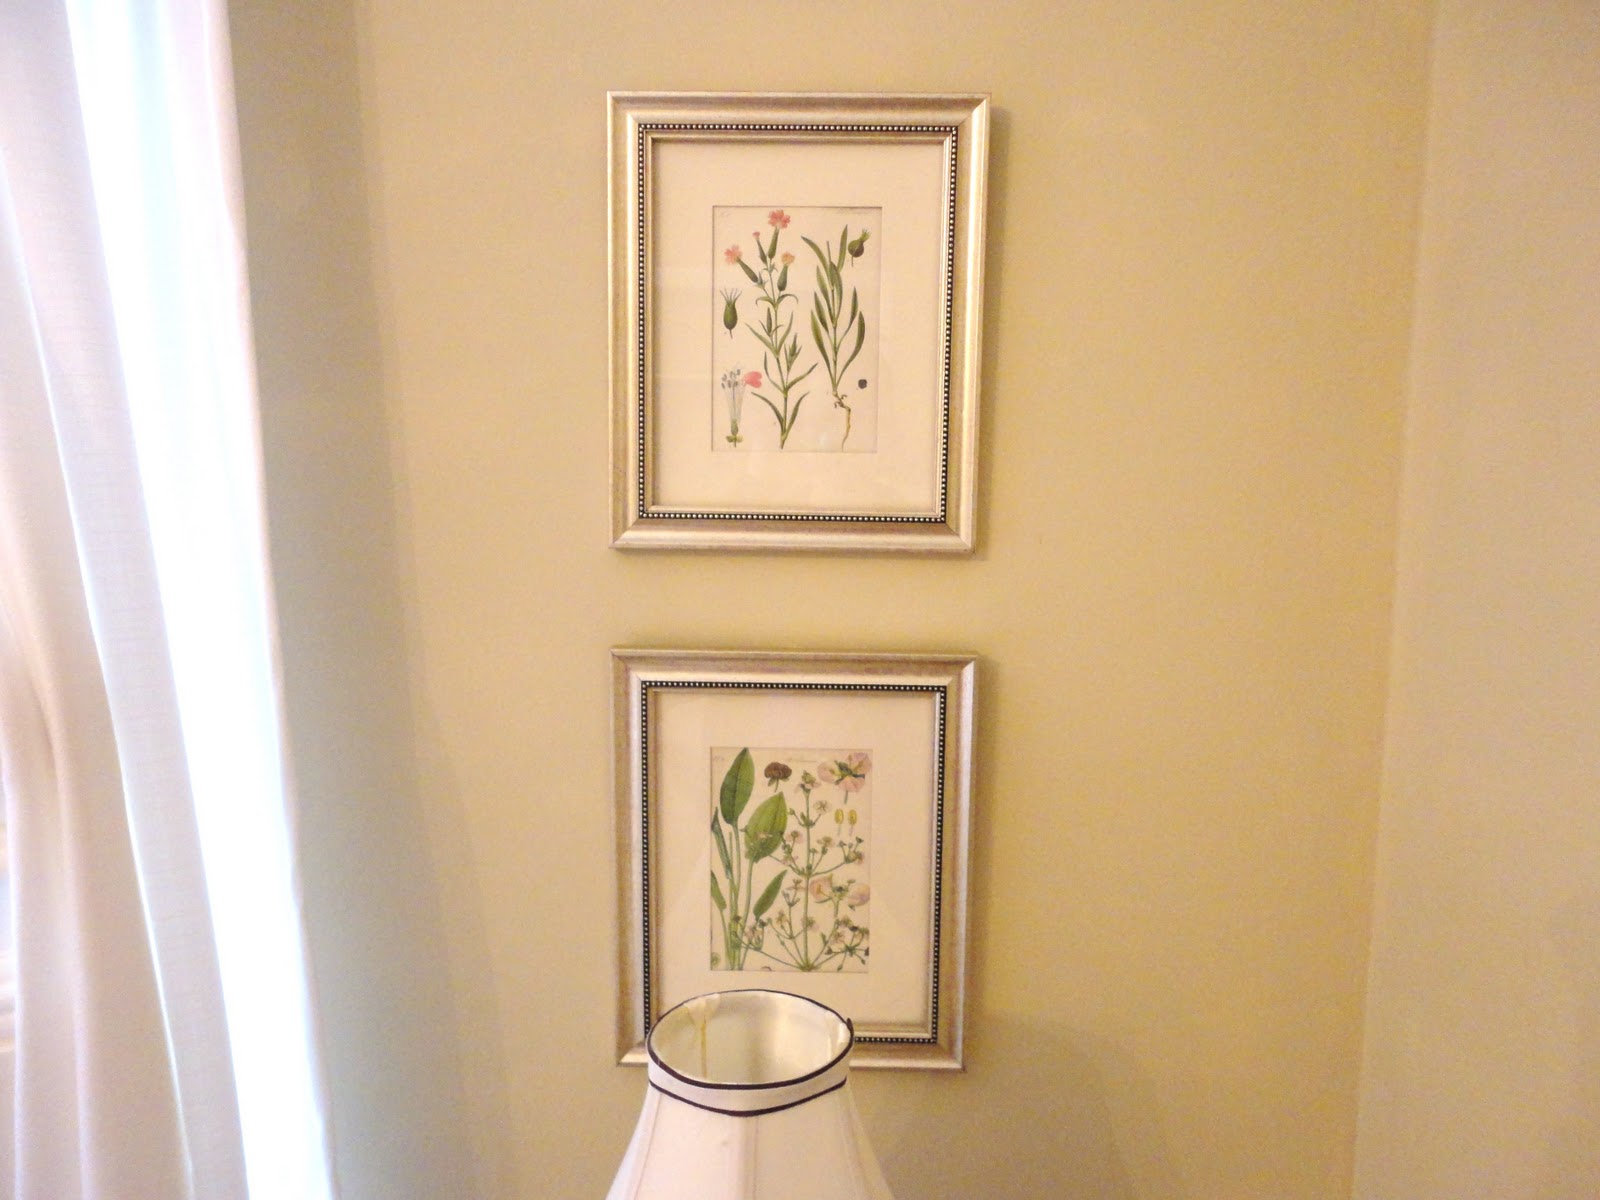
To add inexpensive artwork to the room, I found antique botanical prints on eBay then framed them in frames I found at a local salvage store. I was able to do 5 (2 on each side of the bed and 1 big one on the left side wall) for around $50. You can also find cheap little frames with mats already in them at Wal-Mart for $3-$5. I think a few pieces of ‘artwork’ adds great detail to a room. In this room, it also adds a little pop of color.

I’ll leave you with one last look at our newly finished guest room makeover. My husband’s parents (who I love dearly), have been sleeping on the couch when they come to visit (they are such troopers!) and I am so thrilled to be able to show them their new room next time they come to visit!
Here are some other bedrooms you might also check out:
|
|
|
|


This guest room is heavenly! Love it!
i like how this looks, although with the bed in front of the window, the openings on the headboard brings enough light in to the room making a small room look big! How much was the chandelier that were purchased from Home Depot? I agree, the chandelier adds a elegant look.
This is so lovely! You have done a fabulous job.
Your guestroom is lovely. Can I be your guest? ha! Just kidding. Its good to hear that you make mistakes too. I always get discouraged when that happens.
That is a very lovely room, could you tell me what color you used on the walls, please?
I’d love to stay in this room!! It’s simply elegant!! You’ve got great taste!