Welcome 2021 with year-end savings - see the deals here

Remodelaholic

DIY tutorials, Woodworking plans and more.

FREE BONUS: Kitchen Organization Boot Camp
  • Home
  • About Us
    • About US
    • Contributors
    • Facebook
    • Pinterest
    • YouTube
    • Instagram
    • Disclosure and Advertising
    • Contact Us
  • Shop
  • Project Ideas
    • Our Houses
      • Birch House (current projects)
      • Canyon House
      • Park House
      • Downing House
      • Logan House
    • DIY Project Plans
    • All projects
    • Barn Door Baby Gate
    • Dutch Door
    • Framing A Wall Mounted TV
    • Indoor Playhouse
    • Beach Themed Living Room Design
    • Chicken Coop Building!
    • Computer Desk
    • Computer Desk Plans
    • Custom Newel Posts and Stair Remodel
    • Family Room Sneak Peek
    • Headboard Tutorial
    • Living Room Progress
    • Mood Boards
    • Scrabbled Family Names
    • Pets
  • Design By Room
    • Bathrooms
    • Landscape
    • Kids Bedrooms
    • Kitchen
    • Living Rooms
    • Laundry Rooms
    • Master Bedrooms
    • Mood Boards
    • Office
  • Holiday
    • Christmas
    • Halloween
    • Patriotic
    • Easter
    • Fall
    • Saint Patrick’s Day
    • Thanksgiving
    • Spring
    • Valentines Day
    • Winter
  • Crafts
    • Printable
    • Art
    • Paper Crafts
    • Kids
    • Fabric Crafts
    • Decorate
  • Recipes
    • Appetizers
    • Beef
    • Beverages
    • Breakfast
    • Chicken
    • Desserts
    • Dinner
    • Fruit
    • Healthy
    • Holiday
    • Lunch
    • Main Dishes
    • Salads
    • Sandwiches
    • Sauces
    • Seafood
    • Side Dishes
    • Soup
    • Vegetables
  • Videos

Pallet Wood Memo Board

Written by Cassity

  • Facebook
  • Twitter

Want to add some easy Fixer Upper style to your home? Need a cute farmhouse style pallet wood memo board? But don’t have a ton of building skills?  That is okay, because this project is perfect for beginners and this is the easiest project imaginable! You’ll just need a few scraps of pallet wood (and remember, now you know how to easily take that pallet apart!) and a bit of wire mesh, and ta-da! You’re amazing and everyone will want one. Speaking of which — this would make a great gift idea, since the holidays are right around the corner.

This post is part of our week-long pallet extravaganza, Pallets Aplenty. Be sure to subscribe by email or RSS and follow along over on Facebook and Instagram with #palletsaplenty so you won’t miss a single one of the amazing posts we have coming up!

Super easy pallet memo board -- perfect for when you want a rustic touch to your decor but don't have a lot of time, tools, or DIY know-how (yet!). See more at Remodelaholic.com

 Ready to see how easy it is? Watch the video, and you will know what I mean!

DIY Barnwood Pallet Wood Memo Board

This post contains affiliate links for your convenience. Learn more here. 

Supplies:

3 pieces of pallet wood (at least 34″ long each)

Wood Glue

Wire Mesh (or hardware cloth)

1/2″ staples

Metal clips (optional) and Super glue


Tools:

Saw  (this can be a hand saw with a miter box or a miter saw)

Hammer

Pliers

barn-wood-pic-1

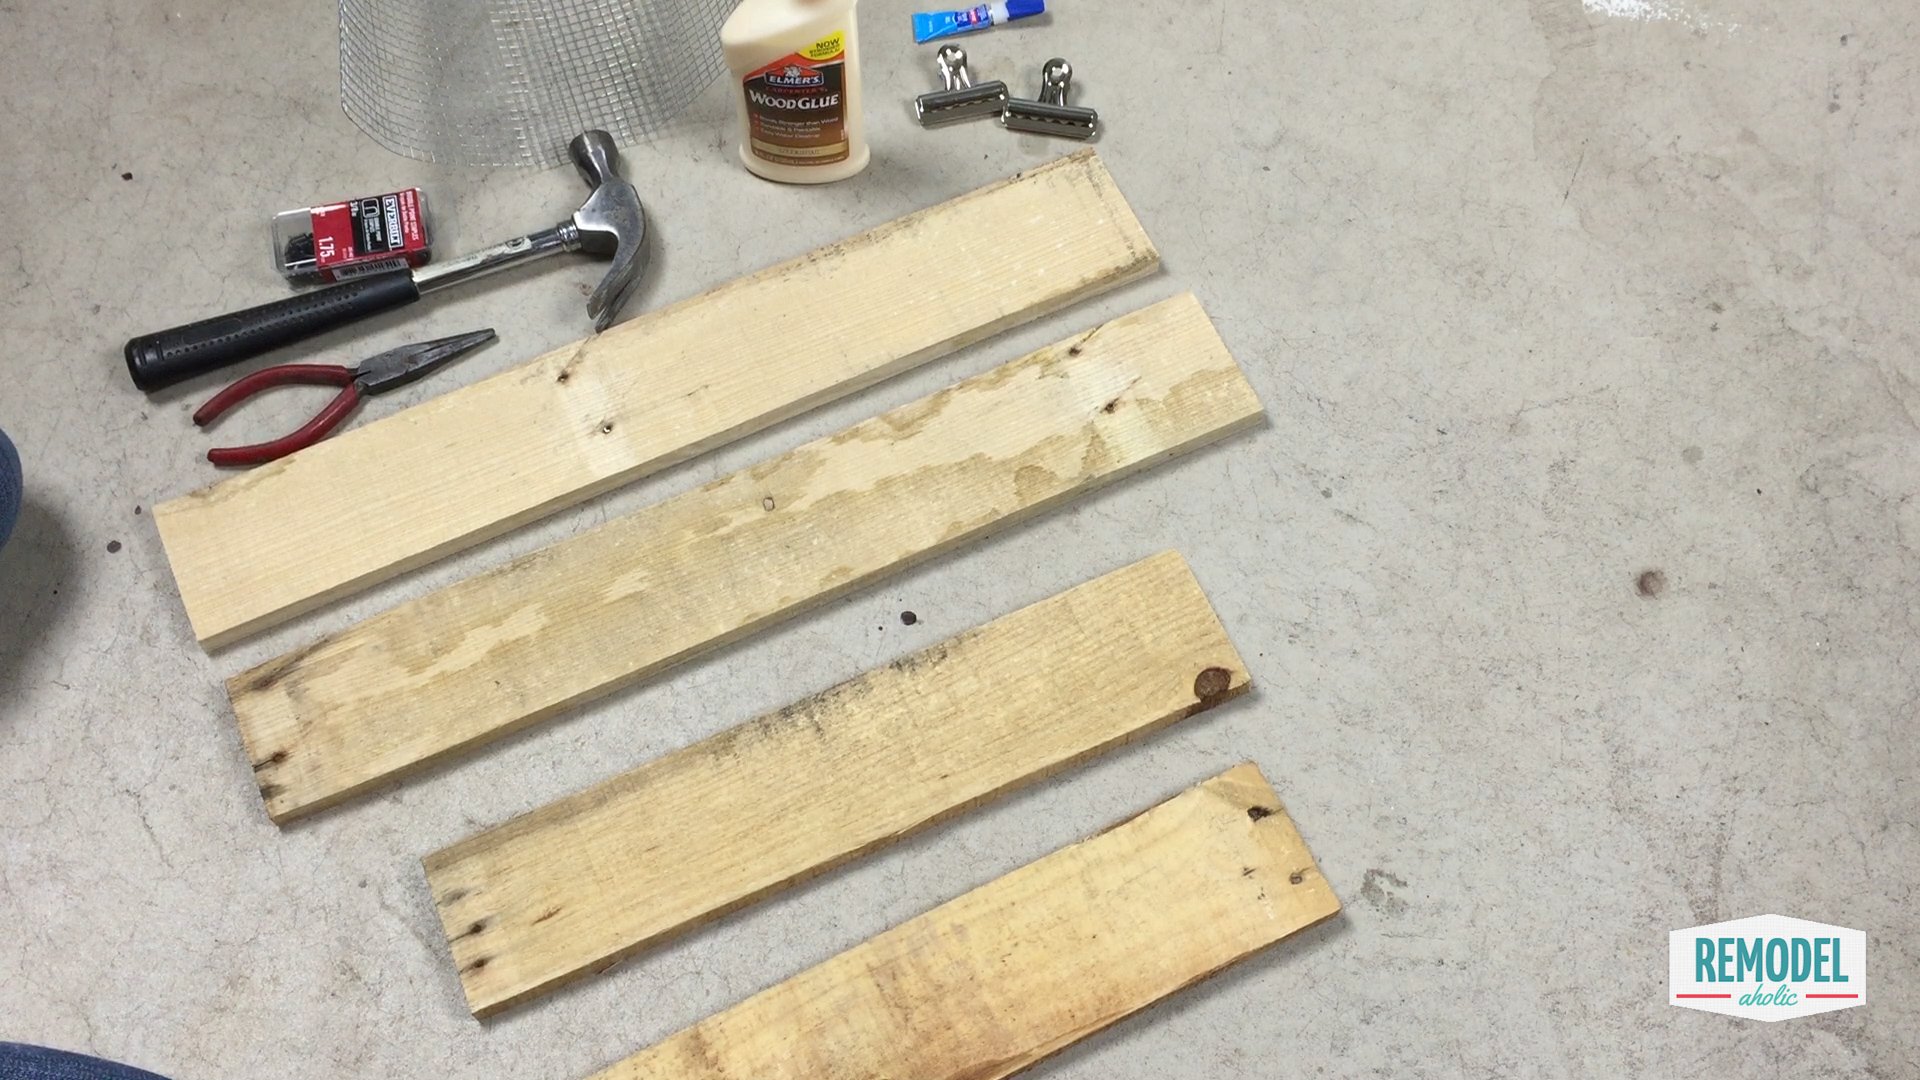
Step One:  Cut the boards to length. 

You can make this memo board into any size you like.   For this example I will be building mine to be approximately 24″ long x 16″ wide.  So the measurements will work on that size.

Cut 2 boards to 24″ long

Cut 2 boards to 16″ long

Wait to cut the last 2 boards for another step.

barnwood-frame-pic-2

Step Two: Begin Gluing 

Like it is shown in the step above place glue on the ends of the horizontal board. 

barnwood-frame-pic-3

Line up the corners and place the board down on the vertical boards.

barnwood-frame-pic-4

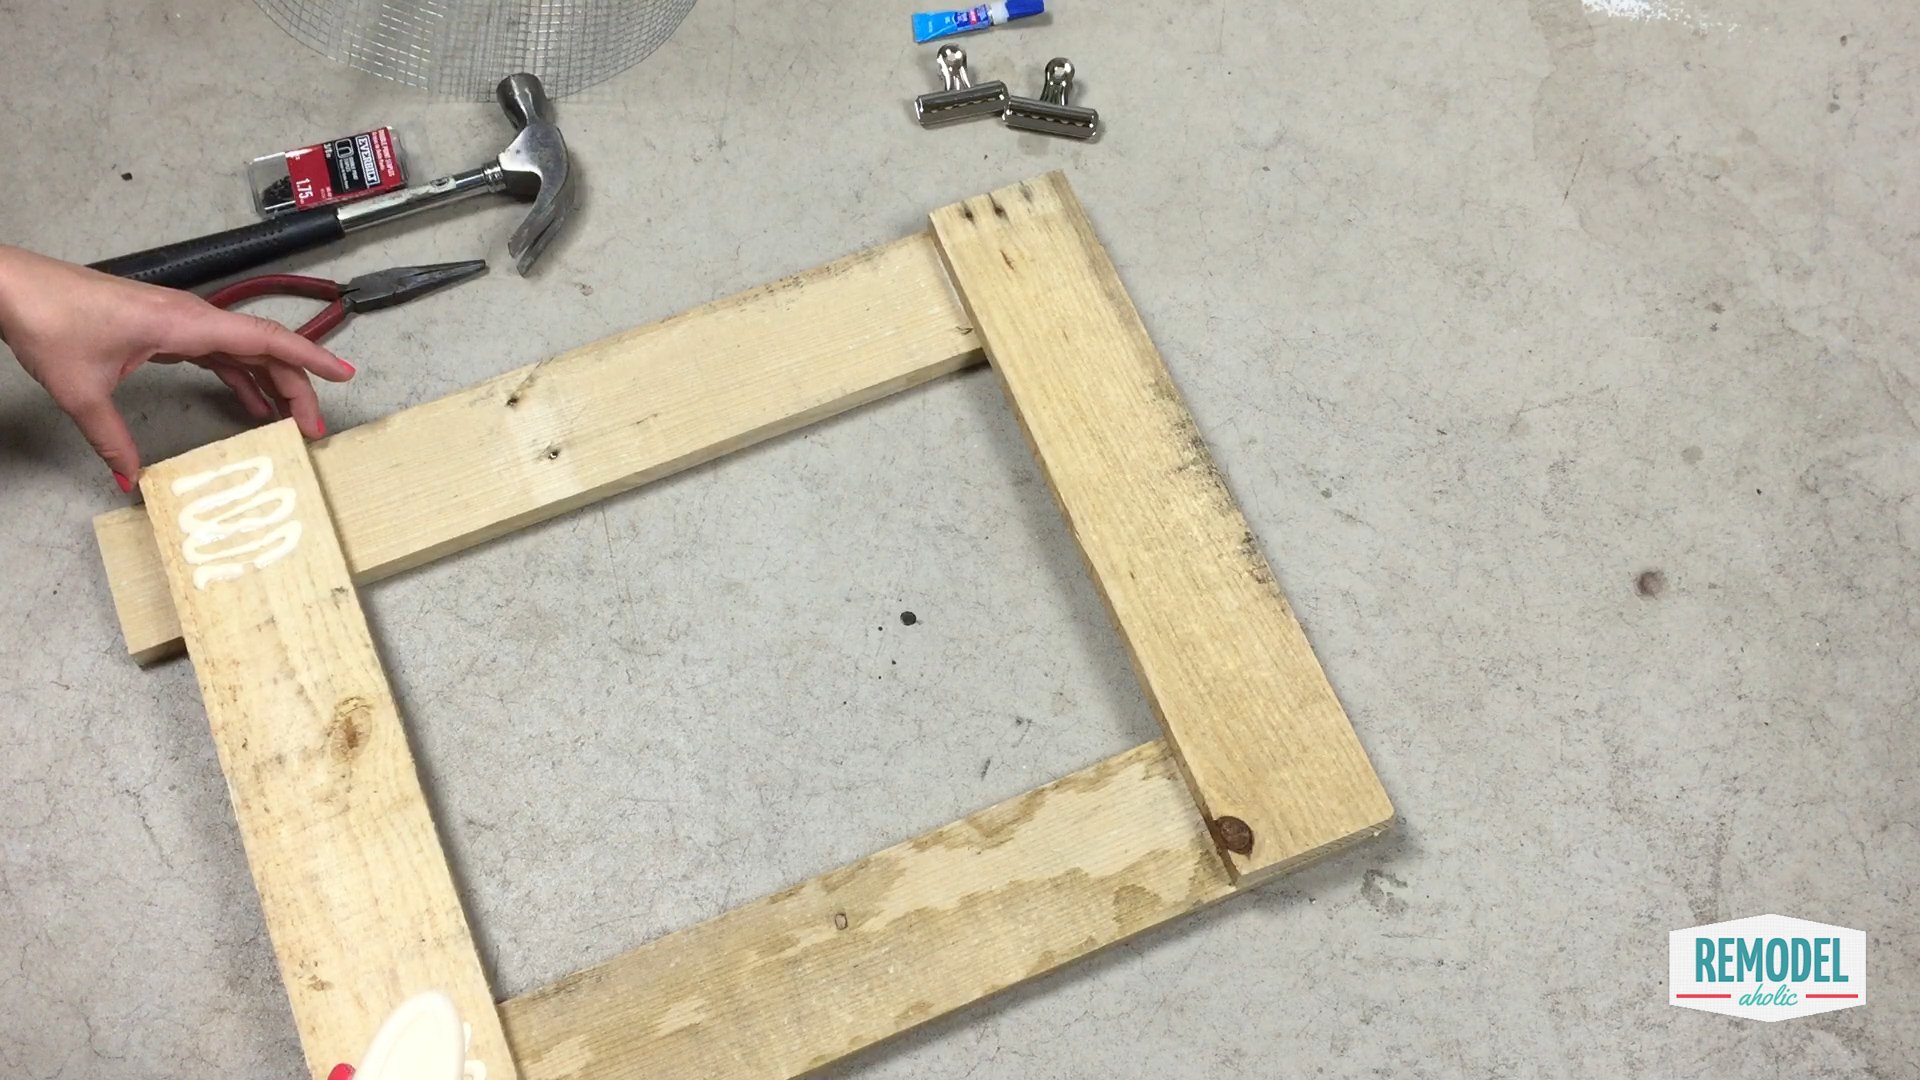
Repeat on the bottom horizontal board.  Allow glue to dry .  You can use a few 3/4″ finish nails if you feel like you need to secure the boards more strongly in the corner (or at least hold things together while is dries)


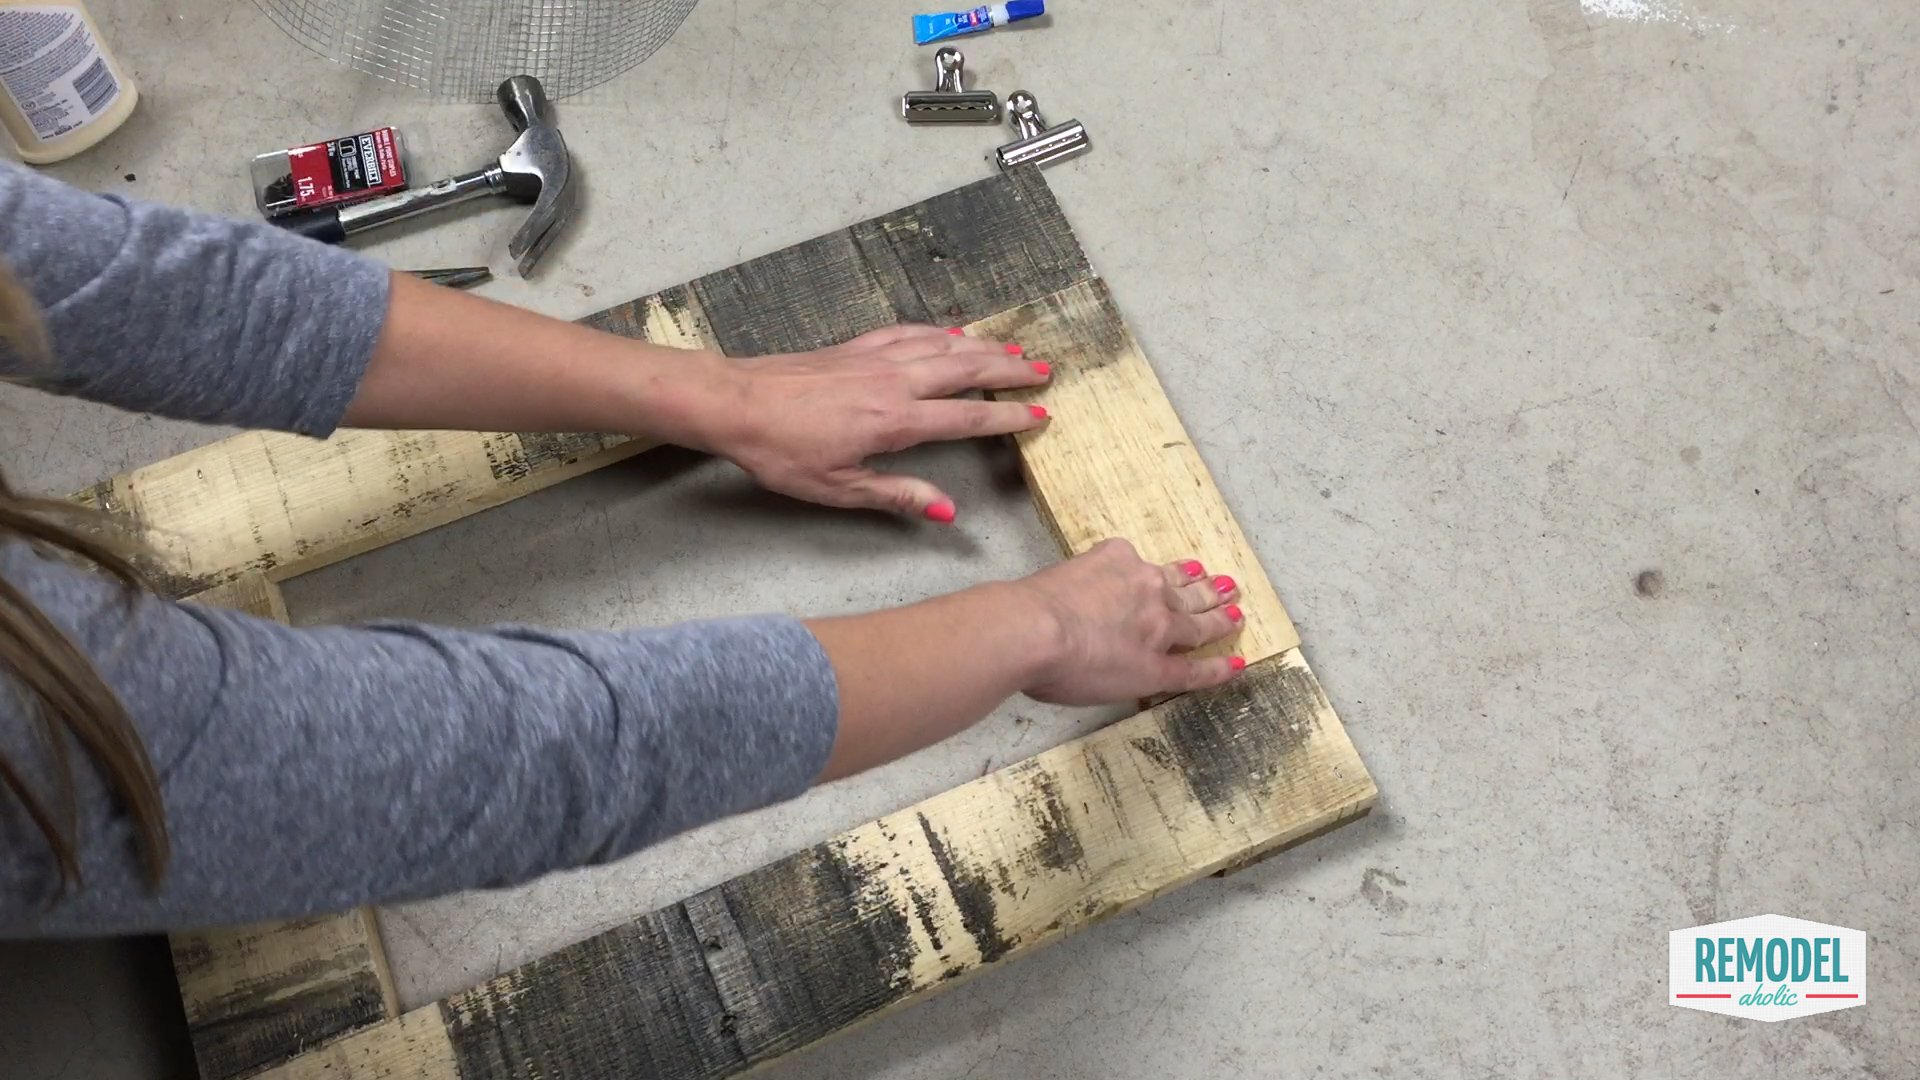
Step Three: Even out the back

Currently there is not a flat surface to affix the wire mesh to.  Flip your memo frame over to reveal the gap on the top and bottom.  measure the space.  This gap will vary depending on your wood width  (mine was approximately 9 1/4″ wide.

Cut the last two boards to the proper length to fit snugly into the two side pieces and make the back a solid one level frame.

barnwood-frame-pic-5

Apply glue and glue the newly cut pieces into place.

barnwood-frame-pic-6

Step  Four: Attach the wire mesh

Using a pair of need nose pliers, hold the staple in place in the corner of the mesh and wood frame and nail the mesh in place.  

Repeat until the whole mesh sheet is attached.

barnwood-frame-pic-7

Step Five: Optional metal clips

You can try adding the metal clips with super glue at this point if you would like them on your memo board.  (if they have a hard time sticking you could use a staple to secure them in to place, it will just be a little tricky nailing!!)

barnwood-frame-pic-8

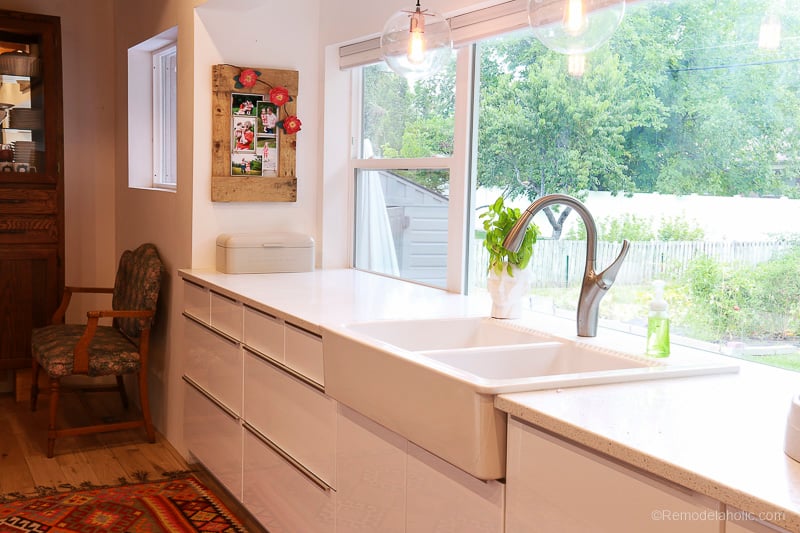
Bam!!  You are done!  Really the whole process couldn’t be faster or easier!!  

These little memo board frames would make great gifts!  And really fun to use around Christmas time to hold cards and photos.  

For my final I decided not to add the clips, but you could also add them at the bottom of the frame to hold additional papers if you want. And of course, I added our beautiful paper flower garland — you can make one of those, too, with the free printable here. 

easy-to-build-barnwood-or-pallet-wood-memo-board-tutorial-remodelaholic-9261

easy-to-build-barnwood-or-pallet-wood-memo-board-tutorial-remodelaholic-9259

easy-to-build-barnwood-or-pallet-wood-memo-board-tutorial-remodelaholic-9255

What would you use them for?

Be sure to subscribe by email or RSS and follow along over on Facebook and Instagram with #palletsaplenty so you won’t miss a single one of the amazing posts we have coming up, like this chic and easy pallet ladder:free-pallet-blanket-ladder-diy-tutorial-also-great-for-storing-shoes-remodelaholic-9137

  • Facebook
  • Twitter
Remodelaholic is a participant in the Amazon Services LLC Associates Program, an affiliate advertising program designed to provide a means for sites to earn advertising fees by advertising and linking to amazon.com. Please see our full disclosure here.

Published: September 28, 2016Filed Under: *Our Projects, Birch House, Decorate, DIY Tagged: Frames, Gift Ideas, pallet, Pallet Wood, Pallets Aplenty, Wall Art

About Cassity

Cassity started Remodelaholic with her husband, Justin, to share their love for knocking out walls together. She is an interior designer, wife, and mother of two. She and Justin have remodeled three homes from top to bottom and are working on their fourth. Making a house a home is her favorite hobby.


free email bonus

Kitchen Organization Boot Camp

Is your kitchen a zen paradise? It can be. I'll show you how.

Previous Post
How to Make a Pallet Drink Station
Next Post
Farmhouse Wall Rack DIY

Leave a Reply Cancel reply

We love hearing from fellow Remodelaholics, so let us know what you like about this and leave any questions below in the comments. If you have followed a tutorial or been inspired by something you have seen here, we would love to see pictures! Submit pictures here or by messaging us over on Facebook.
Recipe Rating


Hey there, I am Cassity! Nice to virtually meet you!

This blog is about DIY at its finest. We are obsessed with it and so are you, so while we're working and have nothing to show you of our own projects we show off yours. So submit your projects! More About Us…

Categories

  • Facebook
  • Instagram
  • Pinterest
  • RSS
  • Twitter
  • YouTube

Meet The Team

Privacy Policy

Remodelaholic is a participant in the Amazon Services LLC Associates Program, an affiliate advertising program designed to provide a means for sites to earn advertising fees by advertising and linking to amazon.com. Please see our full disclosure here.

© 2005-2016 Remodelaholic LLC, All Rights Reserved

  • Facebook
  • Instagram
  • Pinterest
  • RSS
  • Twitter
  • YouTube

Copyright © 2021 · Remodelaholic

  • Pinterest
  • Facebook
  • Twitter