Beautifully Updated Kitchen With Pops of Yellow!
Beautifully Updated Kitchen With pops of Yellow!
by The Empty Nest
by The Empty Nest
Hello everyone, my name is Janet and I am so excited about guest posting here on the very cool ‘Remodeloholic’ blog.
Normally you can find me at my little blog, ‘The Empty Nest’.
At The Empty Nest I try to write about different aspects of my life. What I am doing in my studio, what sewing projects I’ve finished or fabulous fabrics I have brought home. I am an official ‘Apronologist‘ and have been featured in the beautiful Apronology Magazine two times so far. I love rescuing old wool and cashmere sweaters from my local thrift shops (I am addicted to thrift shops!). I transform them into fun, felted children’s cardigans, chic fingerless gloves and more.
Cassidy and Justin have graciously invited me to share all my information on my recent farmhouse kitchen restyle.
So here we go!
We have lived in this house for 11 years and for much of that time, I have wanted white cabinets.
Since posting my kitchen restyle on my blog, I have received so many e-mails from readers wanting to know the products I used and what my painting technique is.

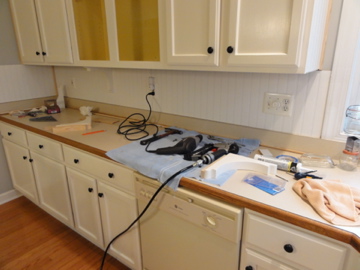
This was my kitchen before. Basic builders grade oak cabinets…nice, but nothing unique or special.
My walls were actually paprika red and in this photo I had just painted them.
I knew I wanted a farmhouse feel to my kitchen. Maybe some open shelving and definitely lot’s of beadboard.

With some old fashioned elbow grease and and a few supplies I achieved this…all for under $500.00
Let’s start with my idea board. I started collecting photos of kitchens that I liked. The more farmhouse touches, the better. I loved the idea of some open shelving and a skirt under my sink was a must.
I loved this look!
and the POP of color here.
So with a design idea in my head, I forged on.

After removing the cabinet doors, I primed the frames with two coats of Glidden Gripper Primer. This product is formulated to adhere to slick surfaces and it works great. I have used Gripper to prime Formica with fabulous results. Let me also say that I prefer (and this is just my preference) to use all water based products in my home. I know many DIY’ers use things like TSP to prep their wood, but good golly, have you read that label? That stuff is toxic! Water based products have vastly improved in the last 15 years and I have never had a durability problem.

Here you can see the former red walls and a test splotch of grey on the wall.

I was concerned that the red would be difficult to cover over. For my walls I chose Behr Ultra Premium in Silvered Sateen eggshell finish, which is a beautiful soft grey color. My kitchen opens into my family room, so I had to go with a color that would suit both areas. This Behr paint is the one with a built in primer.
It covered fabulously! Rolled on evenly, dried fast and with virtually no odor. Don’t you just love it when a product does what they advertise?

This wall had a faux brick stencil design that I never quite finished. The Behr Ultra covered it with no problem.

It covered at one coat, but I’m a two coat kinda gal, so two coats later..perfect. I found the vinyl words for $1.50 at my Salvation Army.
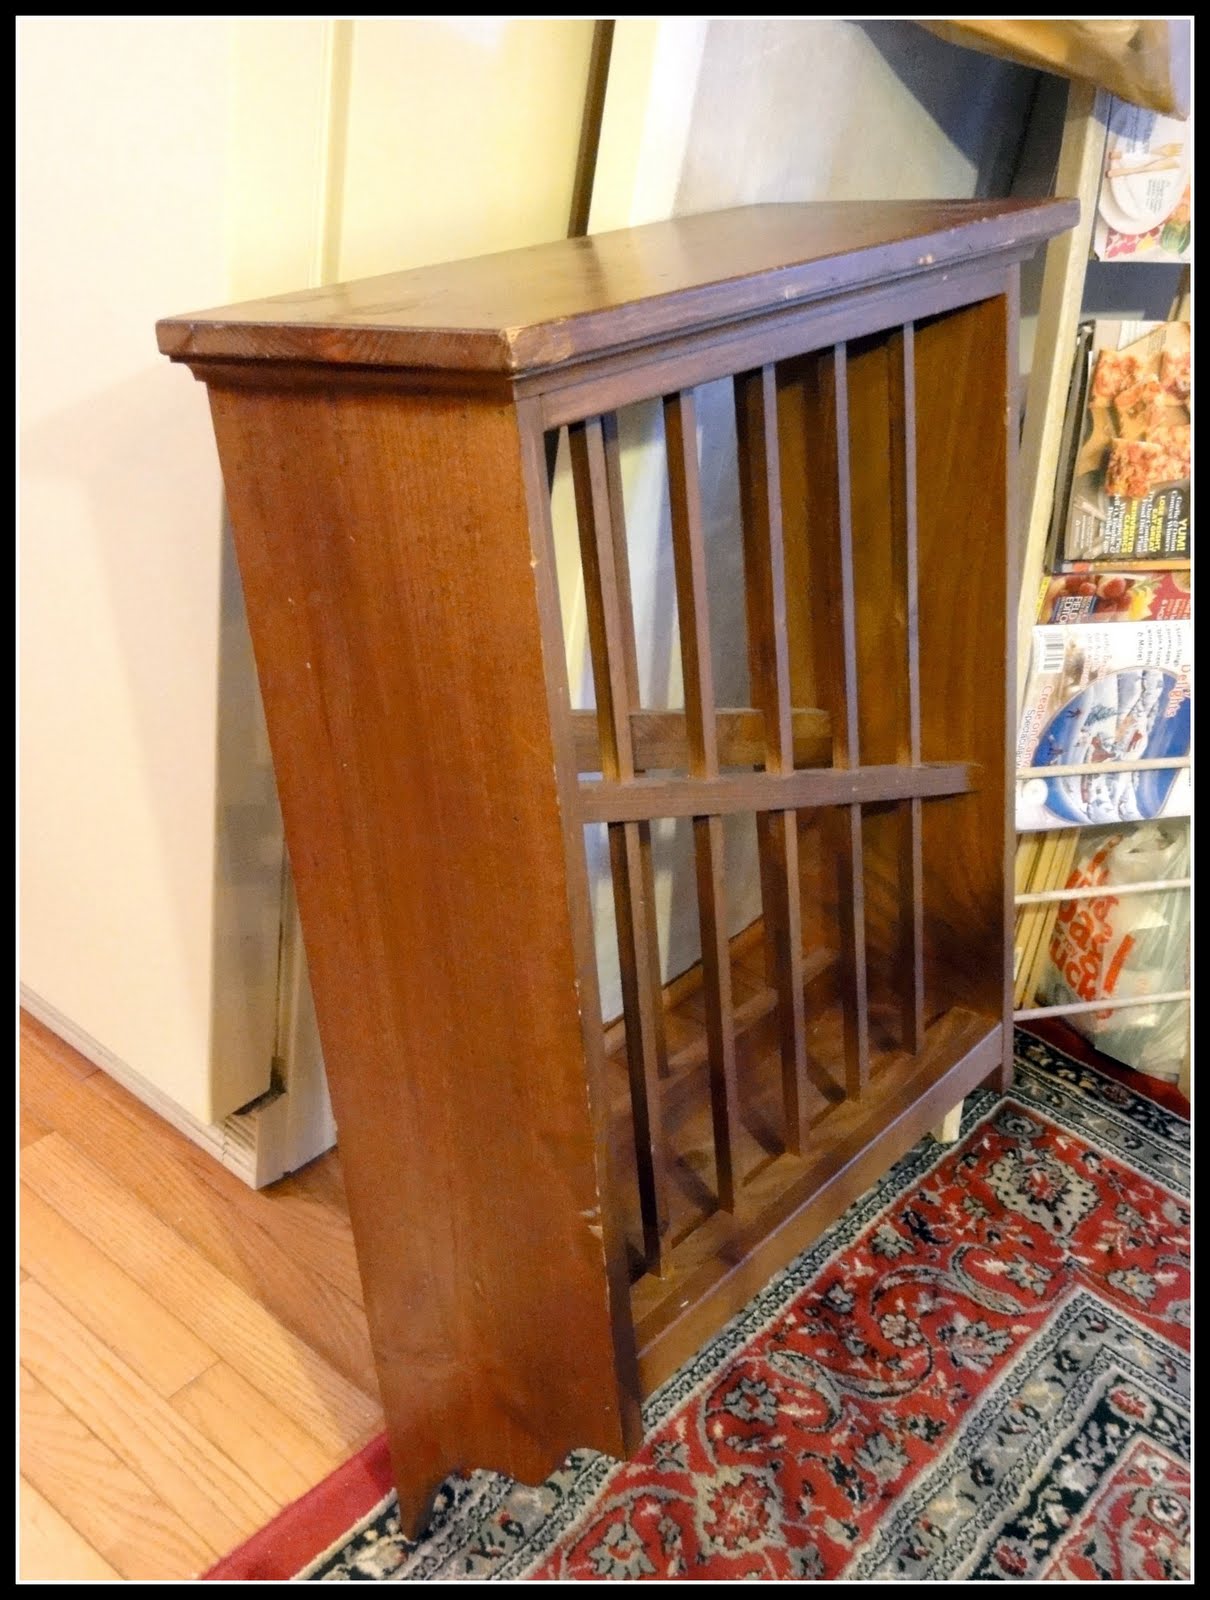
Last year I found this cool plate rack at a thrift shop for $18.00 and it sat in my basement for months.
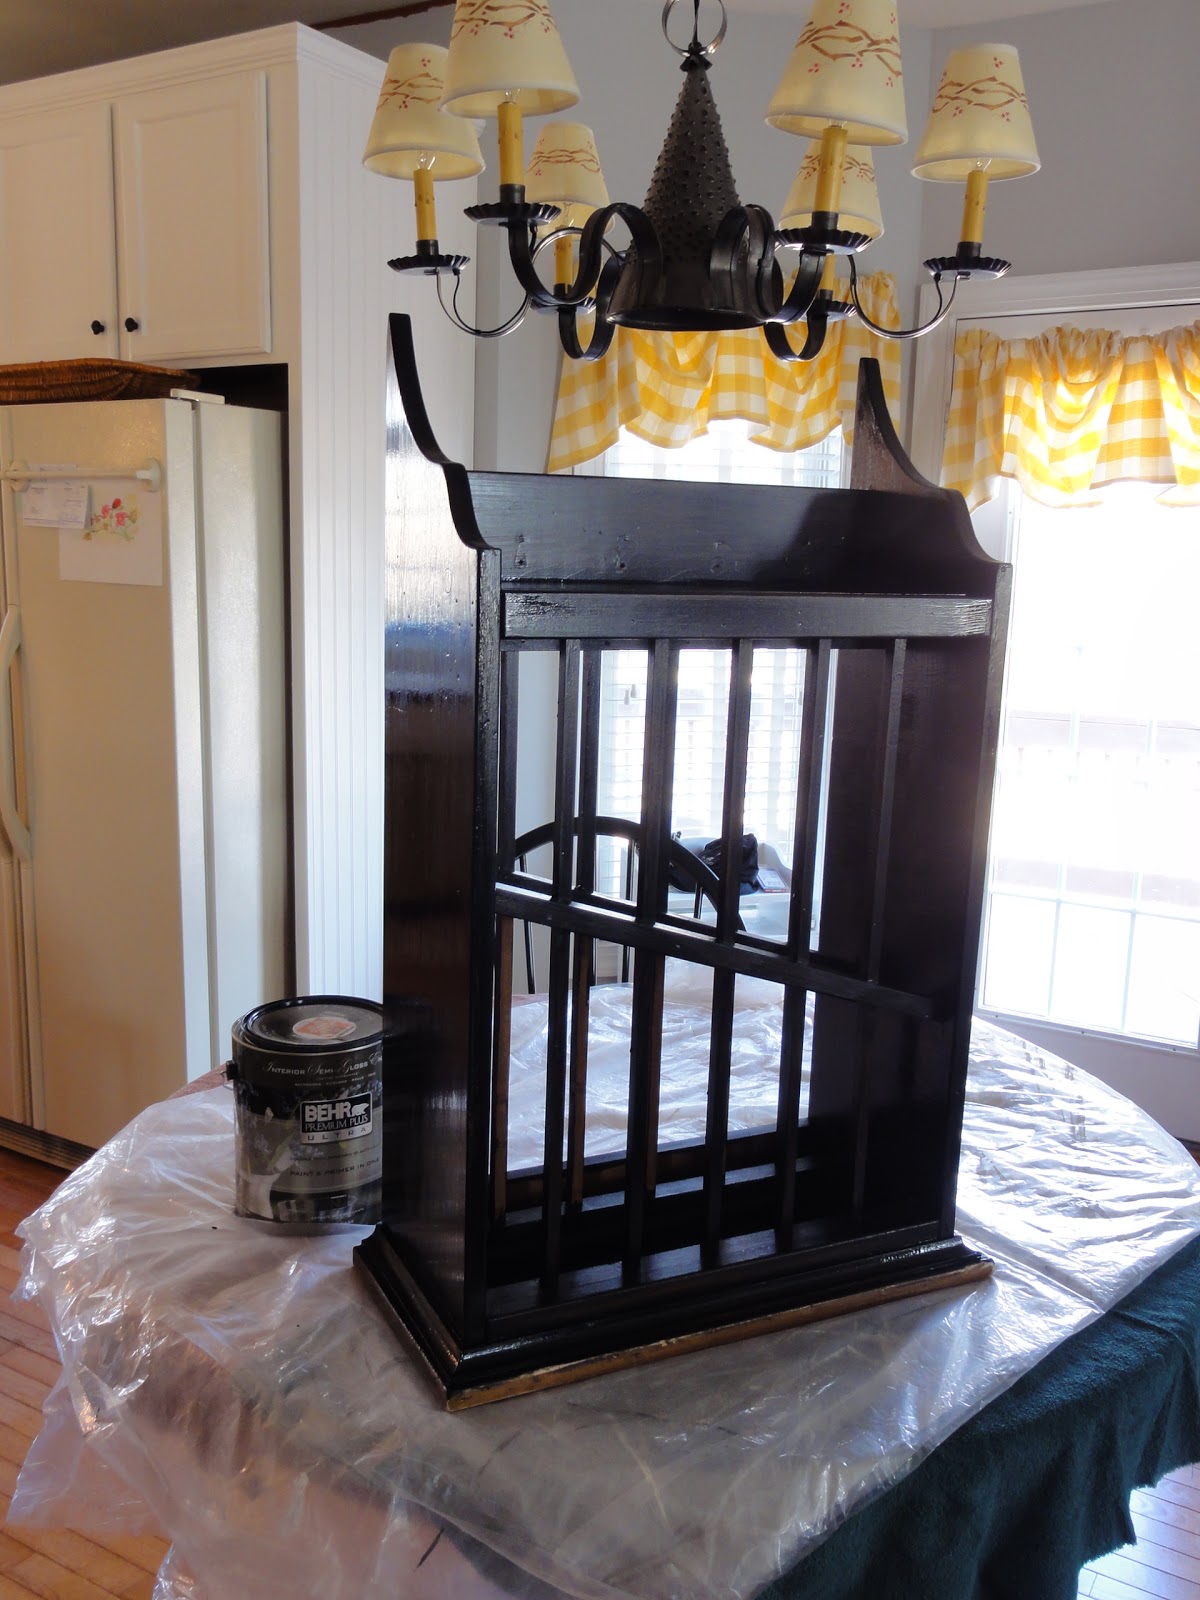
After brushing on some Behr Premium Ultra in black..it was transformed.
I now had the perfect place for it.

After a very light sanding (although it was not needed) I applied two coats of Gripper primer and three coats of the Behr Silvered Sateen in high gloss finish. I started out by rolling the paint on and smoothing with a brush, but ended up using a brush for the whole project. I didn’t like the texture I was getting from a roller or a sprayer. My favorite brush is the Purdy XL Cub 2in short handled brush. I use it for everything and if taken care of they last forever. OK…maybe not forever, but you get the idea.
Here is a very important tip…..don’t rush the painting process! Let your layers dry AND cure. Acrylic paint can take up to 2 weeks to fully cure (harden).

This paint smooths itself out beautifully.

To keep cost down, I chose simple inexpensive (Home Depot $1.95 ea.) matte black knobs.
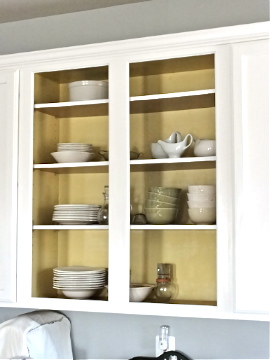
I removed three of my cabinet doors to achieve my open shelving look.
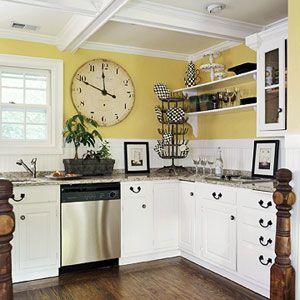
I tried out a few colors before deciding to go with the pale yellow you see pictured. I used Martha Stewart paint in Tahini eggshell finish.

I trimmed out and painted the openings to achieve a more finished look. I did not want these to look like someone had just left off the doors.

Ok..now the we get to install the beadboard back splash and trim. Good advice…measure twice, cut once.
I highly recommend either purchasing, renting or borrowing a pneumatic hammer. It makes all the trim and board work so easy. It is my favorite tool to use.
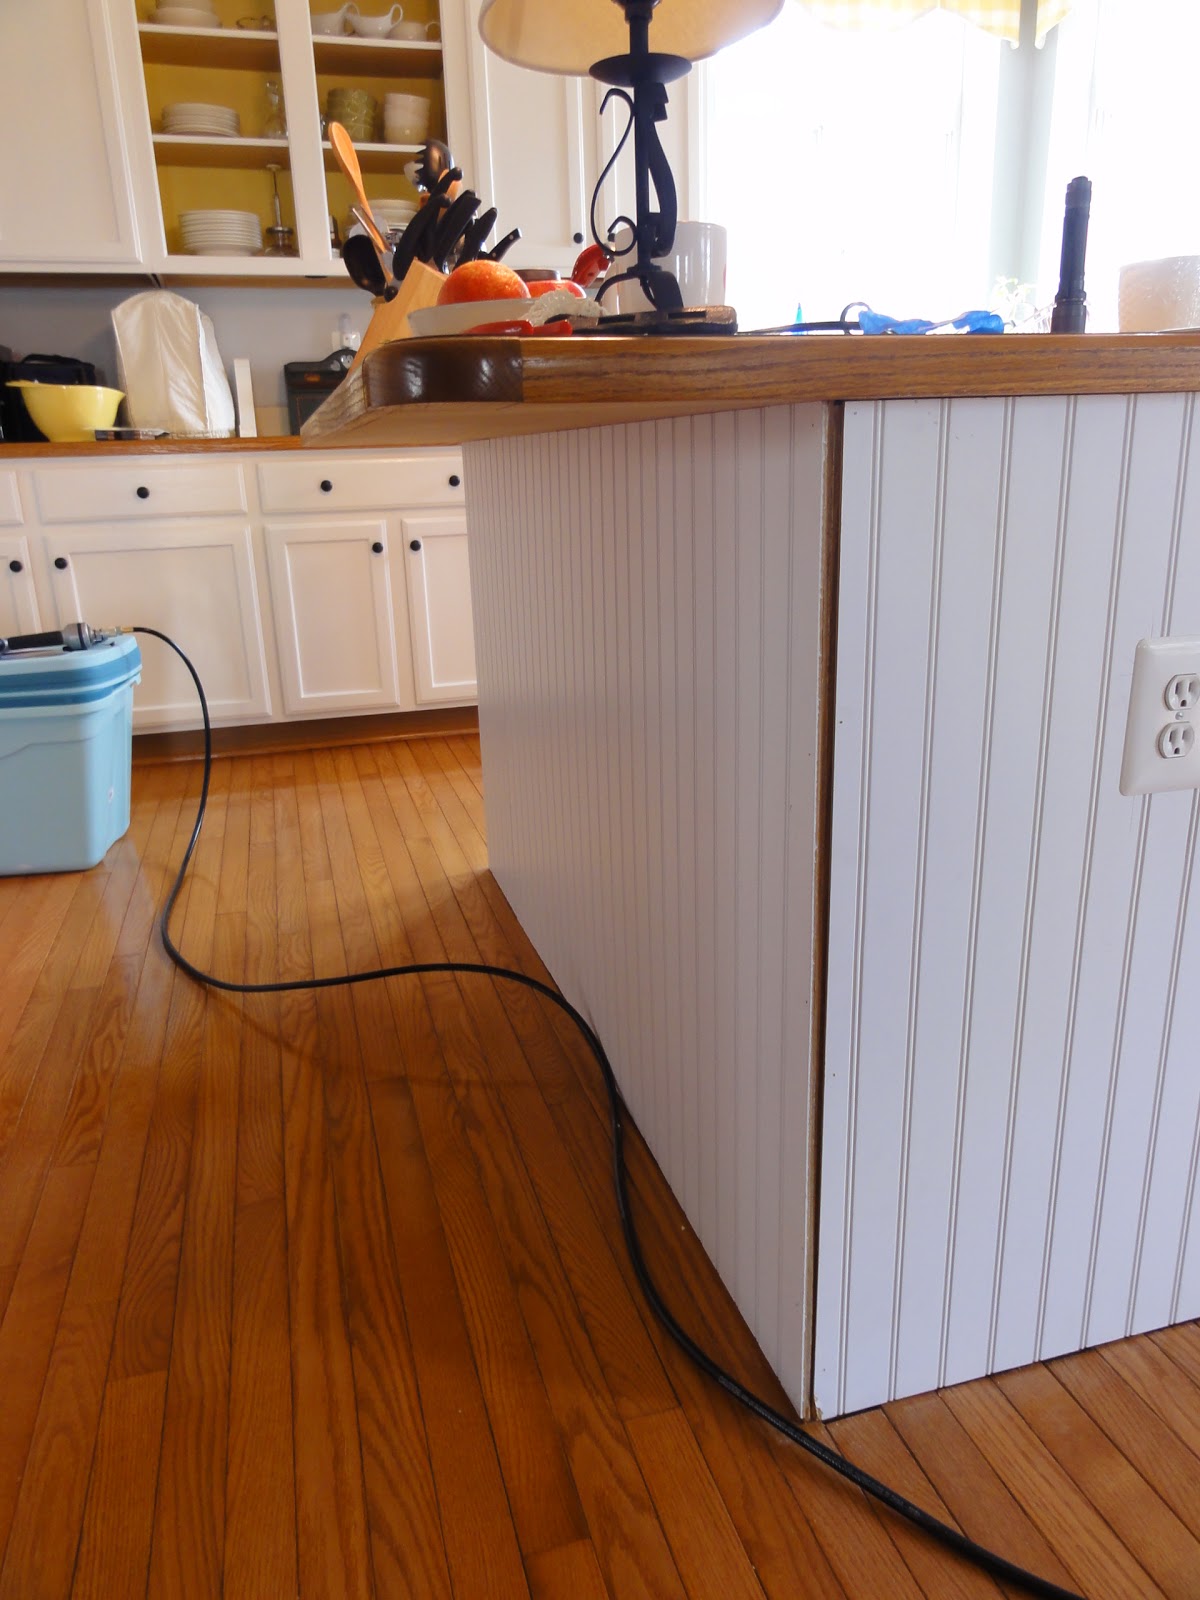
My island got the beadboard treatment on three sides and new baseboard trim.
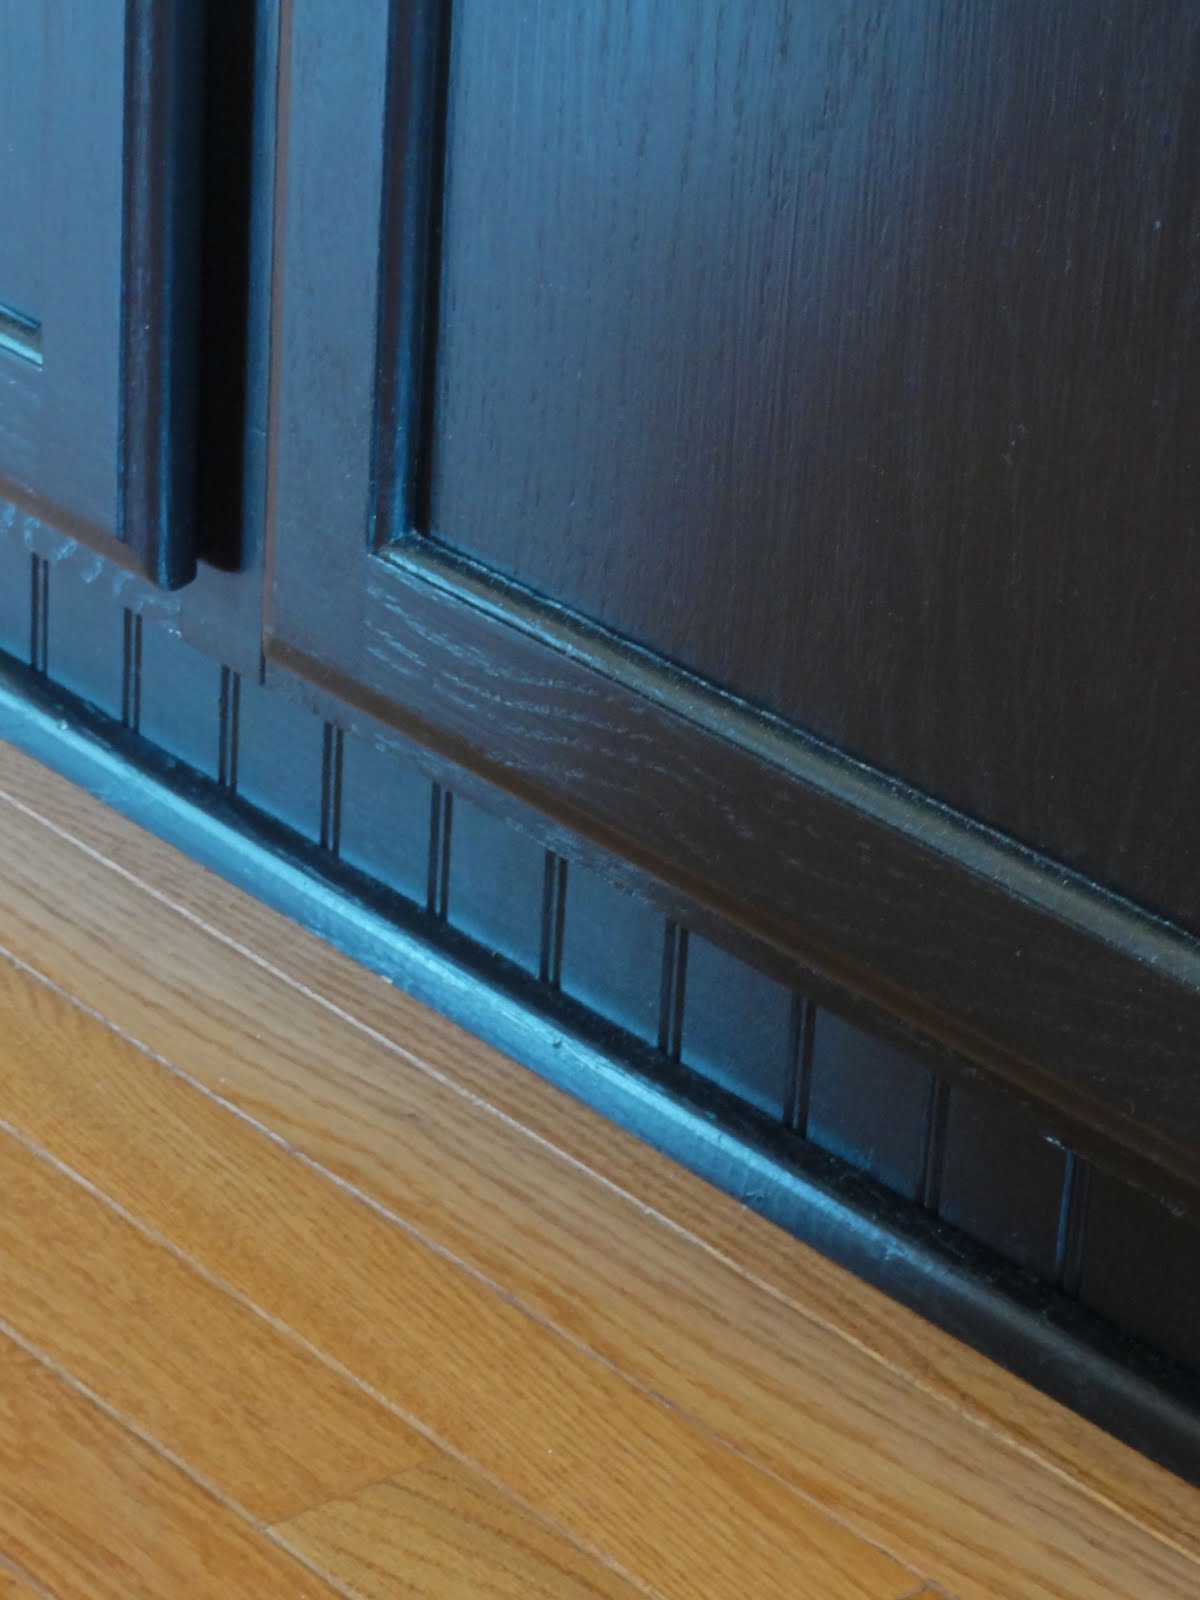
I brought the beadboard all the way down to all the kickplates in the kitchen.
Tip: paint this BEFORE you install, I learned the hard way. Laying down on the hardwood floor as you try to paint this trim is not fun! Pass the Advil please.

Adding nice simple trim is so easy and inexpensive.

To give my plain cabinets a more custom look, I added beadboard to the ends of the cabinets.

I feel it made a huge difference.
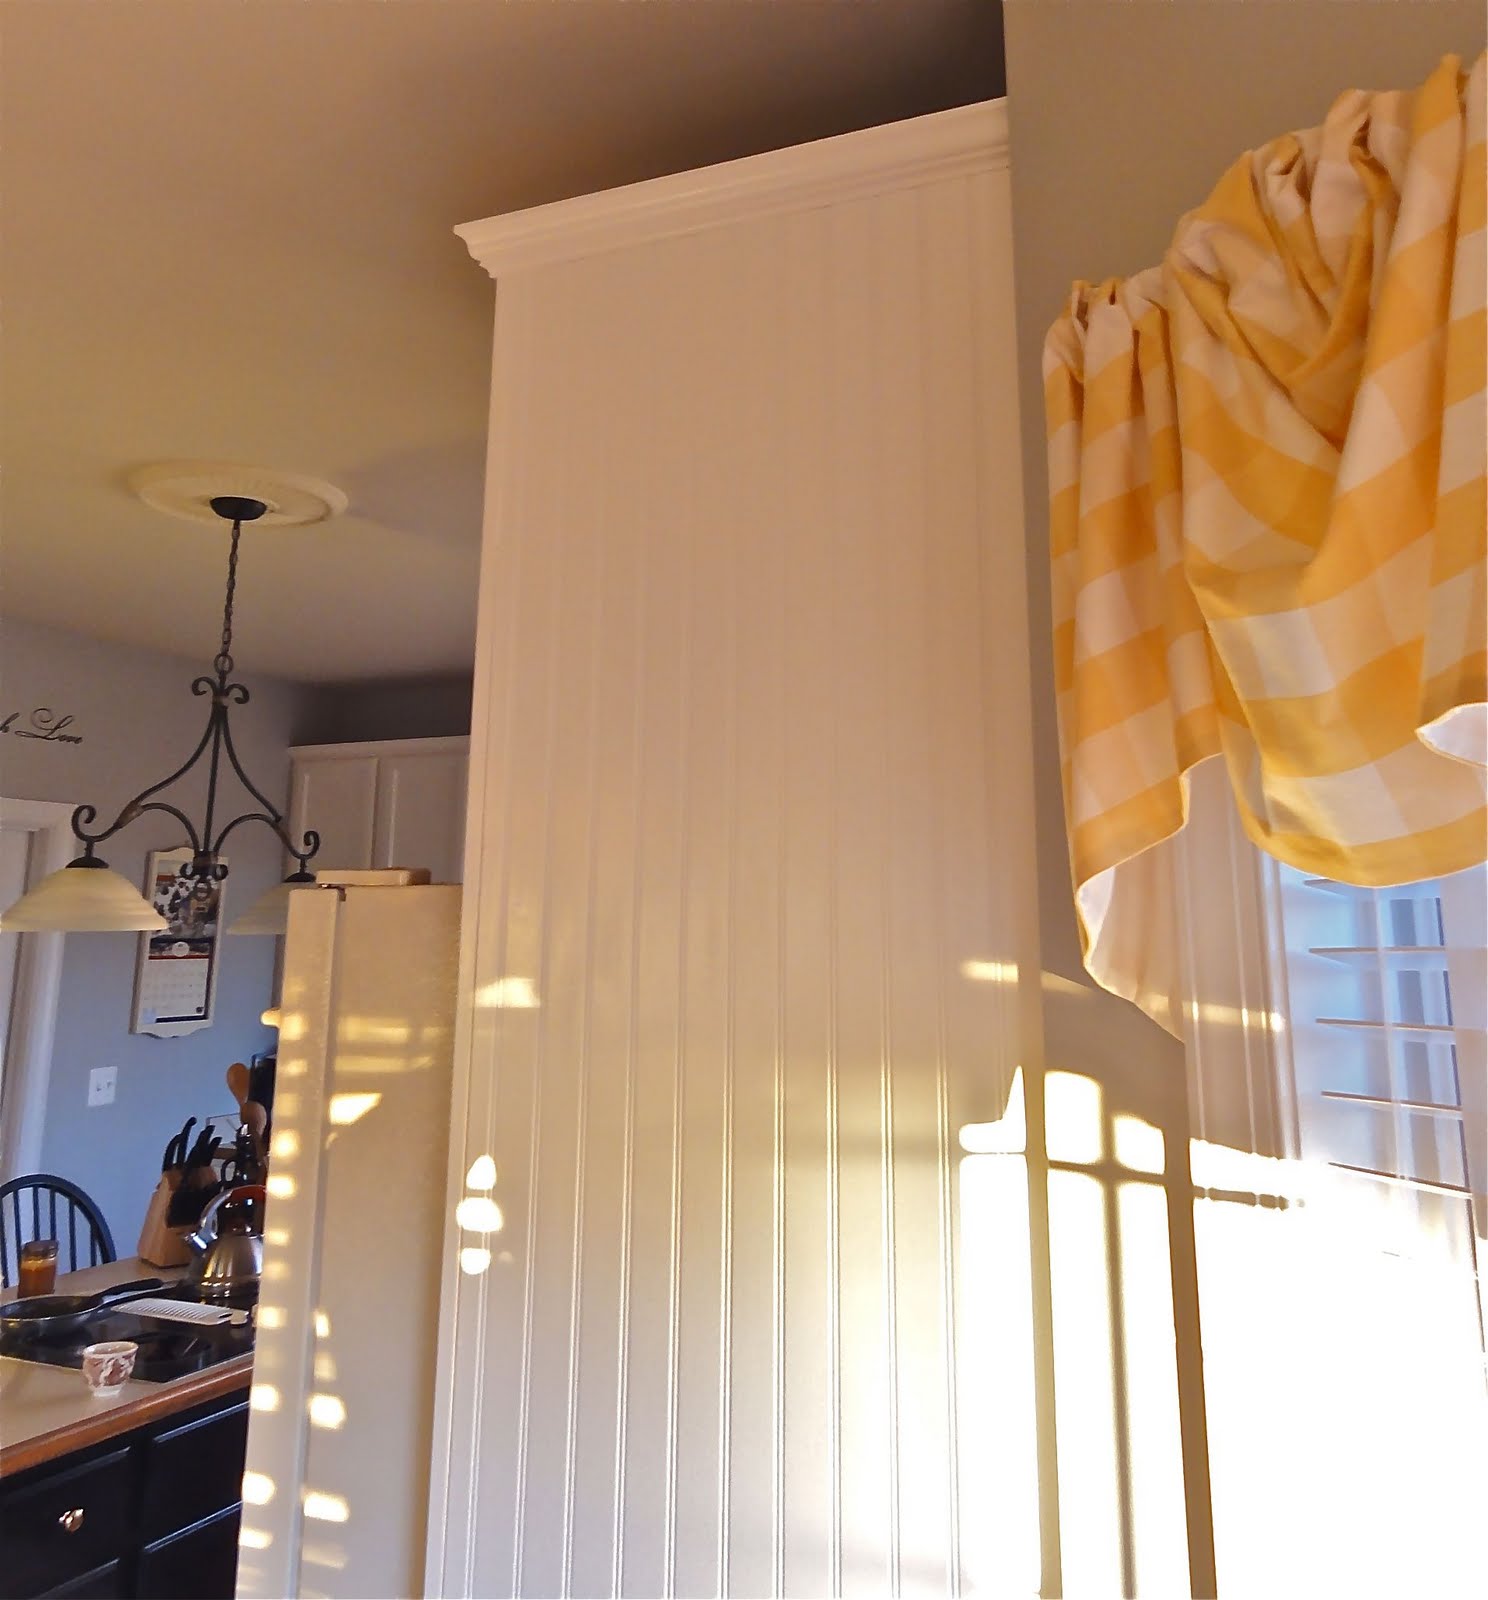
Also to the outside wall of the recessed fridge opening. It totally transforms the space and was so easy to do.
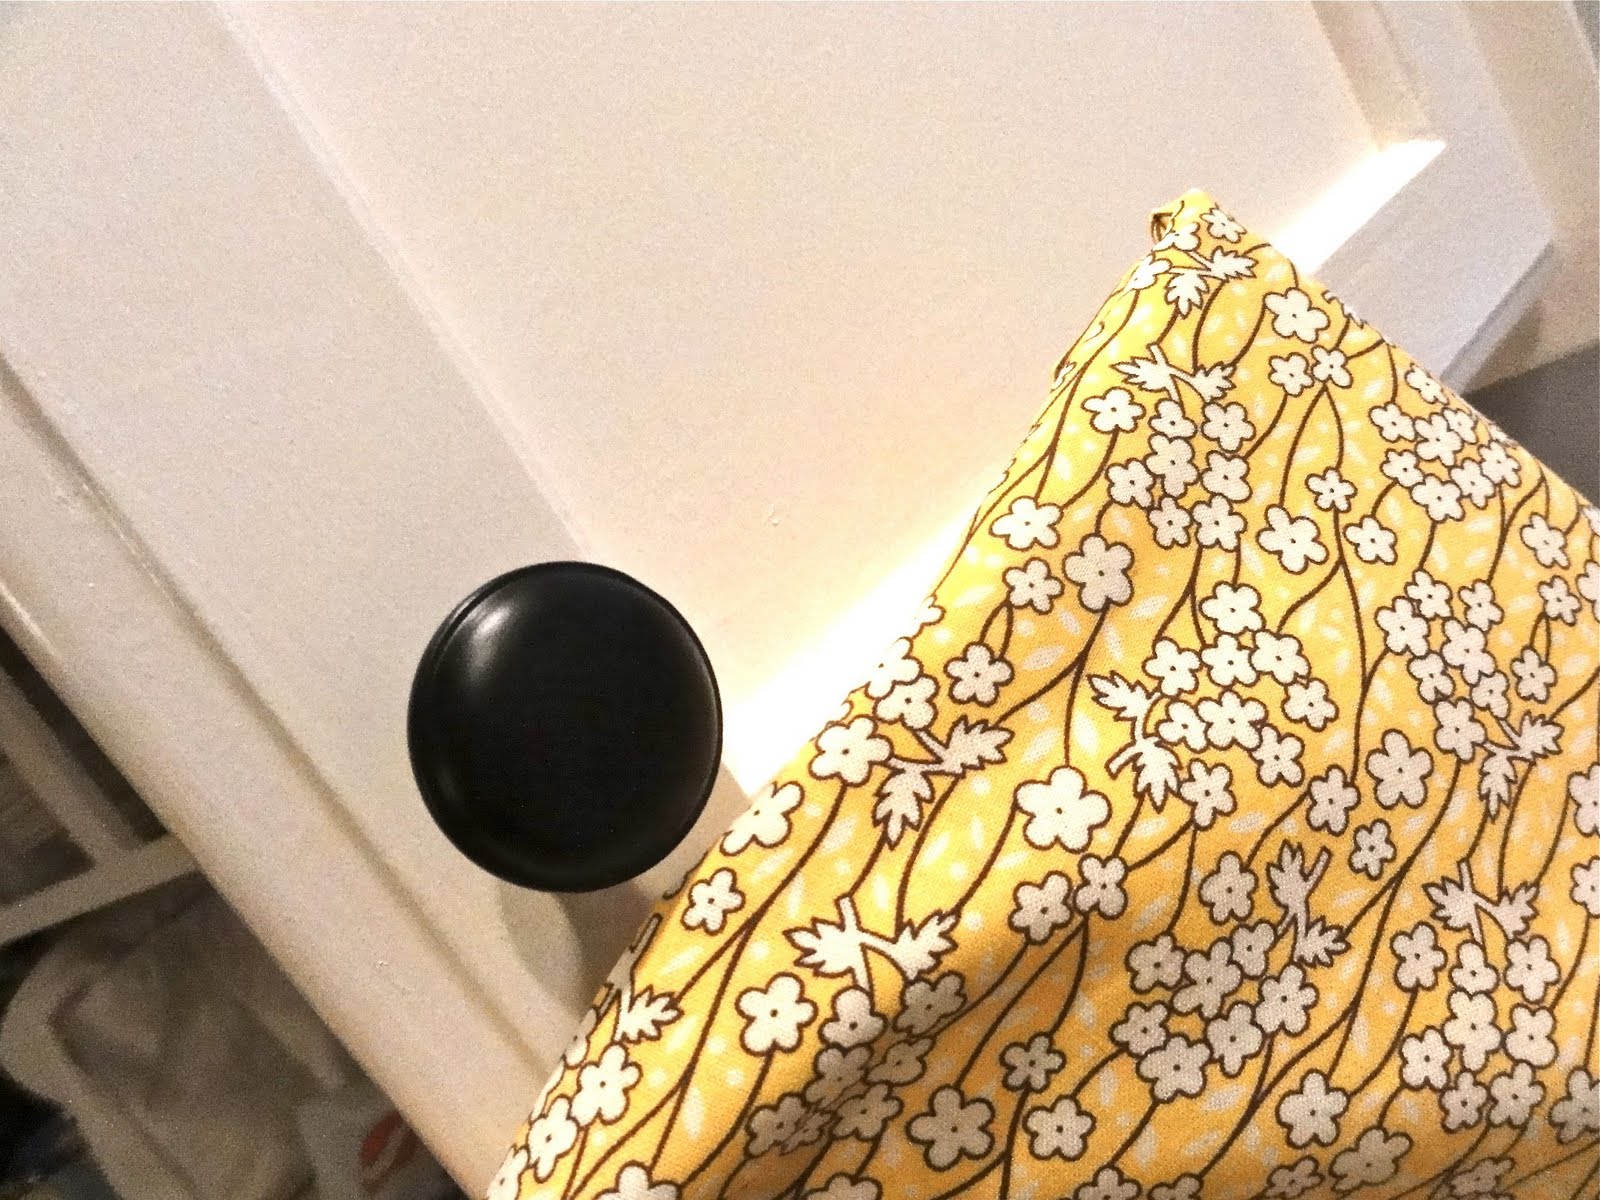
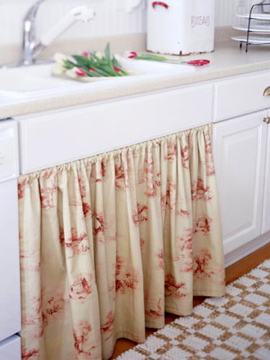
I found a pretty vintage look cotton for my sink skirt.
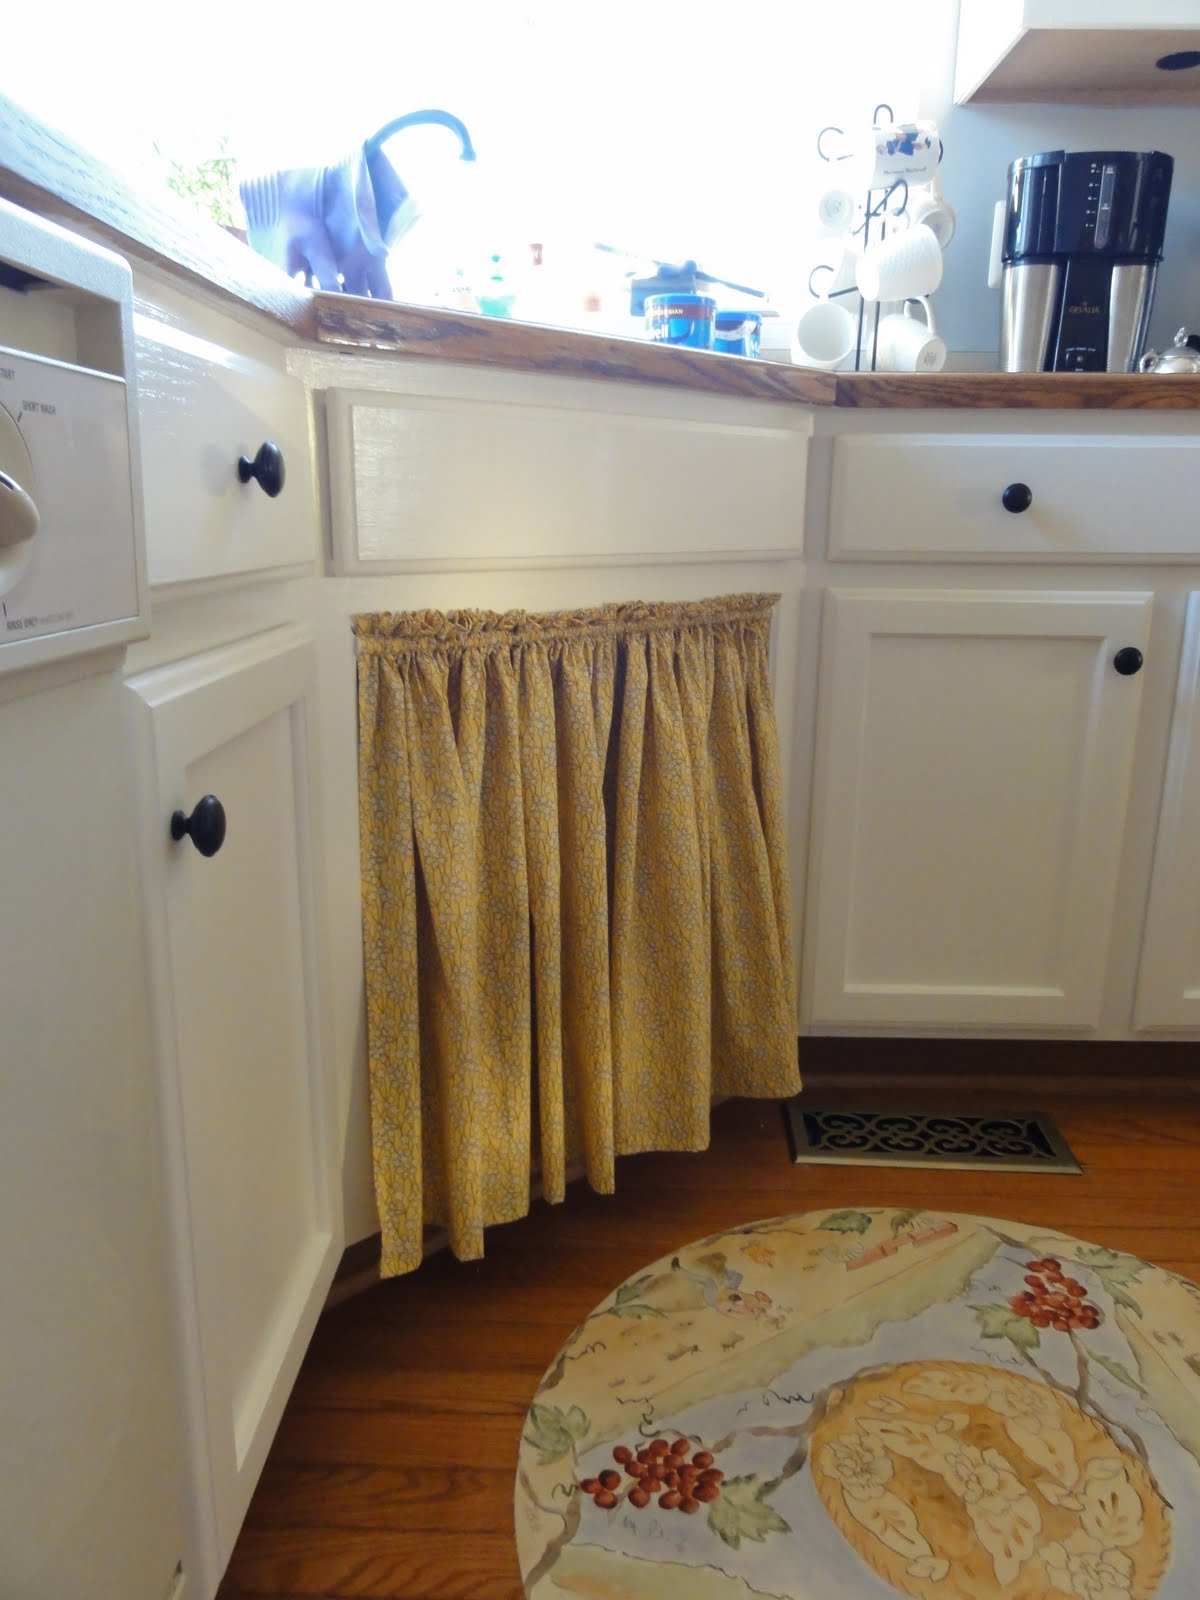
A little simple straight stitch and I had myself a sink skirt. I used a tension rod to hang the skirt. The great thing about this is that all I have to do to change the look of my room is to change the skirt out and repaint inside the open cabinets. Instant new kitchen!
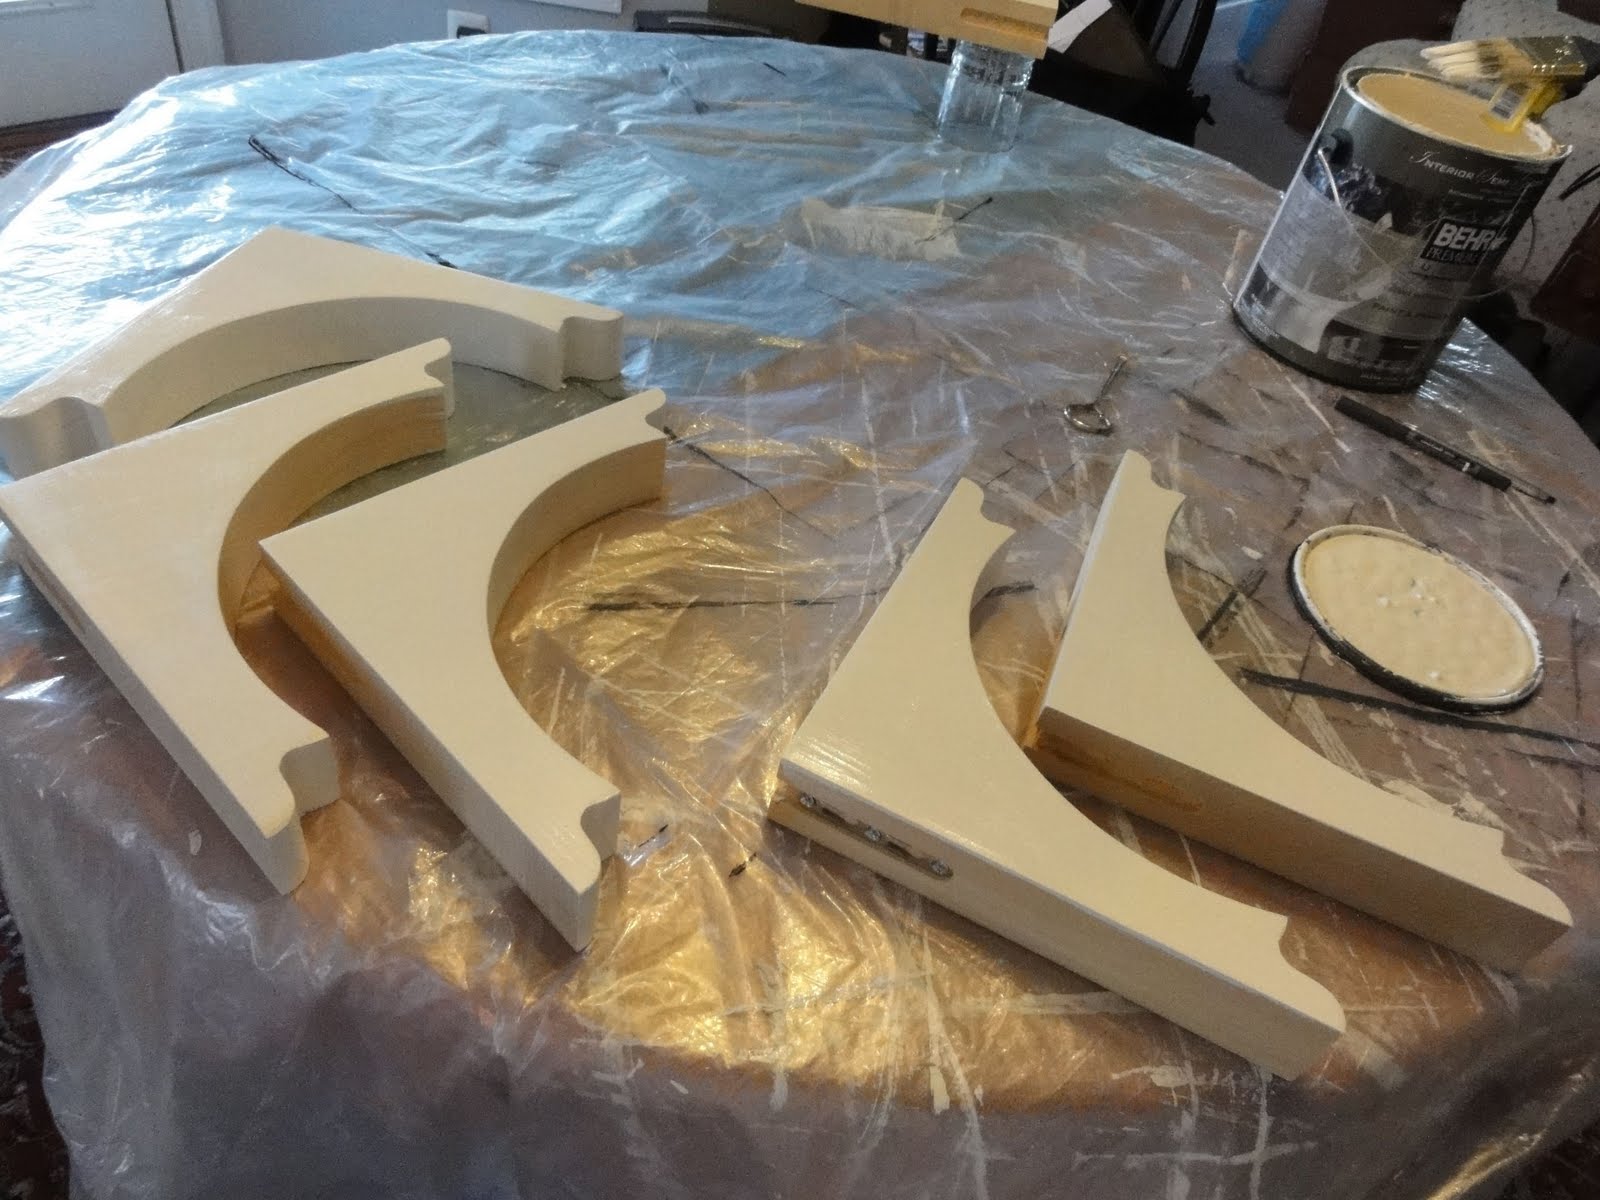
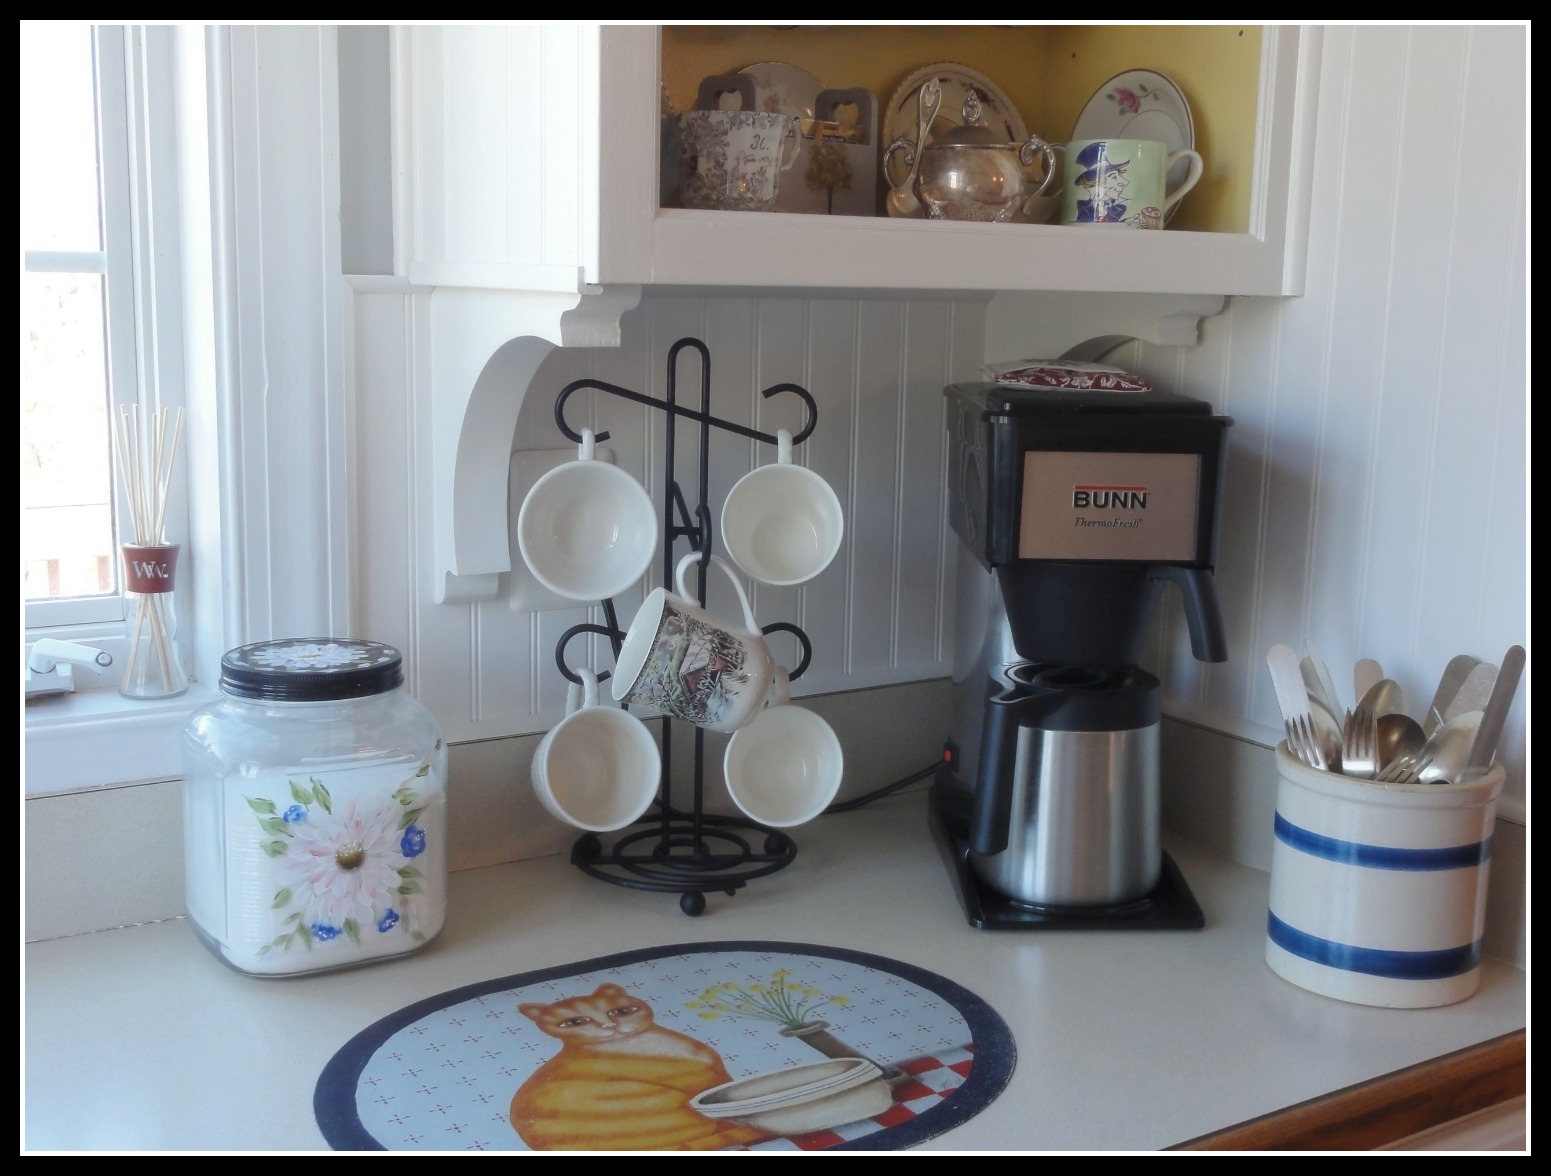
I found these wood corbels at my Home Depot for $8.00 each. They had the simple lines I was looking for. I primed and painted them prior to installation.

I think they make all the difference. For only $64.00 I was able to create a real designer look. Once installed, I gave the backsplash and corbels two coats of paint to give it a seamless finish.
I also tend to over trim…I trimmed every edge. I know… it’s a sickness.
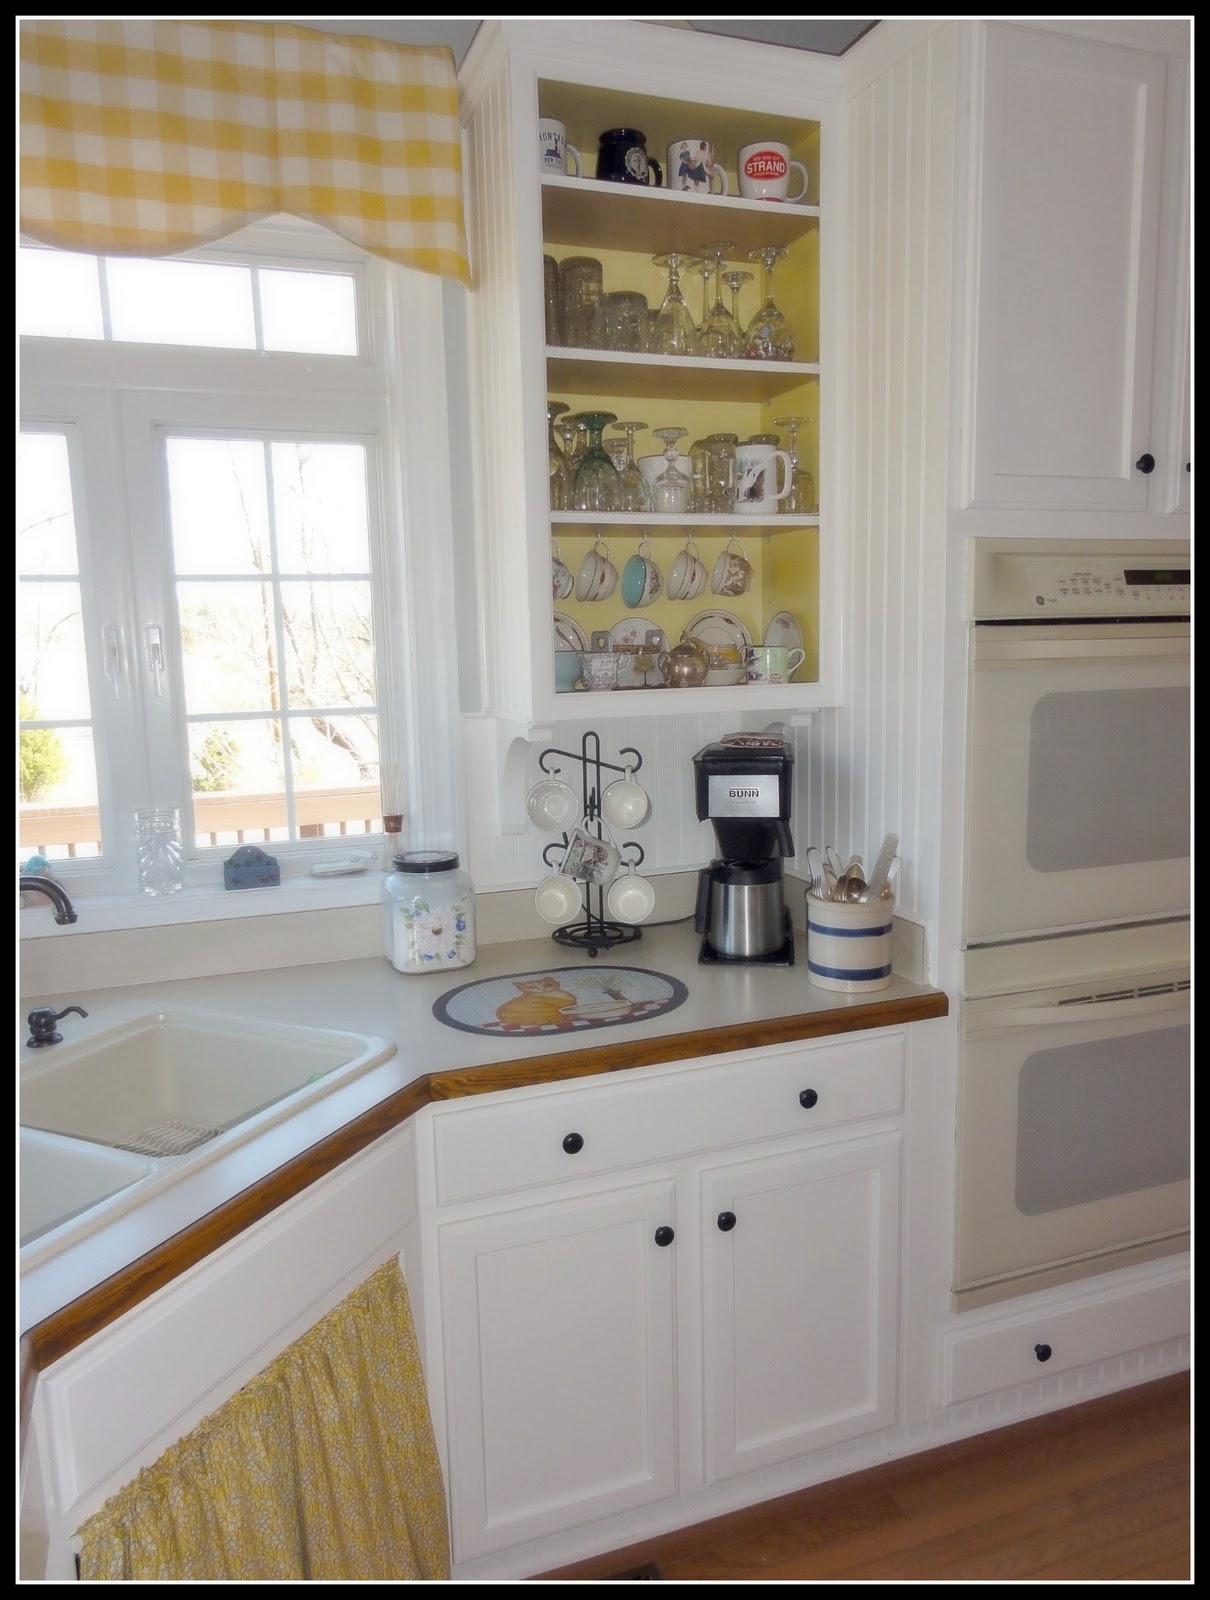
My glassware cabinet became a pretty open mini china and crystal cabinet. Perfect for all my thrift store tea cups and crystal treasures. Extra decor touches like the painted glass sugar jar and canvas placemat I did of my cat Whisper, make this a more personal space.
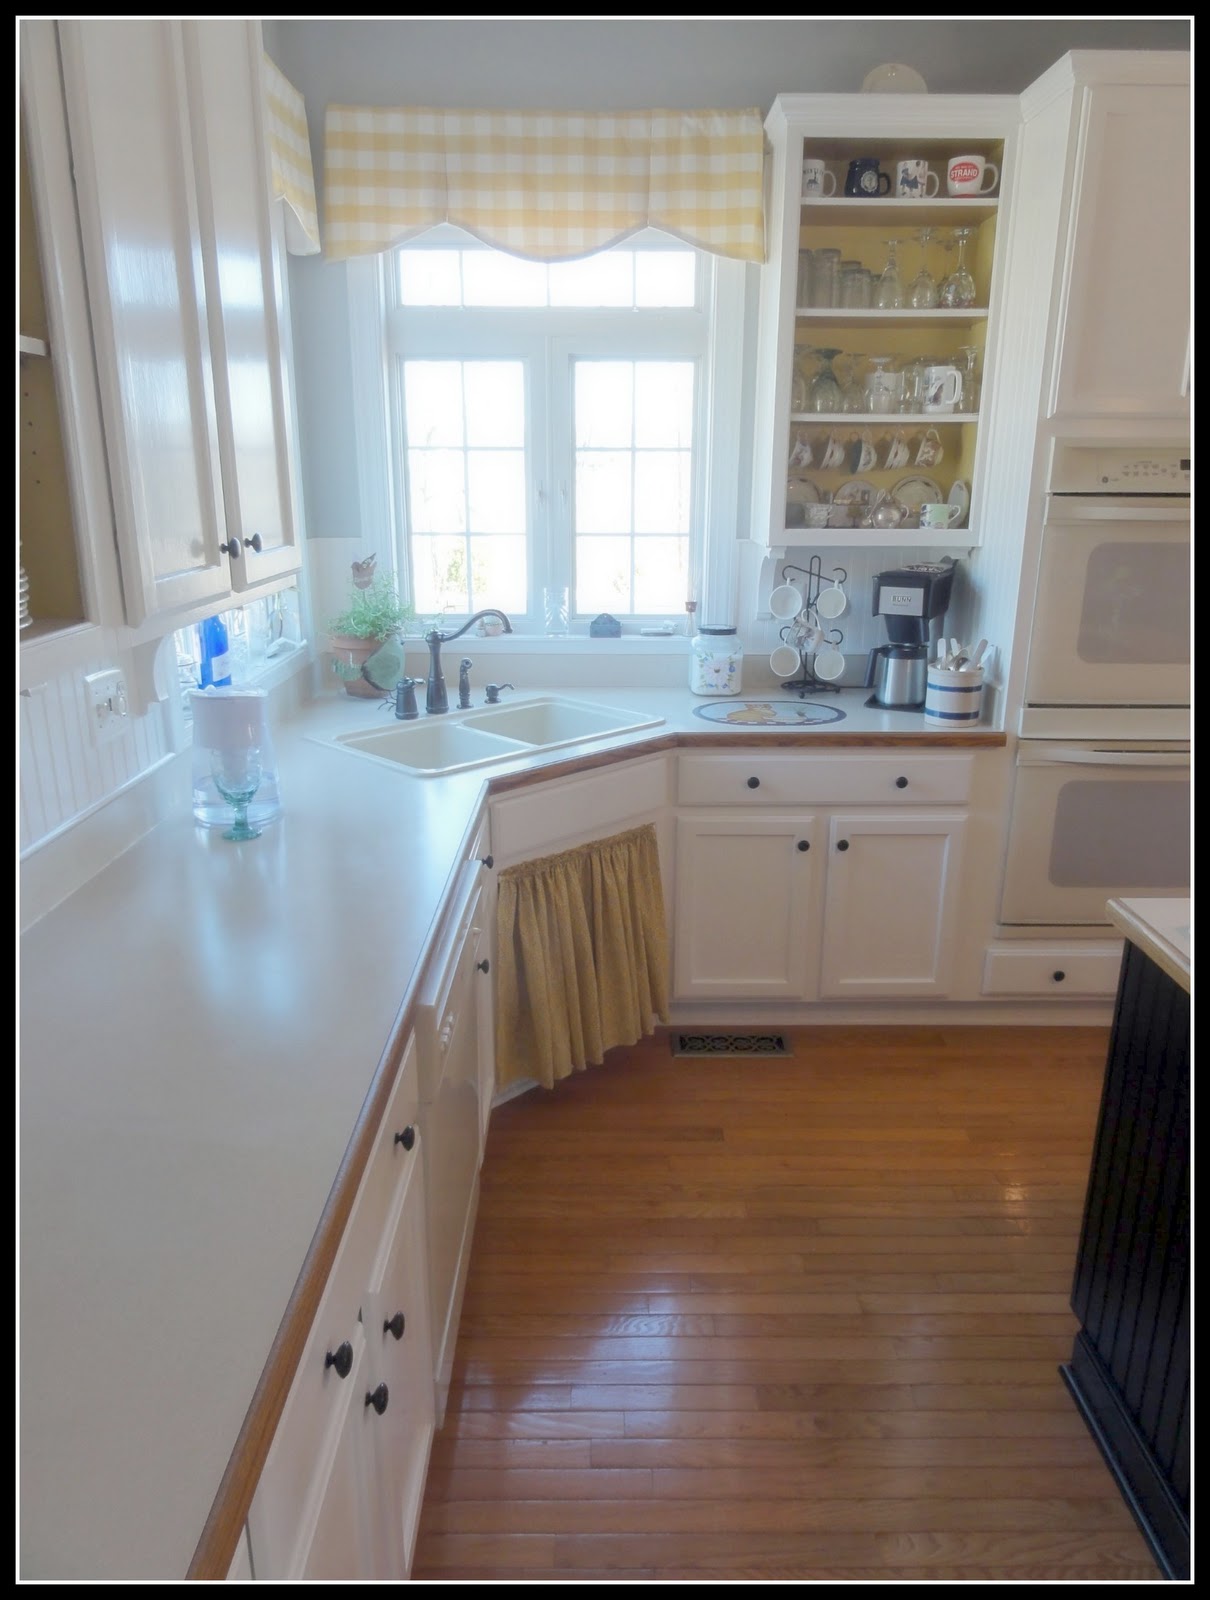
I also said bye-bye to lots of small area rugs I had on my floors. I much prefer to see my beautiful wood.
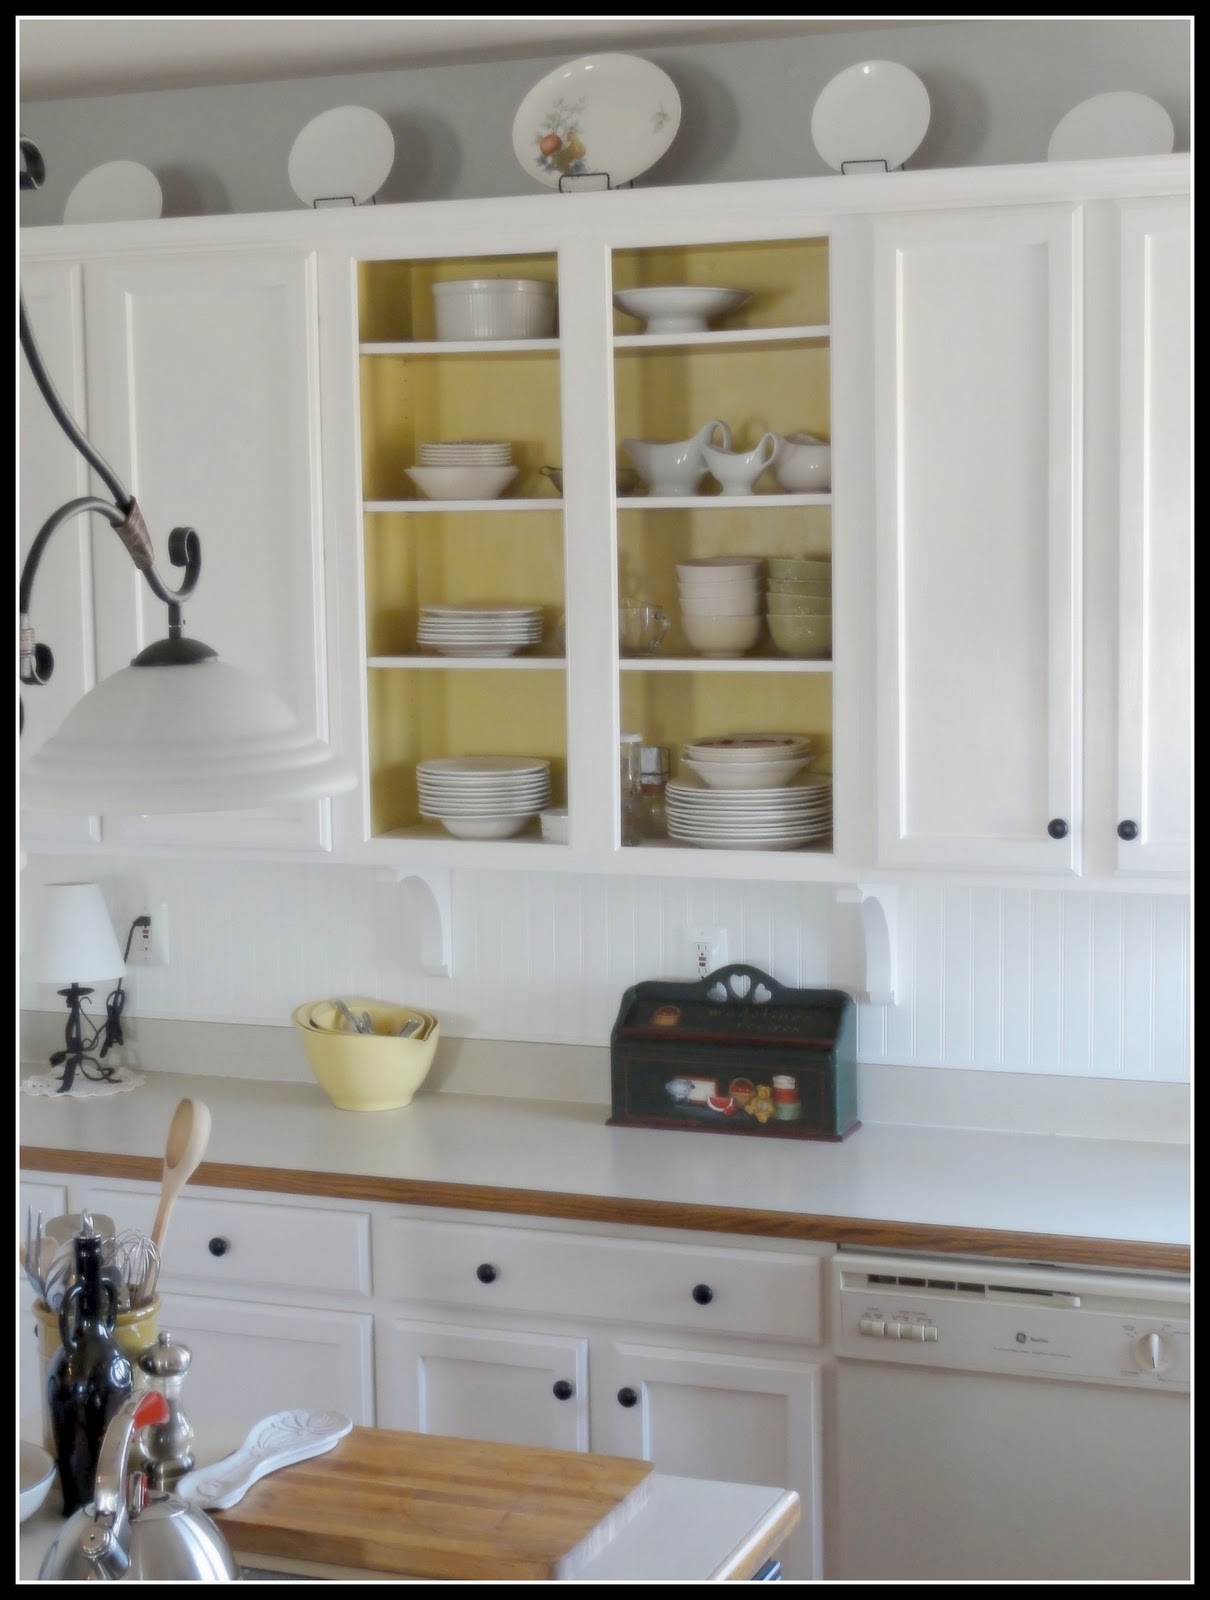
Extra decor touches like the plate display above the cabinets came courtesy of the Salvation Army. Can you tell I am a thrifting addict?
I am so happy with the results. My kitchen is now everything I always wanted.
See what I mean about the corbels. These cabinets no longer have that bland basic look…they look special.
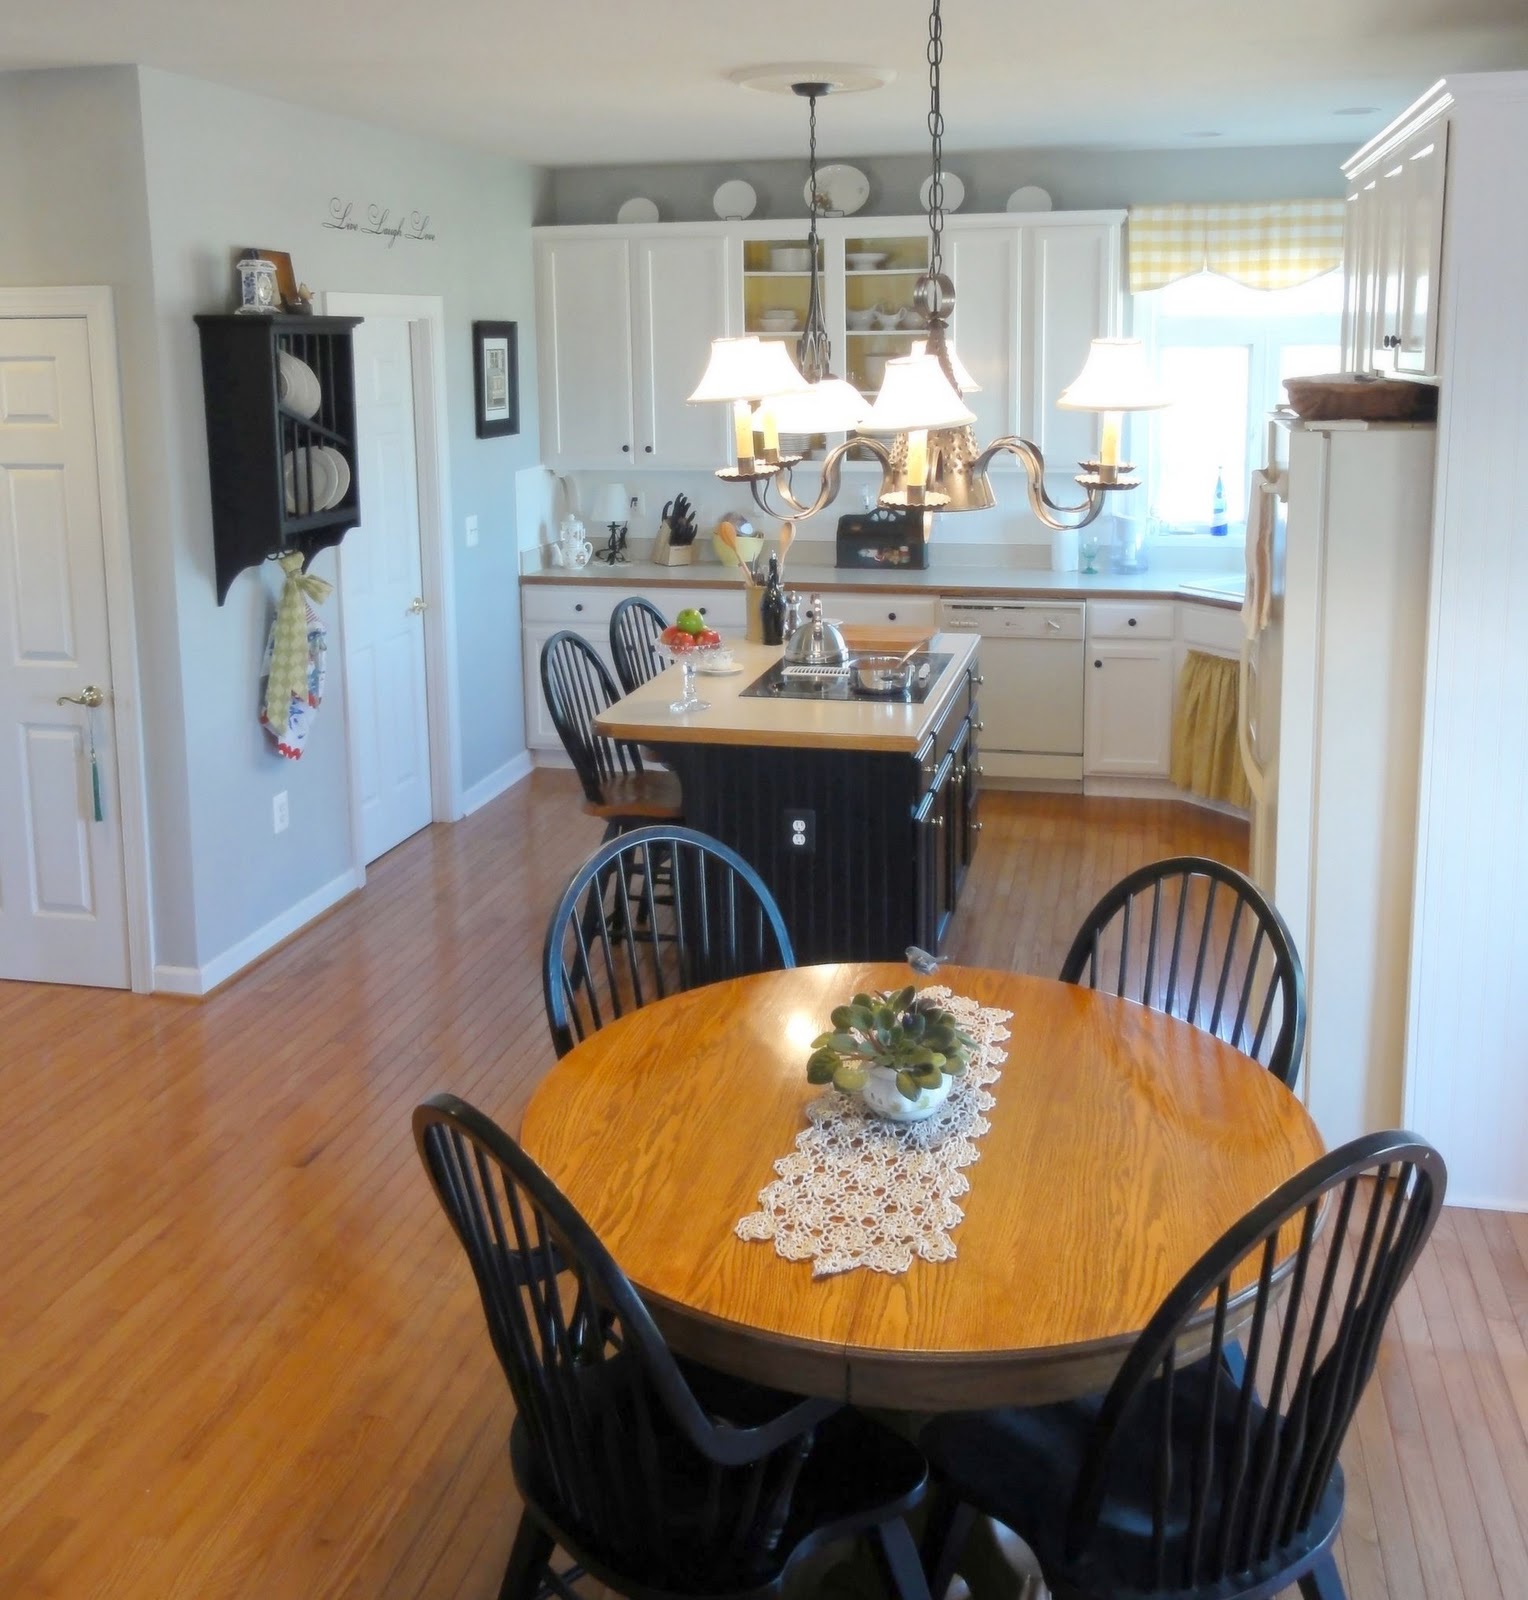
Before the restyle, my island blended in with the oak cabinets. Turns out, only the front was real wood! Now with the black beadboard, the island looks like a separate piece of furniture. Which was exactly my goal.
I really love how everything came together to give me the Farmhouse kitchen that I have been dreaming of.
I do have a few tips for those of you thinking of tackling a kitchen restyle.
1. Don’t be afraid..it’s just wood and paint. All mistakes are fixable
2. Buy good brushes. They will clean up better and last much longer and that will save you money. One of the reasons I was able to keep costs down was taking care of my brushes. I did not have to spent money on new brushes for this project.
3. Keep paint off the ferrule (metal band) of the brush. At the end of the day you can tightly wrap your brush in plastic and continue using the next day. Be sure to clean after the second day.
4. Whenever I see coupons for my local hardware stores I take advantage of them.
I used 3 10% off Lowes coupons for my beadboard and paint at Home Depot…YES, they honor each others coupons!
5. Buy good quality paint..there is a difference! It makes me cringe when I read a blogger saying she used the cheapest paint she could find to tackle a big home painting job.
Don’t skimp…if it is worth doing, it is worth doing correctly.
6. When sanding in between coats, save money and use plain brown grocery bags. Tear into approx 5x5in pieces and use just like sand paper. Works great with virtually no residue and much gentler on your hands. I learned this tip as a decorative painter.
6. Remember to have fun…you are creating a space in your home where you will laugh, love and be together. Enjoy the process.
7. Be sure to stand back, admire proudly and pat yourself on the back. You’ve earned it.
Products I used:
Behr Ultra Premium in Bleached Linen for the white cabinets
Behr Ultra Premium in Bleached Linen for the white cabinets
1 Gallon Behr Ultra Premium Sliver Sateen
1 Gallon Gliddon Gripper Primer
1 Quart Martha Stewart Tahini (barely used half)
3 sheets 4×8 Beadboard
Appox 36 feet trim (I reused old wherever I could)
1 Yard fabric
1 Tension rod
24 knobs (reused island knobs)
assorted decor items from my Salvation Macy’s (Army)
All totaling $493.55
I hope I have answered many of your questions. Please feel free to e-mail me if you have more.
Many thanks to Cassity and Justin for inviting me to guest post. This was fun…now go paint your cabinets!!


You wrote that both the walls & the cabinets were painted in Silver Sateen (eggshell & hi-gloss), but I’m wondering if that could have been an error because they look totally different in the pictures. The cabinets look much lighter. Can you tell me what you used on the cabinets if you did use a different color? Or did I miss a step somewhere… Thank you! Great job, I love it, by the way! 🙂
Natalie, In photographs the way light lands on different surfaces really makes a difference, and ESPECIALLY with different sheens in paint. I am putting my money on the fact that they are the same color, but just photographs make them look different.
She says in her materials list that she used Behr Ultra Premium in Bleached Linen for the white cabinets, and
1 Gallon Behr Ultra Premium Sliver Sateen. So yes, two different colors.
Hi,
Love your kitchen! Did you wait two weeks between application of each coat of paint on your caninets to make sure they cured?
Thank you
Gail W
Hi Gail! This is a guest’s kitchen, not mine, so I can’t say for sure what their application process was — but you can click over to their blog (linked up toward the top of the post) and ask there for sure! Thanks!
Great job! I was wondering if had to cut anything under the sink cabinet to hang the tension rod?
Out of curiosity did you send between the two coats of primer? If so how long did you wait? Hours? Days?