Building the Built-ins; Part 2
Okay, on to the second half (of the building that is!)
We painted the dado for the support, so that the interiors would be all fresh and white – no raw wood showing through. You can see below how the groove sort of disappears, which was the goal.
")
")
")
")
The column shows the difference once the paint gets on there! I love how nice and bright that paint looks compared to the primed wood. The pictures below shows the column all trimmed out (minus crown). It matches the columns we installed on our first floor. I really like how it brings more unity to our home’s overall design.
")
")
")
")
The building of this project did sort of happen in strange succession. We were worried we wouldn’t get the original plan done in time (we had a deadline). Throughout, I was always thinking, “Well, if this got done, and that was all, it would look finished enough to post”. It was really nerve wracking! I think I caulked, patched, sanded and painted something new every night for 4 weeks straight.
Now on to the doors. Our friend Jordan came over and helped a few times. He is single, a great father, kind, and adorable… I’m just saying, cuz there may be some single girls out there.
We went for shaker style doors, which I have always loved. I built some nightstands in my college woodshop class in this style… and it just doesn’t get old. We opted for the proper building technique, instead of a shortcut. Tongue and groove and wood glue, overall a LOT of cutting for all 19 doors!
")
")
")
")
")
")
This is what the door looks like sort of pulled apart, sorry for the picture quality!
")
")
Fitting the doors in place. We did all the bottom doors first, again with the thought that we could just stage the upper shelves if we didn’t’ finish in time. But Justin did it all in the end! That man is amazing!
Next the crown was installed… and more painting and caulking and more door building and more…. Makes me want to break out in song “this is the project that never ends, yes it goes on and on my friends, Some people started building it not knowing…” (yeah sorry for getting that song in your head)
_thumb")
Below are the upper doors all built and ready for paint. I basically just rolled it on with a foam roller. Foam rollers, might just be one of the best inventions ever, but they are so smooth, that you have to be really careful about not leaving any paint lines at the end of the roller.
_thumb")
_thumb")
Once I painted, Justin installed them. I have had mixed reviews on the hardware (mainly the hinges) some love it, some really don’t. But oh well, I love them for the aged character they bring to project.
In our first house (the 100 year old house) there were these same butterfly hinges, and I just loved them. It actually might be fun to paint them white to add the layers of time, (and finishes) that come with old houses. We will see what happens if we have to move before that or not.
")
")
")
")
Okay, next we built the faux hearth. We did this last, to make sure we would have time. Justin used the wood from the half wall we took out. And some old OSB from another project. It is built TOUGH as you can see by the framing, which is probably good, since it quickly became a favorite of all the local wildlife (including the ones that come over to visit, it is the prefect stage).
![Built-in-storage-project-for-family-room (109)_thumb[1]](https://www.remodelaholic.com/wp-content/uploads/2012/01/Built-in-storage-project-for-family-room-109_thumb1.jpg "Built-in-storage-project-for-family-room (109)_thumb[1]")
![Built-in-storage-project-for-family-room (110)_thumb[3]](https://www.remodelaholic.com/wp-content/uploads/2012/01/Built-in-storage-project-for-family-room-110_thumb3.jpg "Built-in-storage-project-for-family-room (110)_thumb[3]")
")
By the way, in case you are wondering, (the image below) is how you help to keep 2 year olds from climbing through glassless doors… Fill the whole cabinet up to the brim with pillows. Okay, it mostly worked… not completely. Sometimes it just became a really nice padded seat!
![Built-in-storage-project-for-family-room (111)_thumb[1]](https://www.remodelaholic.com/wp-content/uploads/2012/01/Built-in-storage-project-for-family-room-111_thumb1.jpg "Built-in-storage-project-for-family-room (111)_thumb[1]")
When we finally got around to adding shelves, which actually did succeed in keeping the little rascals out, we used the melamine again, with edge banding ironed on! (I am sure the iron was happy to get some use, heaven knows I didn’t have time to iron anything else!)
![Built-in-storage-project-for-family-room (155)_thumb[31]](https://www.remodelaholic.com/wp-content/uploads/2012/01/Built-in-storage-project-for-family-room-155_thumb31.jpg "Built-in-storage-project-for-family-room (155)_thumb[31]")
![Built-in-storage-project-for-family-room (156)_thumb[22]](https://www.remodelaholic.com/wp-content/uploads/2012/01/Built-in-storage-project-for-family-room-156_thumb22.jpg "Built-in-storage-project-for-family-room (156)_thumb[22]")
To finish off the ledges, we decided to use a mix of the remaining wood flooring from downstairs and edge it in walnut stained 2 x 4’s. We had just enough wood flooring to do the whole thing with exactly 2 one foot long scraps left… absolutely providential!
")
")
")
The big huge wall of cabinets needed some added detail too. I like the idea of this looking more like a huge built in hutch so we added a counter top that continued from the other side of the column.
")
")
")
")
")
Justin cut all the trim pieces to fit with different thicknesses. One portion to match the thickness of the wood flooring, the other to be a nice ledge overhang… it took a lot of work! ( I can’t seem to find the pictures!)
")
")
")
")
")
")
")
The window seat is Etta’s favorite catwalk.
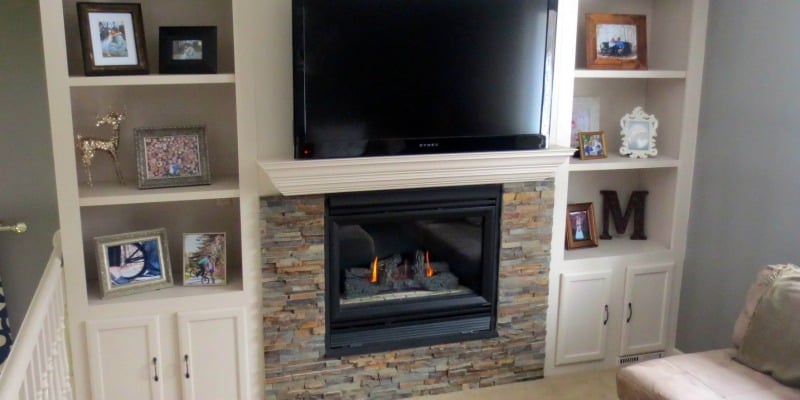
Lastly, just to make the unfinished fake hearth look quasi-finished, we threw some columns up and painted the wall black behind it. Here they are being painted, we didn’t even nail them, just slid them in place.
")
Okay, finally next time I will FINALLY show you the first reveal… and then I‘ll show you what we’ve done since then (although we aren’t yet finished, so we better get to work!)
Also see Built in Storage for Family Room – post 1 and Building the Built-ins! Part 1 – post 2


first of all, i love the new look of your blog! simple and stylish w/o being “busy”!
this project is truly amazing…. as are you and justin! it’s wonderful to see your beautiful daughters playing under your feet as you work together. what wonderful lessons you are teaching them about working together toward a goal… among many other things!!
impressive!!
Holy smokes, so many things in one post! After the reveal you could go on for weeks just detailing all the little things. I’ve love to hear more about making those doors!
We will have to do that some time… he needs to make at least 4 more doors for another closet upstairs… then if I can get him too, I’d really love two more downstairs on my book cases.
Wow, wow, wow. What an accomplishment. And I grew up in a house built in 1910 and I think the hinges are perfect.
So is it all constructed of melimine? If so, is the melimine painted? Your doors were made of wood but match perfectly with the rest of the structure.
The structure is made of melamine, but the doors and face frame are wood, that have all been painted. There is one or two very small sides of melamine that are showing (mostly in the right hand corner of the room when you are looking at it) But I just painted it, to make sure it all looks similar. I didn’t do anything special to the finish, which I may regret, but so far so good, and it has been about 4 months.
The interiors are NOT painted! That is why I chose the melamine, so I wouldn’t have to paint.
What color did you paint your walls?
It was a random bit of mis mixed paint I had left over! Sorry I don’t have a name!