Country Kitchen With DIY Reclaimed Wood Countertop
Submitted By Keeping It Cozy


The reason I decided to share this is because we actually did this makeover on a budget of $1000. I always feel like paint is the most affordable way to completely make over a room and painting kitchen cabinets are a perfect example. The other ways to affect a remodel on a budget are to be resourceful, use existing elements if possible, prioritize those things you feel are worth the extra money and finally, do the work yourself!
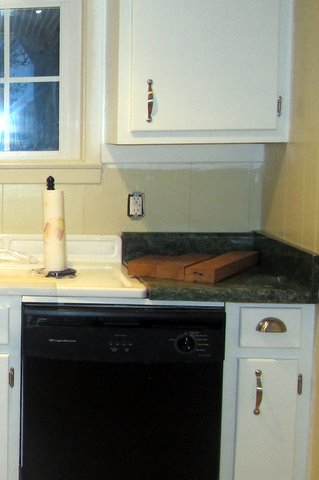
BEFORE:

This is how the kitchen looked when we did a walk-through on the house. Can you believe that I lived with it like this for almost a year? But it was almost exactly a year ago (I was 6 months pregnant at the time) that we were ready to tackle the kitchen!

Believe it or not, we did the majority of the work one Saturday. My daughter spent her first night away from home with her grandma and we worked all day and some of the night. I did all of the painting while Justus took care of trim work, light fixtures, and other time consuming details.
I had never painted cabinets before (in our previous house we purchased new cabinets when remodeling our kitchen) and I was very nervous. But there was really no reason to replace these cabinets. Sure, they were ugly, but these cabinets were as solid as could be, made with thick oak wood.
I visited our local Benjamin Moore store and they helpfully pointed me in the right direction as far as what kind of primer to purchase and a cabinet paint roller. The $6 for the cabinet paint roller was worth every penny! (smile) I originally wanted to use an oil-based primer, but since I was pregnant at the time, we went with latex. I painted one coat of primer and three coats of paint.
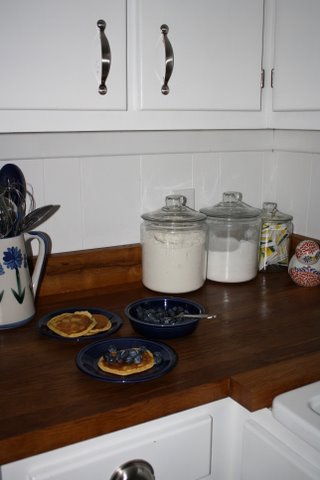
AFTER:

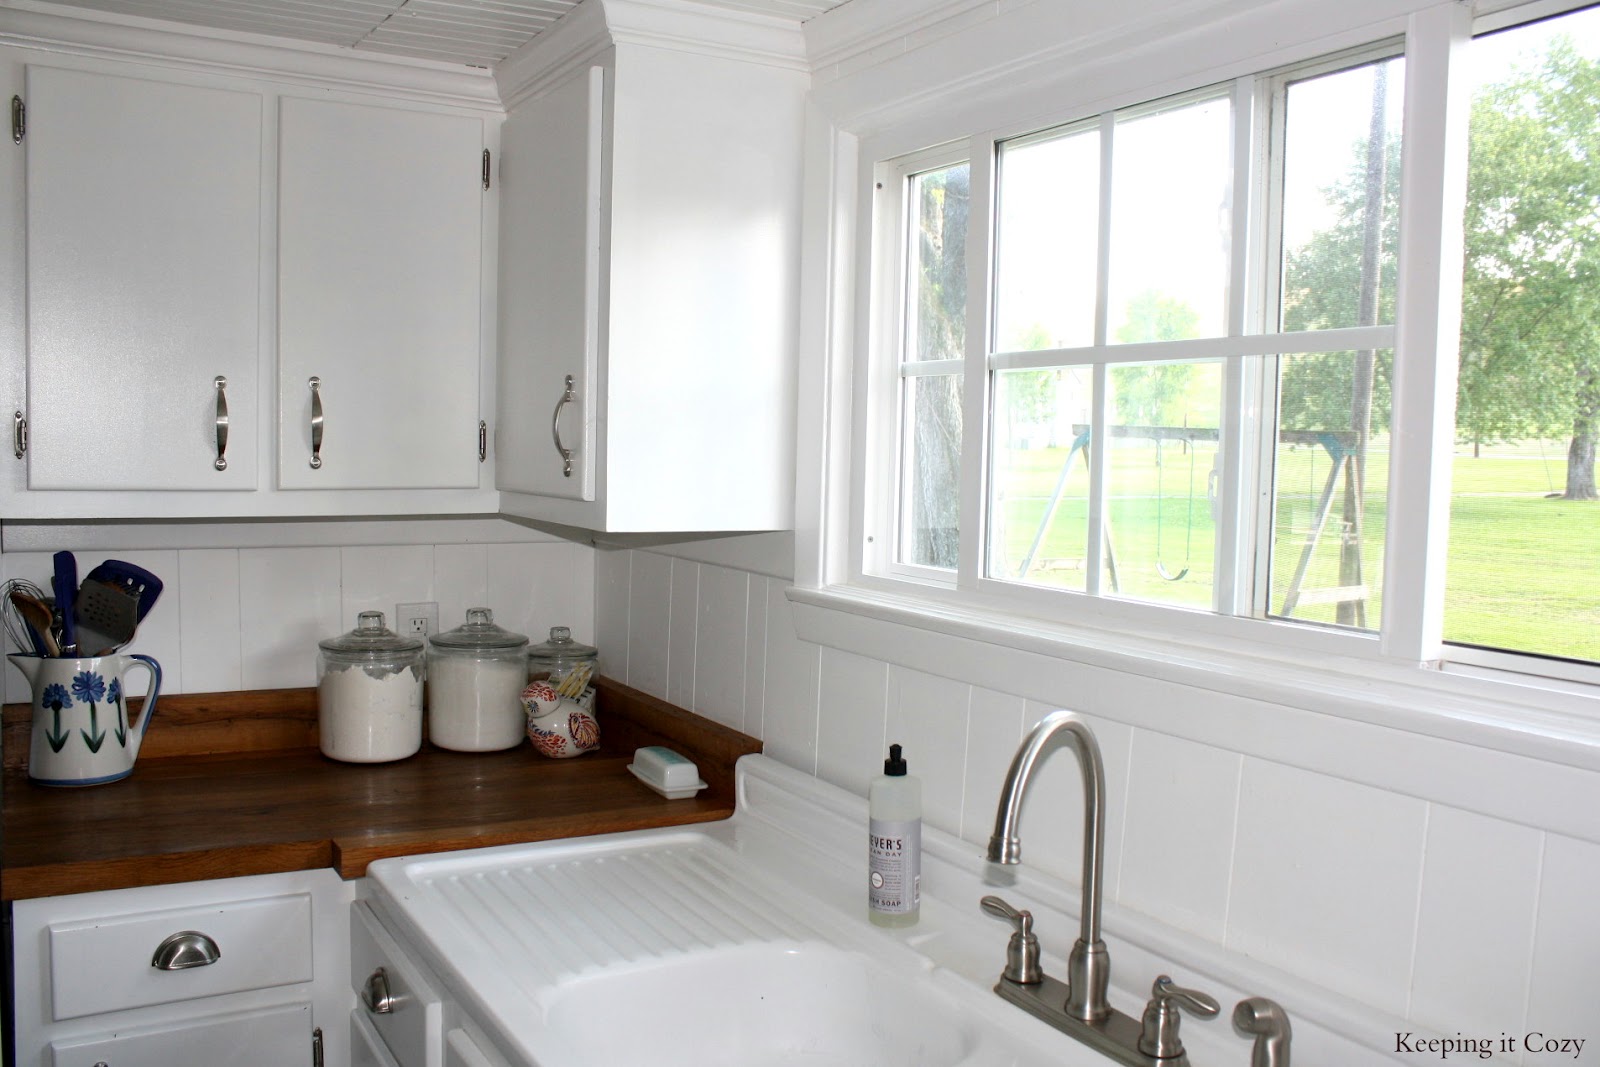
I used the same color for the cabinets and walls (Simply White by Benjamin Moore). Since our kitchen is on the small side, I knew white would not only brighten the space, but also make it appear larger.

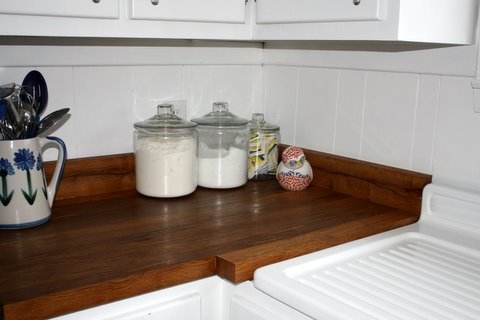
If you’ve read about our butcher block countertops, then you know they are something I have always wanted. The warmth of wood looks beautiful with an all white palette. These countertops are my favorite thing in our kitchen. They were made by my husband and father-in-law from 100-year-old reclaimed barn wood (you can read more about them here).
We were fortunate that the countertops were essentially free since my father-in-law had the wood and tools needed to build the countertops on hand. The countertops are an example of being resourceful though… sometimes unique and lovely things can come about when you have to think outside the box.
BEFORE:

When we purchased our house, the original bead board was covered with foam tiles. Justus and I had no idea what the condition of the bead board would be in when he removed the tiles. He did the laundry room and kitchen at the same time and we were pleasantly surprised that although the bead board was covered in pealing old teal paint and had a few holes, it was in a salvageable condition. This was a very dirty project and Justus did it all himself since I was pregnant and we knew we were potentially dealing with lead-based paint. He shut off this section of the house for a day and wore a face mask when sanding and making repairs. He then added a coat of primer and a coat of paint before opening this section back up. I added three more coats of paint after that to ensure everything was sealed properly and would be for several more years.
AFTER:
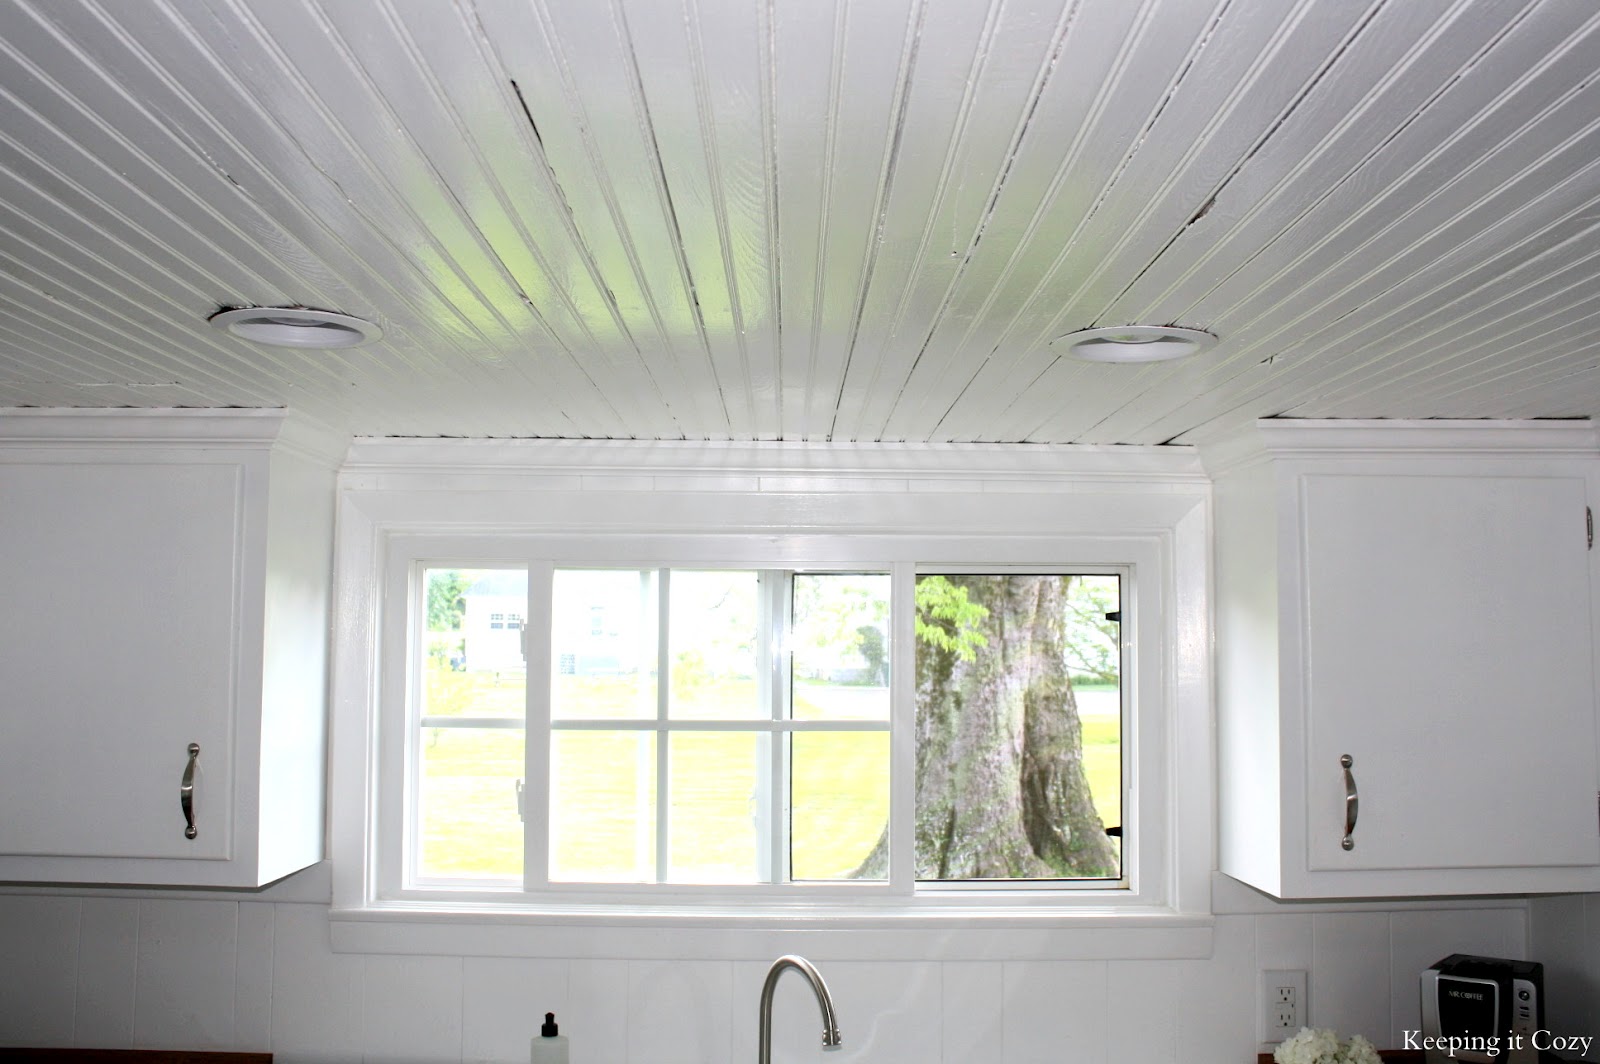
By renovating the ceiling, we were able to raise the ceiling height by a good 4″. This was a very positive thing since the back portion of our house originally was a porch (before there was such a thing as indoor plumbing) and has a lower ceiling height than the rest of the house. Justus added trim on top of the cabinets for a finished look.

The farmhouse sink is also original to the house and fortunately is in excellent condition. We did replace the faucet and spent about $200 on it I believe. I purchased the cabinet hardware off of Ebay for about 1/3 of the price of what we would have spent somewhere like Lowe’s. We also replaced the dishwasher.
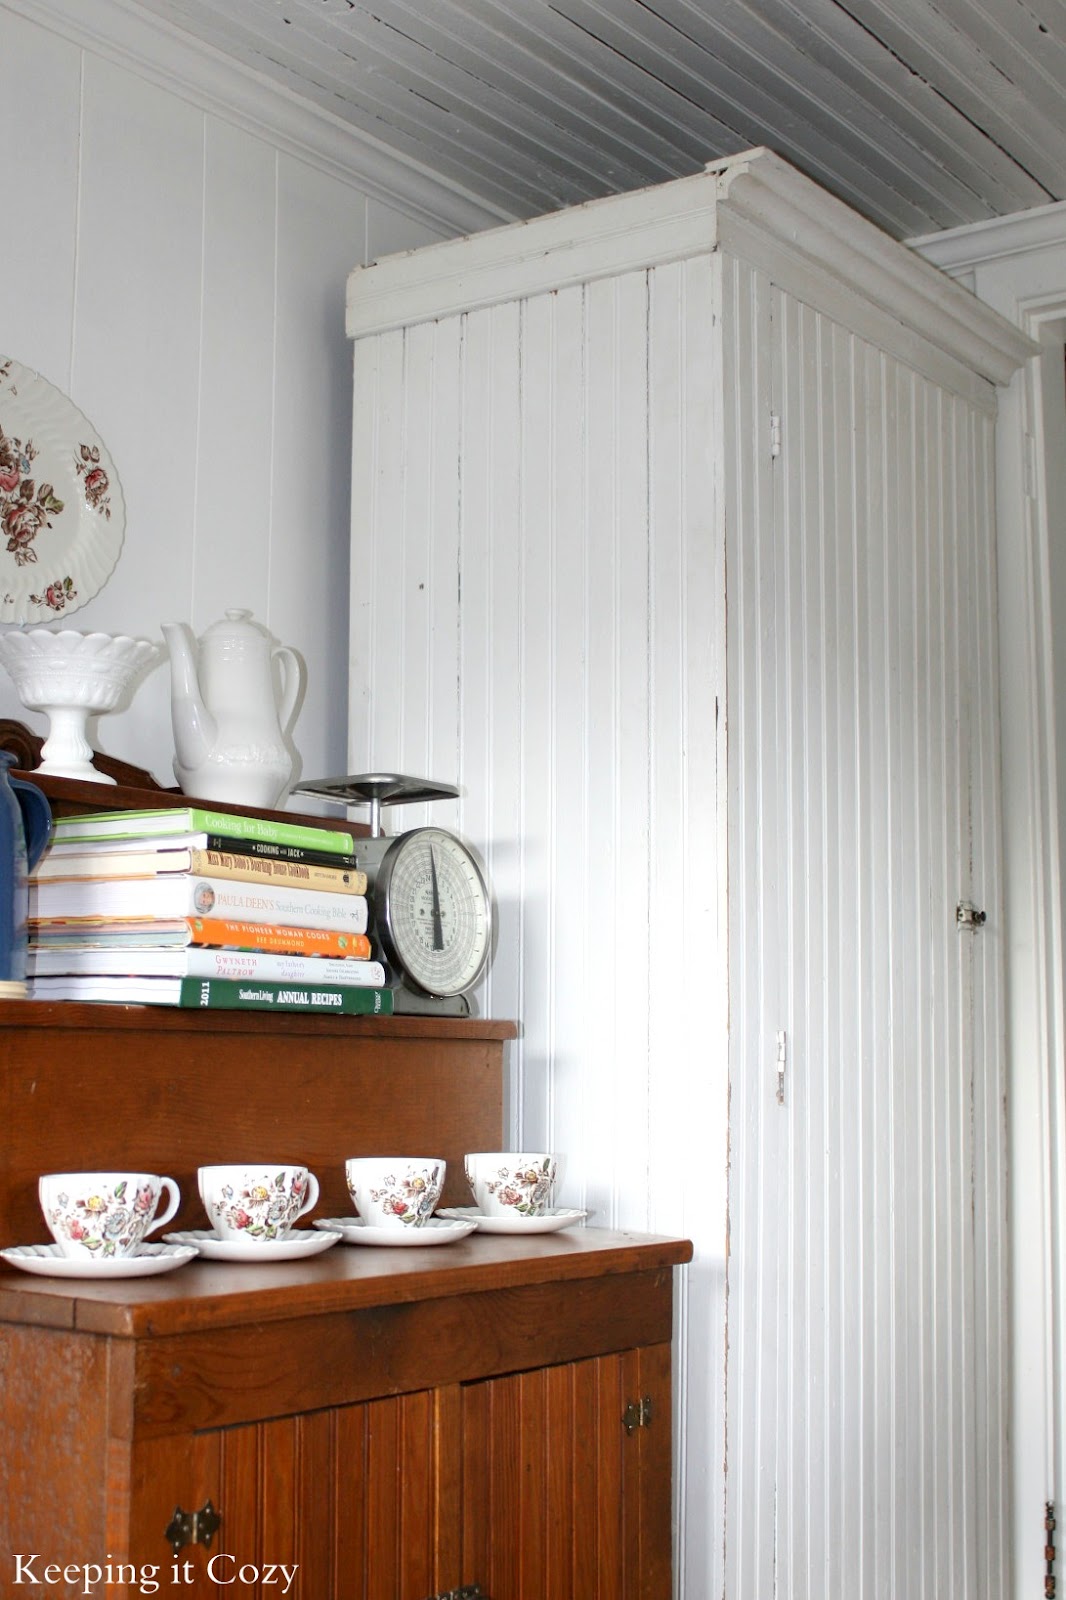
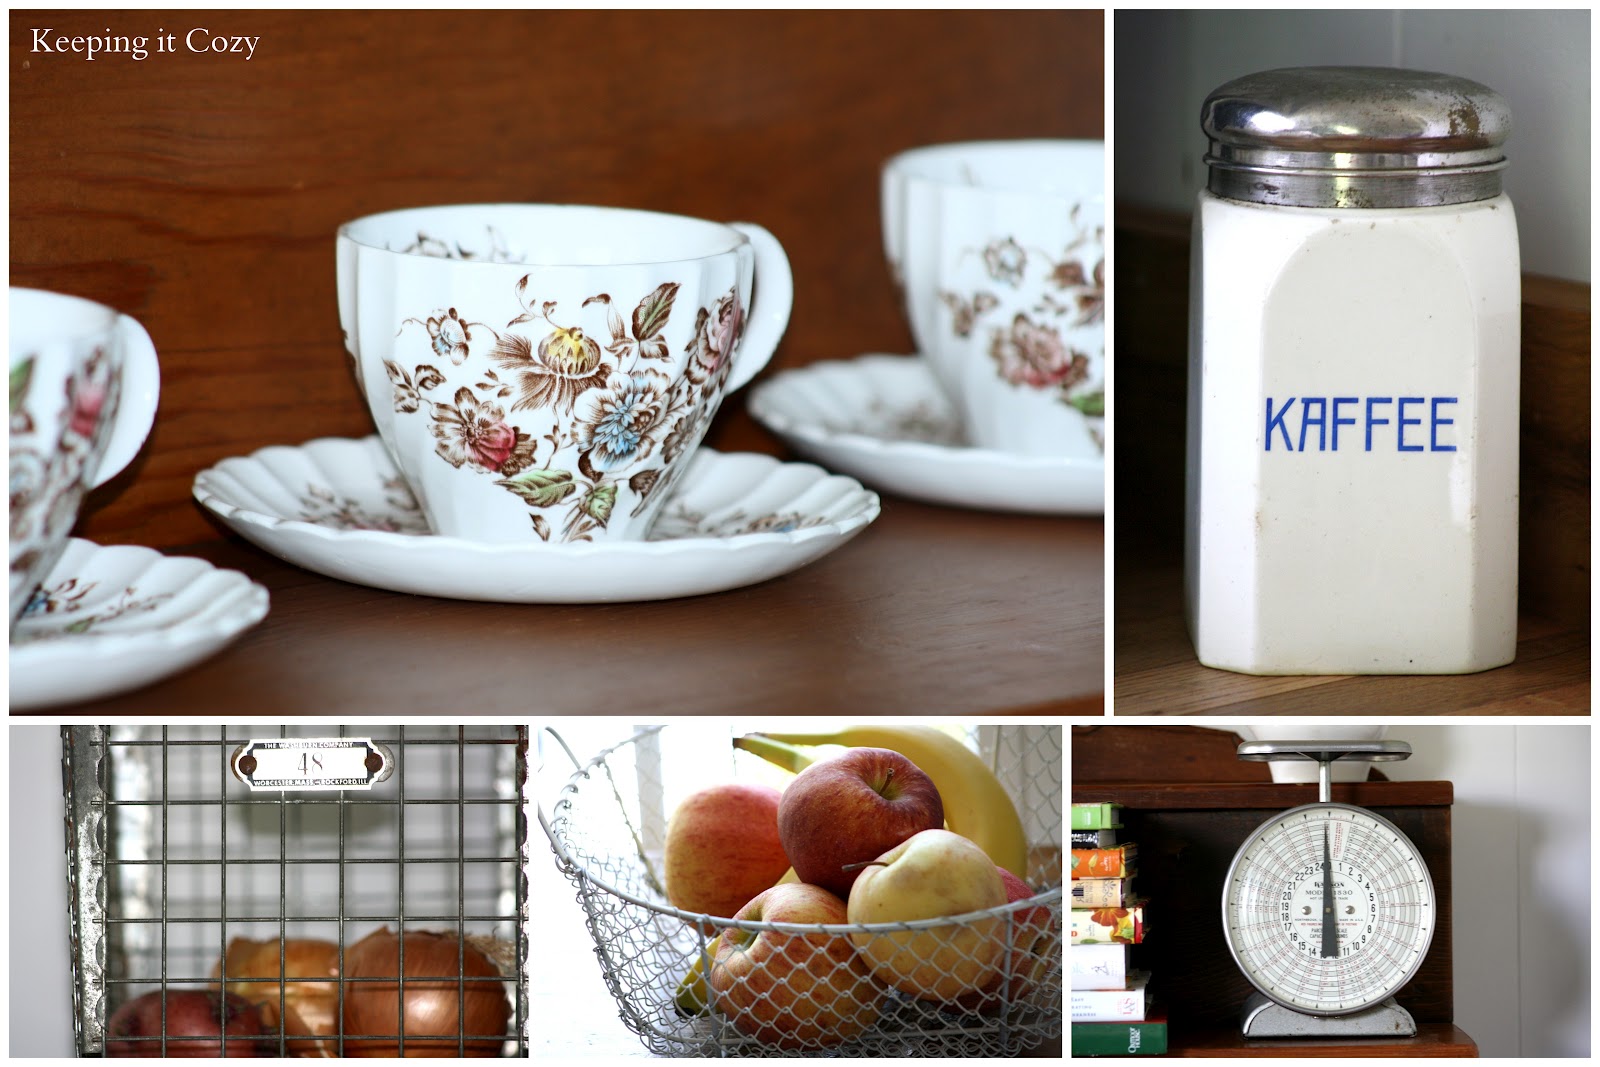
The white bead board cabinet is something I found prior to purchasing our home and I use it for a pantry (you can read more about it here).
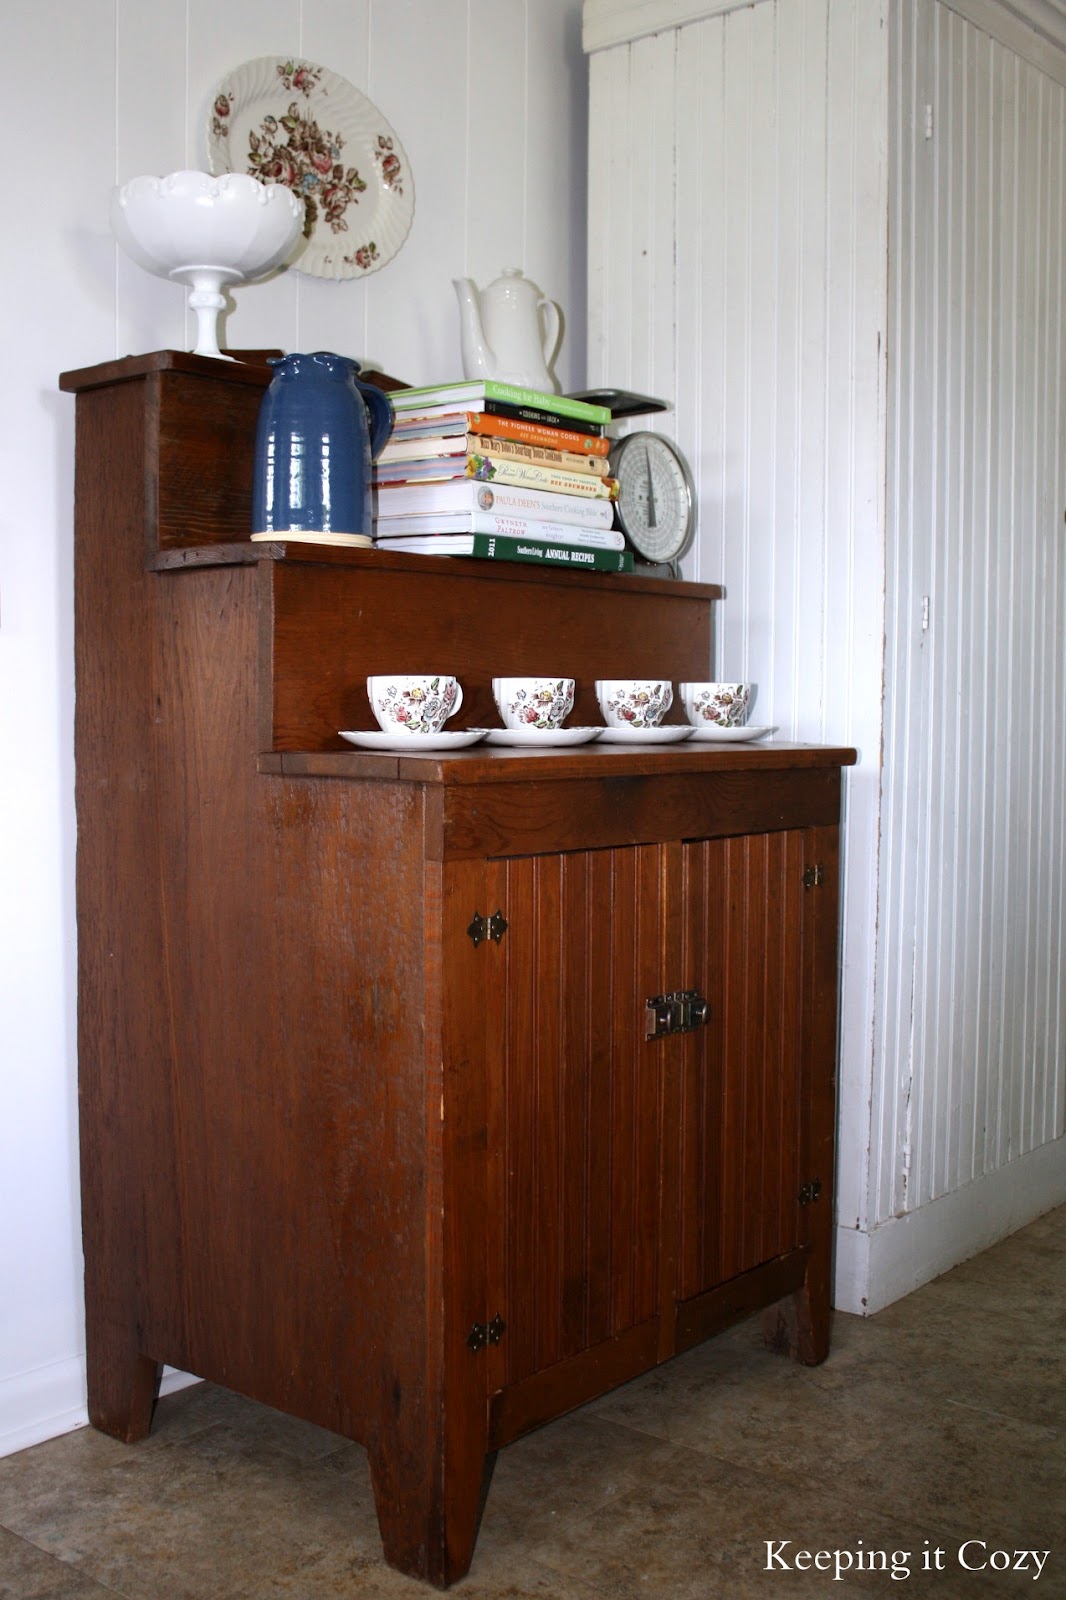
Later I purchased this wood piece at a local antiques store and I use it for extra storage since we have a limited number of cabinets. I love both pieces in the kitchen since I feel like they must have been made around the same time period as our house and the bead board gives a cohesive look.
BEFORE:

AFTER:
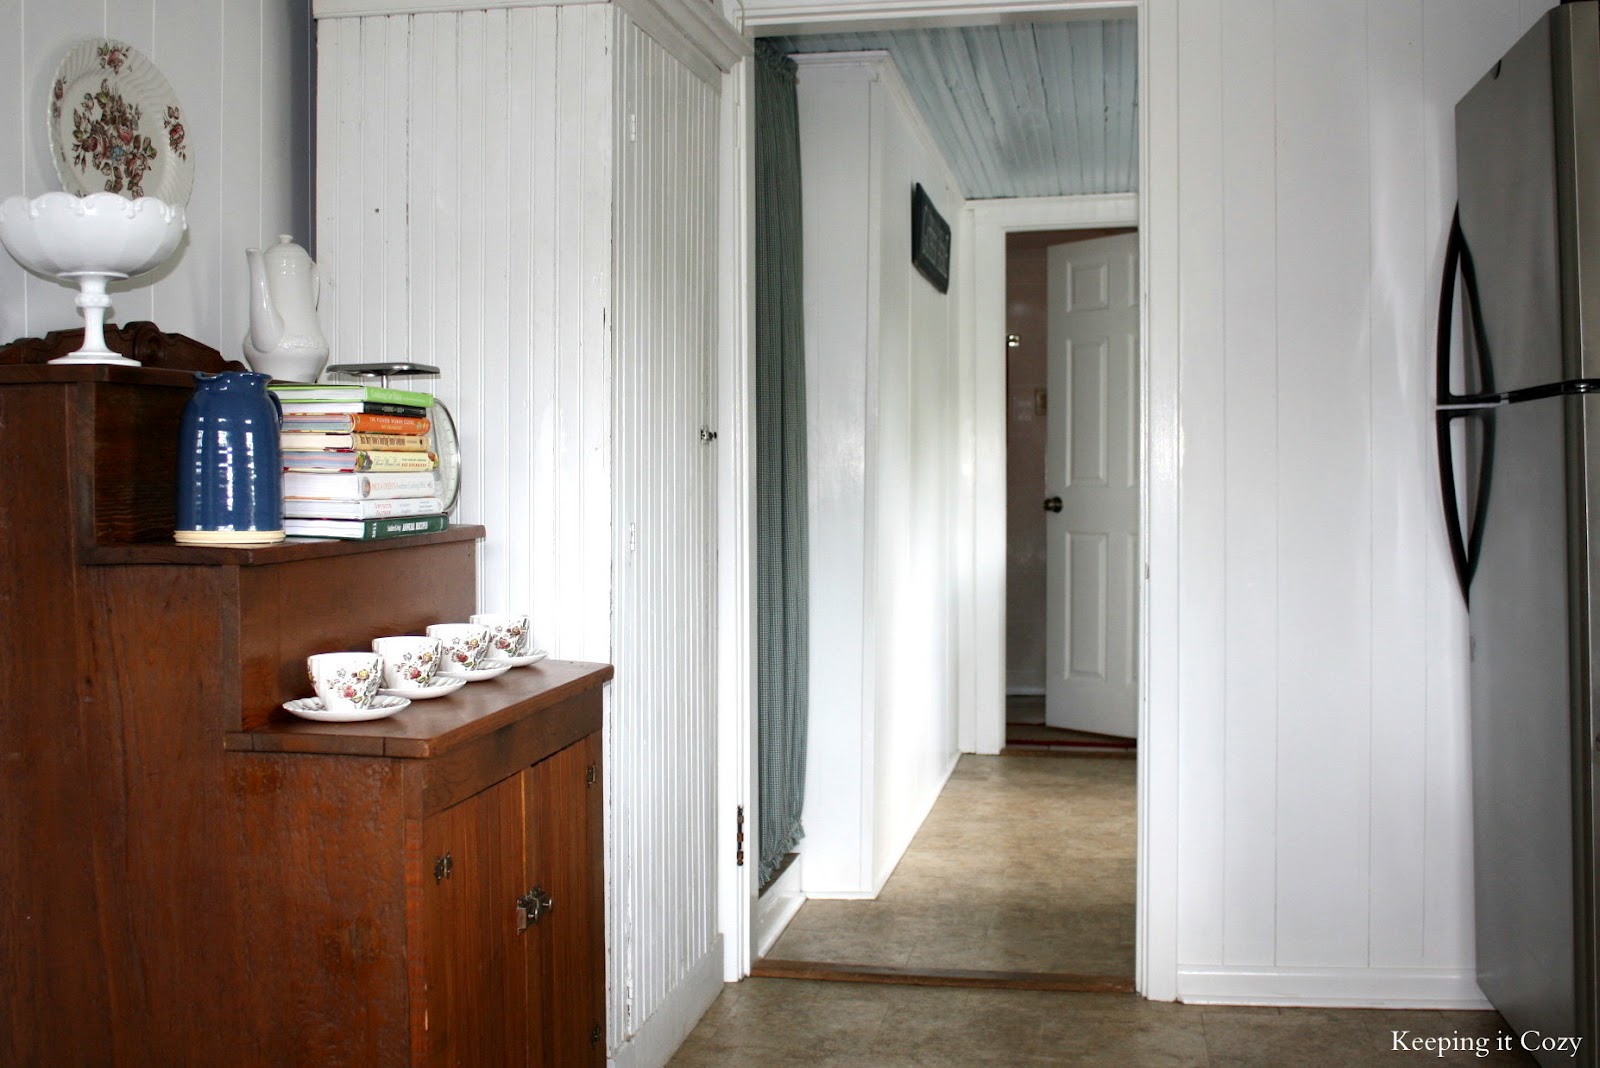
This view is looking into the laundry room and then a bathroom. Eventually we’ll replace the floors in this portion of the house to match the rest of the downstairs. We left the walls as they were because the bead board behind didn’t appear to be in good condition from what we could see and although this is a type of paneling, it is solid wood about 1/4″ thick. And actually I feel like a little variation from bead board is okay… our entire house is bead board!
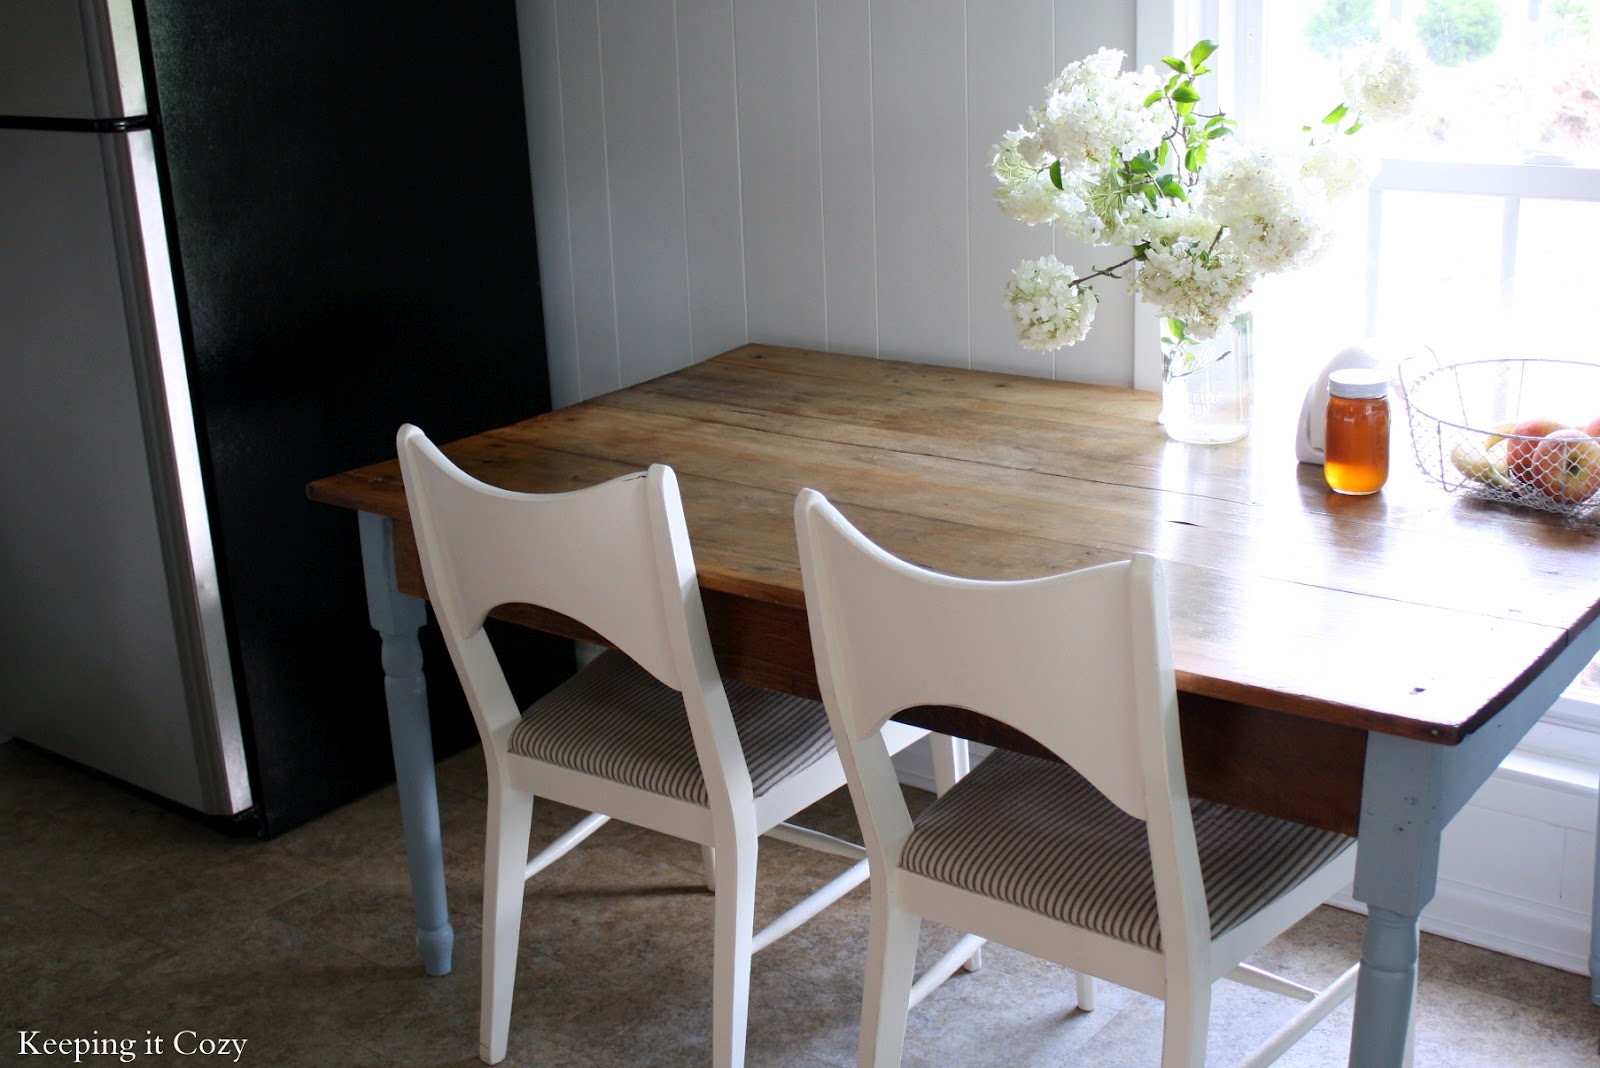
I found this farmhouse table for something like $40 and refinished it. We love this old table and even though we’re a little crowded, we usually eat our family meals here instead of the dining room.
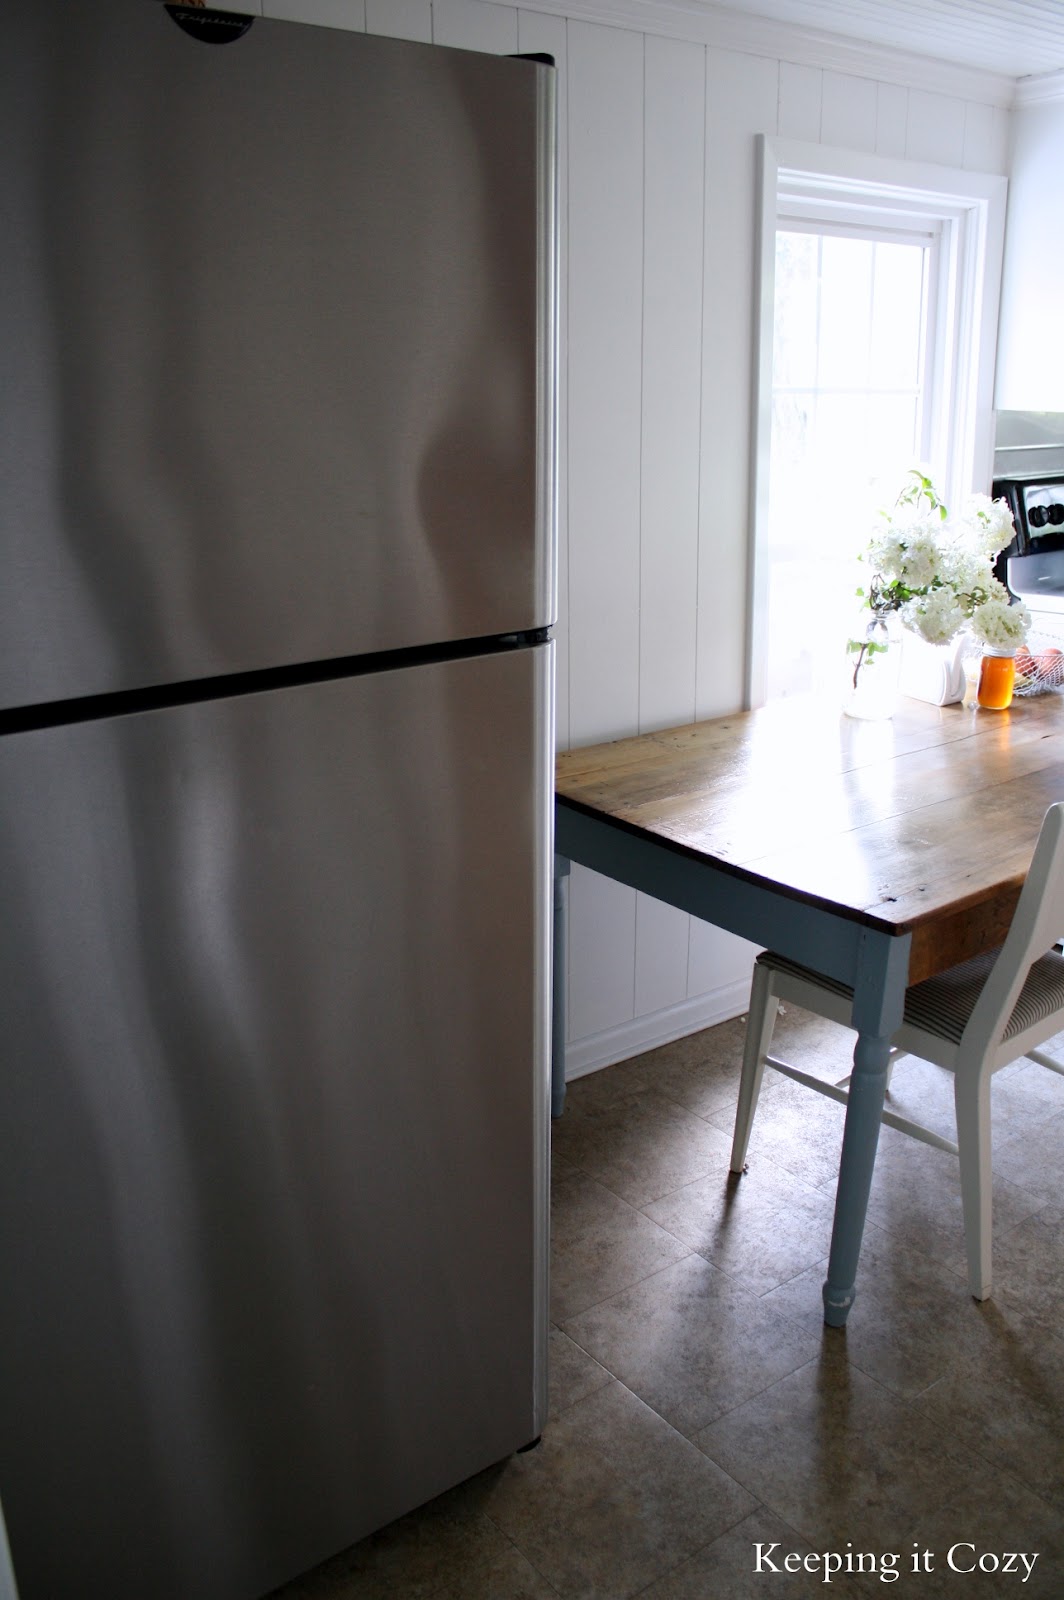
Some day we’ll replace the refrigerator and stove, but for now, these work fine.
Although our kitchen is by no means perfect, it’s cheerful, charming and the heart of our home. I don’t feel like you have to spend a lot of money to bring about some major improvements. We have some ideas in mind for additional improvements, but with an old house, a budget, and limited time, you learn to prioritize home repair projects and be content until the time is right.
For fun, here is a list of what we purchased for our kitchen makeover with approximate prices:
– Paint $100
– Cabinet Roller $6
– Trim $75
– Faucet $200
– Cabinet Hardware $85
– Light fixtures and covers $150
– Dishwasher $400
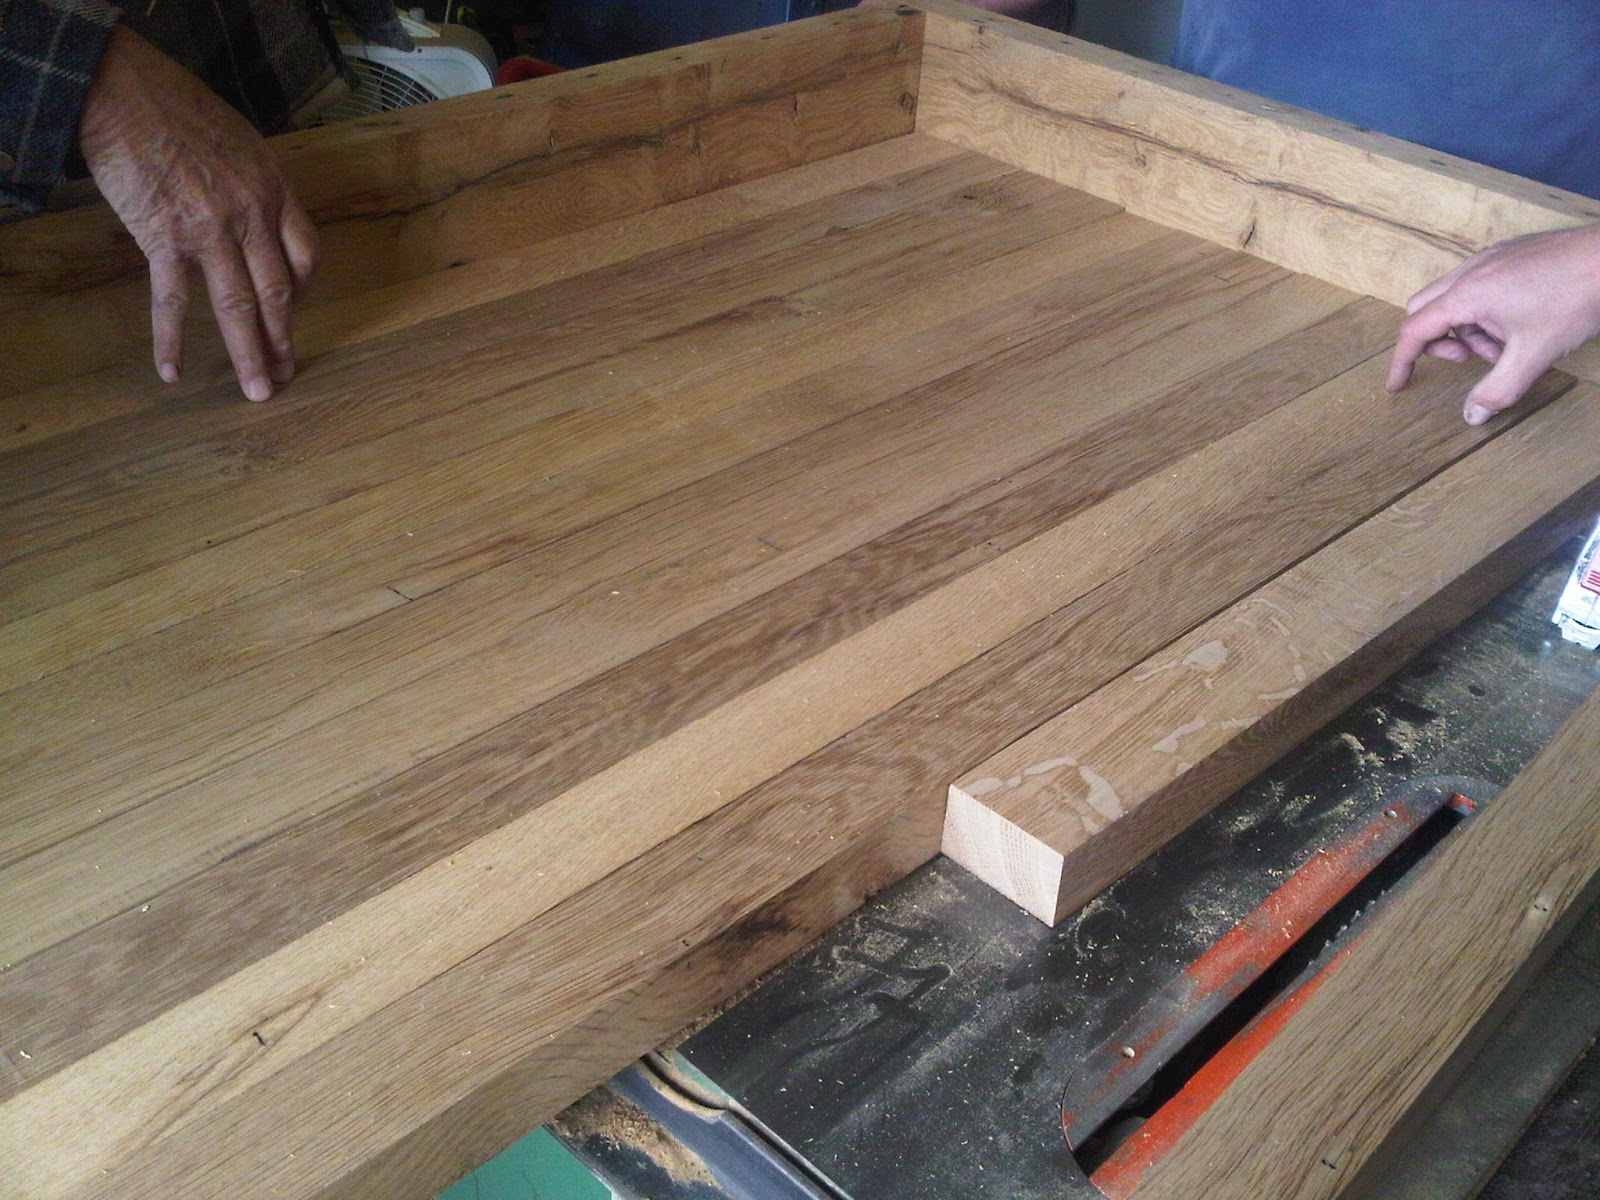
My butcher block countertops may be my favorite thing in my kitchen. When we remodeled our kitchen last year, I told my husband that my ONE requirement was that I wanted butcher block countertops.
The only problem? The affordable butcher block (Ikea) was 5 hours away and butcher block offered online was back-ordered up to 6 weeks. That was when my husband asked, “Why don’t I just make them?”
Lucky for me, my father-in-law had literally a pile of 100-year-old oak wood from an old chicken house. He also had the power tools needed to build the countertops. Although power tools are needed, the process is quite simple:


DIY Reclaimed Wood Countertop Tutorial
1. Find your wood. Good, straight boards without nails that have at least a quarter inch that can be planed down would be your ideal choice.
2. Plane boards to your desired thickness with a planer.
3. Cut slats to desired widths.
4. Place all boards in a jig that keeps it square.
5. Glue each slat with Tight Bond wood glue.
6. Clamp pieces together.
7. Place weight (at least 200 lbs) on top of countertop to keep boards from pushing up.
8. Wait at least a few days for glue to cure.
9. Attach backsplash.
10. Sand to desired smoothness and to sand out any glue that has pushed out through the seams.
11. Install!
Here is a picture of the butcher block being built.
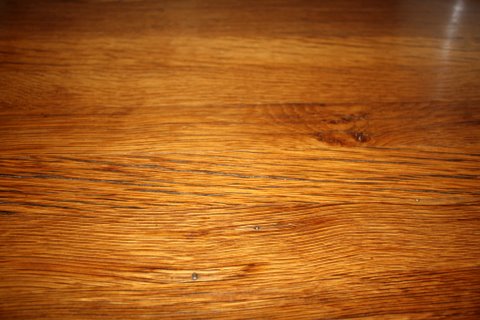
When my husband brought the countertops home to be installed, I was blown away by how beautiful they were. I love all the little “imperfections” in the reclaimed wood, like the worm holes and nail holes. To me, that’s just another piece of history in our home.
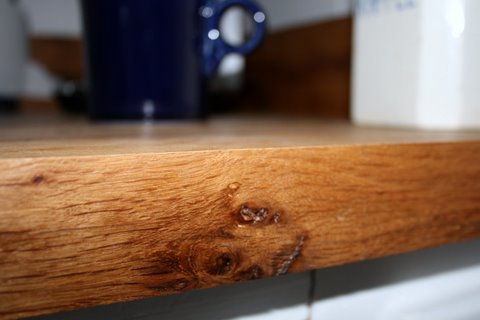
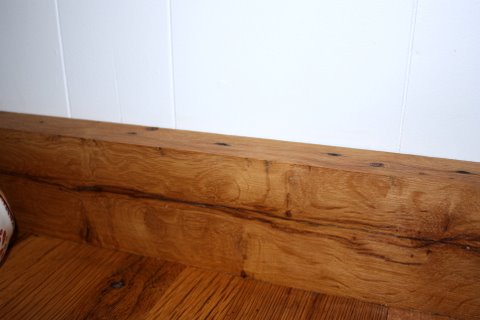
The countertops are 1.5″ thick. See the old knot in the wood?
There is also a backsplash. I had not originally thought we would have one, but I love the additional warm wood in the white kitchen. Do you see the nail holes at the top of the backsplash?
I was worried that butcher block would be hard to maintain. While I wasn’t planning on using the surface for cutting, what if I damaged the surface? How would it hold up with water? I have been so pleased. If you do have an imperfection, you simply sand the surface and reseal, but in the year I’ve had these (and I cook every day), I have not once had to sand out an imperfection. While I am careful not to leave pools of water on the counter tops, they see dribbles of water, grease and other food ingredients every day.
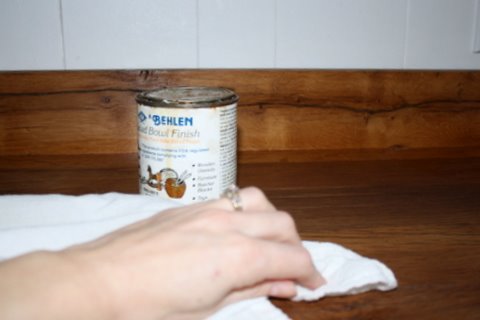
What product did I use to seal them? I read about many different products and saw some wonderful reviews, but in the end I decided to use what my father-in-law recommended. It’s Behlen Salad Bowl Finish. You can purchase it online; it is affordable and you will find it lasts a long time. The instructions are provided on the product, but basically we sanded down the surface to a smooth finish and then applied a thin coat of the product with a lint-free white cloth. We applied 3 coats initially, allowing the product to dry completely in between. Every 4-6 months, I empty the countertops and reapply a coat. Once fully cured, salad bowl finish is completely food safe and non-toxic. It contains only FDA approved ingredients.
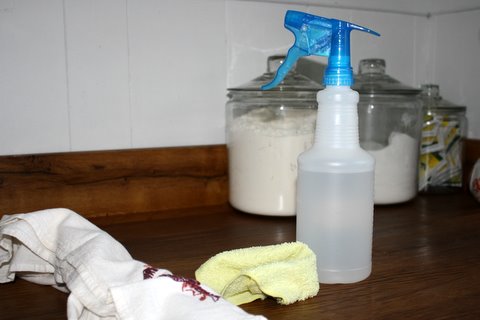
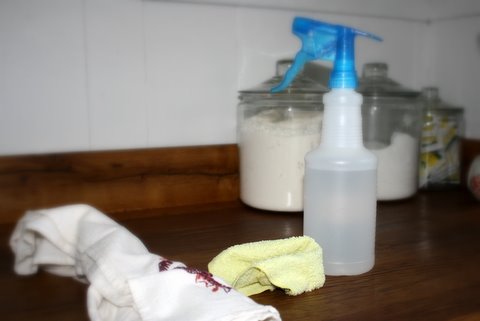
To clean the countertops, I typically use a mild dish soap with water and then dry with a cloth. I also keep a spray bottle with white vinegar and water handy and use this combination often to disinfect the surface.
Now that I have had the countertops for a year and realize how durable they are, I am not nearly as cautious as I was in the beginning, but I do try to keep the surface as dry as possible.
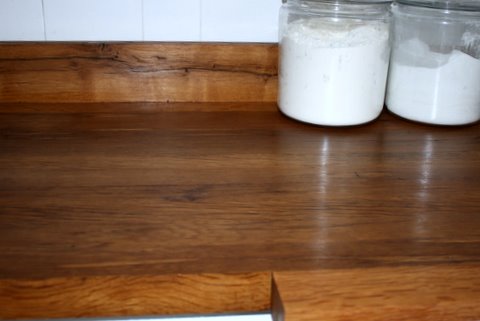
If you are researching countertops, I cannot recommend butcher block enough! It is sturdy, easily maintained, natural, and even has anti-bacterial properties. The definition of “reclaimed” is to bring into or return to a suitable condition for use. I love that something beautiful was made out of an old pile of barn wood – something to be made for many more years of use.
BEFORE:
AFTER:


I am thrilled and honored to have our kitchen featured! Thank you so much.
Beautiful countertops. I was just wondering what size the boards used for the project where? The look to be 1×2 with different lengths?
Amanda, If you count the stripes to that back figuring that an average counter depth is 24-25″ then the pieces are 2 x 2 and 2 x 3’s (remember that a 1 x 2 is really 3/4″ by 1 1/2 inches) But considering this is old wood, they are probably more true to the actual size, back in the day a 1 x 2 really was that size. If you are planning on buying some wood to build this you may want to go a little thicker than a 1 x 2 to get the counter thickness that you need.
I LOVED your makeover…SOOO inspiring! So often “inexpensive” makeovers are still thousands of dollars and for us “regular” folks out of reach. Yours was AH..mazing and truly affordable. I also loved how it is still a work in progress. Again, for us regular shlubs an obtainable goal! 🙂 Beautiful!
Your kitchen is simply beautiful! What a great tutorial, especially on the countertops. I now have a project in mind….!!!
This is EXACTLY what I want to do, but Iwas thinking of Ikea countertops as well. My husband does woodworking, so maybe this will work for me. Thanks so much for the grab step by step tutorial, and tons of inspiration!
Nancy
Powellbrowerhome.com
I absolutely love the countertop. I am in need of new countertops (mine are at least 20 years old–we bought our house 12 years ago). My husband could do that–I’m not allowed around any type of power tools as I am quite clumsy :).
I also like how you included what you did to paint your cabinets. I have solid wood cabinets and shelves throughout my house and would love to paint over them.
What a beautiful kitchen! I love the counter-top and the ceiling!
Such a huge difference! I adore the beadboard ceiling! It looks so fresh and beautiful. Well done!
Oooo all of the white is so pretty! I’ll have to visit Keeping it Cozy and check out some more of their stuff. Thanks for the great post!
There is something about the way you integrated the color white in the project that made the room look majestic and very elegant. Thanks for sharing this. I’ve got a new site to check out (and I mean Keeping It Cozy) after I check yours. 🙂
oh I love it. two thumbs up
You did a beautiful job! I have been looking into doing wooden countertops myself and this was just the inspiration I needed. I have a question about those foam tiles. Did you get them tested for asbestos? We have some in the farmhouse we are re-doing that look exactly the same. Again, great job!
Love it!! This is exactly what I would love to do in my kitchen. My kitchen has the same features: tiles over beadboard, same cabinets, cast iron sink with drain board, wood walls with paneling. It’s all solid and much better then what we can buy, just needs updated. Now I can show my husband an example of what I want done. Looks great! Would love to see any renovations on the rest of your home.
you sanded the butcher block, did you stain it with anything or just apply sealant? Are they still glossy after a year? They look great and exactly what we want to do, we are going to IKEA
Chris, this is a guest feature so I can’t tell you how it is holding up, but I am sure the author would love to help you out! There is a link at the top of the page!
I love all you did in your kitchen. Just wondering where the kitchen sink with drain board came from. Was it original in the house or did you purchase? Would love to know where to find one like it.
Fay, this was actually a guest poster, so I am not much help, but there should be a link at the top of the post to the original blogger. Good Luck!
Lovely remodel! Where did you get that sink? I would love to know. Thanks!
I too love butcher block countertops. We will be remodeling our kitchen within the next six months. Did you use stain on the wood before applying the sealer? Also, do you happen to know what woods are best to use. I would assume pine would not be because it is a soft wood but I was wondering about maple. Any suggestions you can give me would be greatly appreciated. Thanks, Lori
Hi your kitchen is beautiful and inspire me to keep going in the remodelation of my house, i stop the work because is a little more expensive, but anyway. What your husband did to get the ceiling so pretty, my ceiling is in the same conditions as yours was before. I wanna know about the paint if he cover any holes and with what, my ceiling is very high and is a little hard to work in it but i will do my best. Can you help me telling me any tip, thanks!
I also would recommend wood countertops. I love ours. Ours are not butcher block, but solid slabs of cherry milled from lumber my late father-in-law had stored for years and years and years. When they were first installed I oiled them daily with mineral oil for a week, then once a week for a year, and then after a year I’d intended to oil them once a month, but in fact I just do it when it looks like they need it. Mineral oil is food safe so I could cut on them if I wanted to, but I don’t. Cherry is hardwood, but nevertheless the countertops have picked up a few dings from dropped plates and such. They still look beautiful though, and are so easy to maintain. I don’t know why more people don’t choose wood.
Oooooo, I made maintaining the hardwood countertops sound more labor intensive than it actually is (above). Actually I rubbed on mineral oil once a day for a week, once a week for a month, and then once a month for a year. Since then it has been as needed (i.e. when they start to look a little pale or water isn’t pooling on them anymore). And like the blogger, I keep a lookout for water drips and wipe them up when I notice them. Water spots aren’t really permanent–they disappear next time you oil the counters, but wiping them up prevents them altogether.
GREAT ADVICE!!!
Beautiful! Did you stain the wood before putting on the finish? We just bought all the lumber to make wood counter tops but I want to stain them before putting the finish coat on. Do you know if the stuff you used can go over stain?
I love the white makeover……….why don’t you paint the cabinet white too ?? LOVE the butchers block work tops . And I have lived with worse when I lived with father in law for two years !! Well done you guys……..I love to see projects like these, solid wood cabinets will be there a while longer.