Hand Painted Lamp Shade Tutorial
Hand Painted Lamp Shade Tutorial by Liz
Hi Remodelaholics!
I’m Liz from Bon Temps Beignet and I’m very excited to guest post here today. I’m a 20-something, displaced New Orleans native (thanks a lot Katrina!), living in San Diego with my hubby and our pound puppy, Gus. I started my blog a little over a year ago as a way to share thrifty craft projects like this post office box turned magazine storage project and this toilet paper roll wall art post. Yes, I decorate my house with toilet paper products. Like I said… I’m thrifty to the max. My blog is also a place where we’ve been documenting the bigger renovation projects that we’ve done to our house like our bathroom overhaul and our kitchen demo and renovations (part 1, part 2, part 3, part 4, AND part 5).
I’m so excited that Cassity asked if I would share my lamp revamp with all of you!
So here it is:

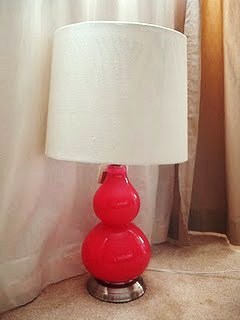
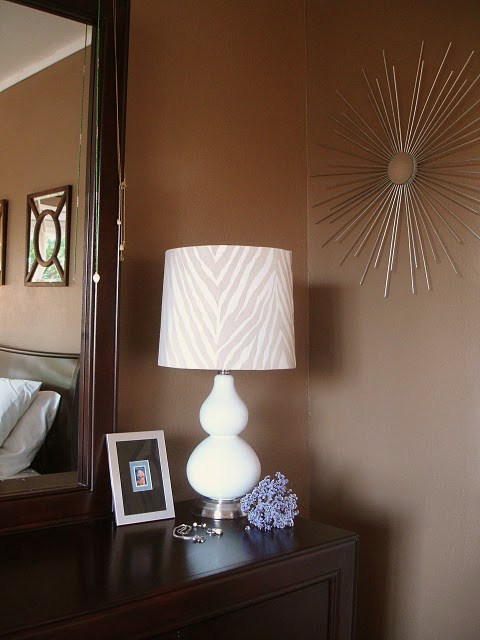
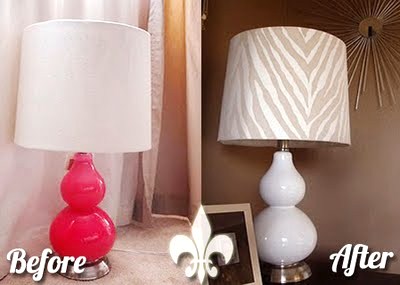
I found this gourd lamp/linen drum shade combo at Marshall’s. I wasn’t thrilled with the bright pink color, but having seen a few lamp makeovers on other blogs, I knew I could turn this one into something that would work in our home. So, into the shopping cart it went, even though I still wasn’t exactly sure what I would do with it.
I thought about covering it with a pretty fabric but was too nervous that I would totally screw things up, so I started searching for a pattern that I could stencil onto the shade. A few days passed by with that bright pink lamp still sitting on my dresser and no ideas of what to do. Then one morning, I found myself on Young House Love’s blog where I noticed an ad for one of the sponsors, Shades of Light. I searched high and low on their site and finally found the perfect lampshade.
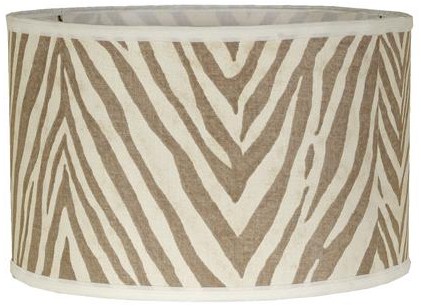
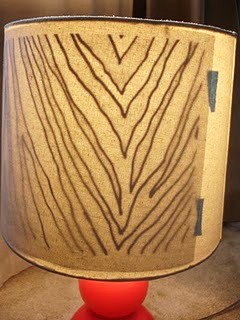
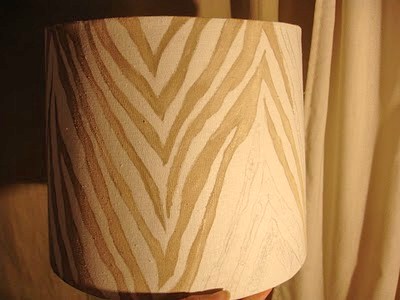
Ah, LOVE! I immediately fell for the muted colors and the zebra pattern. It also reminded me a little of a chevron print. And don’t we all love a good chevron? There was just one problem… the shade retails for $69 (plus tax & shipping). As nice as it is, I certainly don’t have $69 to spend on a lampshade. And, even if I did, I don’t think I would buy it anyway. It was way to easy to recreate.
Here’s how I did it….
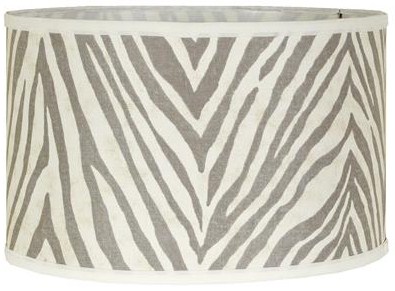
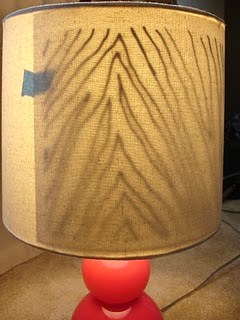
Step 1. Print pictures of the lampshades from the website. I printed all three sample pictures because each one showed a slightly different pattern.

There wasn’t much contrast between the stripes and background color, so I traced over each line with a Sharpie marker.
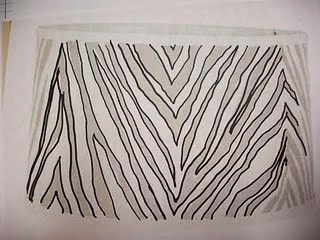
Then I enlarged the image to 150% on a copier so that the image would be proportionate to the size of my shade.
Step 2. Tape your pattern to the inside of the lampshade.
Would you look at that!? You just made your own ‘light box’.
Give yourself a pat on the back for being so creative!
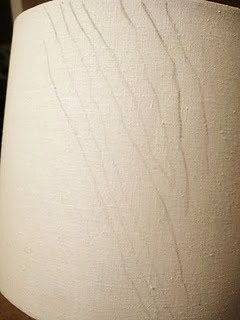
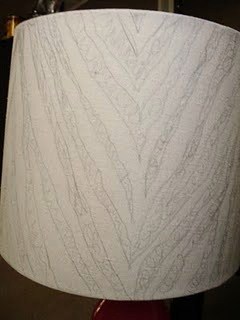
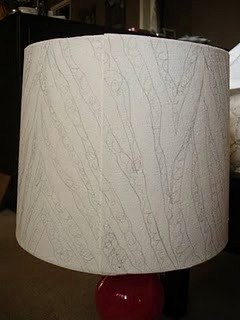
Step 3. Use a pencil to trace over the stripes.
It might be a little difficult to see what you’ve already traced over.
Turning the light off and on as your trace will allow you to see the lines that have already been drawn.
My pattern didn’t reach the top of the shade,
so I just continued each line to the edge.
so I just continued each line to the edge.
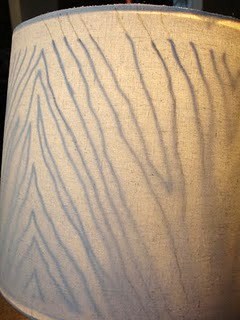
Then I lightly colored in the stripes that would be painted with a pencil.
This will help you keep track of where the paint should go.
This will help you keep track of where the paint should go.


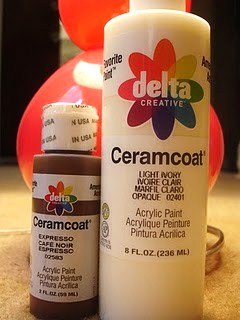
Step 4. Choose your paint colors.
I used a mix of ‘expresso’ and ‘light ivory’ acrylic paints by Delta.
My paint looked like a light chocolate milk color when I mix it.
Remember, it will be a shade or two darker when it dries.
I used a mix of ‘expresso’ and ‘light ivory’ acrylic paints by Delta.
My paint looked like a light chocolate milk color when I mix it.
Remember, it will be a shade or two darker when it dries.
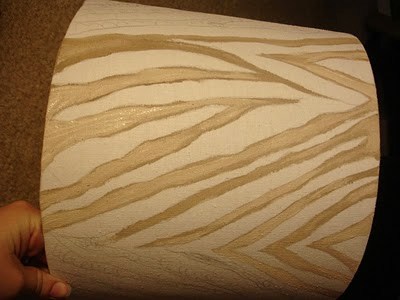
Step 5. Just slap that paint on!
Ok, don’t ‘just slap’ it on. That would make a big mess.
Gingerly slap the paint on over your marked areas.
Ok, don’t ‘just slap’ it on. That would make a big mess.
Gingerly slap the paint on over your marked areas.
painting
painting
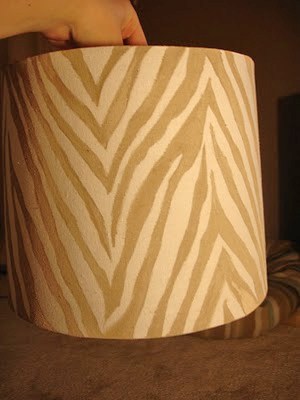
just keep painting…

(Sorry, for the poor picture quality! I was working reeeaaally late at night.)
Now that the shade is painted, let it dry and get to work on the lamp base.
Step 6. Tape off the metal base, bulb receptacle and light switch.
Then wipe down the surface of your lamp base with a degreaser. You want to clean off as much oil and dirt as possible before you spray your paint.
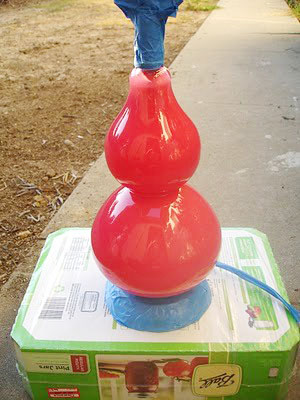
Step 7: If the lamp base is a smooth texture, you’ll want to spray it with an etching primer first. This will allow your top coat to stick really well.

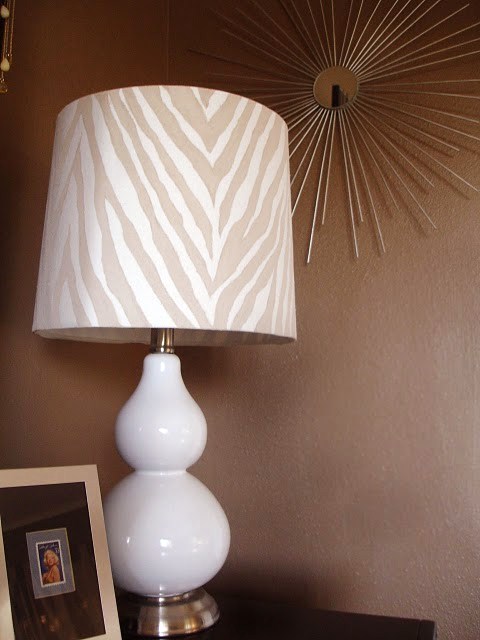
Step 8: Once the primer has dried, choose your top coat color.
I used Rust-Oleum Painter’s Touch in gloss white.
Give the whole lamp base one or two coats (depending on how well the paint covers) and let it dry completely.

Step 9. Remove the tape and attach lampshade to base.
Step 10. Oooo and Ahhh over your amazing creation!
(Here’s a tutorial on how to make a bamboo skewer sunbursts
like the one in the background of these pictures)
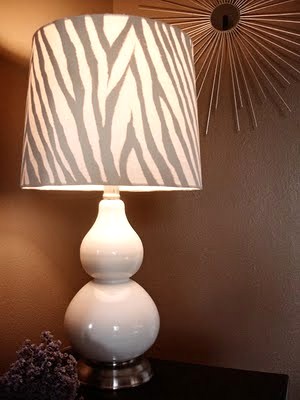
Here it is with the light on:
And here’s that before and after again…
That’s all folks.
Cheap, easy, and it looks like a million bucks! Ok, maybe it looks more like $69, but that fine with me!
Come stop by Bon Temps Beignet any time for more thrifty makeovers! And thanks again Cassity, for inviting me to guest post on your awesome blog. You made my week!


I love it. Fantastic job and thank you for the tip about the etching primer. I’ve got some lamps to paint and can’t wait to try it!
Hi I love your idea! It looks amazing. I was thinking about doing the same thing, but the problem is that my shade has lighter flowers on it, and I am afraid that even though I will paint it over with lets say a light grey, and then make some white ornaments, I will still be able to see the flowers when the lamp is on. Any suggestions?
Best regards! Love your blog