DIY Antique Zinc Finish Tutorial
I’m thrilled to welcome a very talented guest blogger today, who will be sharing a tutorial for a gorgeous furniture refinishing project. After you read it, you’ll feel confident that you can use a specialized painting technique on your next project, too.
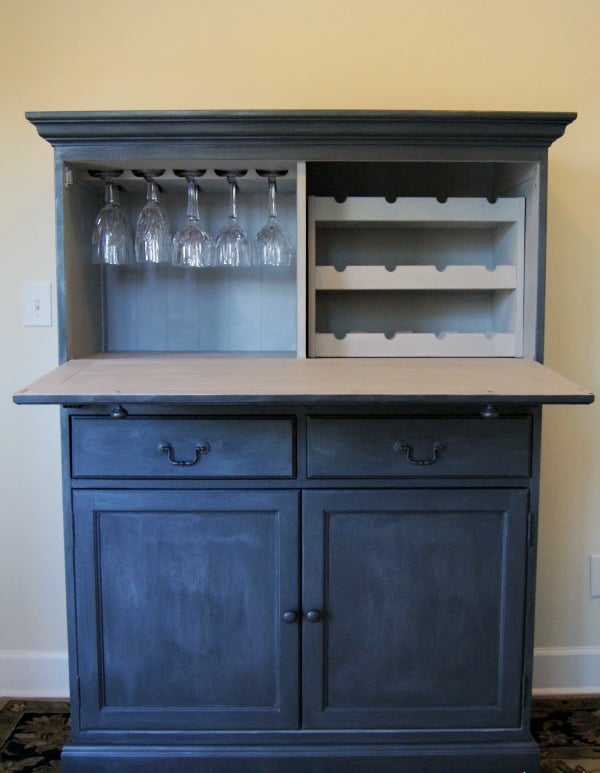
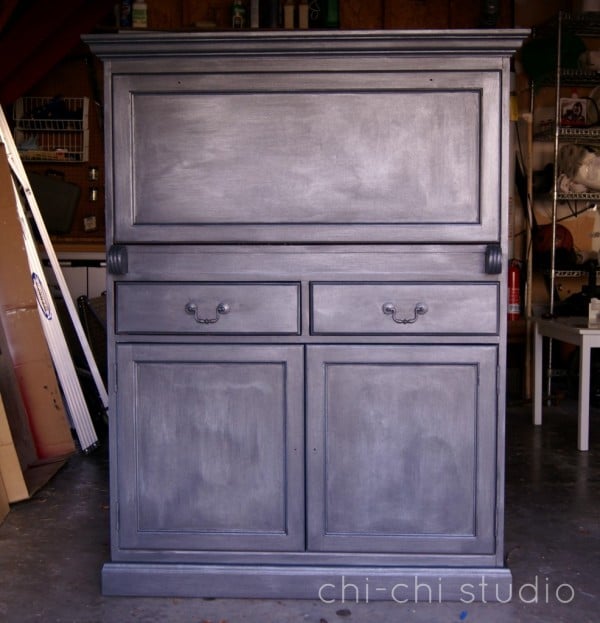
This is the end result of the tutorial you’ll be reading in a moment. The hutch is refinished to have the look of antique zinc. Antique zinc is on the trend watch, right now. Check out a few other projects I found that are sporting this interesting new/old look:

Zinc Finish Nightstand | Freckled Laundry

Faux Zinc End Table | Lovely Crafty Home

Liquid Zinc Wall Treatment | Porter Paints
Faux Zinc Coffee Table | Restore Interiors

Zinc Finish Makeovers | DTTD Imagine Design Create
Now it’s time to check out the zinc-ified transformation of a bar cabinet by our guest blogger.
Submitted by: Chi-Chi Studio
Hi! My name is Kristin, from Chi-Chi Studio. I focus mainly on painting furniture, but I also feature crafts, photography, and home design ideas on my blog as well. I’m thrilled to share my DIY Antique Zinc Finish tutorial with you.
Thanks to Pinterest, most of us have seen several very good takes on the faux antique zinc finish. The basic idea of all of them is to recreate this look from Restoration Hardware. While I had seen it done many times and really liked the look, I didn’t think I’d ever really try to do it myself until I had a house with lots of furniture I could use to experiment.
Then, lo and behold, I meet a client at C’est Moi. She brings in a Restoration Hardware catalog and points to the piece she’d like to use as inspiration. It’s the zinc finish, of course. I was excited to try a new technique but also quite nervous. This wasn’t my own furniture; I had to experiment on a piece that was going in an attorney’s office. Yikes!
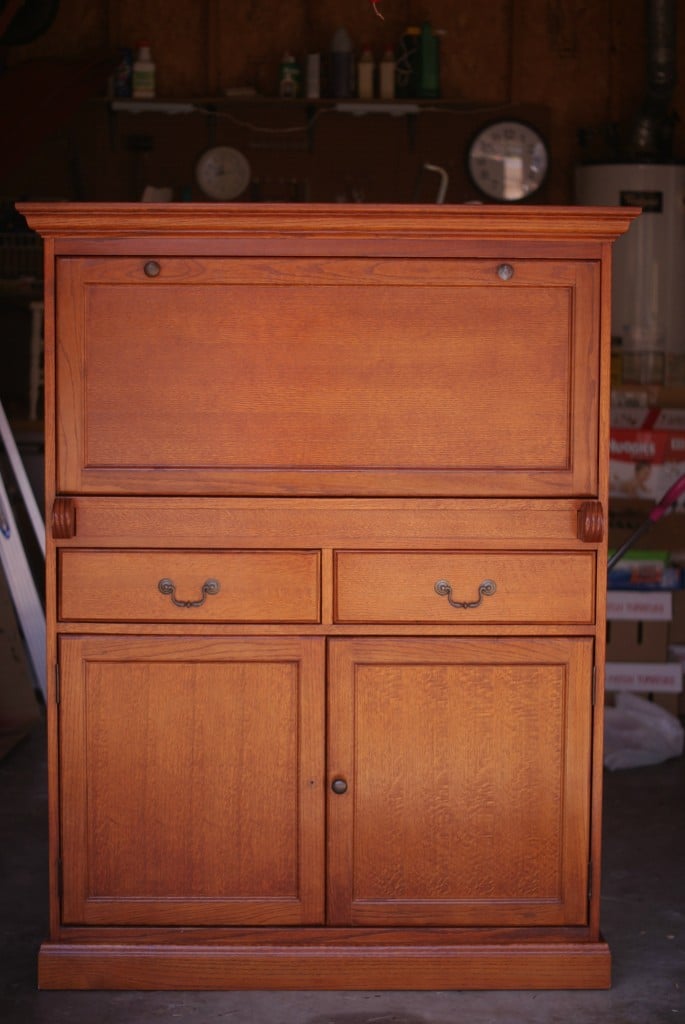
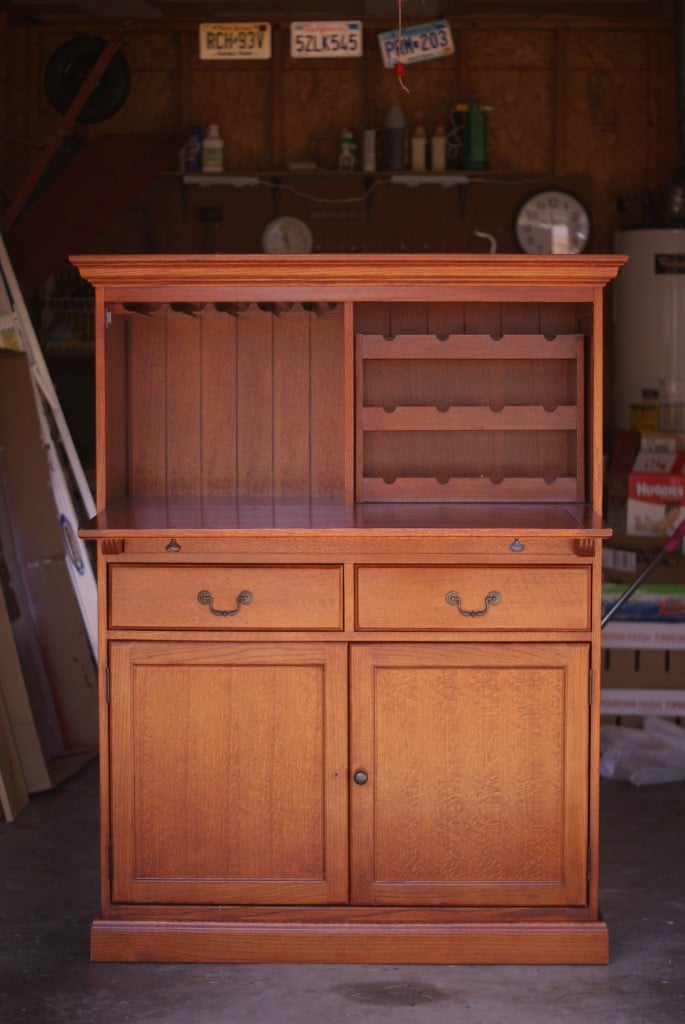
Before I explain how I did it, here’s the bar I stared with:
And here are my supplies:
Annie Sloan CHALK PAINT™ in Graphite
*Sherwin Williams Faux Impressions Metallic Pearl Finish in DISTANCE SMET (This stands for Distance Metallic. They have a latex color called Distance, so this is the metallic version. The number assigned to it is SWF315.)
Annie Sloan Clear Wax
Annie Sloan medium paint brush
Annie Sloan wax brush
Chip brush
Cheesecloth
*I used the glaze only. It’s supposed to go over a Sherwin Williams Faux Impressions Base Coat. I used the Graphite Chalk Paint as my base coat.

I used this method because
a) I pretty much always use Chalk Paint. It’s just who I am. ![]()
b) Mixing four different tiny bottles of acrylic paint to create this look on such a large piece would have been CA-RAZY. And I wouldn’t ever trust acrylic paint on furniture I was painting for someone else. Jami at Freckled Laundry and Amy at The Salvage Collection have both created beautiful faux zinc finishes using acrylic paint in some form or another. I guess I’m just a scaredy cat.
c) While meeting the customer at C’est Moi, Tawnya was nice enough to refer me to a friend of hers who had had success using metallic glazes over Chalk Paint. Lucky for me, she was actually visiting the shop (from North Carolina, I think) so I was able to ask questions and get some valuable advice. It made me more comfortable trying this technique.
Antique Zinc Finish Tutorial
First, I painted the whole thing in Graphite. I painted the inside in Paris Grey (Chalk Paint™), which you can see peeking out a little bit in this photo. I made sure to touch that up with Graphite before moving on to the next step.

This is the glaze I picked up at Sherwin Williams. There are many brands of glazes out there; I think Tawnya’s friend recommended one made by Behr. But I already had bought this one, so Sherwin Williams Faux Impressions it was. I had picked it out because of a swatch at the store. I didn’t want the piece to be too light of a silver tone. Zinc is much darker than that. So I thought I was picking out a much darker tone than the very blue color they showed me after they mixed it. I was scared, especially since it was non-refundable! :/
But thanks to a conversation at C’est Moi, I remembered that metal does have a lot of blue tones in it. The guys at store said if it didn’t work to bring it back and they’d remix the color for me free of charge. So I figured it was worth a shot, especially since a glaze isn’t opaque and would (*fingers crossed*) show enough of the Graphite to tame the blue!

This is what it looked like on the chip brush. Can you see my hands shaking? Yeah, they totally were. I was holding my breath on this one. My only comfort was that my client was one of the nicest people I had ever had a conversation with and was also not on a tight deadline. If it looked disastrous, all I had to do was slap a little Graphite on there again. Right? (Nods head, rubs own arm to comfort self)
Still, for some reason, I felt like I was taking an exam I hadn’t studied for. Actually, I was a total nerd in high school and college. I never took an exam without studying, but I can now imagine what it would feel like!

I finally got up the courage to start painting. Or glazing. Whatever you want to call it. Because it’s so transparent, I laid it on pretty thick…

So when I finished brushing it on it looked like this.

But then I used cheesecloth to wipe off the excess and remove the brush strokes. See the brush stroke to the right of the cloth? You want that to disappear. This glaze (and I’m assuming most or all of them) dry very quickly. I worked in one small area at a time.

As it dried I saw that plenty of the Graphite was showing through. It wasn’t turning blue! Yay!
I even saw that I was taking a little too much off with the cheesecloth than I wanted. I went back and added a second coat in the first two areas I glazed, since I had been so light handed. I also noticed that if I kept working the glaze in with my brush (going back and forth between vertical and horizontal strokes) the brush strokes disappeared. The glaze became a little more pasty, for a lack of a better word. When I did that, I didn’t have to use the cheesecloth nearly as much.
You can see it drying on the front. I worked from right to left, for some reason. You can see how much bluer the left is than the right, where the glaze had already started to dry.

I added clear wax the day after the glaze had dried, to add some extra protection. Here she is, finished:
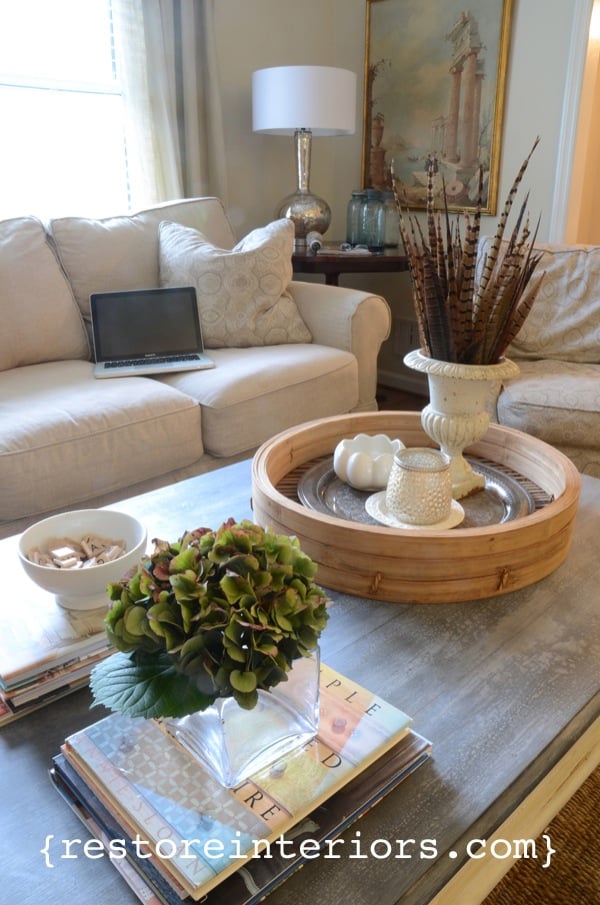
And this is how she looks in her new home, the attorney’s office:


Wow, Kristin! The finished product is simply stunning! Thanks so much for sharing your painting techniques with us, today. I think I’m going to have to pull out my painting pants, now.
If this Antique Zinc Finish Tutorial has sparked your interest in furniture refinishing, then you might enjoy reading reviews on other specialized painting and refinishing products that we’ve shared here at Remodelaholic. Take a look:

CeCe Caldwell’s Paint Review | Annie Sloan Chalk Paint Review | Old Fashioned Milk Paint Review


This is great! I’ve been looking for a great faux zinc tutorial to use on some chicken wire baskets I bought at World Market (all I could find was recommendations to use galvanized spray paint…ick!). And the timing on this is perfect…finishing up my boys’ vintage comic book room this week, and the baskets are one of the final details. Thanks for sharing Kristin and Cassity!
We are glad you found what you where looking for.
It turned out beautiful!! I love the color. What are the benefits to painting with chalkboard paint??
Crystal, I think it is a matter of preference I have some great features from Cassie at Primitive and Proper where she talks about different paints and why she likes them.
Chalk Paint requires no priming and takes much, much less time to dry than latex. That’s primarily why I use it (and it’s much less stinky, too!) Also, it can be used in numerous ways (washes, colored waxes, etc.) that create many different finishes. Cassie’s right–Cassie does have good posts about paints. You can also try googling Annie Sloan Chalk Paint to learn more. There’s a lot of information out there!
Thanks for the info!
Wow, this is gorgeous!! I love it and have pinned…I really want to try this on a piece sitting in the basement. Beautiful!
Debbie 🙂
Wow. What a gorgeous transformation!
Thank you, ladies! It was definitely a fun project to work on. 🙂
Interesting. For my house I don’t think I could do but a frame or two and maybe a table top. I think a little would go a long way in my place.
Wow! Excellent tutorial! I love to try this sometime. Thanks for sharing this. 🙂
I love your zinc finished cabinet! Thanks for sharing this tutorial. I think I might try this for my little boys room! I found you on Pinterest.
Welcome! Good luck on the project, I think this is such a fun finish!
Do you have to sand the furniture first? I have some older, Ethan Allen solid wood furniture but the top has like a laminate top. Just on the top. Do you think that would still work on it?
It turned out fabulous!!!
Thanks so much for sharing – I’m an ASCP user too – 🙂
Hugs,
Suzan
Wow, great look and so refreshing after seeing everything painted boring old white. Great tutorial and definitely will be trying this!
Thanks for the comment, Ellie! We’d love to see pics when you do!
Thanks for the tutorial! I used it (with minor adjustment: used rustoleum silver metallic paint – likely more metallic than the paint used here) with an old side table (laminate wood) as a test piece for others in my bedroom and I’m pretty happy with the results. This is my very first “refurbish/paint” piece (I am not very crafty!). Loved the chalk paint, metallic paint may have been a little much (less translucent), but able to be “buffed” out to less a shine if done immediately after applying. Next time I think I will avoid waxing and will poly…
not sure I can post pictures here…
Hi Shannon,
Thanks for the comment and feedback! You can send us photos here: https://www.remodelaholic.com/share-brag-post/ or email to hello@remodelaholic.com Thanks!
I’m new to this but am in love with it!! Is there anything, such as metal, faux wood etc, that faux zinc doesn’t work on? What does it work best on, wood?