DIY Stone Fireplace Update with Live Edge Wood Mantel


How to Update a Stone Fireplace and Add a Live Edge Wood Mantel
There were three parts to this fireplace refresh: the painted stone, the mantle, and the painted brick. Each comes with it’s own challenges (but once you have it figured, you’re golden!). If you have the right products, it will be easy to give your fire place a fresh look with a bit of elbow grease (believe me, painting stone is an elbow grease kind of job). For this refresh, here’s the supplies we used:
- TSP and rag for cleaning the stone
- Pry bar and hammer to remove old mantle
- Indoor/Outdoor stone friendly primer and stiff, affordable paintbrush (get two- one for primer, one for paint and toss them in the trash after you’re done)
- Black heat resistant paint for the brick and paint brush you can toss in the trash when you’re done
- White interior latex paint (I used trim paint)
- Live edge wood for mantle (call around, we got ours from a rural builder that had piles of the stuff laying around)
- Sandpaper (I used 100 grit and 120 grit)
- Varathane crystal clear water based polyurethane (I used a satin finish) with quality paint brush (I love the Purdy ones for poly)
- Caulking gun and PL (construction adhesive)

The first thing we did is clean up the fireplace. As you can see from the photo- this thing hadn’t been used as a fireplace in a long time. Stone is difficult to clean- you could also use a wire brush, but I just took my time with a rag (several rags, actually) and a TSP formula.
When you’re sure it’s nice and clean (so paint can stick to it), you can get to painting. A stone friendly primer will stick to this stuff great. BUT it’s a pain to get even coverage. Using a stiff brush (and don’t expect to use it again) with a dabbing motion will help you get into all the nooks and crannies. I found I would load up my brush and paint it on before going back over, pressing the paint into the crevices.
For the grout, I would angle my brush down to get the top of the bottom stone and then go back over angling it up to get the bottom of the top stone. You need to move around a lot because the stone tricks you! It looks great from where you’re painting… then you move and you see all the spots you’ve missed. It also pools if you put it on too thick and I really wanted the texture of the stone to stay true, not glossy pools of paint, so I kept going back over to dab it in. I’m not going to lie… this takes fooooorever. Especially if you need to take breaks to nurse a baby.
I also primed the base of the fireplace and the slate grout lines to brighten it up (the white it was painted was faded and dirty looking).
Let your primer dry before moving to your paint. I chose to paint mine white like our trim. This coat goes quite a bit quicker since you don’t need to be quite so picky with all the little nooks and crannies as they should already be white. The interior of the fireplace should go much quicker. Make sure that you choose a heat resistant paint in case anyone decides to try using the fireplace again (we don’t plan on it, but better safe than sorry!). I’m amazed how much this helped freshen the look- a little bit of black paint. This stuff is quite smelly, so make sure you open up all your windows/ turn on fans/ wear a mask/ keep kids away… you know the drill.


Now your fireplace is ready for a new mantle (the best part!). We removed our old one with a prybar and hammer- it came off easy. We spotted some piles of live edge planks out by a campsite we used a couple years back and managed to snag this piece for under $50. We love the knots in it and the radial saw marks. We wanted to preserve all that character so only used a 100 grit sandpaper followed by a 120 grit sandpaper to smooth down jagged edges and clean the dirt out. When it’s sanded to your preference, time to protect it.


I’ve used the Varathane crystal clear water based poly before (I love the satin finish) and am happy with how it brings out the natural colour in the wood without yellowing. I applied 6 generous coats of this, allowing it to dry fully in between each. I really wanted the mantle to look finished- not rough and the poly did the trick. The satin finish is also great because it gives the sheen without the high gloss that picks up fingerprints. You’ll see that it goes on a milky colour, but don’t worry- it dries clear. It’s important to use a quality paint brush (I used Purdy) so you don’t end up with shed brush hairs in your finished clear coat.

To attach the mantle, we used PL- our go-to construction adhesive. It’s like a super glue that’s meant for big jobs. It’s ugly, so make sure you don’t apply it too close to the edges, but it won’t go anywhere. This is the most satisfying part- because you can immediately start decorating it!

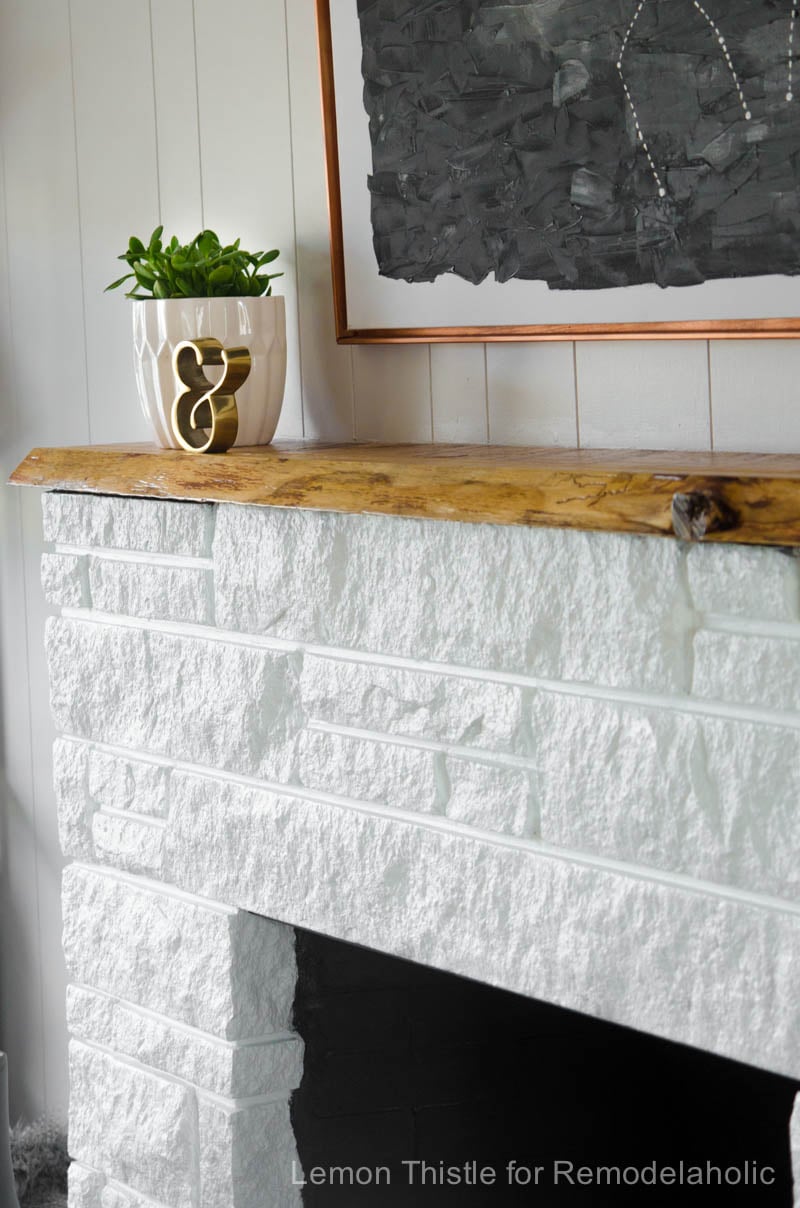


I know painted stone isn’t for everyone, but we’re head over heels for it. And the mantle? Sigh* it makes me all sorts of happy. The best part is that since we had most of the supplies on hand (we only had to buy the wood, masonry primer, and heat resistant paint), this project rang in under $100 for us. And since I love the mantle now, I’m not temped to crowd it with too much decoration to hide the awful panelling that is pretending to be wood! My whole living area benefits from this change! Tell me… would you ever paint stone?
Product Sources:
- Taper Candlesticks: Thrifted vintage brass
- DIY Constellation Painting with Copper Frame
- Plant Pot: Secondhand score (have you heard of 24 hour bidding sites?! New obsession!)
- Brass Ampersand: Indigo Chapters
- Pillar Candlesticks, Cream Clay Vase: Ikea
- Fur Throw, Wire Basket, Black Candle, Gray Vase: Homesense
- White jar candle: Target
- Egg Crate, Vintage Score
Other Posts You Might Like:
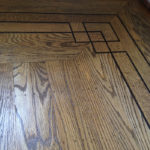
Refinishing Old, Thin Hardwood Floors / Moody Navy Bedroom with Chalk Spraypainted(!) Dressers / DIY White Bright Kitchen Renovation