From Desk to DIY Ottoman
From Desk to DIY Ottoman by Kat

Hey there guys! This is Kat from Maple Leaves & Sycamore Trees where we’re renovating our home (all 950 sq ft of it) little by little and trying to do it on the cheap. We just recently redid our kitchen, and are in the process of renovating our garage into more usable living space. And today I’m going to share our latest DIY project with you, so thanks for having me, Cassity!
Like many of you, I love checking out blogs and magazines soaking up design inspiration along the way. That being said, I know that I simply can’t afford to furnish my home with those same designer items while living on a shoe-string budget. So how do you get the look without breaking the bank? Improvise. And that’s exactly what my husband and I did with this DIY ottoman project. First, I bought this table at Goodwill several months ago for ten smackaroos:

And just recently turned it into this ottoman (while saving ourselves some serious cash):
And this is how we did it:
First, my husband, Mitch, cut down the legs for me with his miter saw.

Next I sprayed the legs with a glossy black spray paint.

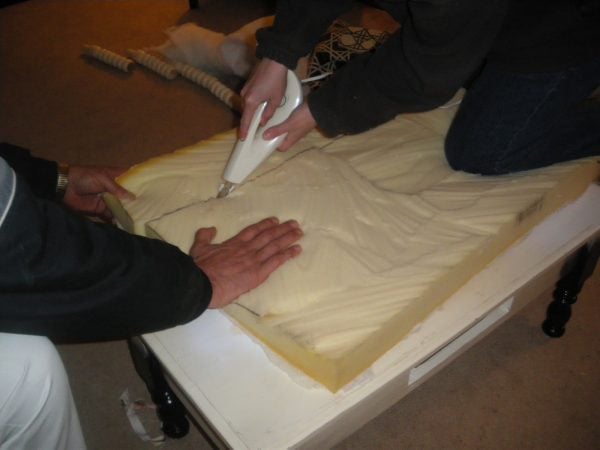
We took foam from a former couch cushion and cut it to size. Reuse whatcha got!

It was way to thick to use as is, so I cut it in half with my bread knife.

Then used an electric bread knife to finish up the job. Who knew kitchen utensils would come in handy with this project!
Next, we attached the foam to the top of the table with spray adhesive.

Covered it with batting


Then Mitch cut boards (from a skid) to length and I wrapped them with batting and fabric.

We covered the foam with fabric while stapling it to the underside of the tabletop.

Mitch adhered the sides with screws from the inside while I made sure the print lined up as evenly as possible.

Mitch then added the nailhead trim. (Have you noticed yet that he did all the tedious things? Having a partner really helps!)


We tufted the top with fabric covered buttons.

This is what the underside of the ottoman looks like. Once we pulled the string taut, I threaded a button on the string and tied several knots to keep it that way.

And here ya go–the finished product!


So if a guy and a girl who know nothing about upholstering can do this project, so can you! I have found that if you have the vision, you can make pretty much anything happen.
Thanks again, Cassity, for having me today. Come on over to Maple Leaves & Sycamore Trees for some more thrifty inspiration.


Love this ottoman, I am thinking to give my ottoman a new look as well.
how did you turf? wondering how the needle can go through the table.
Did you drill holes a ahead of the time?