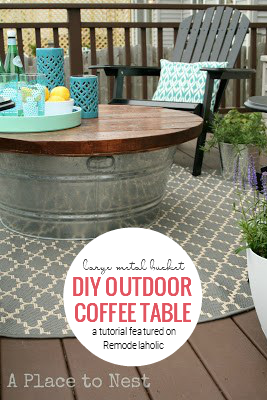
Outdoor Coffee Table with Metal Bucket Base

We also love these pieces of outdoor furniture, both beautiful and comfortable:

Build an Outdoor Table Using an Old Door | The Handmade Home
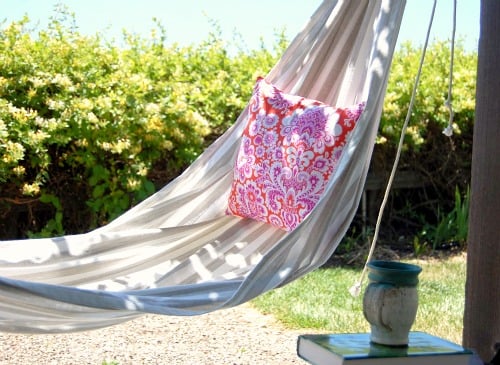
DIY Porch Hammock | Going Home to Roost

Easy Outdoor Bench in Less Than an Hour | The Basement
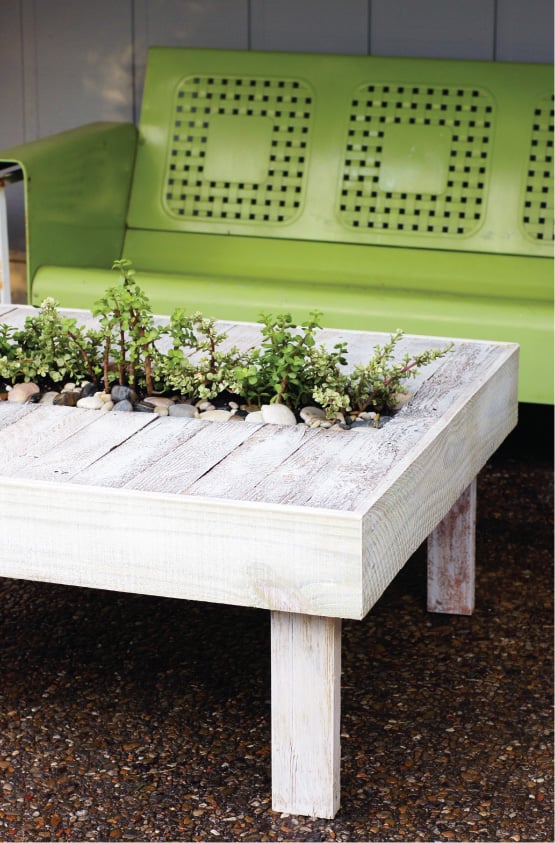
Cheap Chic Cocktail Table from a Pallet | Today’s Nest

Build a Rustic Outdoor Dining Table | Unexpected Elegance on Remodelaholic
Now see how Melissa built this outdoor coffee table for her patio!
Metal Bucket Outdoor Coffee Table
by Melissa of A Place To Nest

Hi, I’m Melissa from A Place to Nest. I juggle a busy nest filled with a five year old son, a busy Hubby, a full time job, all while updating our builder grade home. I love wood tones, white frames, and if I could paint everything with chalkboard paint I probably would.
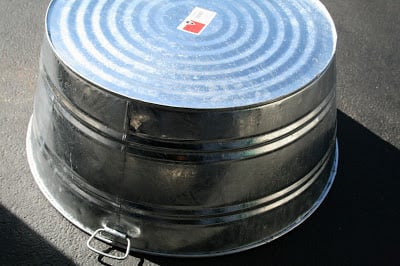
I was thrilled when I was contacted by Remodelaholic to show off my bucket outdoor coffee table. It all started with our patio table set breaking to pieces from the strong winds by my house. Enter a large bucket I use for my Christmas tree and my imagination. The rest, as they say, is patio history.
Here is a close up of the bucket I had on hand (bucket size 3 feet at the widest part). I decided for walking space to put it right side up and drill a few holes in the bottom for any possible water drainage.
Remodelaholic note: We’ve had lots of questions asking where you can find a similar bucket to make this awesome table! We found one that’s just a little smaller than Melissa’s on Amazon (affiliate link) here. We’ve also had fans tell us that their local farm or tractor supply store stocks large washtubs and metal bins like this. If you’ve built this, we’d love to see pictures and know where you found your bucket!
 Next came some planning and decisions about lumber and how to attach to the bucket. I decided to buy some 1/4 inch plywood to use as the base to attach the 2×6 boards to. I wanted this table to withstand drinks, kids, and most of all resting feet on top of it so a base was key.
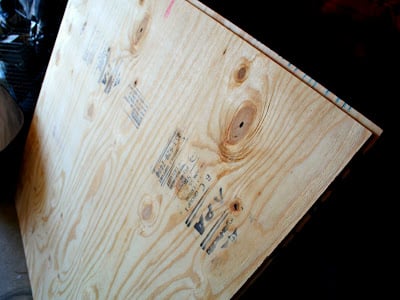
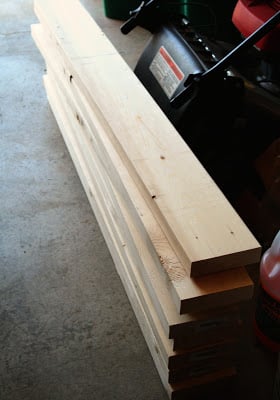
I drew a circle and cut the plywood into a circle. The next step was my favorite to get all negative energy out… the beating of the 2×6 boards to give it some character. After that mood-altering step I then glued the 2×6’s to the circle and let dry overnight. I followed the same technique by using the plywood as my template and cut the 2×6 boards to match the circle.
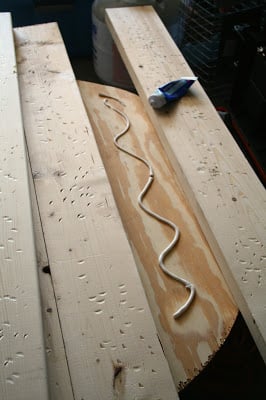
I already had stain on hand that I used on my wood wall art and on my chunky bathroom shelves so I stained it up and watched the character come out. Finish with a coat of poly and my table top was done.
I attached it to the base using liquid nails and then finished with some clear, outdoor caulk to keep the water out.
Let’s get to the final product since that is what really matters. Cocktails anyone?

Bucket- Free (thank you Christmas)
Stain- Free (from other projects)
Glue- Free (had on hand)
Caulk- Free (had on hand)
One 1/4 inch plywood- $20 (we bought bigger for an oops piece just in case)
2×6 untreated lumber- $30 (my son is using the left over scraps for building Lego worlds)
Poly- $10
Total cost: $60
The coffee table ends up being the perfect height with our chairs (luck was on my side) and we have enjoyed the deck so much more already and summer has just started.
Anyone want to come chill out with me?
I want to come chill out with you, Melissa! Thanks for sharing with us!
[pinit align=”center” url=”https://www.remodelaholic.com/outdoor-coffee-table-for-patio/” image_url=”https://www.remodelaholic.com/wp-content/uploads/2013/06/DIY-outdoor-coffee-table-from-a-large-metal-bucket-by-A-Place-to-Nest-featured-on-Remodelaholic.png” description=”Ready for summer? Add this DIY outdoor patio table to your list. It’s designed to be sturdy and simple to build with this tutorial by A Place to Nest featured on Remodelaholic. #Remodelaholic #patiofurniture #DIY #outdoorfurniture”]
Looking for more ideas for your patio? See below!
Beautiful Porch and Patio Decor Ideas


Thinkinging about having my husband make a base for it. So can be a coffee table or picnic table.
Be sure to send us pictures if you do, Becky! 🙂
How is the table holding up to the elements?
Hi Jana – This post is from a guest and I’m not sure how often she is able to check comments here, but you can ask your question over on her blog (linked at the top of the post) for a quicker answer. Thanks!
hi there! I actually applied a few coats of poly on the wood and its holding up great!
Love your idea. For the table.
Thanks, Pamela!
I LOVE IT! Awesome job
Hi Melissa,
Thank you so much for this idea – it is beautiful! Can you please tell me what size the rug is? I tried to link to your blog to ask but you are no longer blogging. 🙁
Great job! I love it, and the rug! Where is the rug from?
This is awesome! We actually have a round table top that lost its legs in the process of moving. We’ve been holding onto it for 6 years and just haven’t had the motivation to do anything with it. With a bit of a stain it would work perfectly for this. Thanks!
Great look and idea. However, all the wood needs to be pressure treated for outdoor use or it will warp, buckle and rot. It should also be stained with a weather-repellent deck stain or deck paint. Just saying.
How did you attach the plywood to the bucket? It doesn’t tell about that part?
Hi Amy — the info is in the post: “I attached it to the base using liquid nails and then finished with some clear, outdoor caulk to keep the water out.”
I want to make this and put a hinge in it to be able to use the basin for storage for sunscreen, pool goggles etc…love the design!
Great idea! We’d love to see photos when you’re done!