Turning a Glass Vase Into a Lamp Tutorial
Hey y’all! I’m Aaron and I blog at The Thrifty Abode. I’m a wife, mother, and teacher and I blog about my attempts at creating a beautiful home on a small budget. I’m pretty much a newbie blogger so I’m super excited to be guesting on such a popular and established blog! Thanks for having me Cassity!

I absolutely love finding a bargain or a knock-off that looks exactly like an item from Pottery Barn, West Elm, or ______________(fill in your favorite inspiring, but out of budget store here). What’s even better is creating the item from things I already own and a couple things I found at a hardware store.
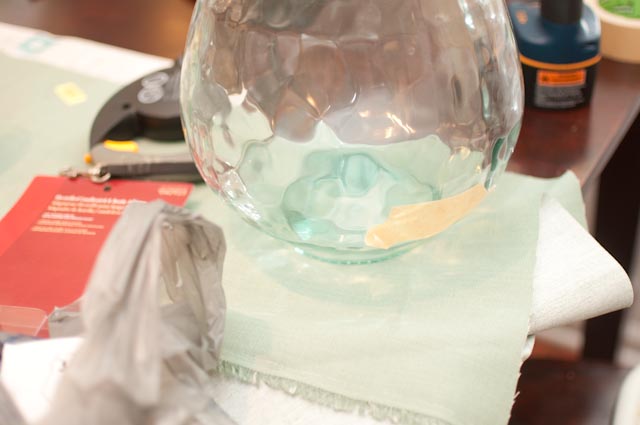
That’s exactly what I did with my glass jug and $18 I spent at Lowe’s.
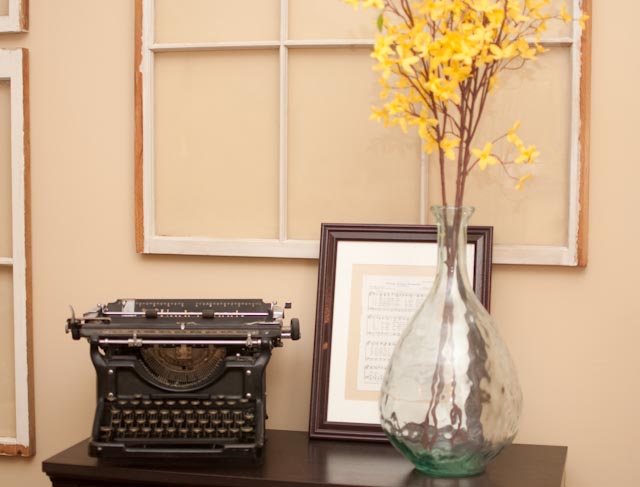
I turned this:
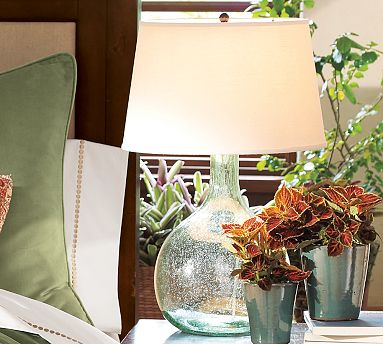
Into this:

 |
| via |
 |
| via |
In all of my searching I never found one. I’d had the glass jug pictured above for years and I started wondering how difficult it could be to turn it into a lamp. The only difference between my $15 jug and the $100 + lamps was a hole and some wiring.
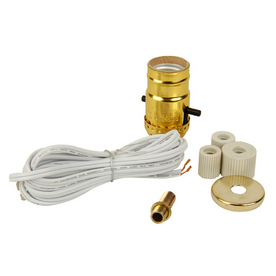
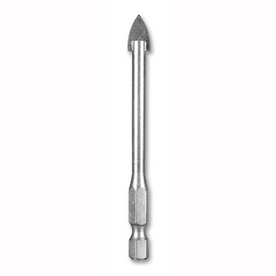
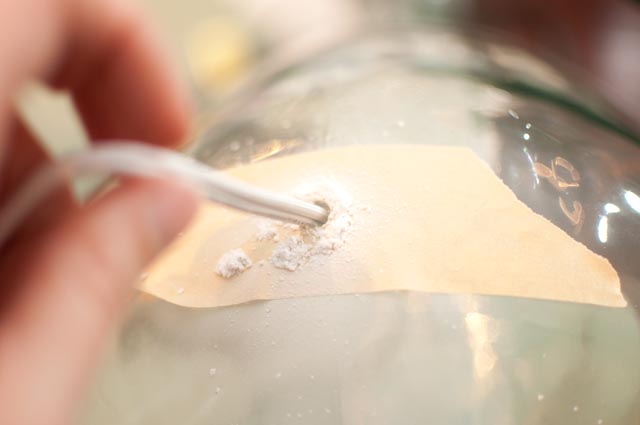
I knew that bottle lamp kits were sold at Lowe’s so all I had to do was figure out how to put a hole in my jug. With a little research I found out that I needed a ceramic cutting drill bit. I made a trip to Lowe’s and picked up the kit and bit (I got the 5/16″) for $18.
 |
| via |
 |
| via |
And here’s what it cost me:
New money spent:
- drill bit: $8
- lamp kit: $10
$18 is pretty good for a solid PB or West Elm knock-off.
Here’s what it would cost if all the parts had to be bought new:
- bit and kit: $18
- jug: $10-$15 (The shelves of HomeGoods, T.J. Maxx, and Marshall’s are littered with glass jug thingies. Mine was $15, but I’ve seen ones the same size for $10.)
- drum shade: $15 from Wal-Mart’s Canopy line
- lamp harp and prongs: $4 (you may need these depending on what kind of shade you have. These are also sold at Lowe’s)
$47-$52 is still about half of what it would cost to buy the Pottery Barn Eva lamp.
I hope you’ll hop over to The Thrifty Abode and check out my other thrifty adventures in decorating.


This is awesome! I have a similar vase I am going to try this with- wish me luck!!
Debb, that is great news. I love to hear that people are trying to do this. This is a cool lamp.
Thank you, this is the best tutorial on turning a vase into a lamp that I could find!
I know that unfortunately here in Switzerland the bit will be more expensive and I am not even sure I can find the kit here, but you sure made me want to try 🙂
That is awesome that you found it so helpful. Thanks for reading our blog in Switzerland!
I fell I love with this lamp in a magazine, that was $109. We just bought a new house, new furniture etc, and I can’t spend that kind of money. Plus, I need two of them! So I, like you, took to the Google…and found this tutorial. I didn’t write down that you used a 5/16 drill bit. I should’ve because it probably would’ve saved me trouble. I had asked an employee to help me. He gave me a 3/8. I cracked my first vase, even though I used masking and duct tape. It looks like a bullet hole. I’m going to try again but I wanted to post this so that anyone reading would buy the bit that you did!
Thanks for the helpful info, Natalie!