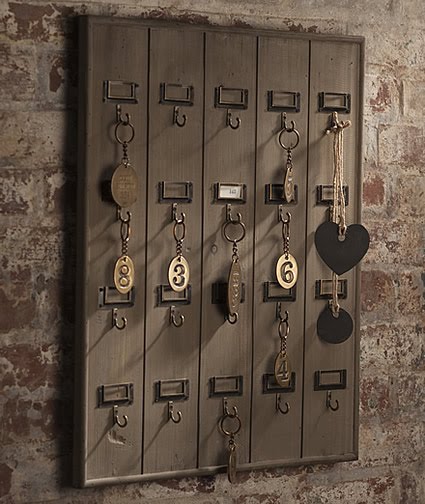
Suzanne Meridian Road saw a really nice hotel key rack and decided to build one of her own. See what she liked and how she built her own.
I really like this key rack
I decided I need one. Even though our present system of key organization was clearly working for us.
Yeah.
So I thought I’d try to make one for less.
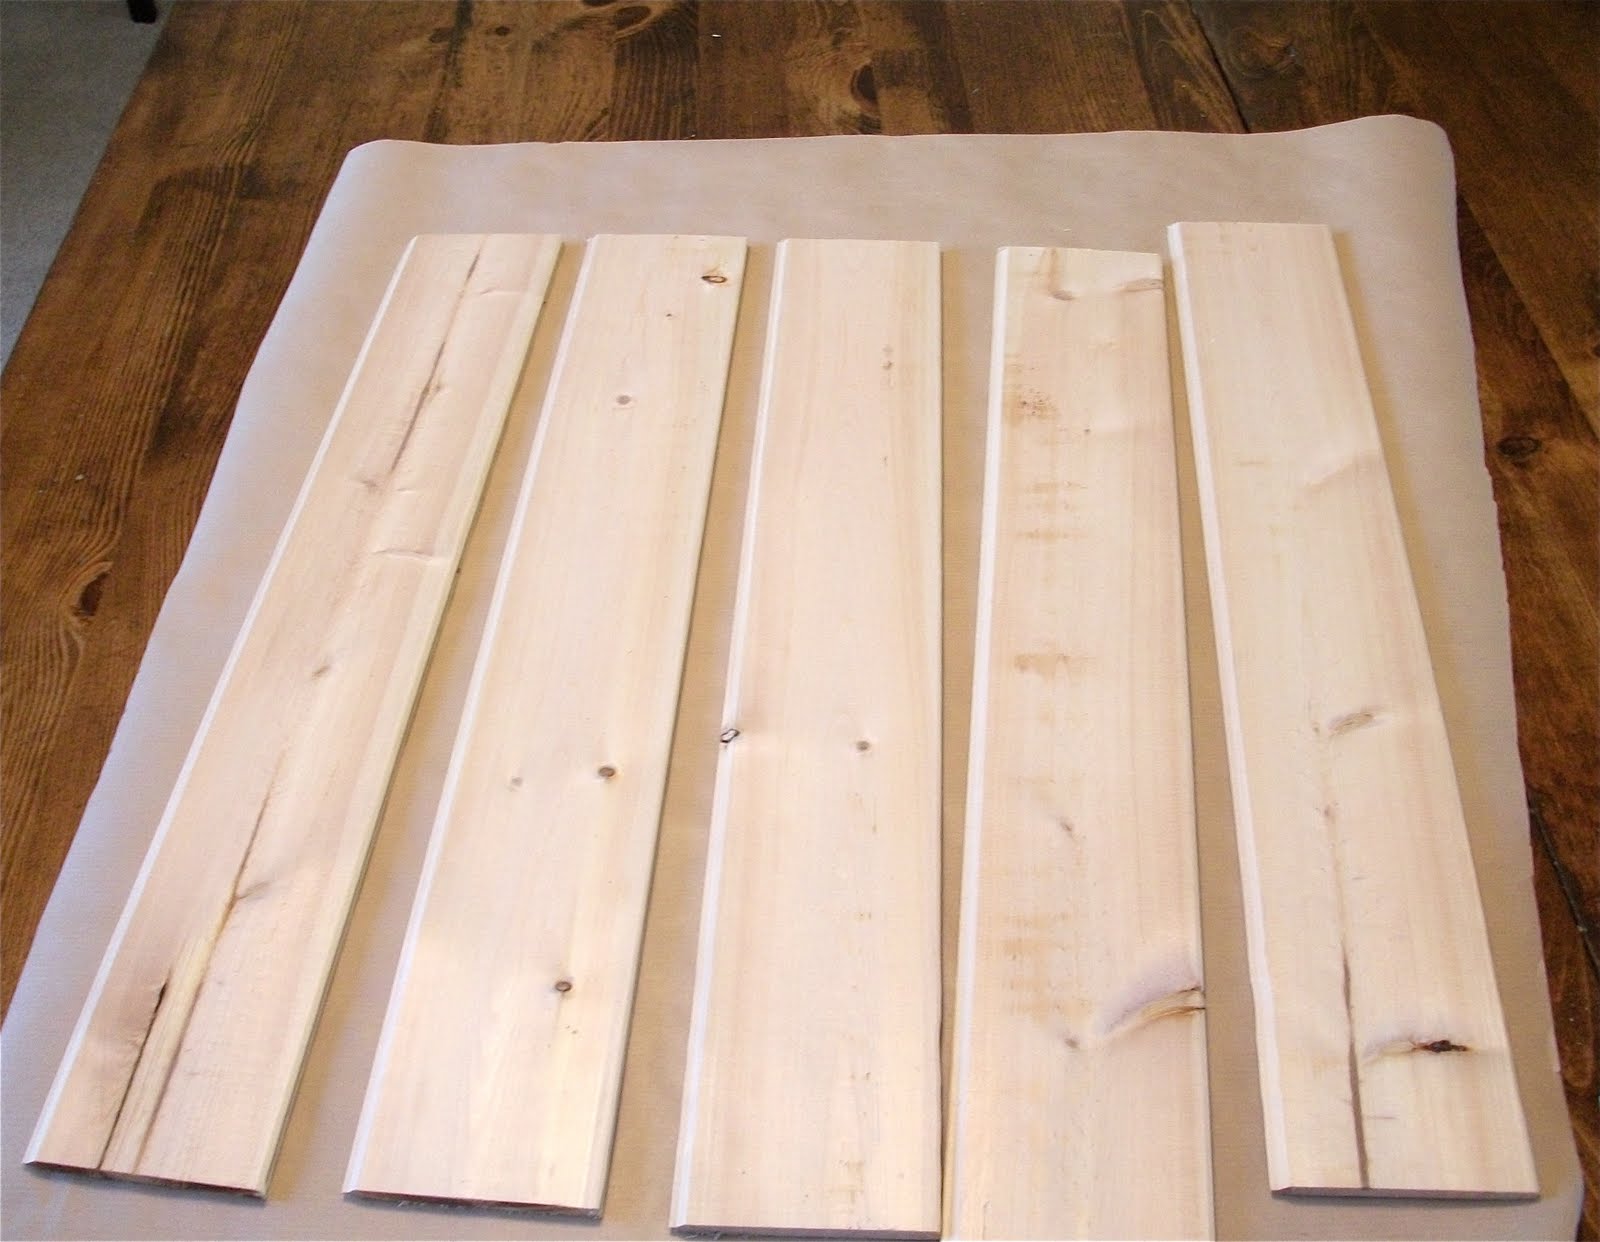
I cut some tongue and groove planks that I had left over from thisproject and this project and glued them together. I just used an ordinary construction adhesive.Then I needed to frame it. Since our miter saw is broken, I asked someone who kinda likes me to help.
He just used Gorilla super glue to attach the frame.
(Because I didn’t want to fill in the holes that finishing nails would have left.)
We used this kind of frame because we already had it.
Now for the hard part.
The original rack is made from reclaimed wood. Mine is made from brand new pine. Somehow I needed to make it look older, and maybe a little weathered.
(Yeah, a key rack wouldn’t normally be all that weathered. That thought occurred to me. But then I decided not to think that hard.)
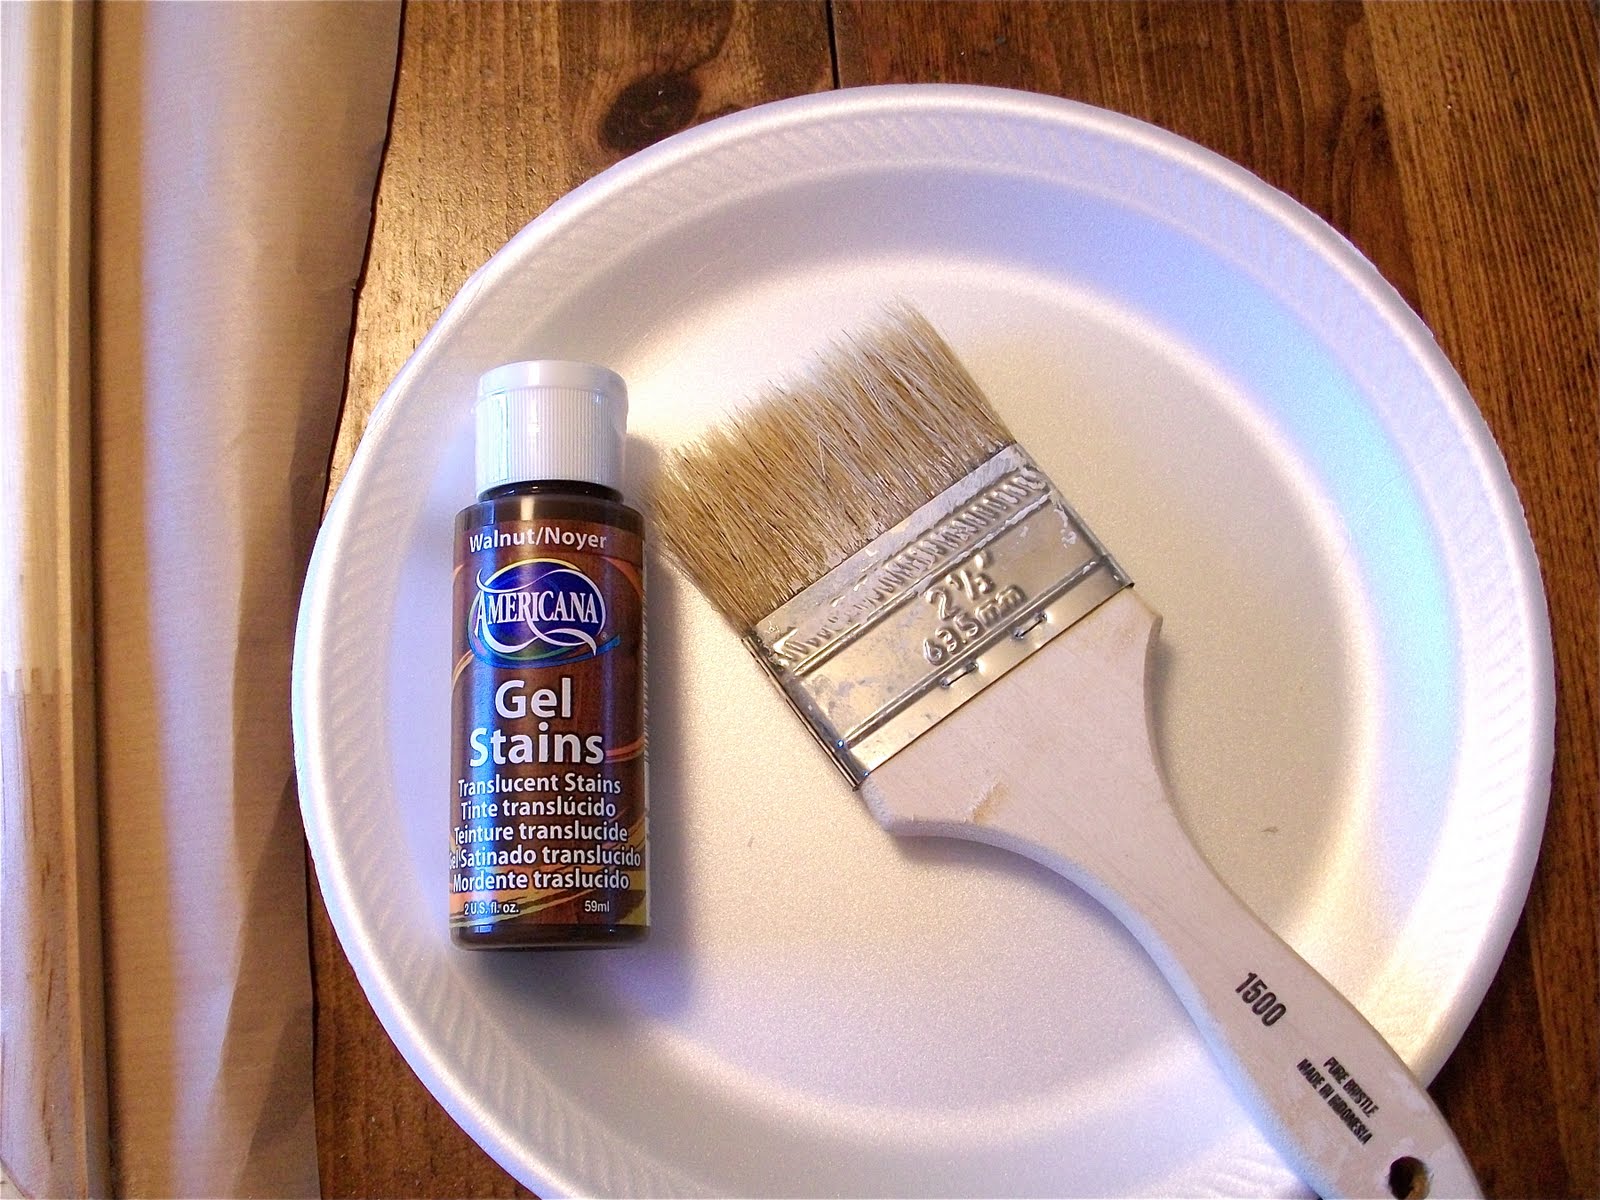
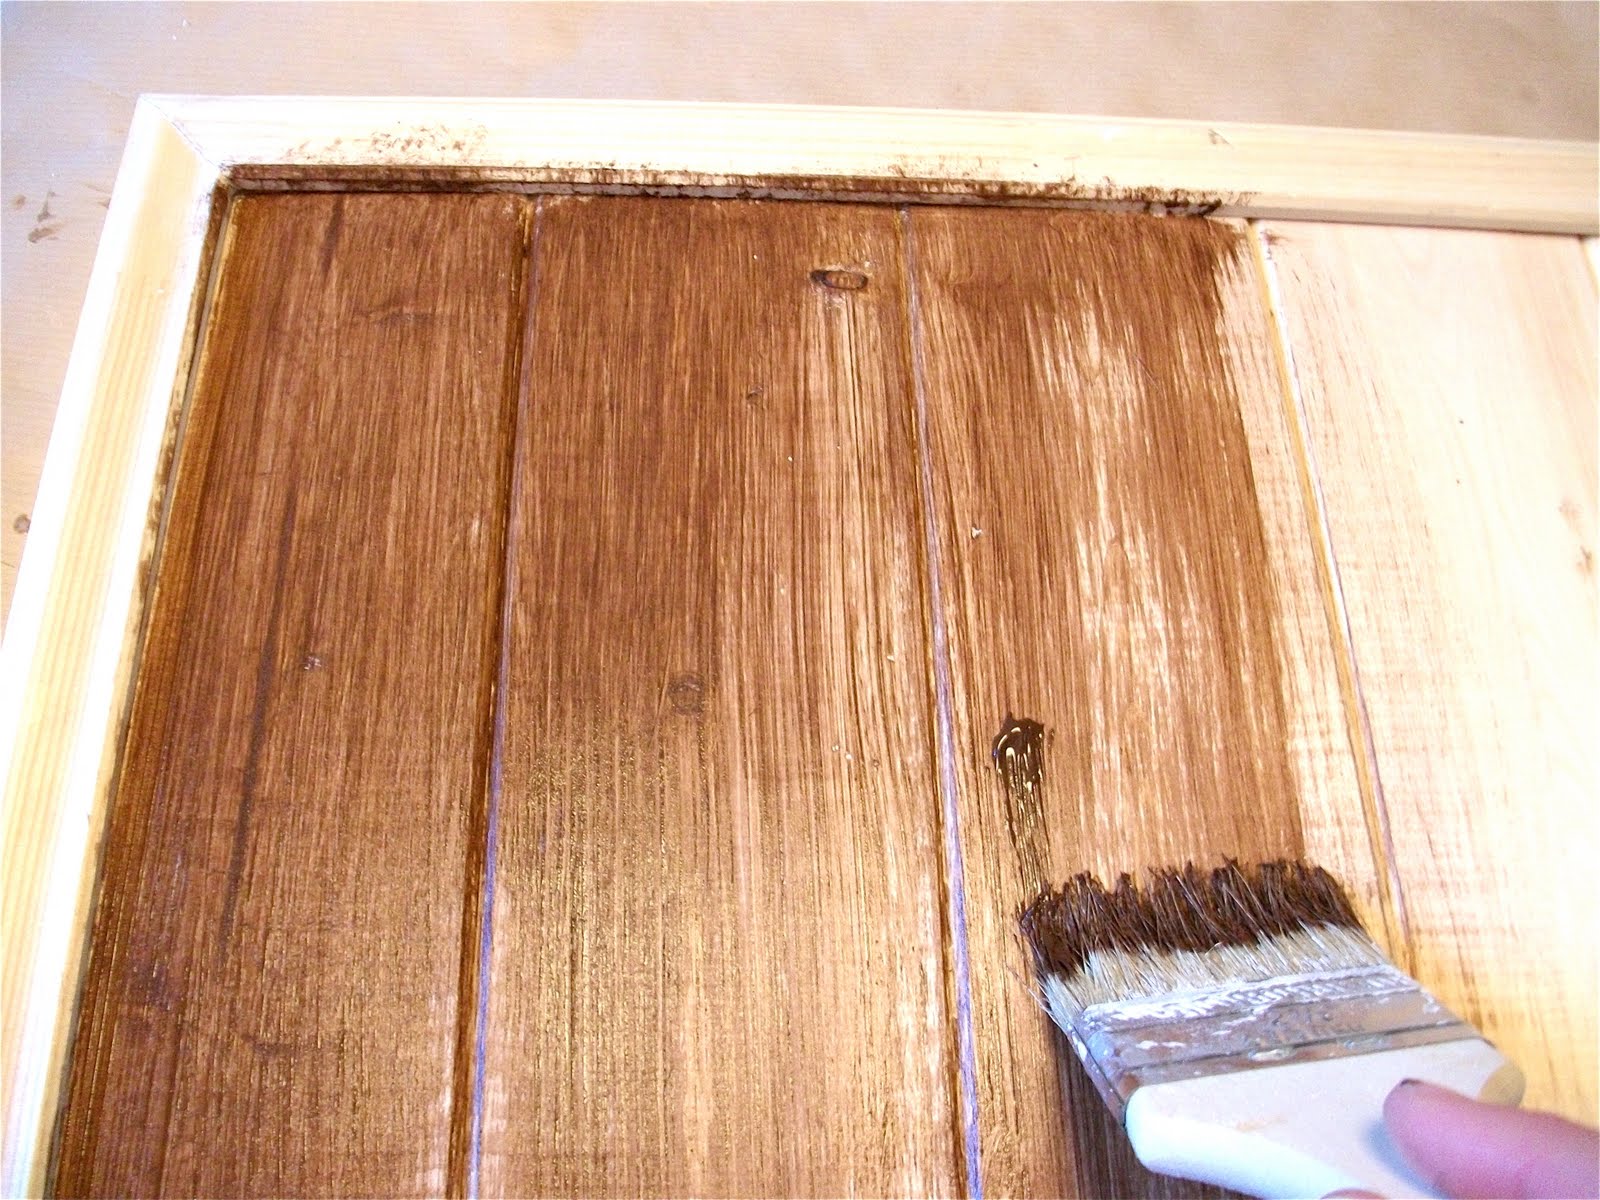
So I started with some of this.
I just used a cheap brush, because I wanted a little bit of a streaky look.
I really like the gel stain. It doesn’t dry very fast, which was good. It gave me time to make sure I had a somewhat even coat.
Once that was dry, it was time to add something else.
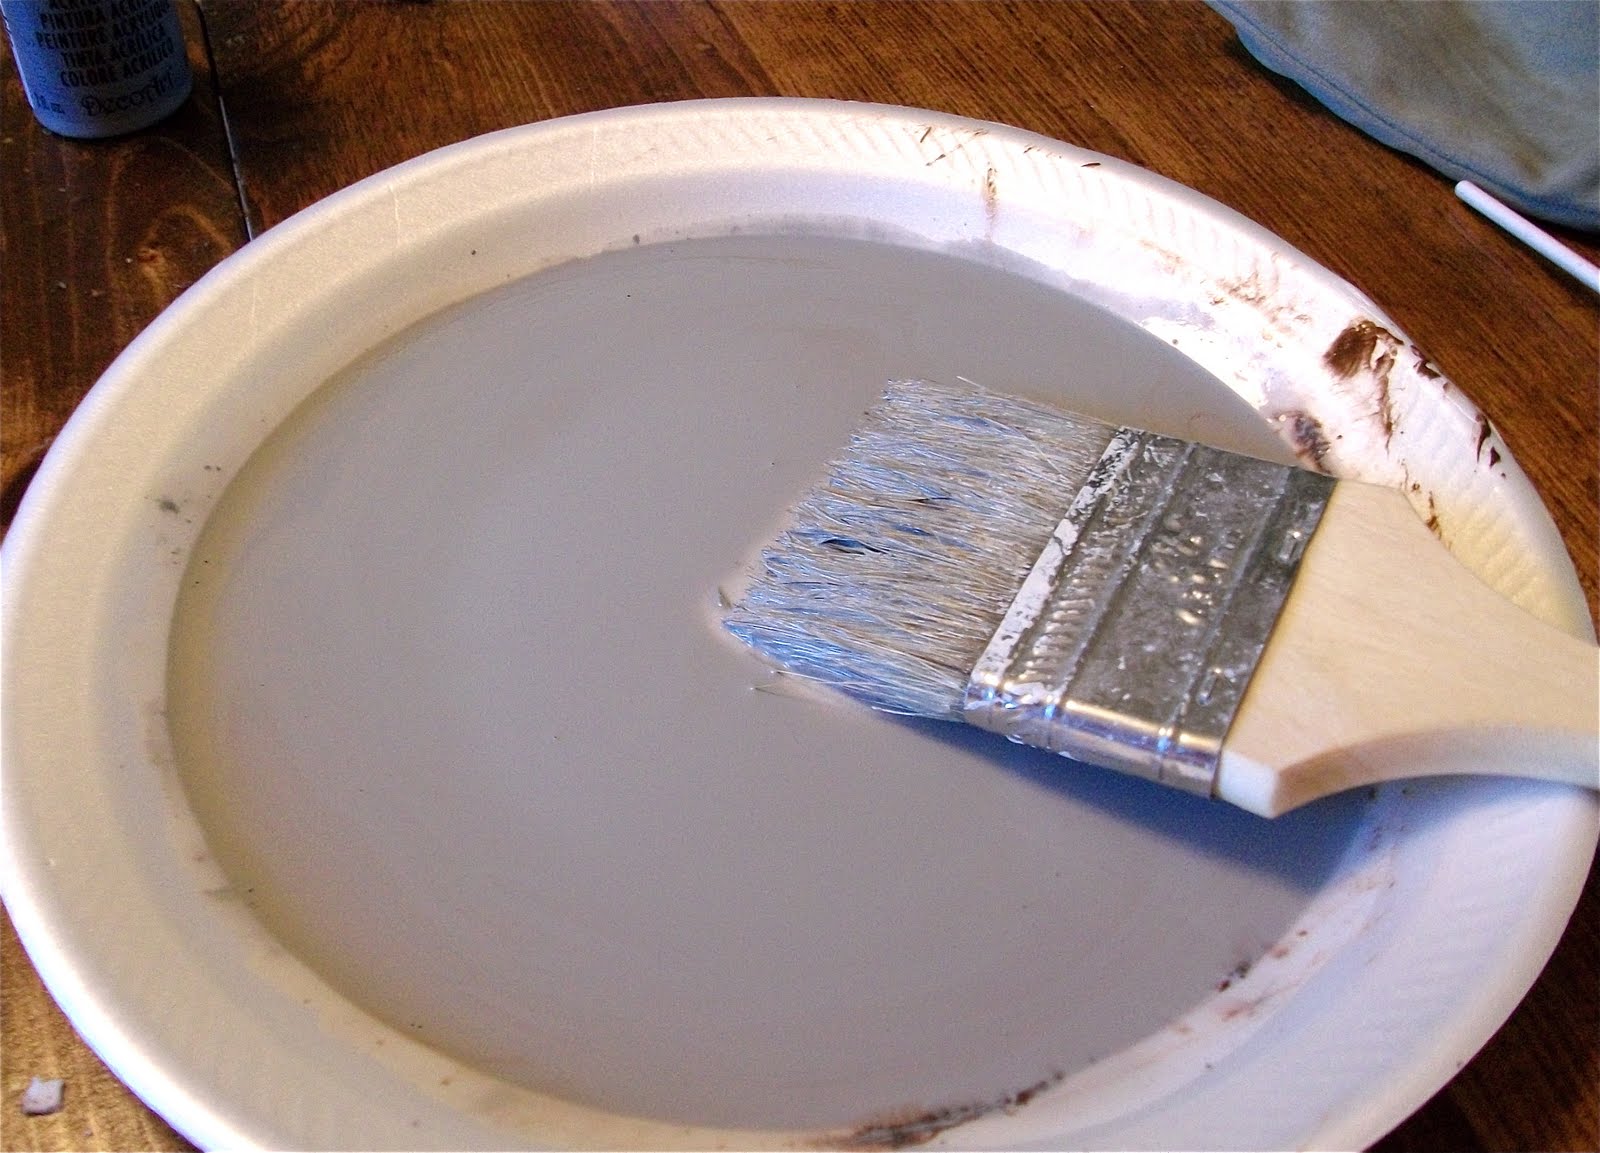
I watered down some of the Slate Gray
and applied it. Then I added the brown (Mississippi Mud) to the watered down gray paint, and applied some more streaks.
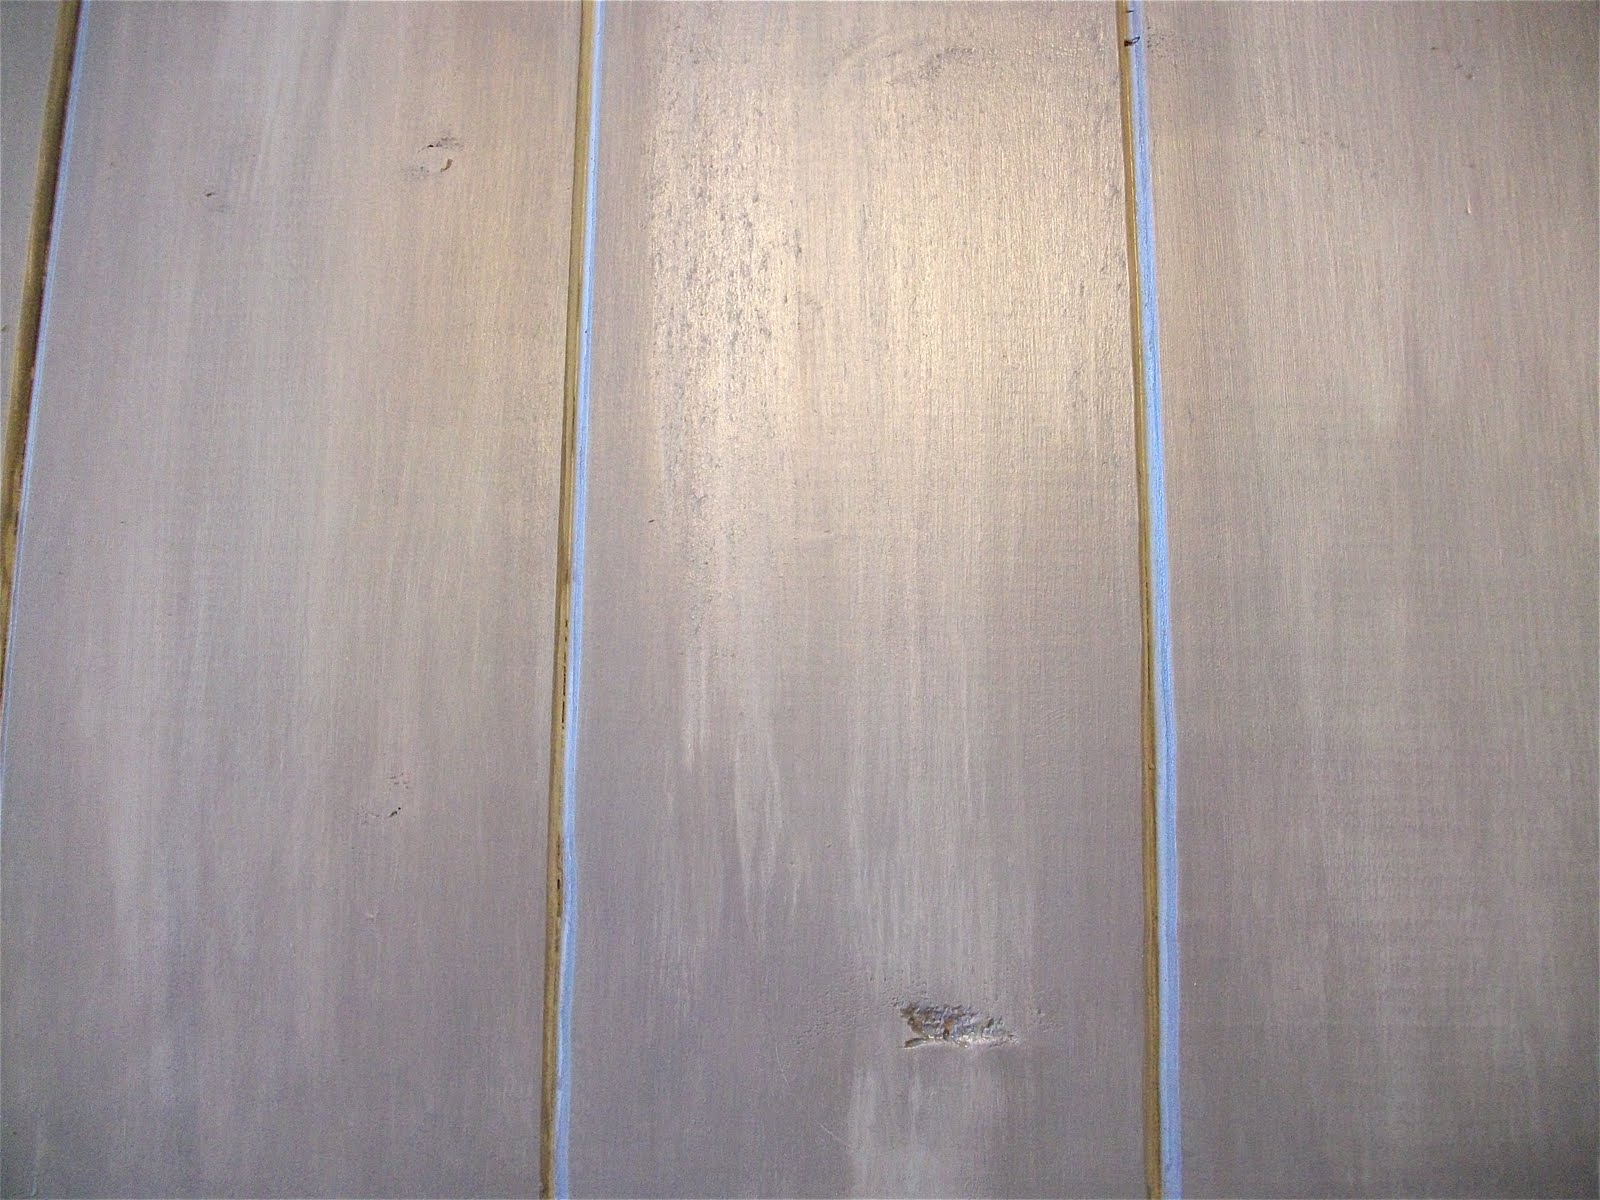
I kept going until it looked like this.
Then I added more gray to the watered down gray and brown paint mixture, and coated the whole thing. When it was just barely dry, I rubbed it down with a damp paper towel. That’s the cool thing about craft paint~it will wash off if you don’t let it dry too long.
So then it looked more like this.
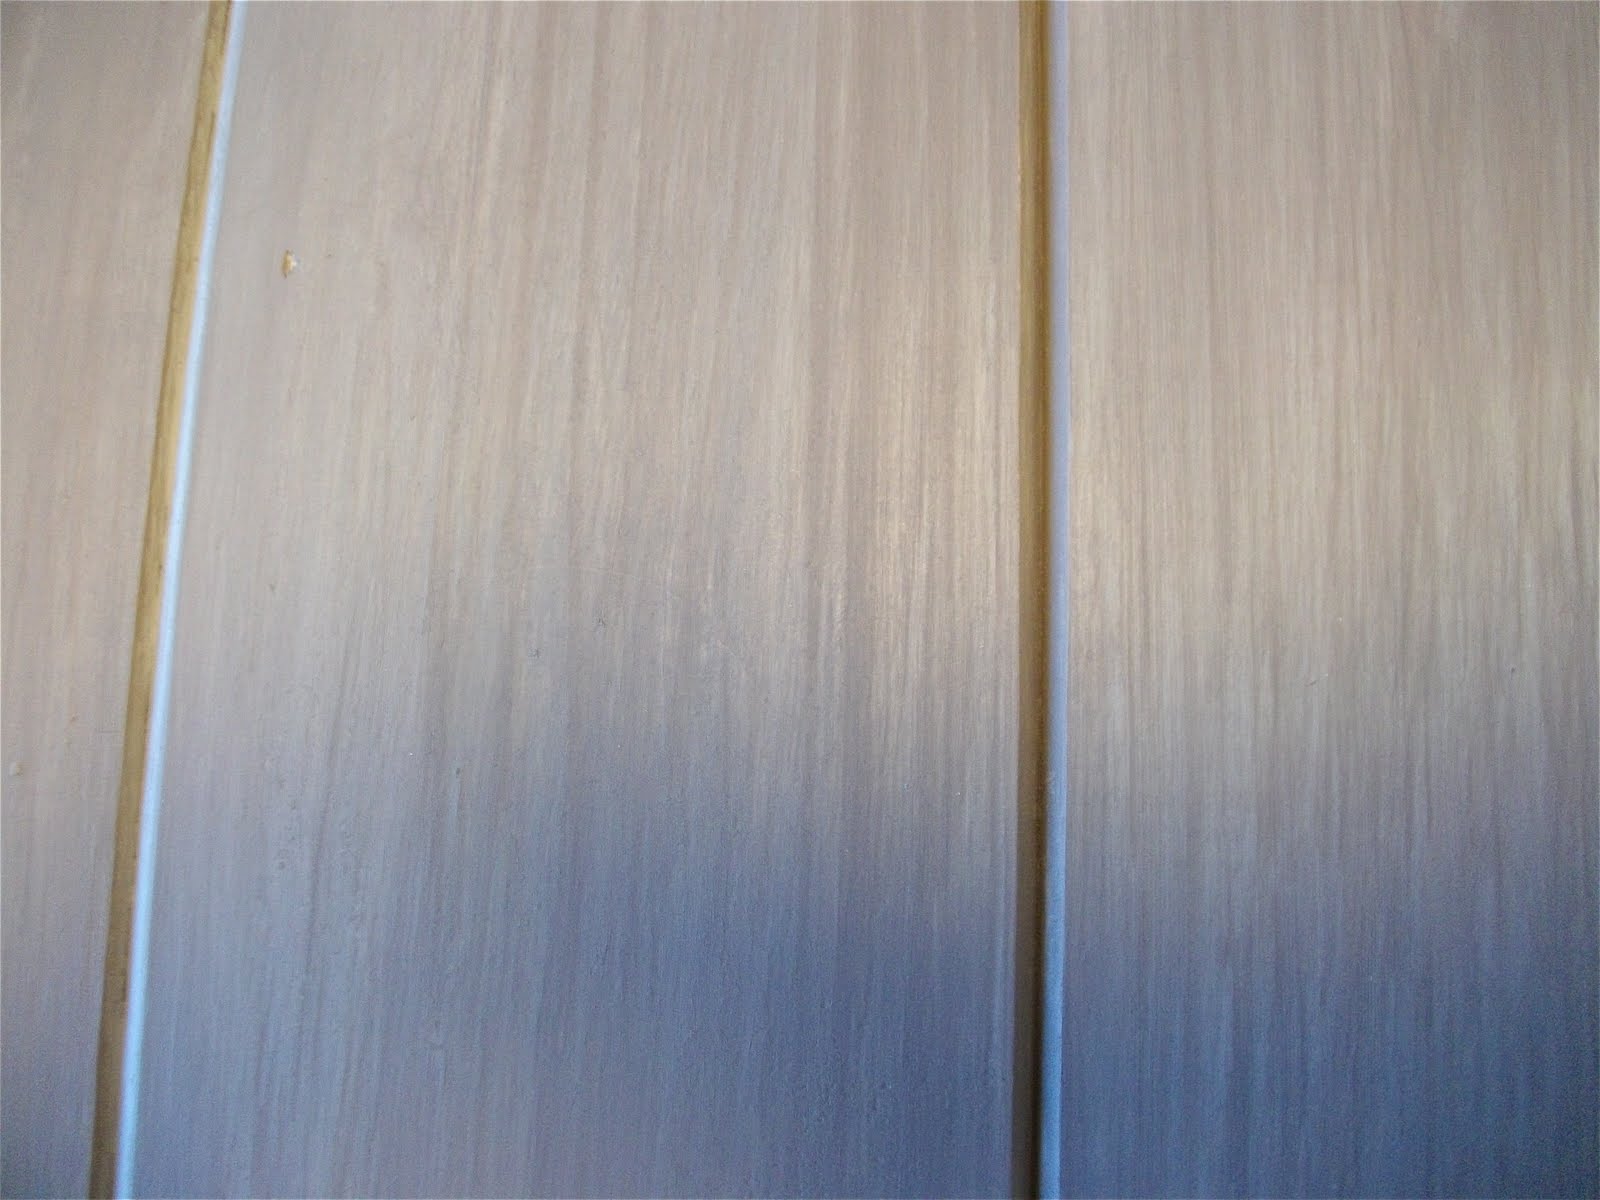
I repeated the process a few times, alternating between a more brown coat, then a more gray coat, rubbing it down with a damp paper towel each time.
This is the final coat. It’s streaky, but it doesn’t scream “STREAKS!!!” at you.
Then it was time to put on the hooks.
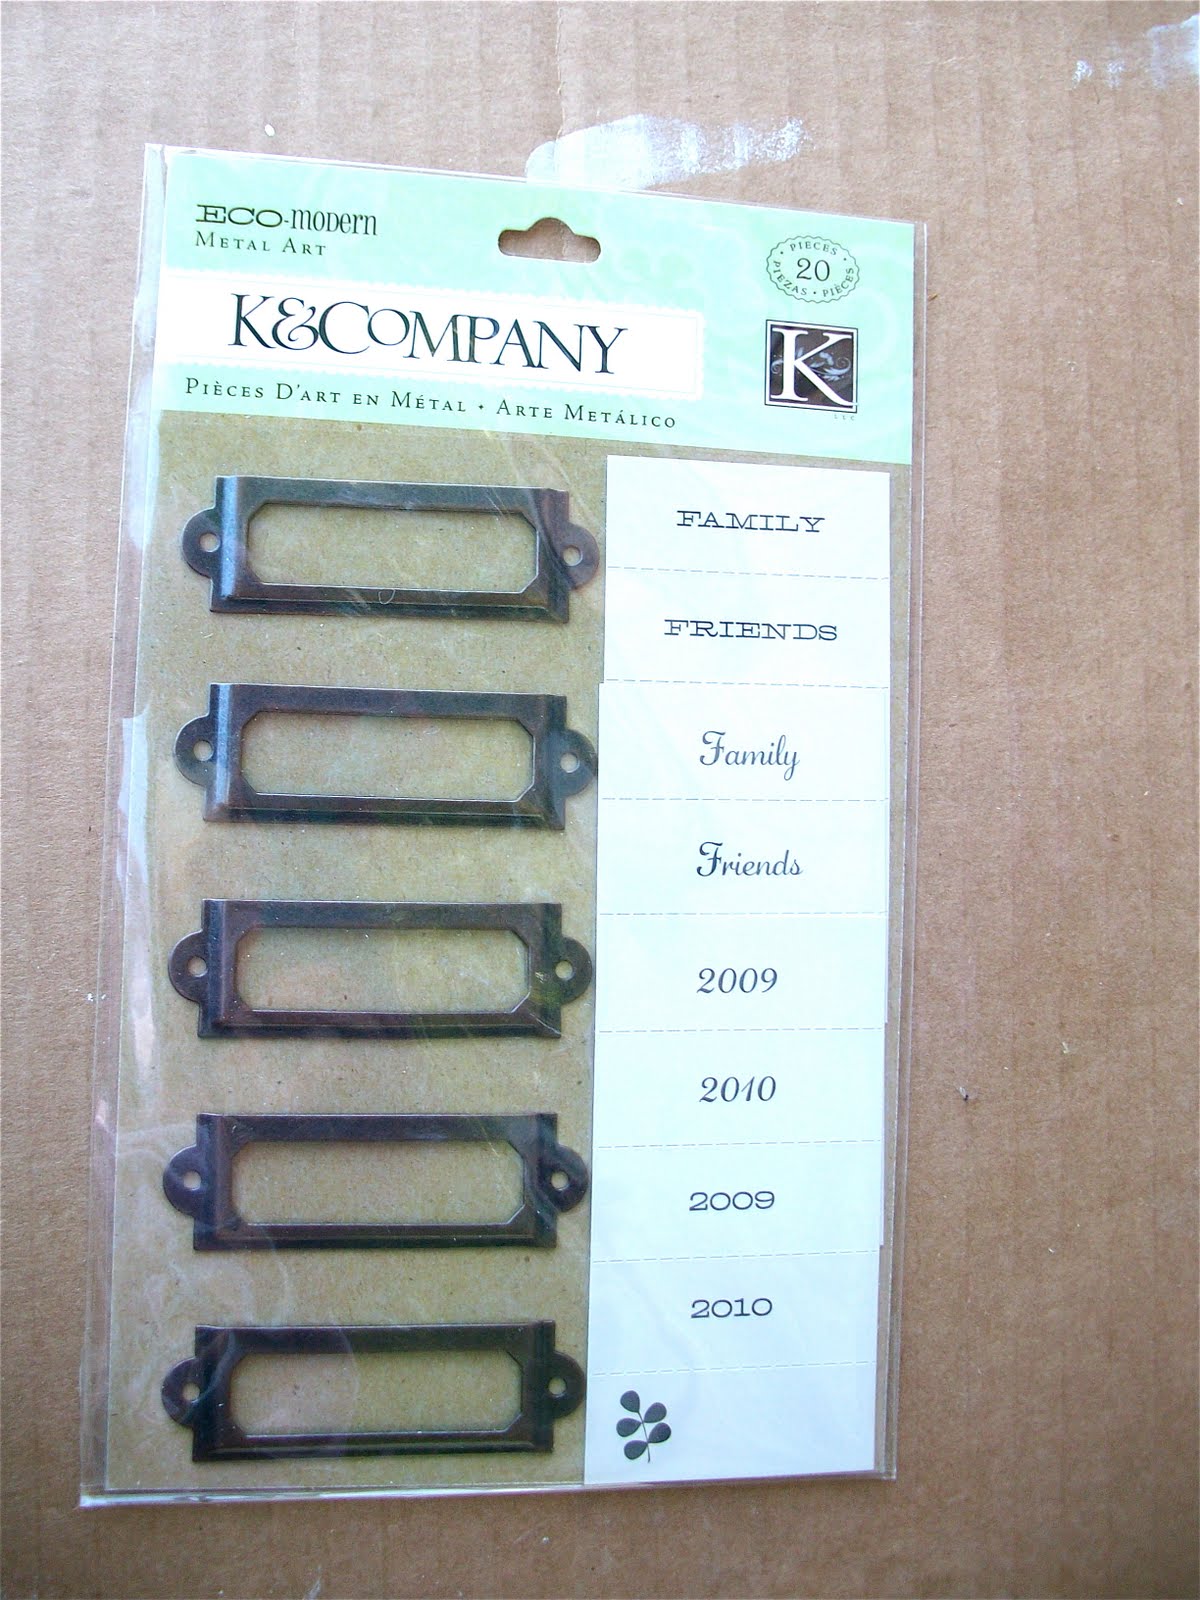
The hooks and label holders on the inspiration key rack look like they’re all one piece. I couldn’t find any like that. I found a few label holders online, but I really didn’t want to pay $3 each for them since I needed 20 of them.
I found these
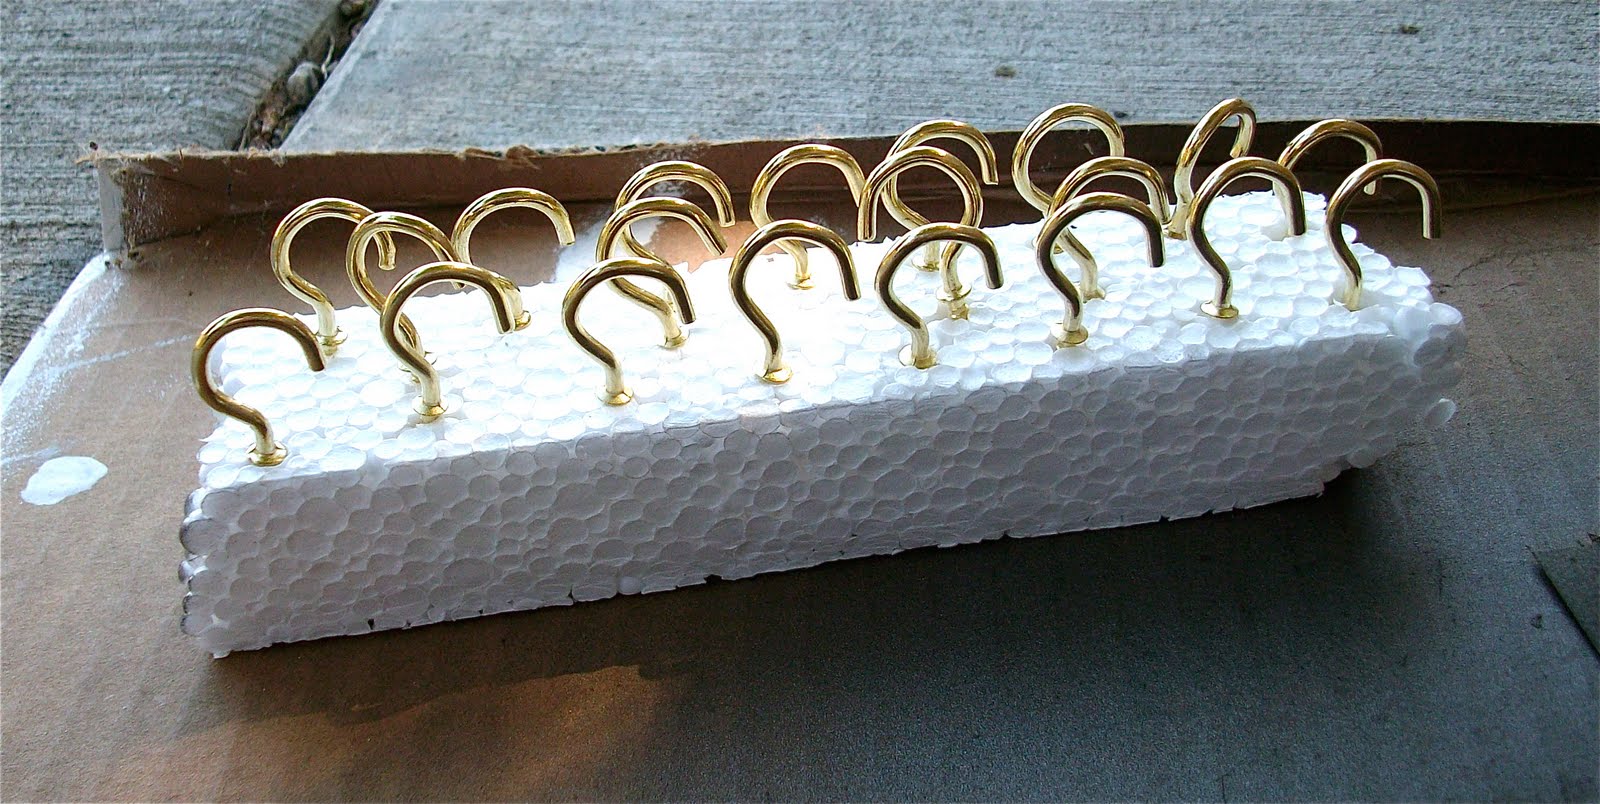
at a scrapbook store, and these cup hooks
at a hardware store.
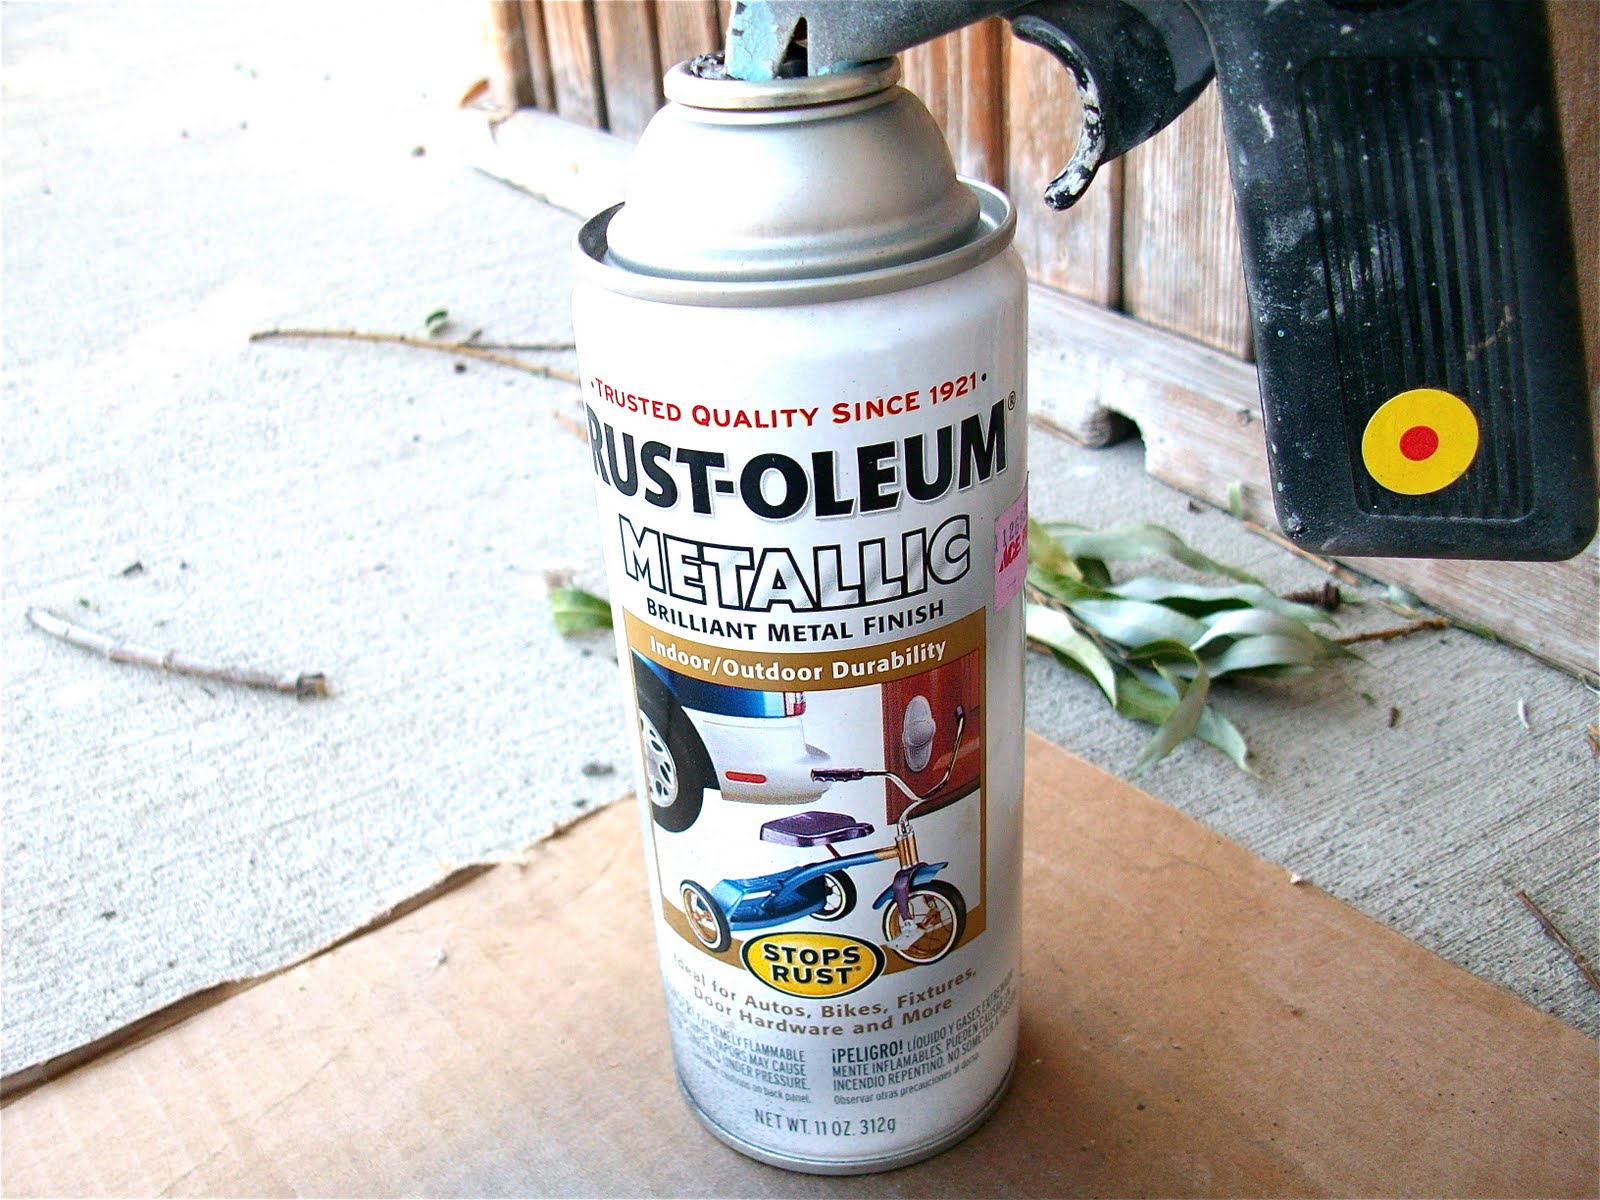
I just needed them to look like they belonged together. So I sprayed them all with this. It’s a dark bronze color.
Once they were dry, it was time to add them to my board.
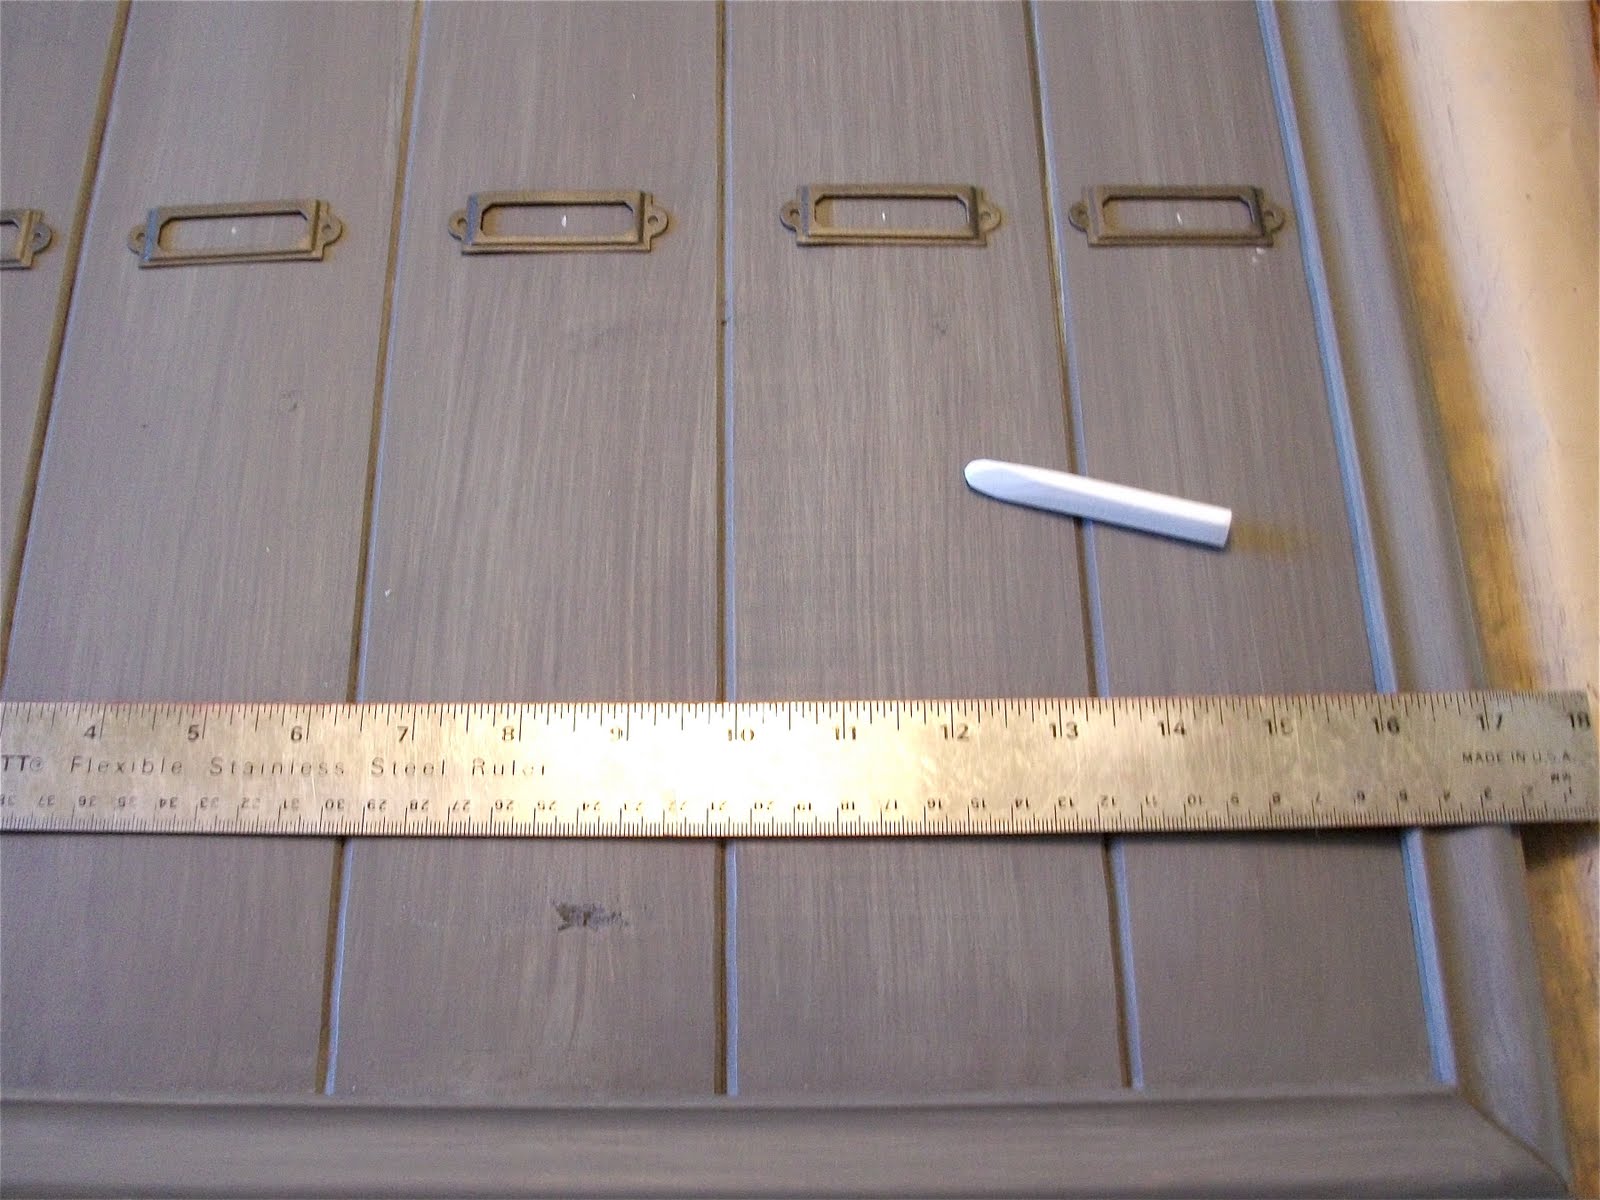
I’m not the best when it comes to measurements, and I had to do a little adjusting.
That’s why I made all my marks with chalk. It’s easy to rub off if you make a mistake. I made my marks in the center of each label holder.
This thing is an odd width, and my ruler was too long to fit on this, so
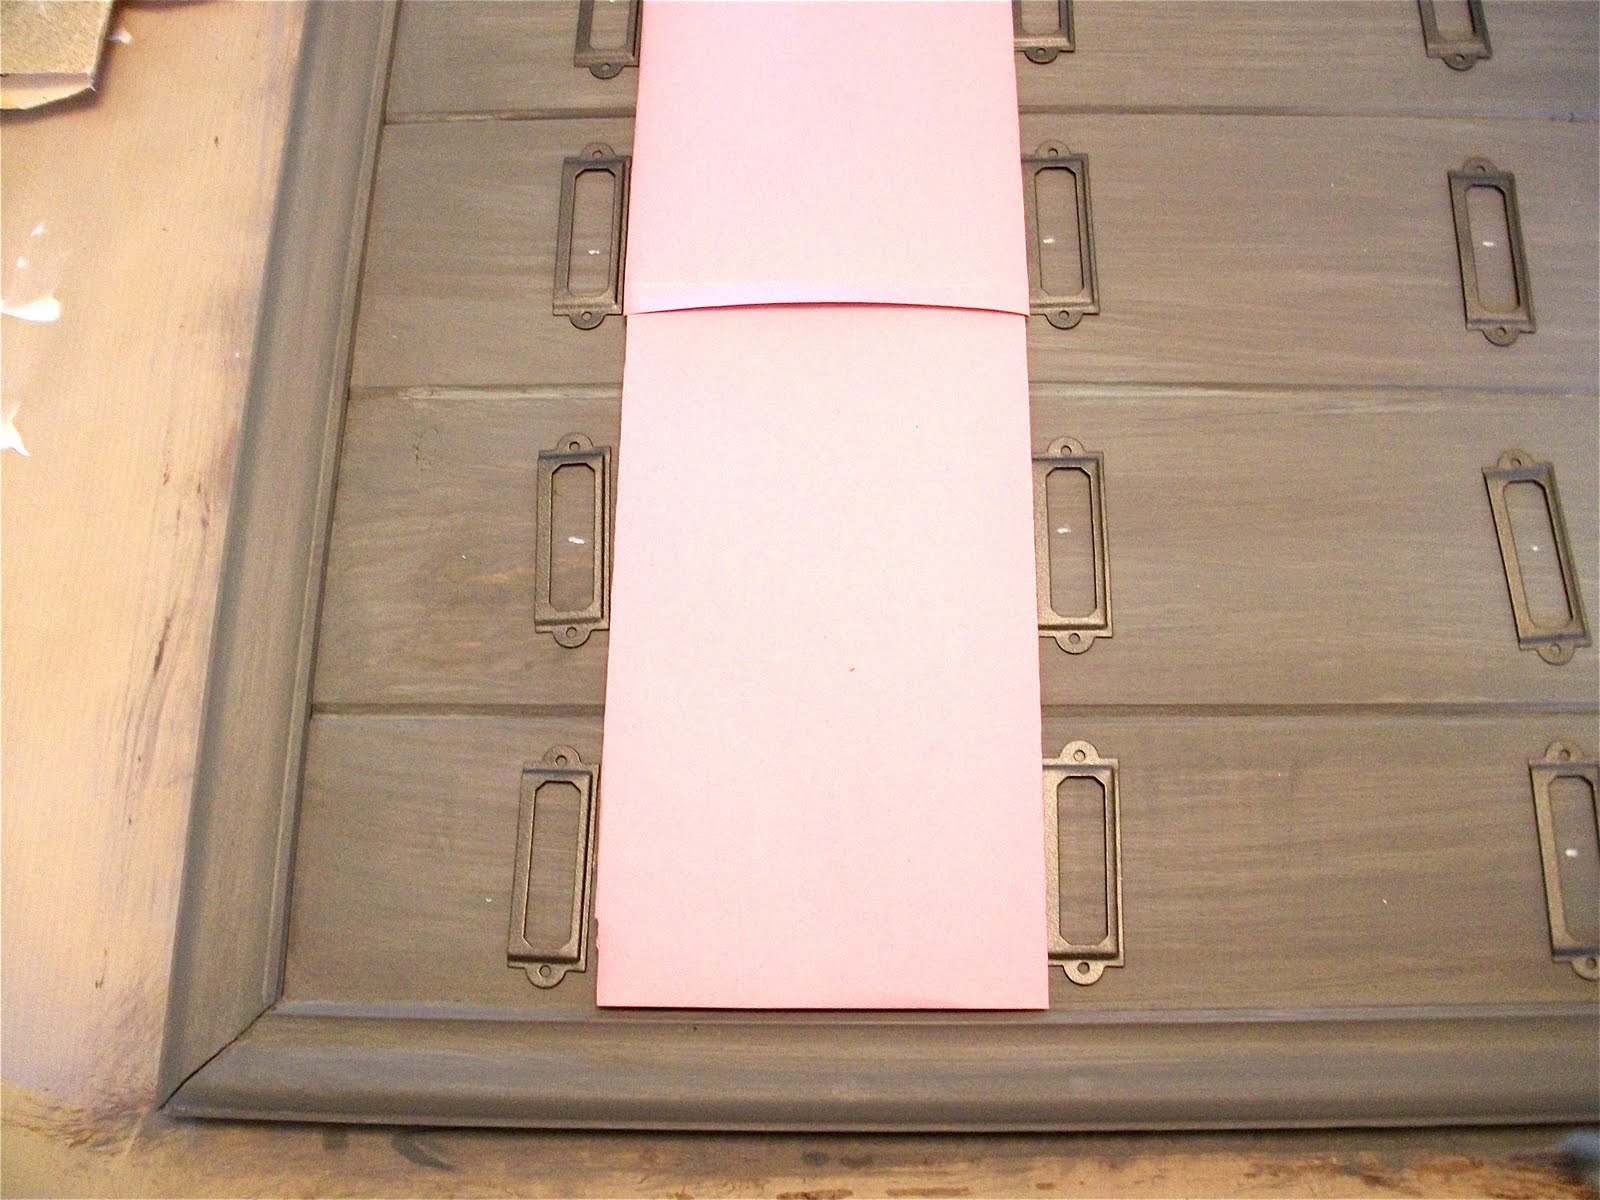
I decided that if I used a template, it would be easier to get everything all lined up straight.
I just made one out of paper.
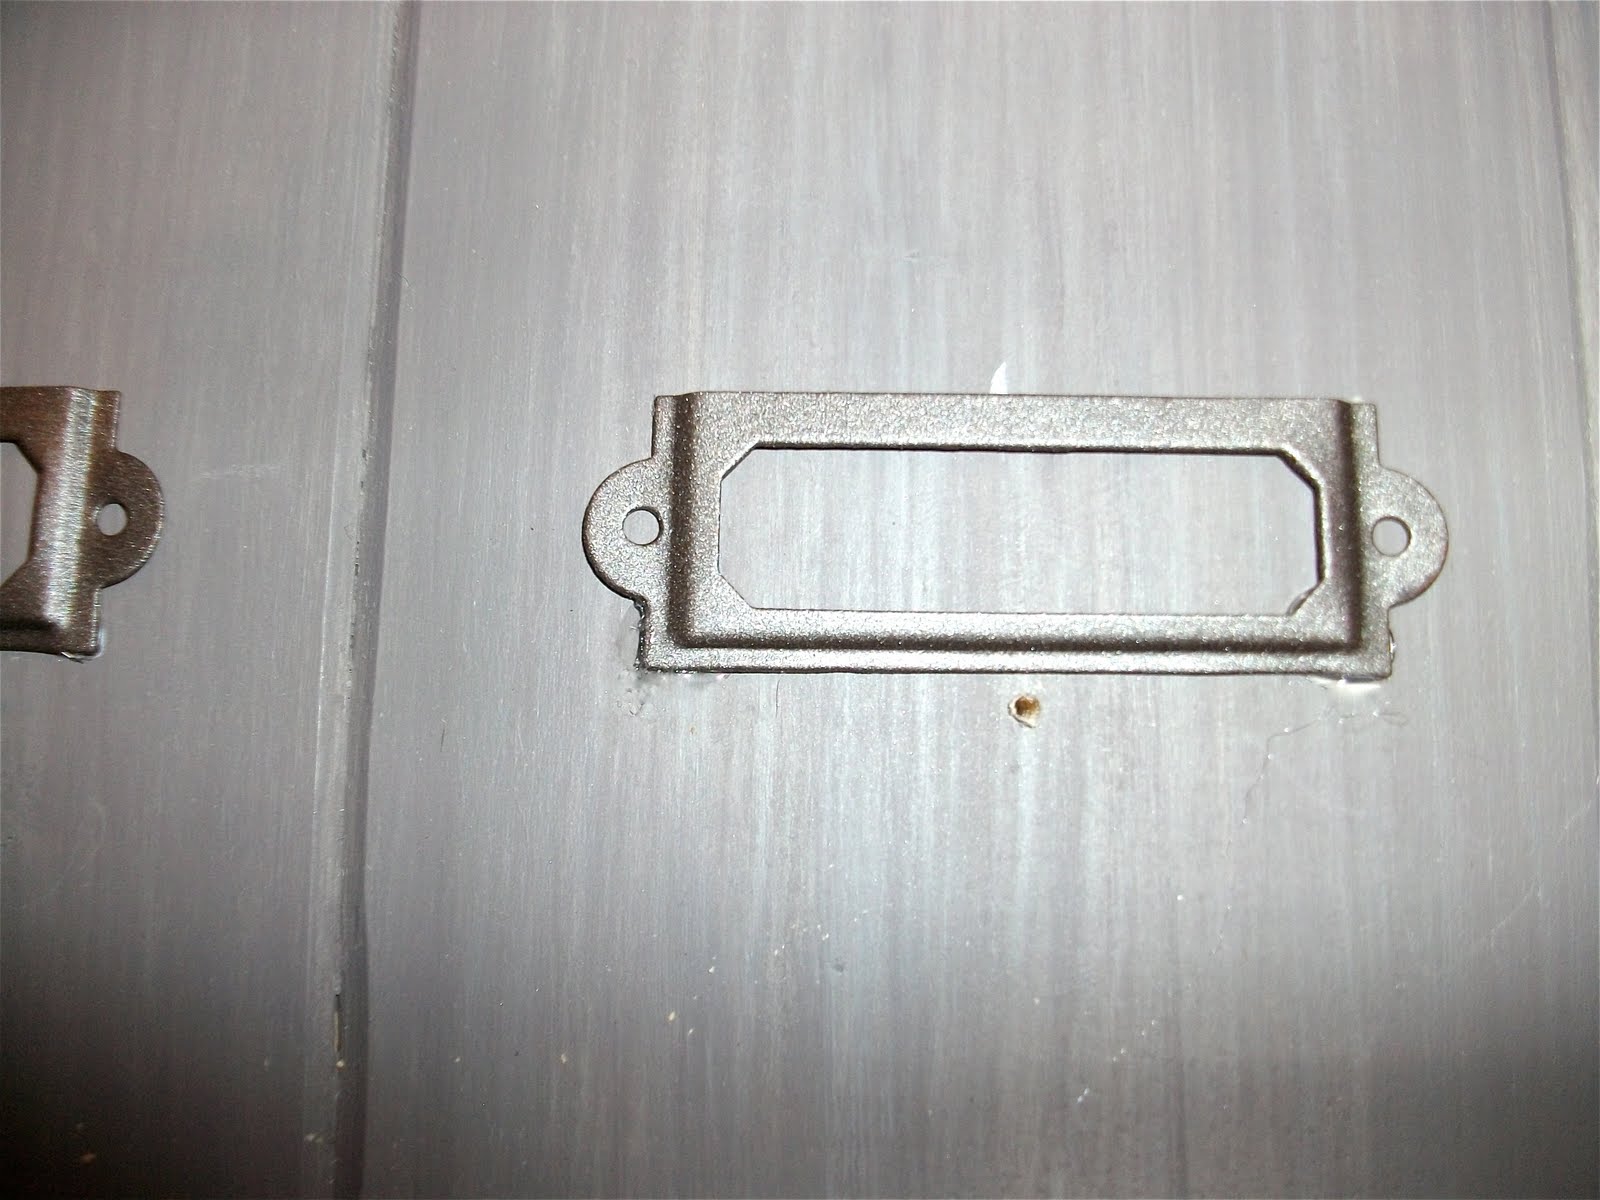
I put a dab of glue in the corners of the label holders and put them all in place.
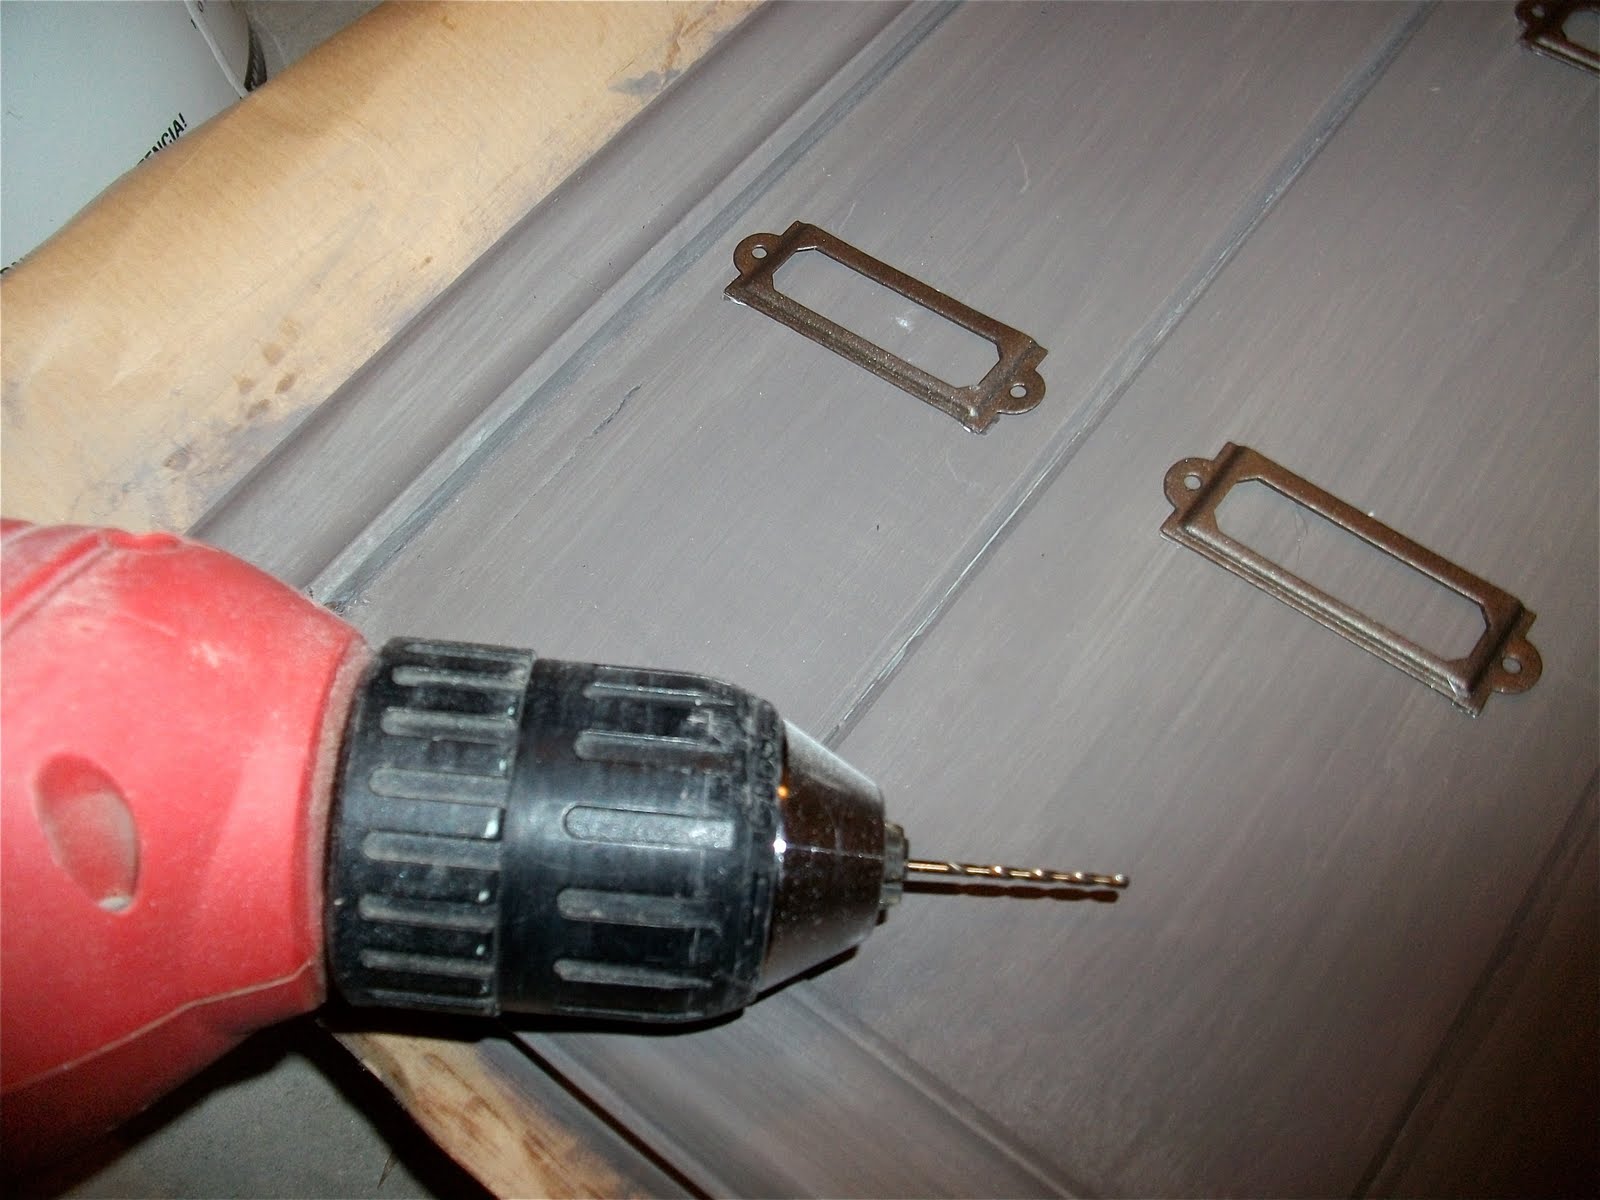
Then I had to drill some pilot holes for the cup hooks. The planks I used aren’t thick, and I didn’t want the cup hooks to split the wood.
I used one of the smallest drill bits we have
and put a small hole under each label holder, making sure I centered each hole.
Then I screwed them in.
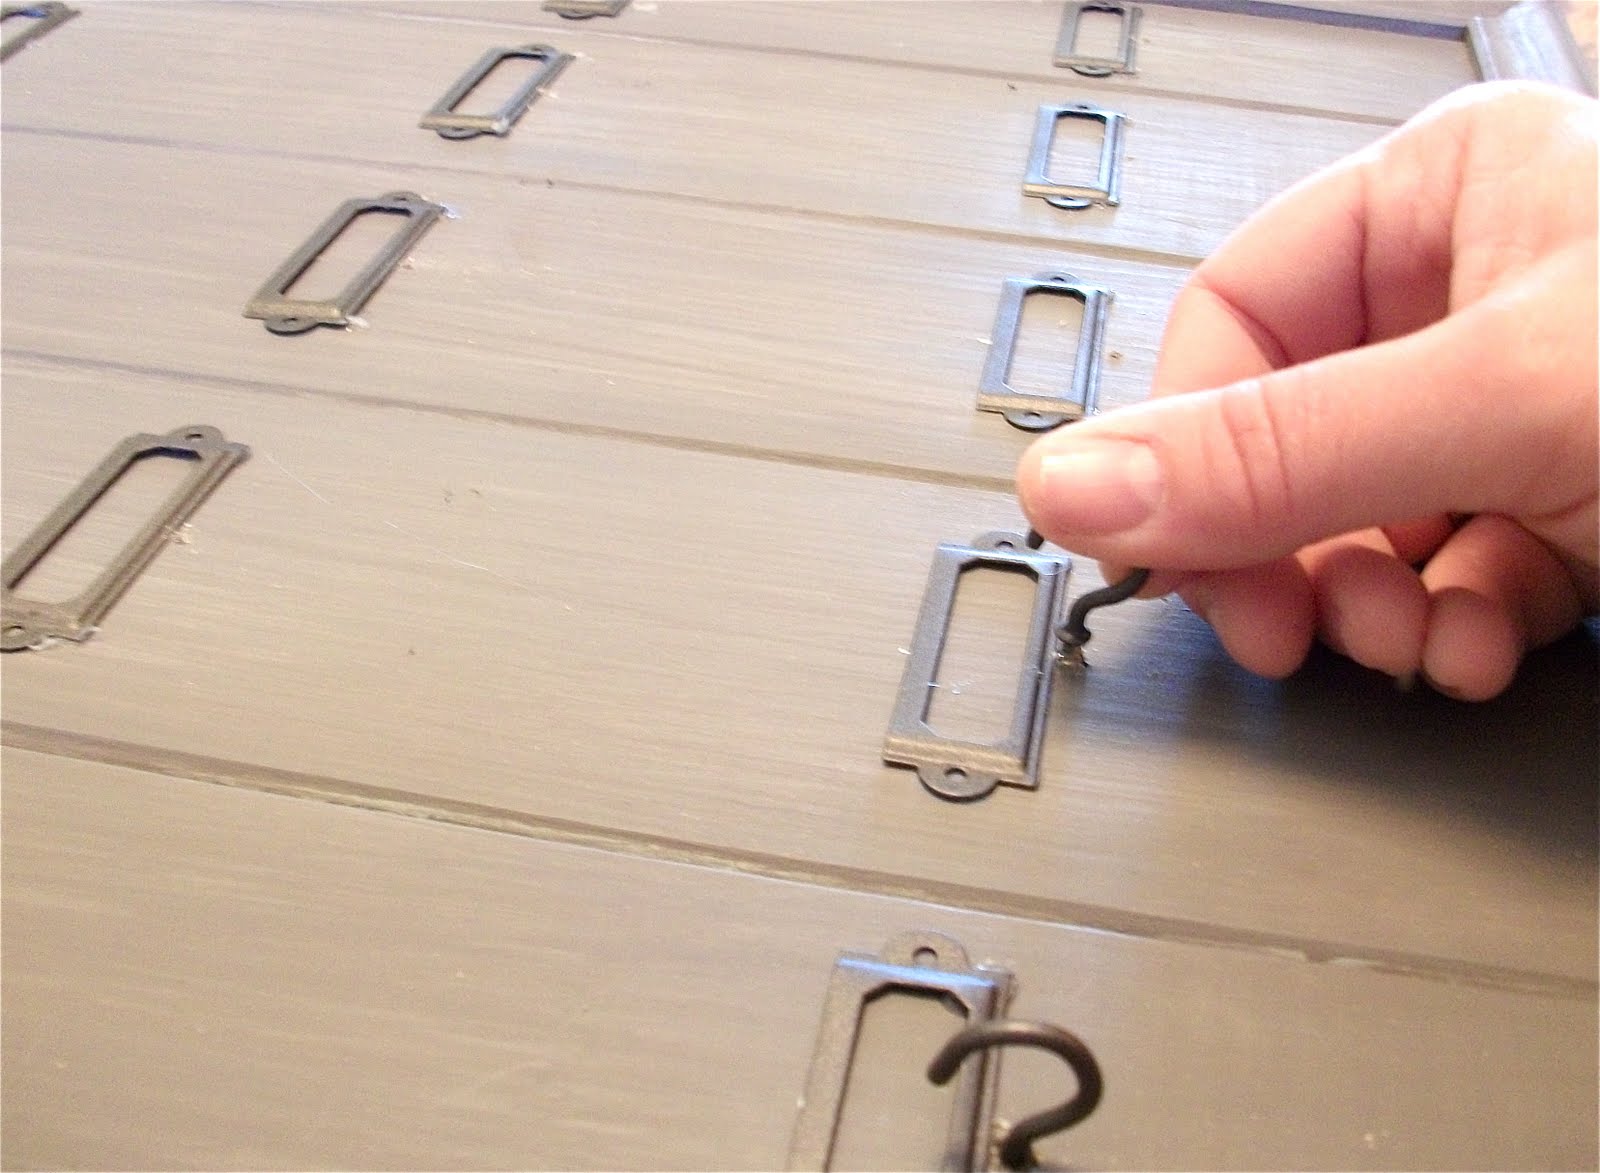
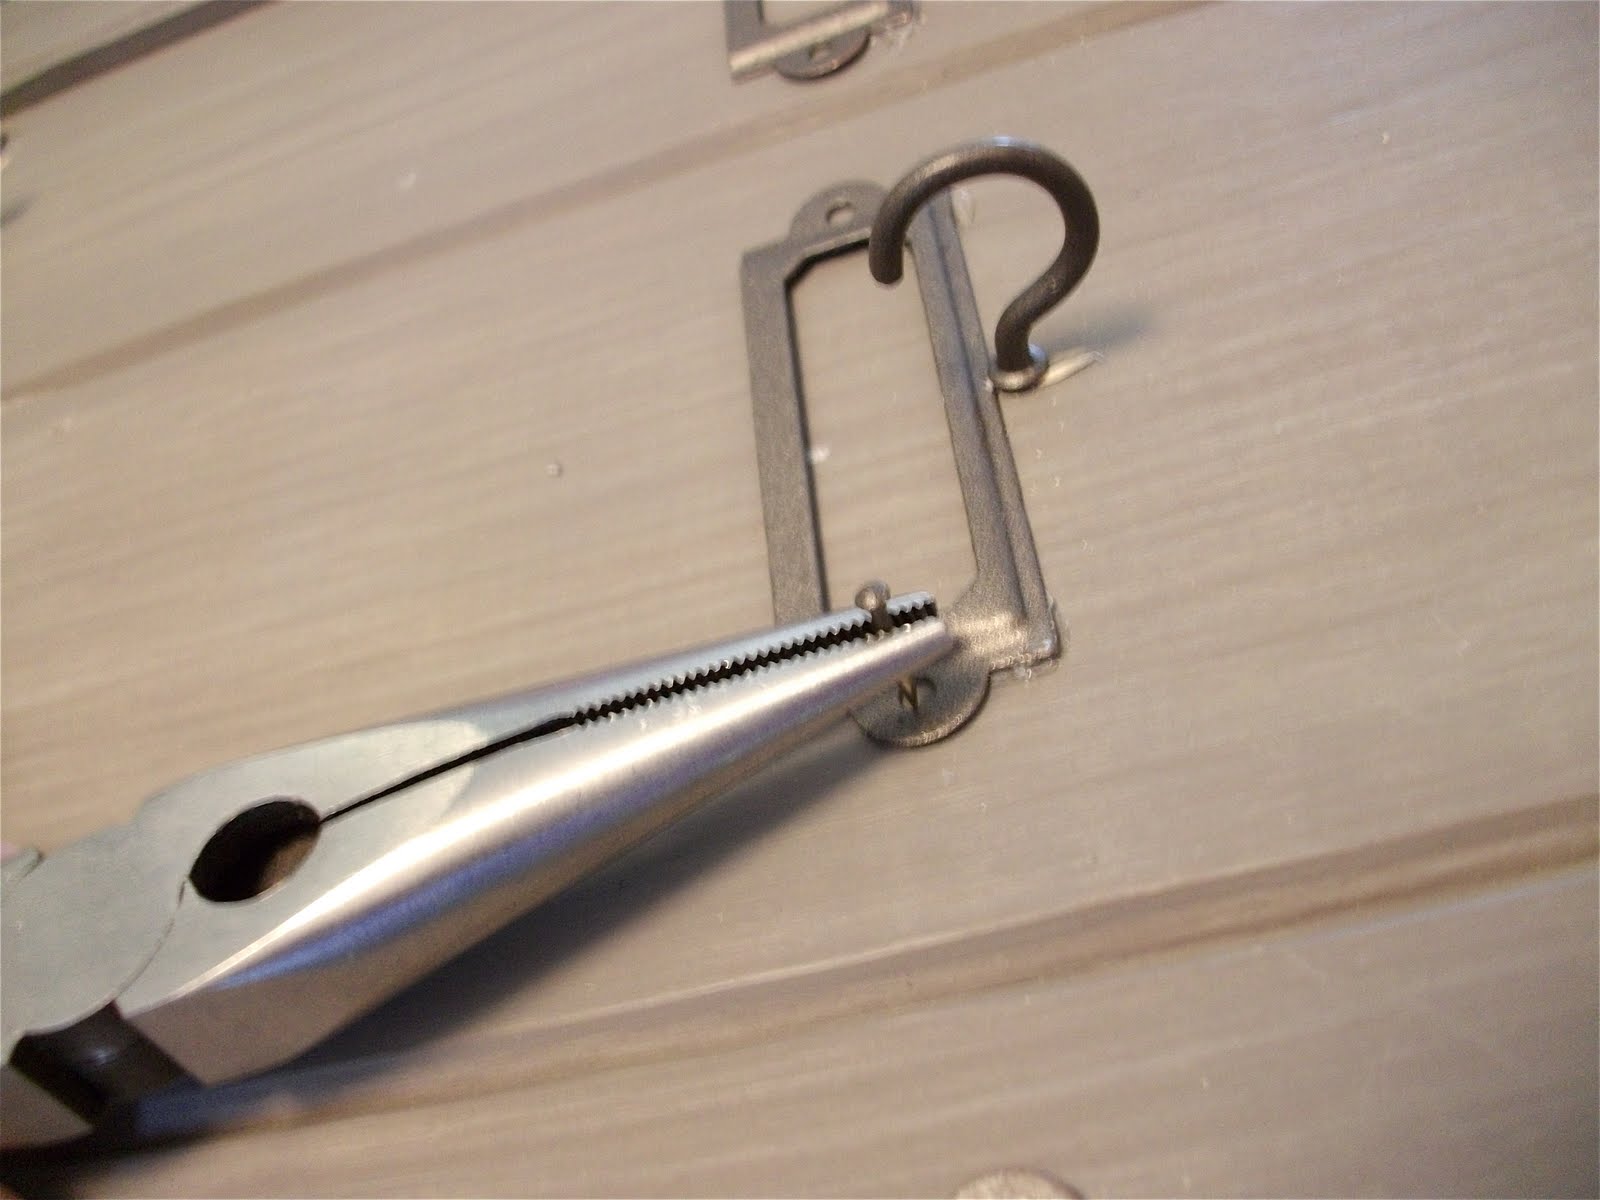
Once that was done, I needed to make sure the label holders were really secure.
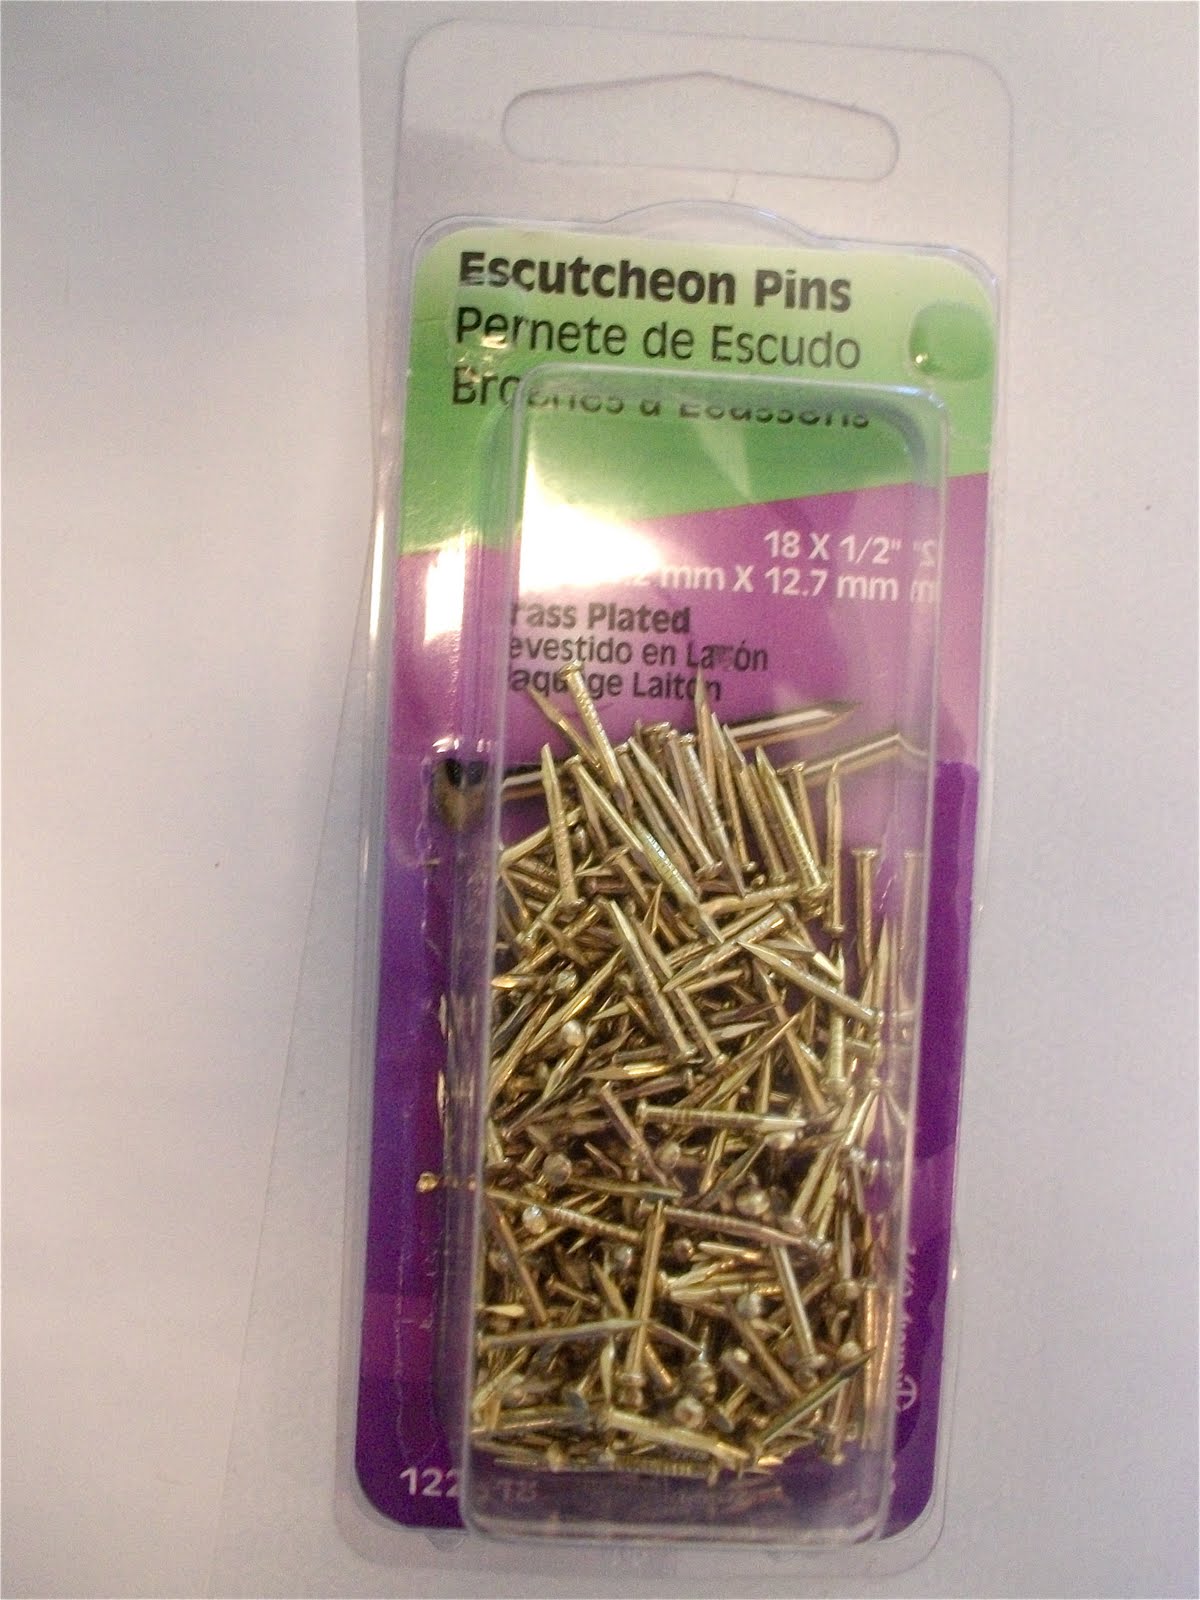
I used these.
They’re very small, so it helped to use some needle nose pliers to hold the pins while I hammered them in.
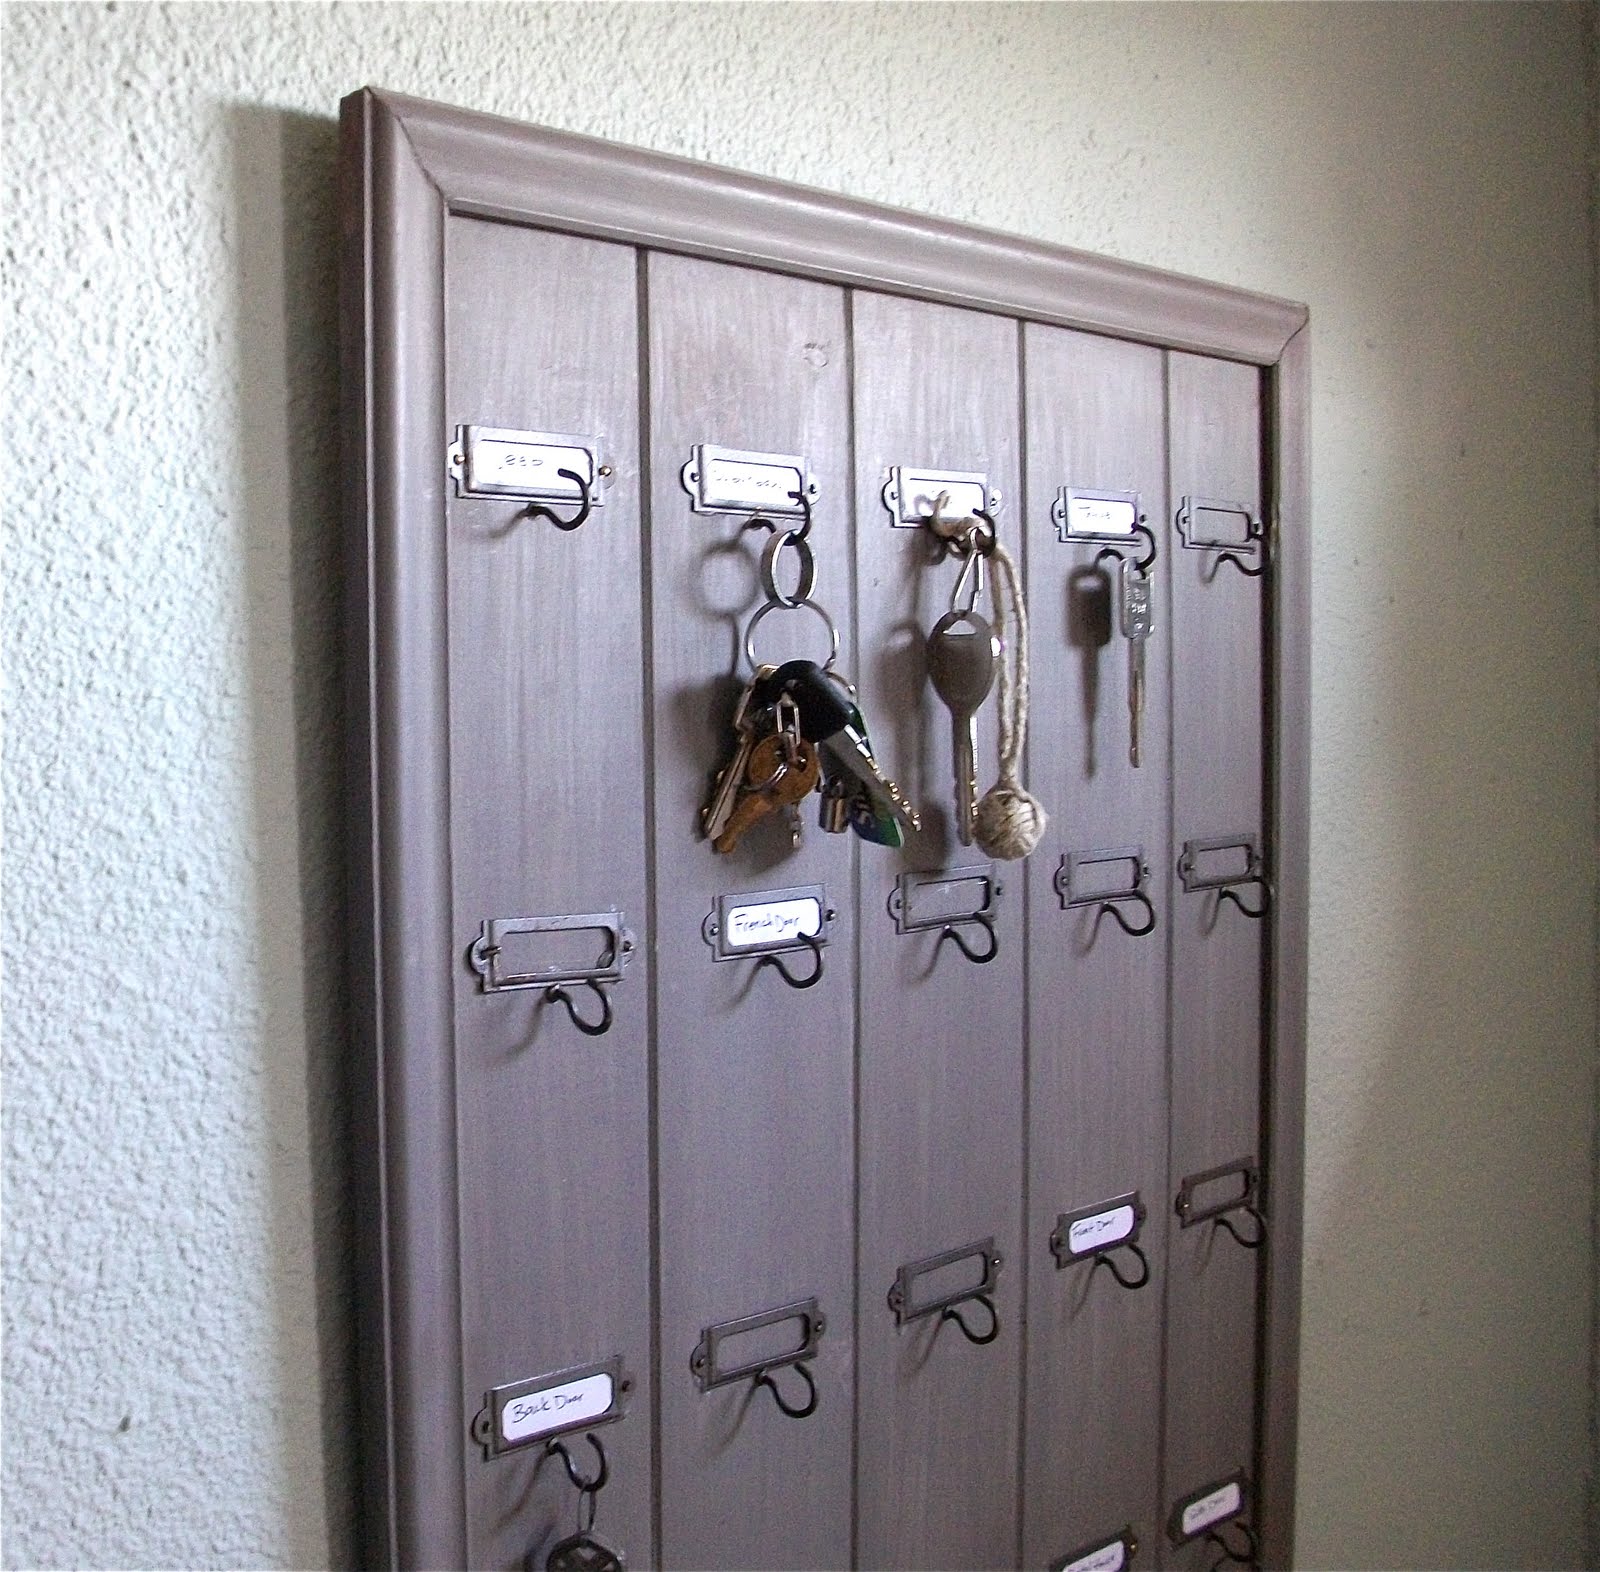
Here’s the finished product.
I hung it by the front door.
I’m really happy with how it turned out!
It’s not exactly like the Mothology key rack, but I didn’t pay anywhere near $62, either.
I love DIY projects! It’s fun to see how we are able to recreate something that we see and make ourselves. Great job on the key rack!
Related


>Love the key rack! I have seen the one on mothology too… you did such a great job. You must have alot of patience to put all the little number holder thingys on like that!!!!
>Wondering what the dimensions are. I like how many hangers you have on yours, What length are the T&G boards you used?
>You've made a great job of this, but have you thought:
Your house is burgled, all your keys are on display for the burglar to use at his convenience, possibly steal your car as well.
Like I say you've made a great job of it.
>Great Work. So beautiful. https://www.smokersworld.info/
>I've got a new blog and this is my first feature! I'd love for you to stop by and grab a button! todaystoptwenty.blogspot.com
>I can not lie….this is utterly amazing! I want one now so bad!
>this makes me wanna make one myself!!!
i would like to purchase the key rack or accessories for my hotel situated near indo nepal border.
kindly let me know the rates and tell me how to purchase above.
regards
manish malhotra
hotel harsh palace
bahraich (u.p.)
India
postal code-271801
cell-09452760000
Sorry Manish it isn’t for sale.
Can you tell me de dimensions of the planks that you used?
Thank you!