Board and Batten Accent Wall
Board and Batten Accent Wall
I’ve been mentioning a bedroom project. And finally, last week we tackled it! We created a feature wall for the bed in our master bedroom by putting up board and batten.
I’d read several tutorials online and my mom helped me plan. We took measurements and decided on board sizes (18 inches from the ceiling is where the molding starts, and the boards we used are 3.5 inches). I bought one sheet of MDF board and had the guy at Lowes cut 14 3.5 inch strips. I brought all my measurements into the store so that we didn’t have to do any cutting at home. From all of my preparation, I thought 1) I could do it myself. 2) It would only take an hour or so. I was doing one wall not the entire room.
Well, I was wrong. I didn’t do it all by myself. I am grateful for A’s help. I do know how to properly use the compressor and nail gun now.
 We had some issues with a bad level reading level but the board visibly slanting. We had to pull nailed in boards out of the wall more than once. We got both horizontal top boards and bottom boards nailed in only to discover the wall did something strange and the vertical pieces did not fit on one end or in the middle.
 We ended up building from the top down.
On the wall, I tried to space the boards out according to where the studs are. That ended up with the boards being 13 inches apart. It’s not perfect. There were two in the middle of the wall that, to get the spacing right with the studs, had to be about 11 inches apart. But that’s directly in the middle and then the 13inch spacing goes out from the middle on both sides.
 Putting the board up took about 2.5 hours. As I said, we had to take things down a few times. Next up was painting. Painting the board and batten white showed up all that other molding in the room (which was cream) so I set myself up for a lot of painting. I was painting for DAYS. And I’m still not done. There are four doors in the room. And I skipped those, so they still need painting. The board and batten wall took three coats of paint (Valspar Ultra White in semi gloss). I painted the rest of the room Benjamin Moore’s Gray Wisp color matched to Valspar’s low VOC paint in an eggshell finish. Gray Wisp is very similar to Restoration Hardware’s Silver Sage. It can look blue at times and it can look more green at times depending on the lighting. Ironically, it never really looks ‘Gray’.
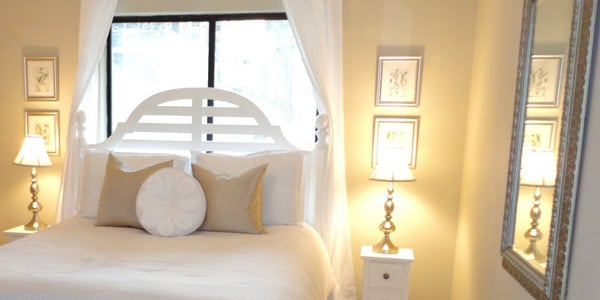
Here’s a recent ‘before’ pic. (For the more distant before pics, see this post.)
 And here’s how the room looks now.
 A few shots from other angles.

 The night tables (mentioned here) unified with the new lamps.

This was a relatively inexpensive update. I walked out of Lowe’s with a receipt for $102. That included 2 gallons of paint, the MDF ($24 for the board), the two trim pieces, and a few miscellaneous items (painters blue tape, a small jar of oops paint, etc).
Next up (besides more painting), art & mirrors.
What do you think? Have you totally changed the look of a room lately? Or does anyone feel my pain of painting for hours on end for several days in a row?


I love it – it’s stunning! Exactly what the room needed!
That is so pretty!! I did much the same for a whole room, only I put wood up on the wall first, because the walls weren’t in the best of shape. I love the color you used in your bedroom. So calm. (and your headboard is absolutely lovely!!)
Great look!
The crisp white brings out the beauty of your headboard. It is a total transformation!
I think it’s a definite improvement. It really brightens the space and creates a big visual impact. I love the nightstands/lamps against the new wall.
Cassity, i’ve got the husband approval for doing this project in our bedroom. I LOVE IT! Thanks for sharing!
Can’t wait to see it! You will have to send me a link!
Thanks so much for the kind comments!
Hi! I love your wall! Did you cover up the nails with anything? Or just painted over them?