
DIY Built-In Entryway Table with Board and Batten
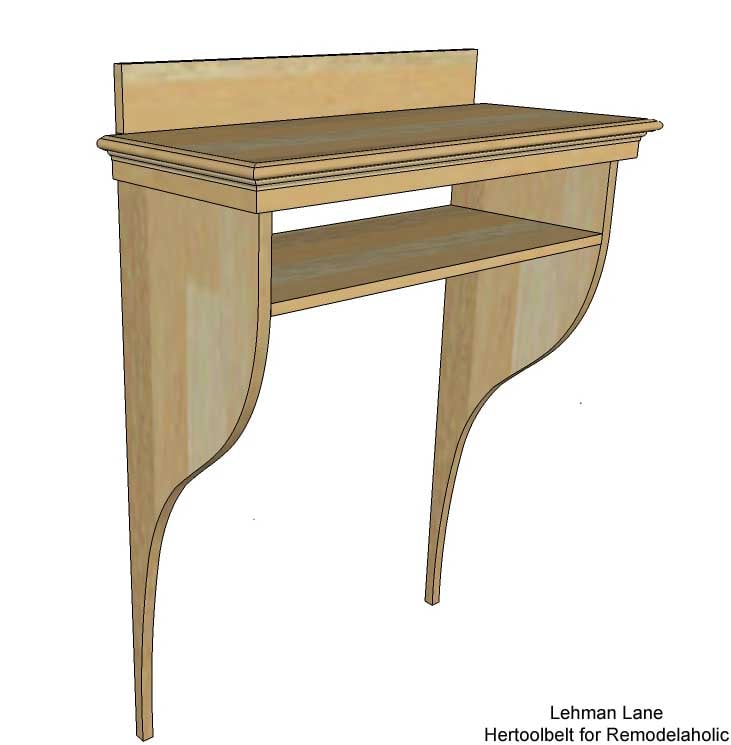
Built-in Entryway Table Building Plans
by Amy of HerToolbelt
Click here for the full photo tutorial from Tara of Lehman Lane

 Materials
 Materials
- 1″ x 16″ x 8′ glued edge pine panel
- 1 – 1″ x 4″ x 8′ board + additional for board and batten
- 1 – 1″ x 2″ x 8′ board
- 1 – 8′ base cap molding
- 1 – 8′ shoe molding
- bead molding as required
- 1 1/4″, 2″ or longer brad or finish nails
- 1 1/4″ min screws
- Spackle/wood filler
- paint/primer
Note: for this built-in entryway table plan, leave 27 1/4″ in between 2 of the board and batten boards. Plans can also be adjusted to fit a different width according to your needs.
Step 1
Download and print the table leg templates. This is a close approximation to Tara’s table legs, not an exact replica. Built in desk leg template 1 Built in desk leg template 2 Built in desk leg template 3 Built in desk leg template 4 Built in desk leg template 5 Built in desk leg template 6 Make sure your printer setting are on 100%, not fit to page. Line up alignment marks and tape together the pattern (there will be paper overlap). Cut out the template and trace it onto the 1″ x 16″ panel, nest the legs to reduce wasting wood. Cut out the legs with a jig saw, sand the edges smooth as necessary. Attach the legs to the board and batten.
Cut the top piece from the 1×16, approx 13″ wide and 29 1/4″ long. Cut notches about 3/4″ x 1″ in the back corner to fit between the board and batten.

Attach the top to the legs.

Step 2
Place a 1″ x 4″ cut at 27 1/4″ long between the vertical board and batten boards, rest it on the top piece, secure to the studs in the wall. Pre-drill holes and secure the top to the 1×4 from underneath the top.

Cut the shelf 12″ x 25 3/4″ out of the 1×16. Measure down about 6″ from the top and secure the self into place. (secure with screws, nails or pocket holes/screws)

Step 3
Install 1×2’s around the table, under the top. The following dimensions are guides, cut to fit your table. Secure the 1×2’s to the table.

Add base cap molding around the edge of the top and shoe molding under the base cap on the 1×2.

Love it? We’d love to have you pin this or share it on Facebook!


Thank you again for featuring my built in entryway table.
Take care, Tara
Thank you for sharing with us, Tara!
I love the Finished product of each view. My future product is a 1940 house. This house was built with the real solid wood.