Get organized! See our favorites in the shop

Remodelaholic

DIY tutorials, Woodworking plans and more.

FREE BONUS: Kitchen Organization Boot Camp
  • Home
  • About Us
    • About US
    • Contributors
    • Facebook
    • Pinterest
    • YouTube
    • Instagram
    • Disclosure and Advertising
    • Contact Us
  • Shop
  • Project Ideas
    • Our Houses
      • Birch House (current projects)
      • Canyon House
      • Park House
      • Downing House
      • Logan House
    • DIY Project Plans
    • All projects
    • Barn Door Baby Gate
    • Dutch Door
    • Framing A Wall Mounted TV
    • Indoor Playhouse
    • Beach Themed Living Room Design
    • Chicken Coop Building!
    • Computer Desk
    • Computer Desk Plans
    • Custom Newel Posts and Stair Remodel
    • Family Room Sneak Peek
    • Headboard Tutorial
    • Living Room Progress
    • Mood Boards
    • Scrabbled Family Names
    • Pets
  • Design By Room
    • Bathrooms
    • Landscape
    • Kids Bedrooms
    • Kitchen
    • Living Rooms
    • Laundry Rooms
    • Master Bedrooms
    • Mood Boards
    • Office
  • Holiday
    • Christmas
    • Halloween
    • Patriotic
    • Easter
    • Fall
    • Saint Patrick’s Day
    • Thanksgiving
    • Spring
    • Valentines Day
    • Winter
  • Crafts
    • Printable
    • Art
    • Paper Crafts
    • Kids
    • Fabric Crafts
    • Decorate
  • Recipes
    • Appetizers
    • Beef
    • Beverages
    • Breakfast
    • Chicken
    • Desserts
    • Dinner
    • Fruit
    • Healthy
    • Holiday
    • Lunch
    • Main Dishes
    • Salads
    • Sandwiches
    • Sauces
    • Seafood
    • Side Dishes
    • Soup
    • Vegetables
  • Videos

DIY Brass Chandelier Makeover

Written by Cassity

  • Facebook
  • Twitter

Please link up to our Remodelaholic’s Anonymous Party today, for a chance to be featured on Remodelaholic!

Sarah at A Little Of This, A Little of That contacted me and wanted to show off how she made an old brass chandelier look stunning with a little paint and TLC.  I think that what she did is great, and I love that she reused an old light that might have been discarded otherwise!


I’m excited to share my latest DIY project with you!

I’ve seen some cool chandelier rescues out in blog land, and have been wanting to try it myself!

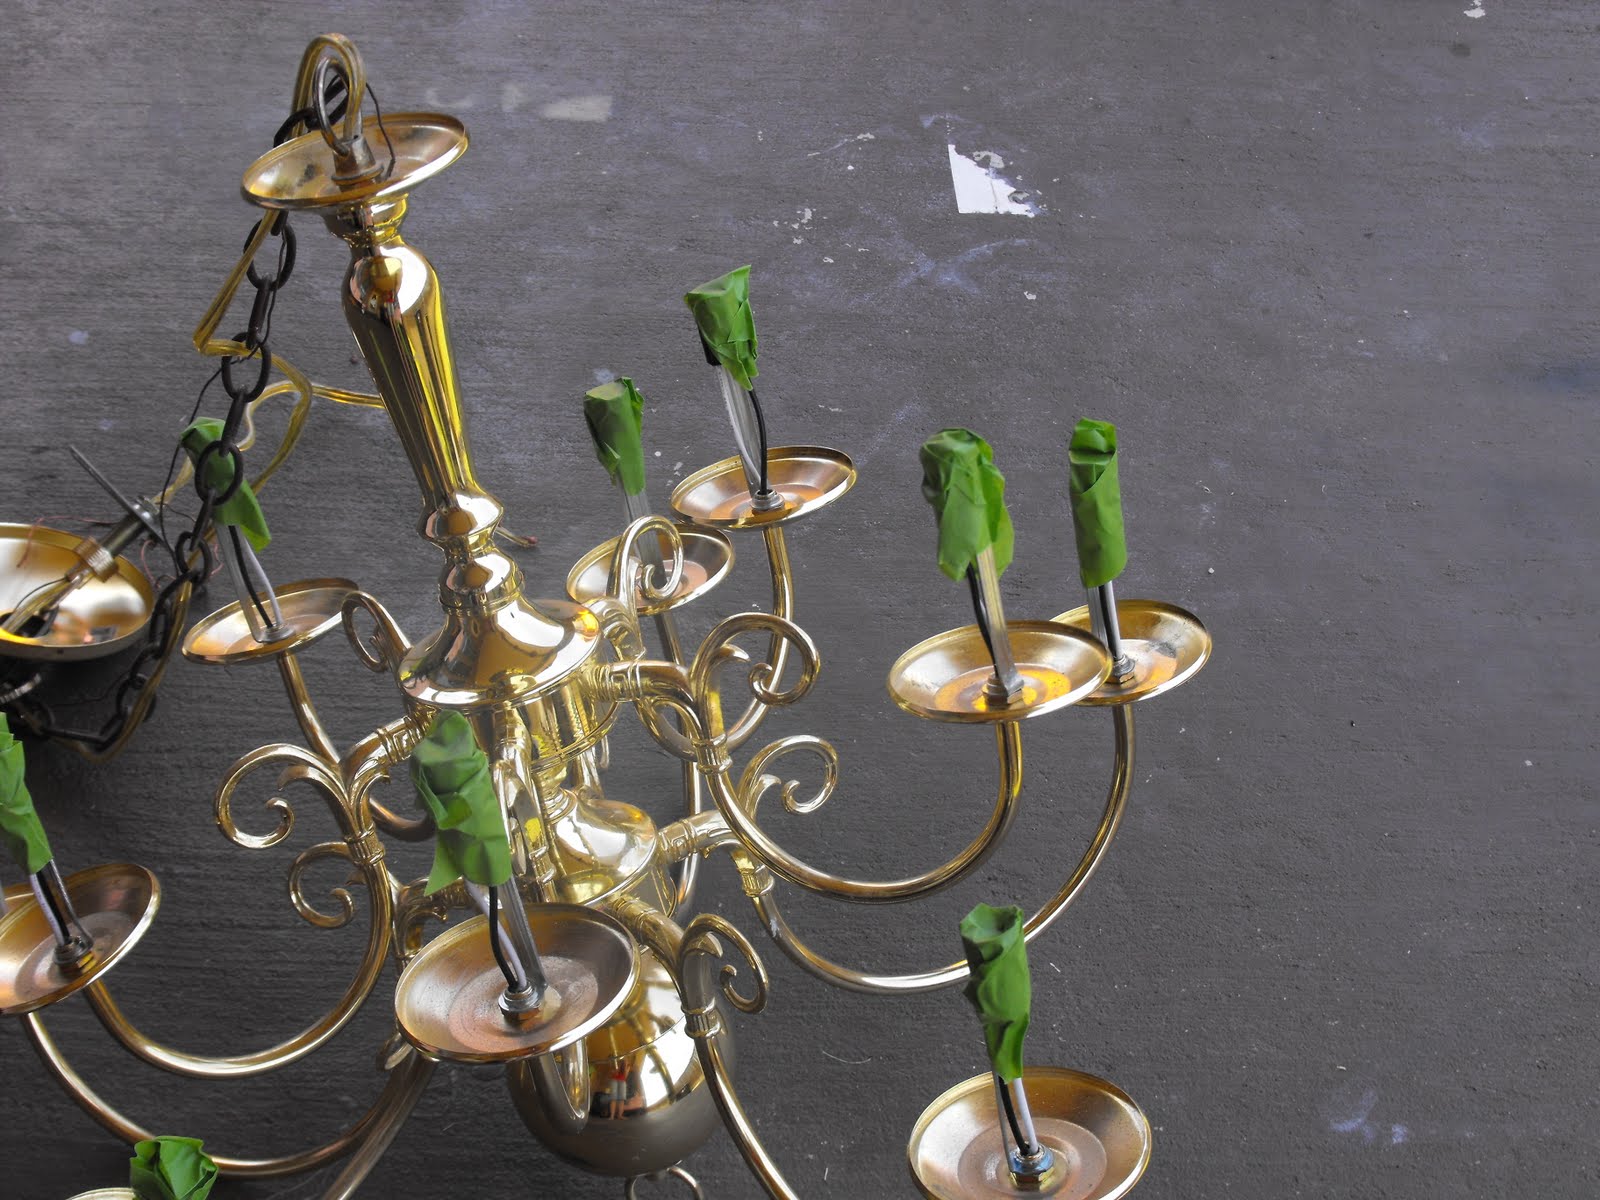
Last week I took my frist trip to a thrift store in almost 4 months *gasp!* and found THIS beauty:


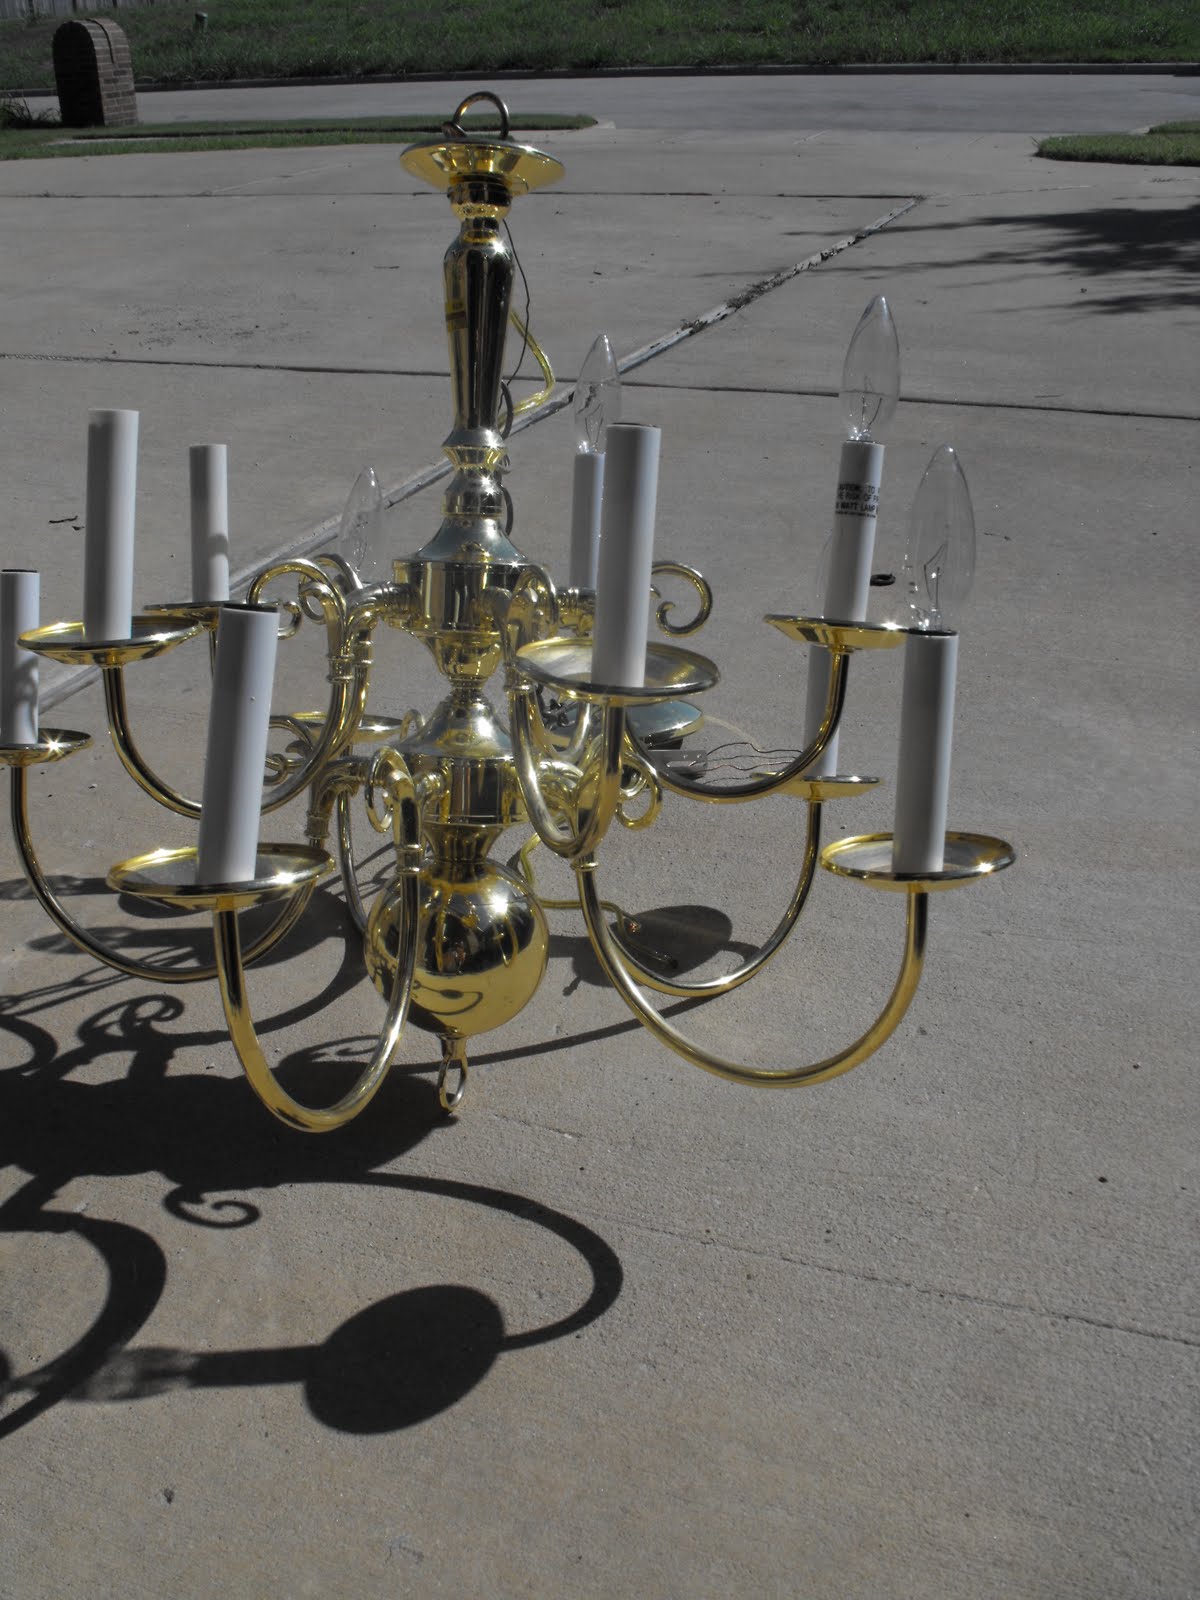
Isn’t it GREAT?!  I was SO excited!  I probably looked like a crazy lady hauling this huge light fixture through the store, and towing two little ones with me.  This chandelier is pretty big; 10 lights.


The steps I took to a girlie chandelier:


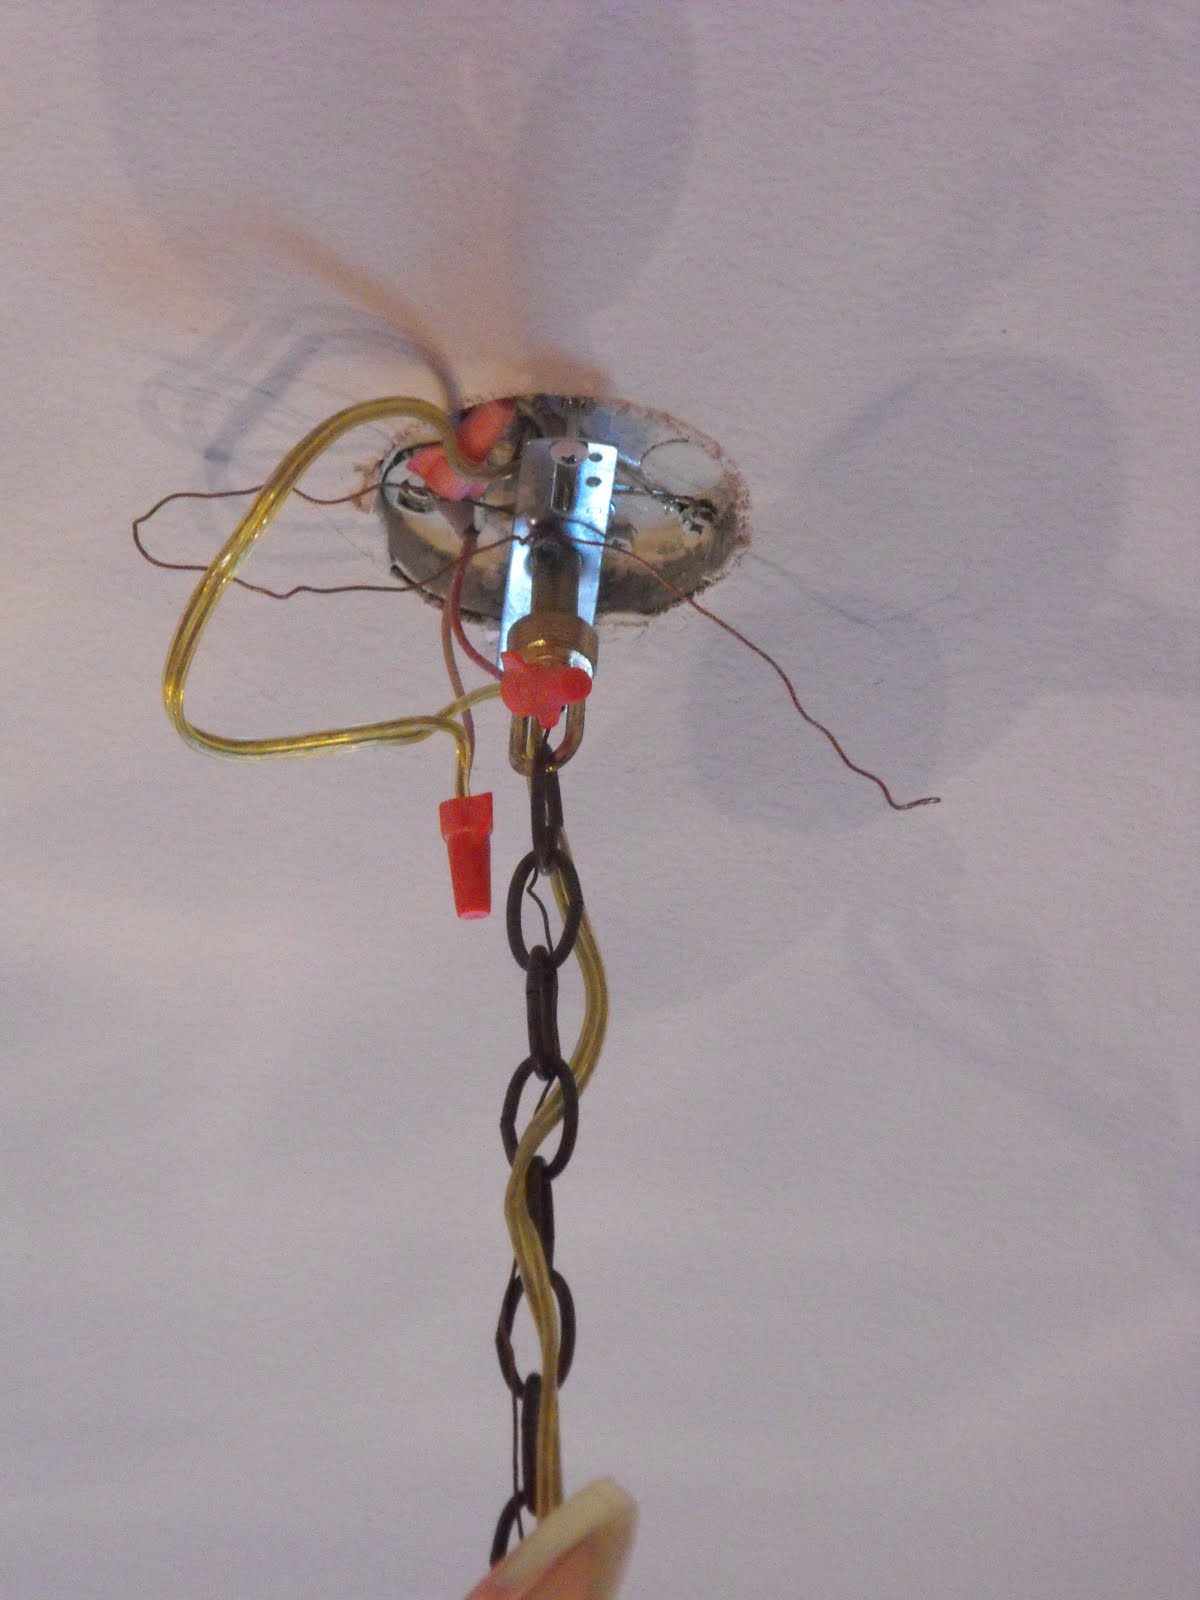
  • Do a “Pre Install” to make sure the fixture works!  You don’t want to spend time fixing it up if it doesn’t work! Light fixtures bought at a thrift store are always a gamble!

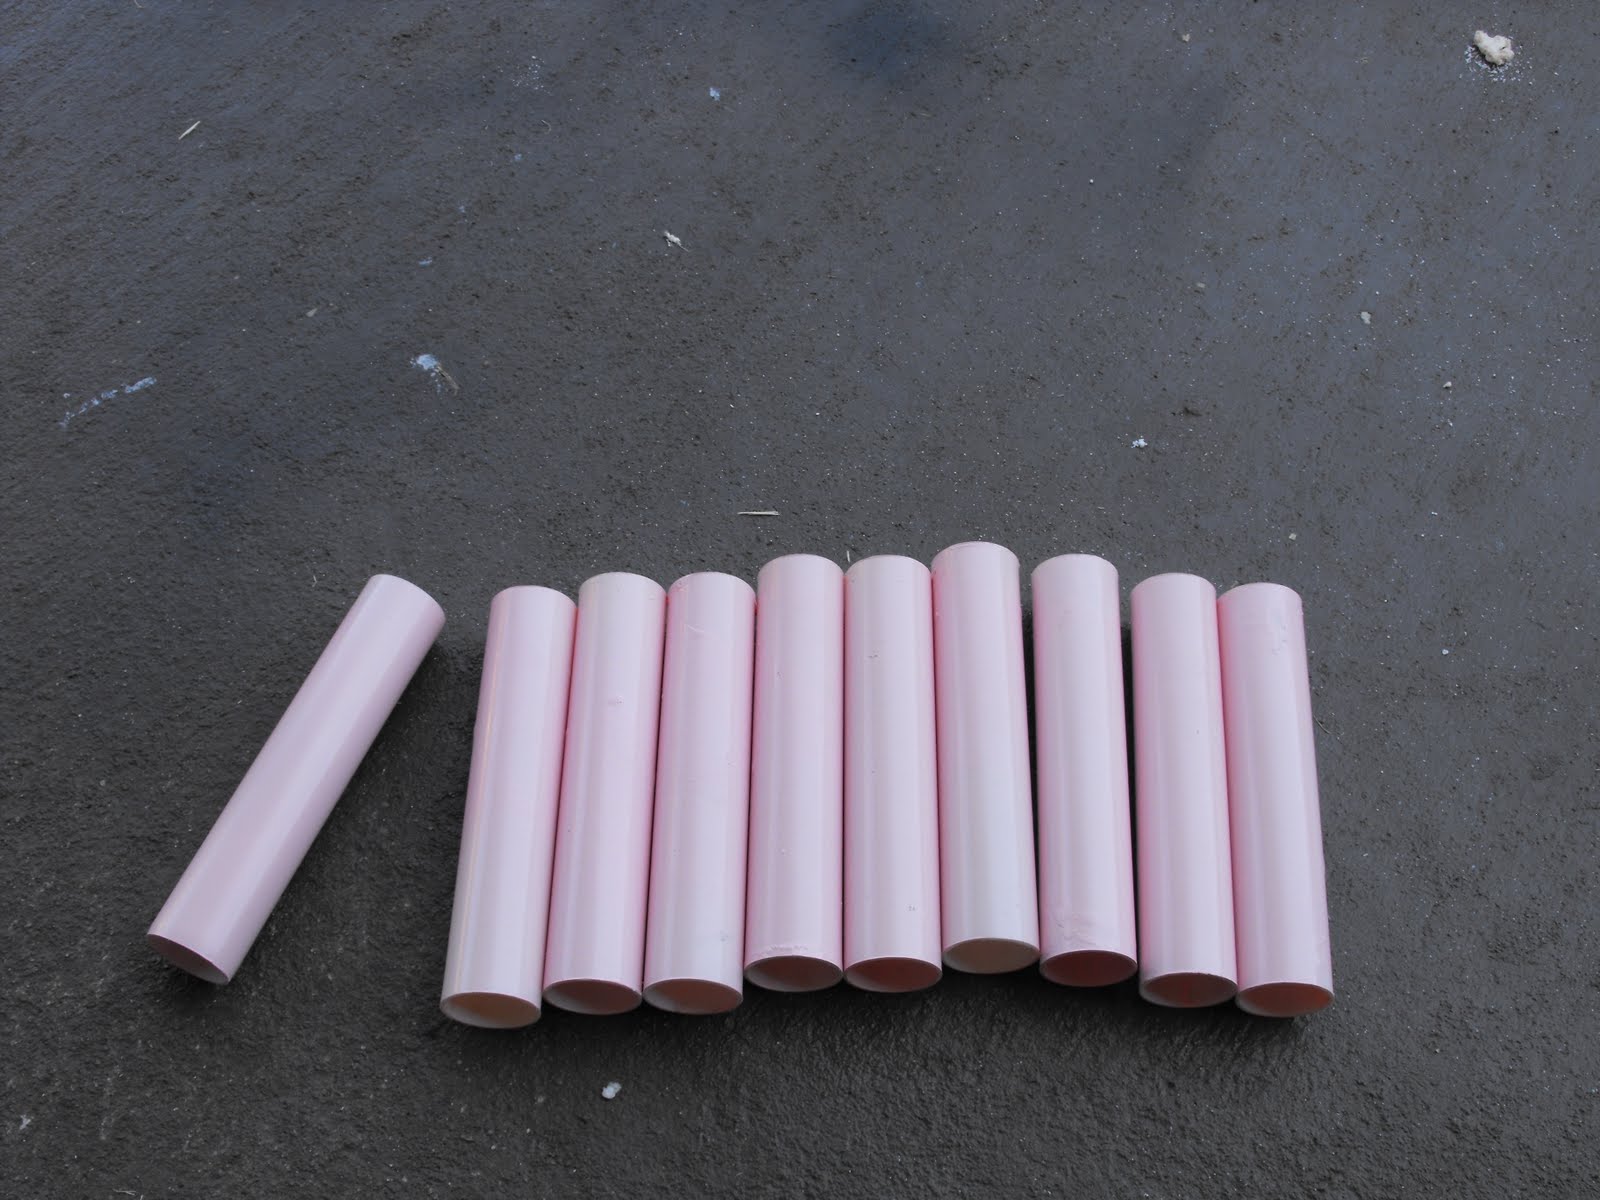
  • After you make sure it will work……Remove the white covers

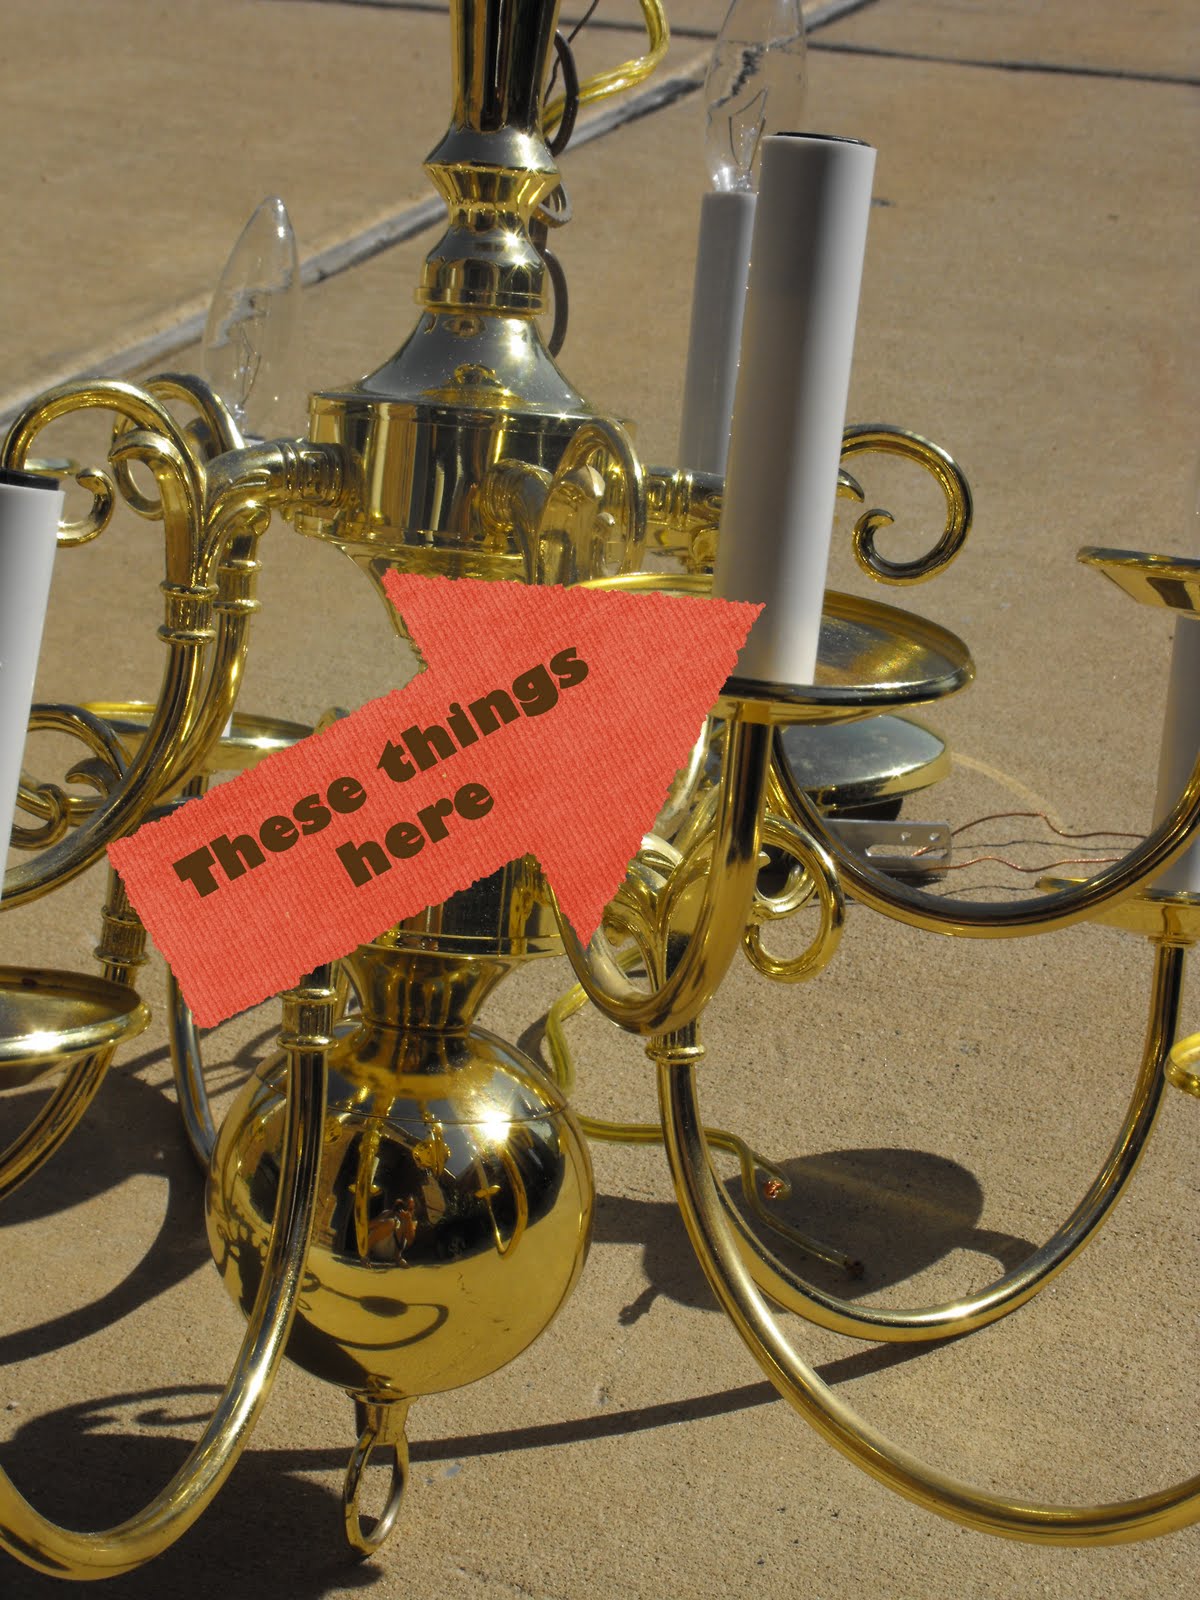
  • Tape over where the electrical stuff is:

  • Prime your chandelier (I chose Krylon primer.  Any primer will do)


  • Spray paint it.  I went with Krylon’s Ivory


  • I then painted the white light covers (Krylon Ballet Slipper)
  •  Make a cord cover to hide the top of the cord

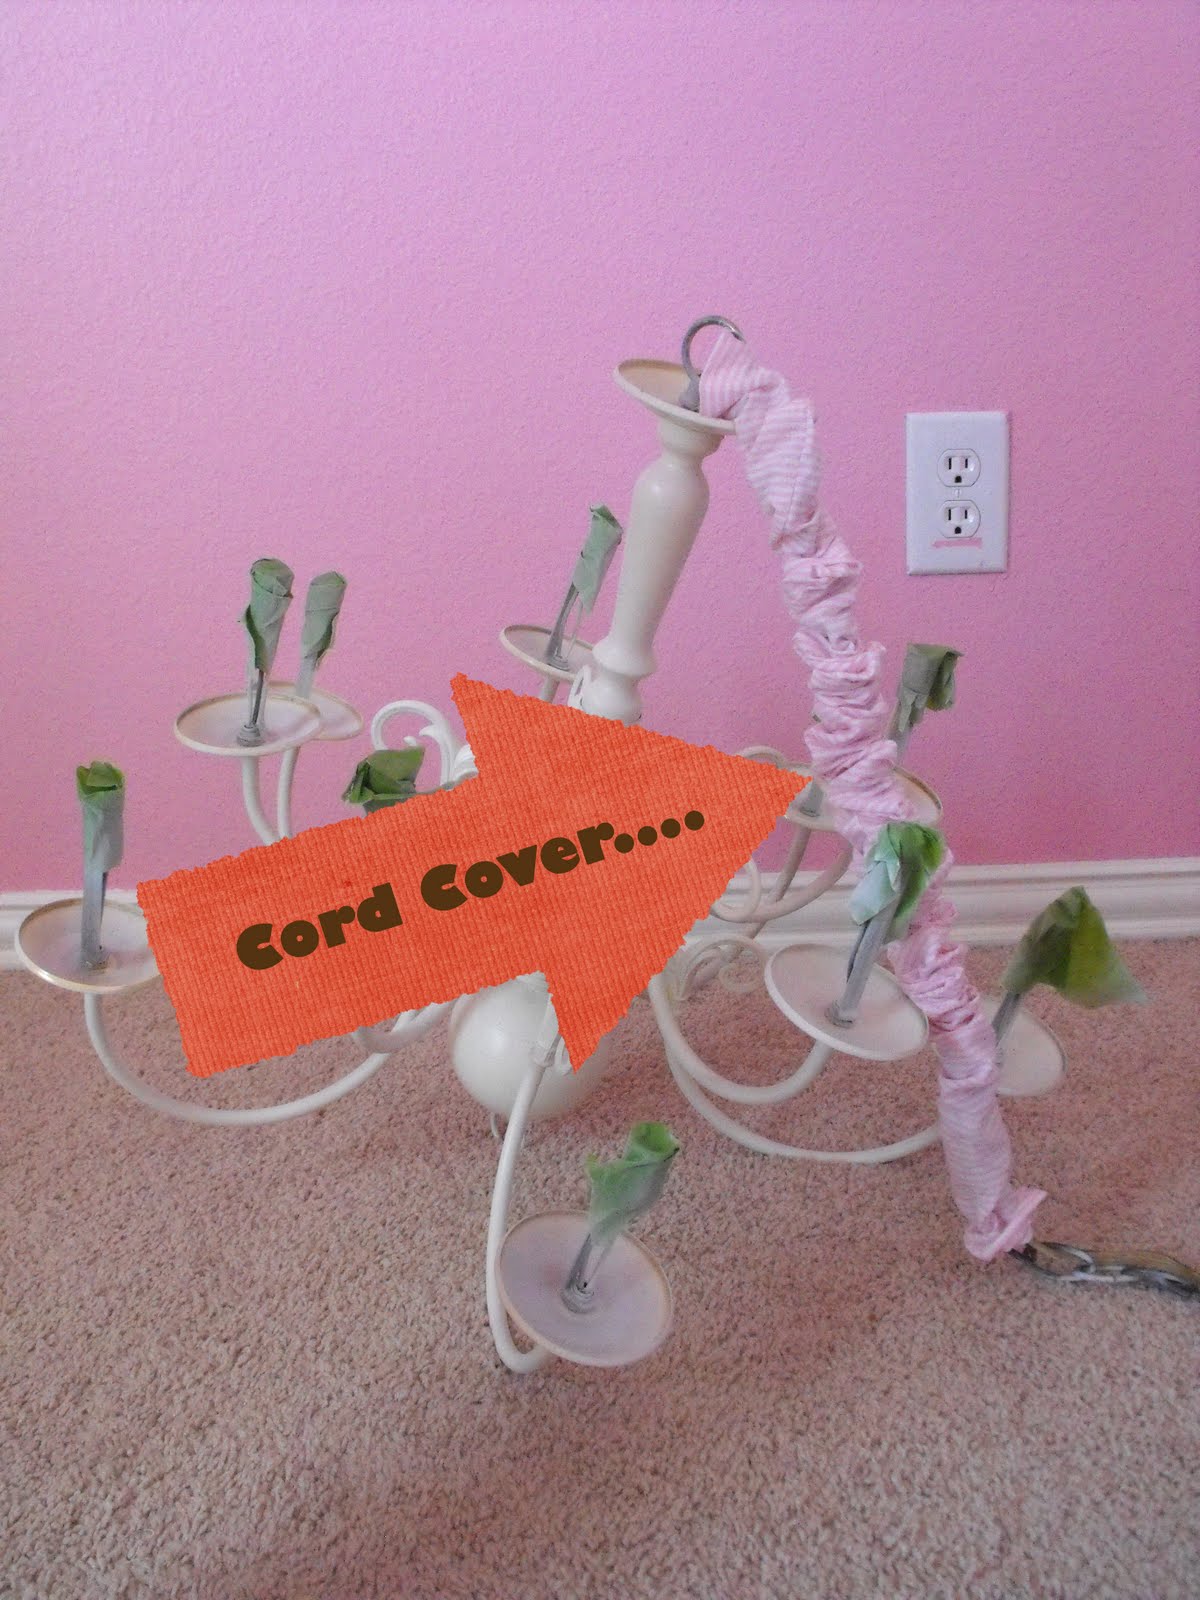
  • Reassemble the chandelier with the white covers, and cloth cord cover
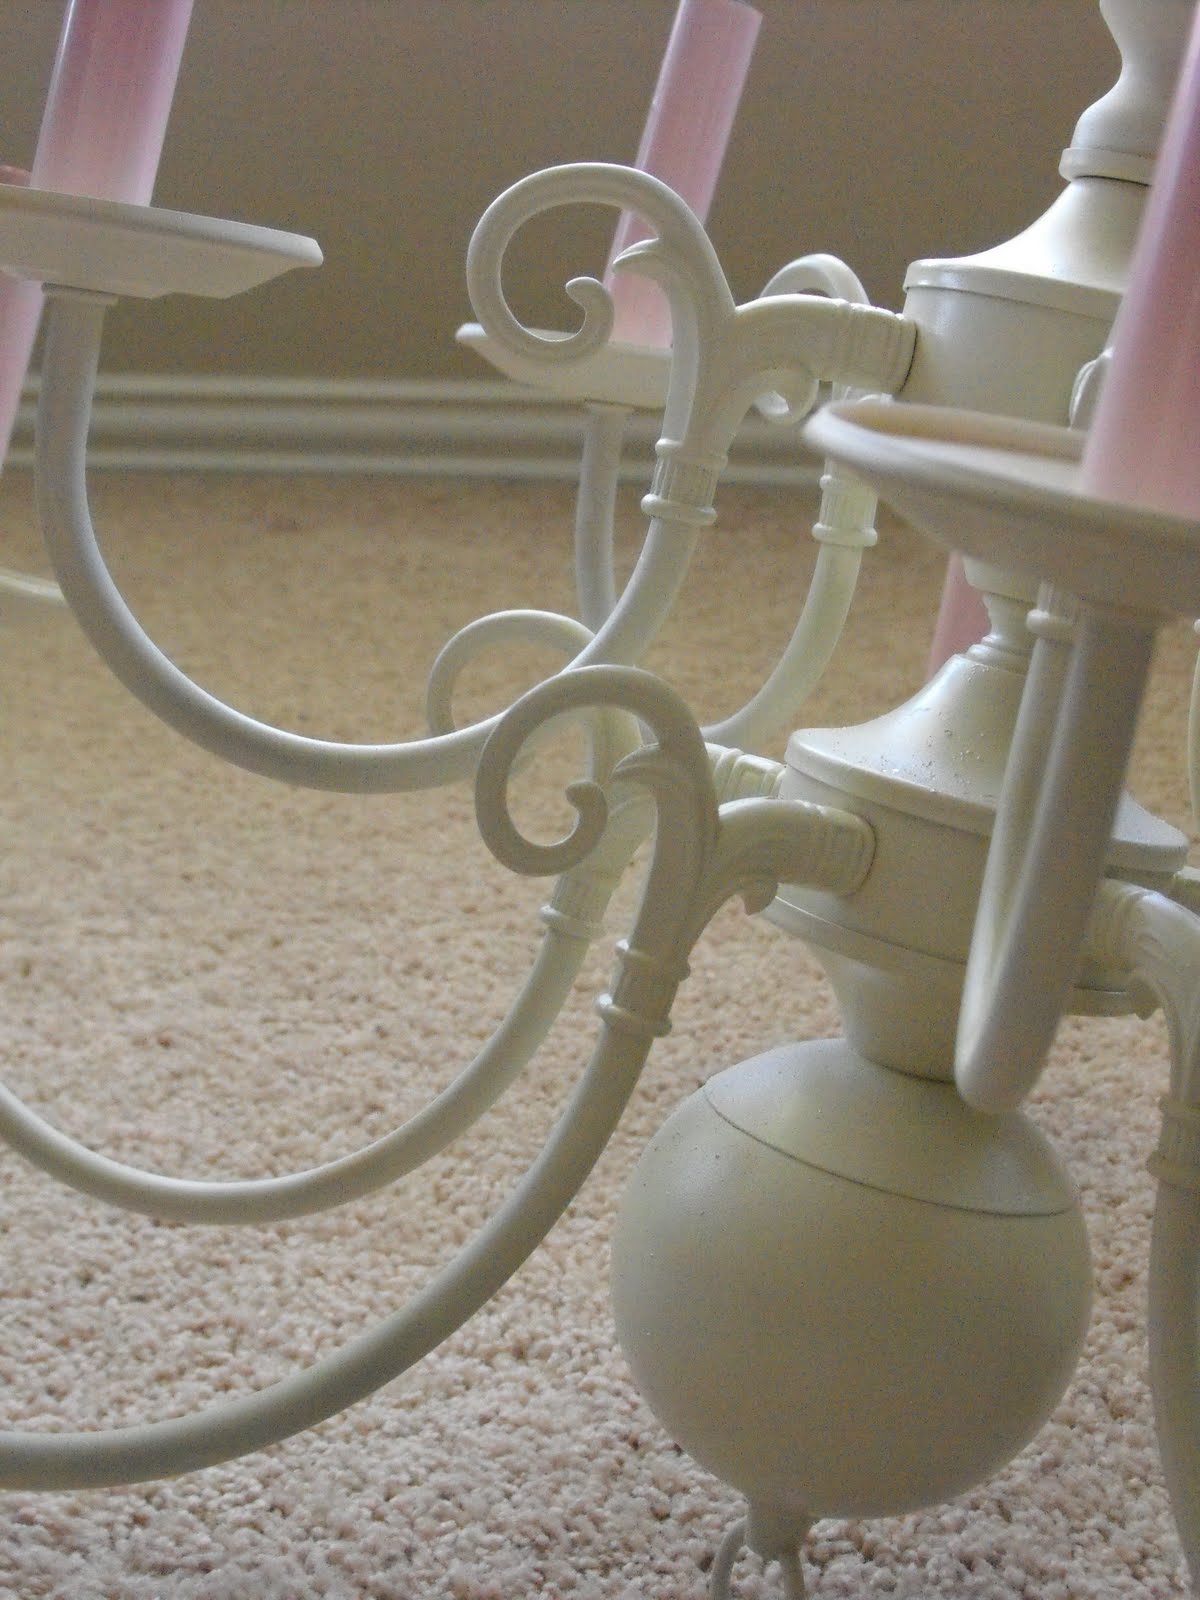
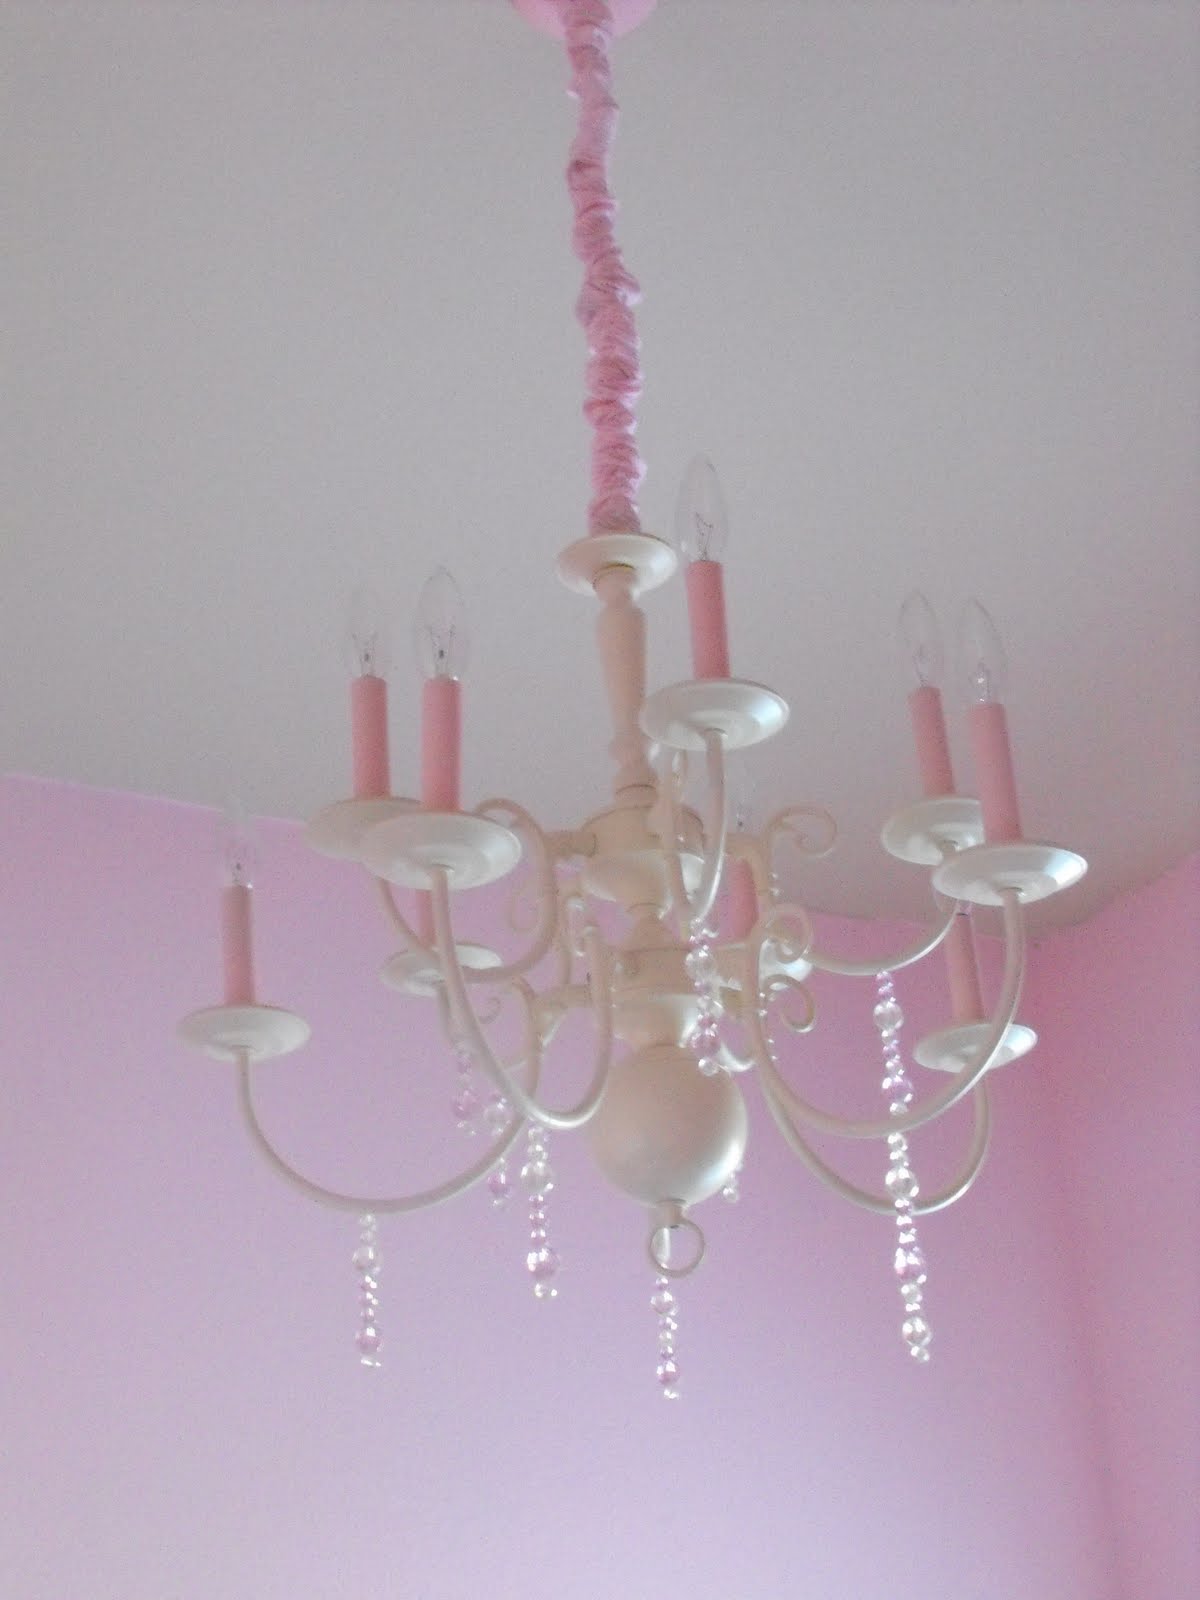
  •  I’m LOVING the contrast between the ivory chandelier, and the girlie pink light covers!

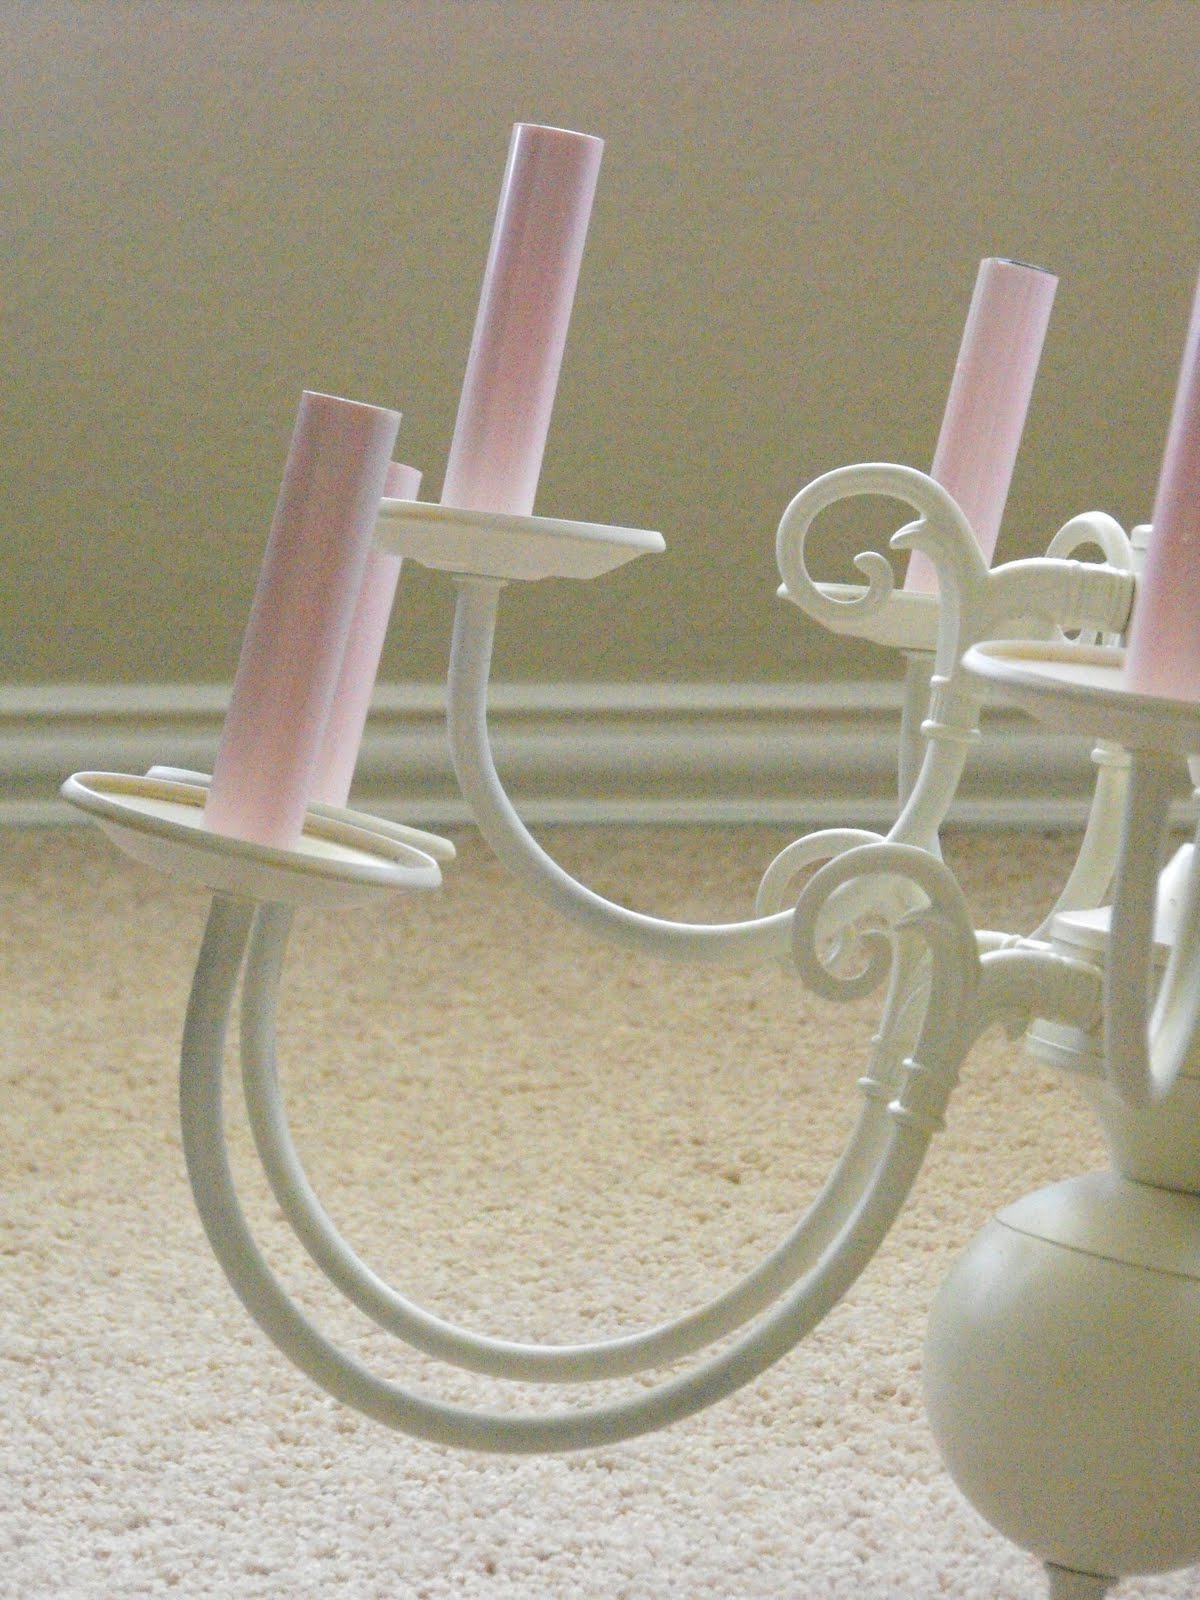
  • I also loooove the feminine details of this chandelier….so many swirlies
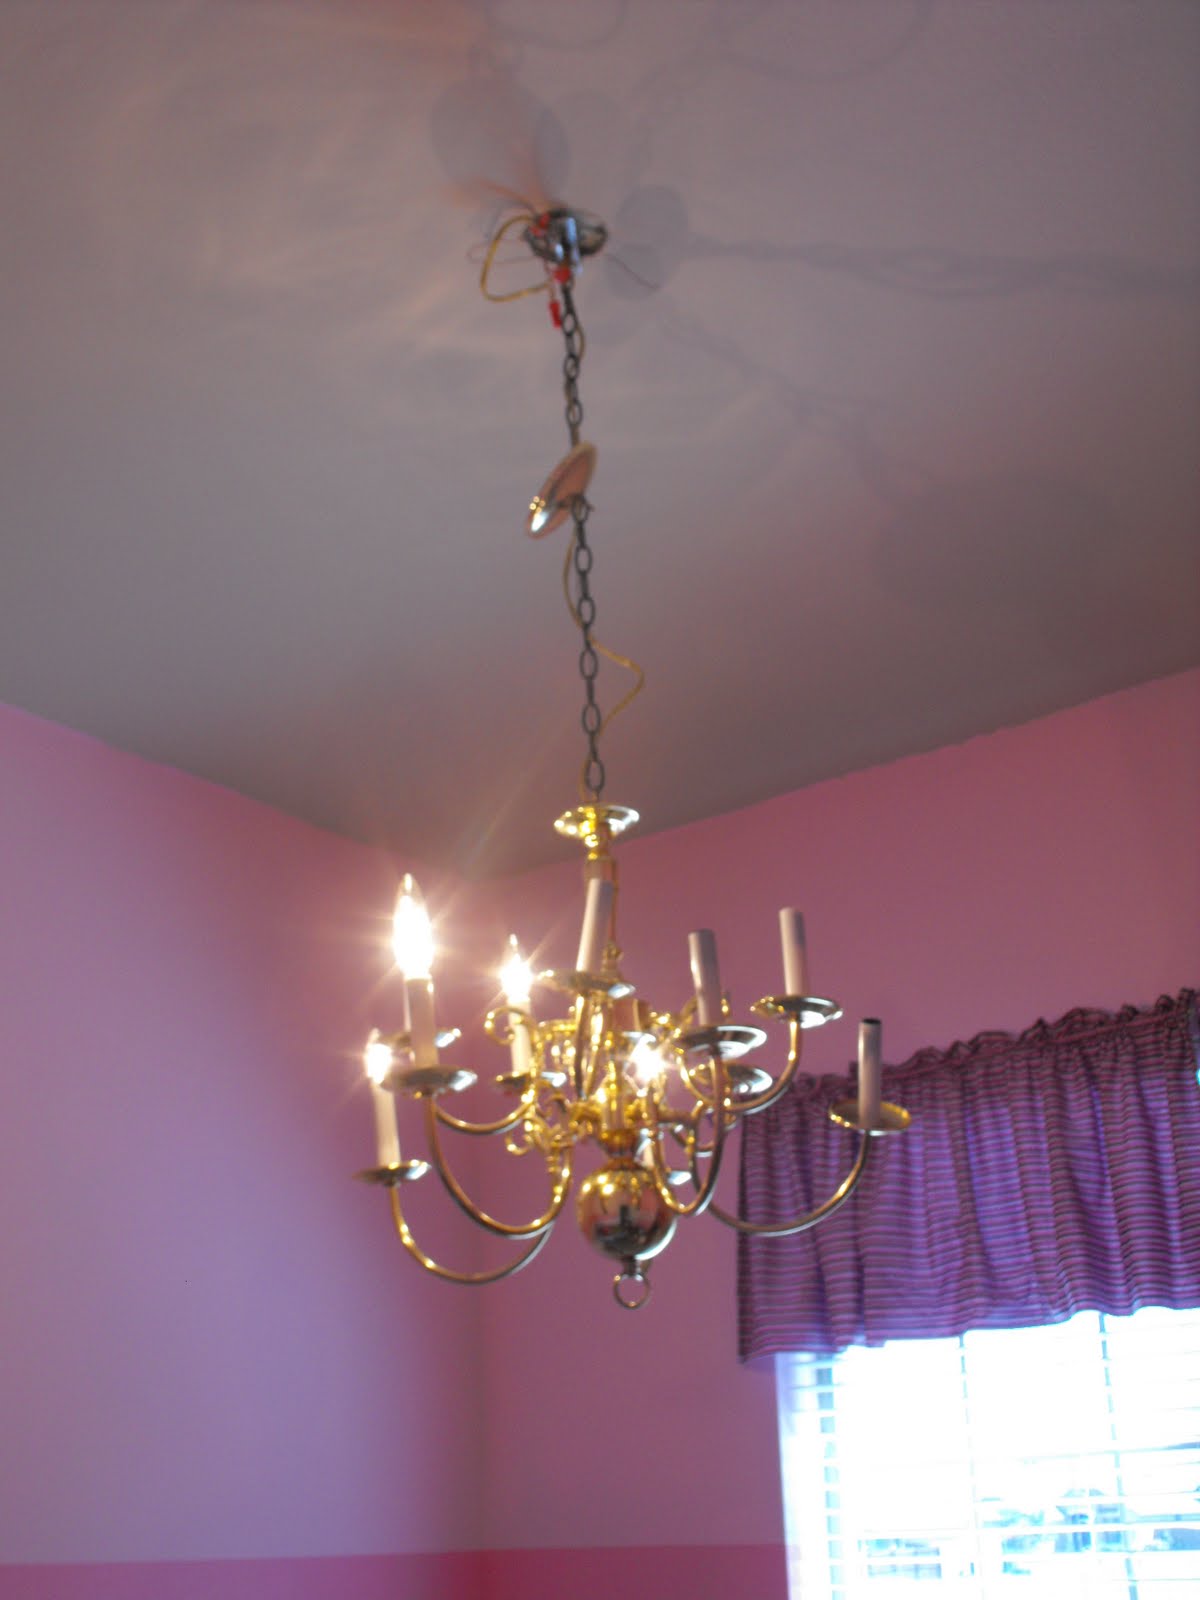
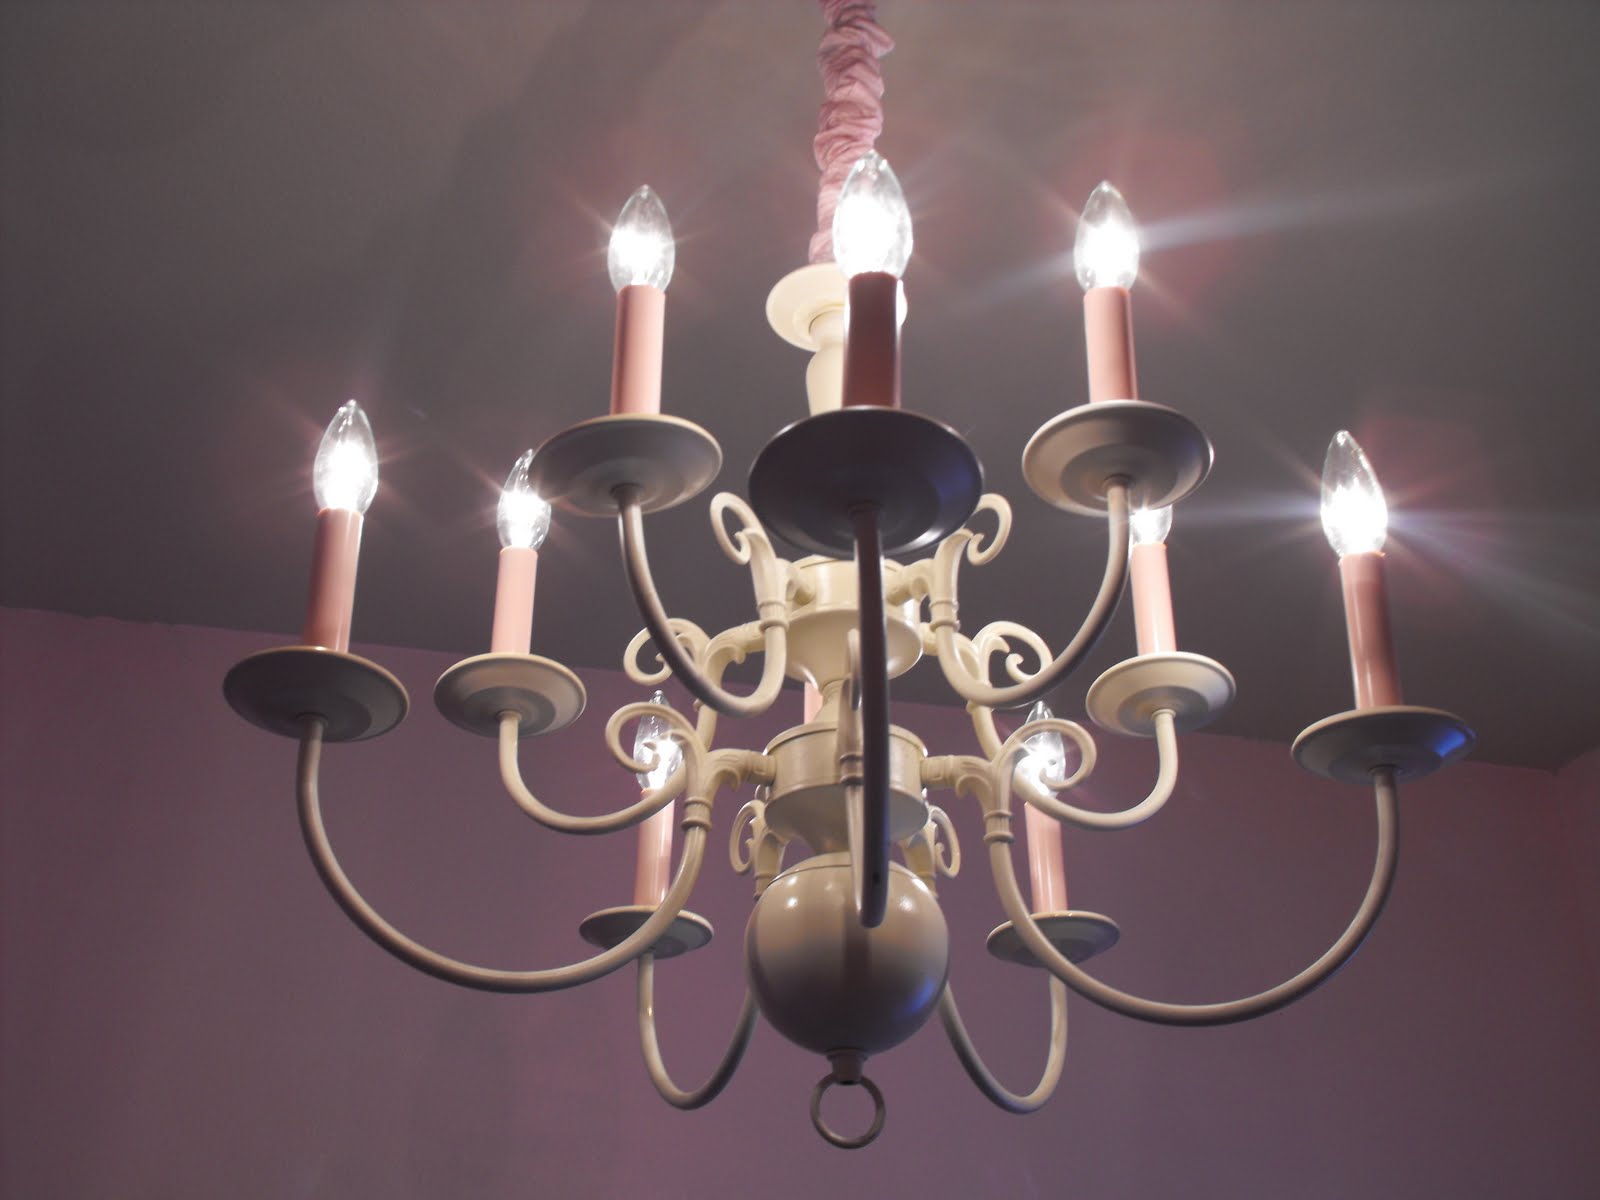
  •  Here it is, hanging up in Miss J’s room

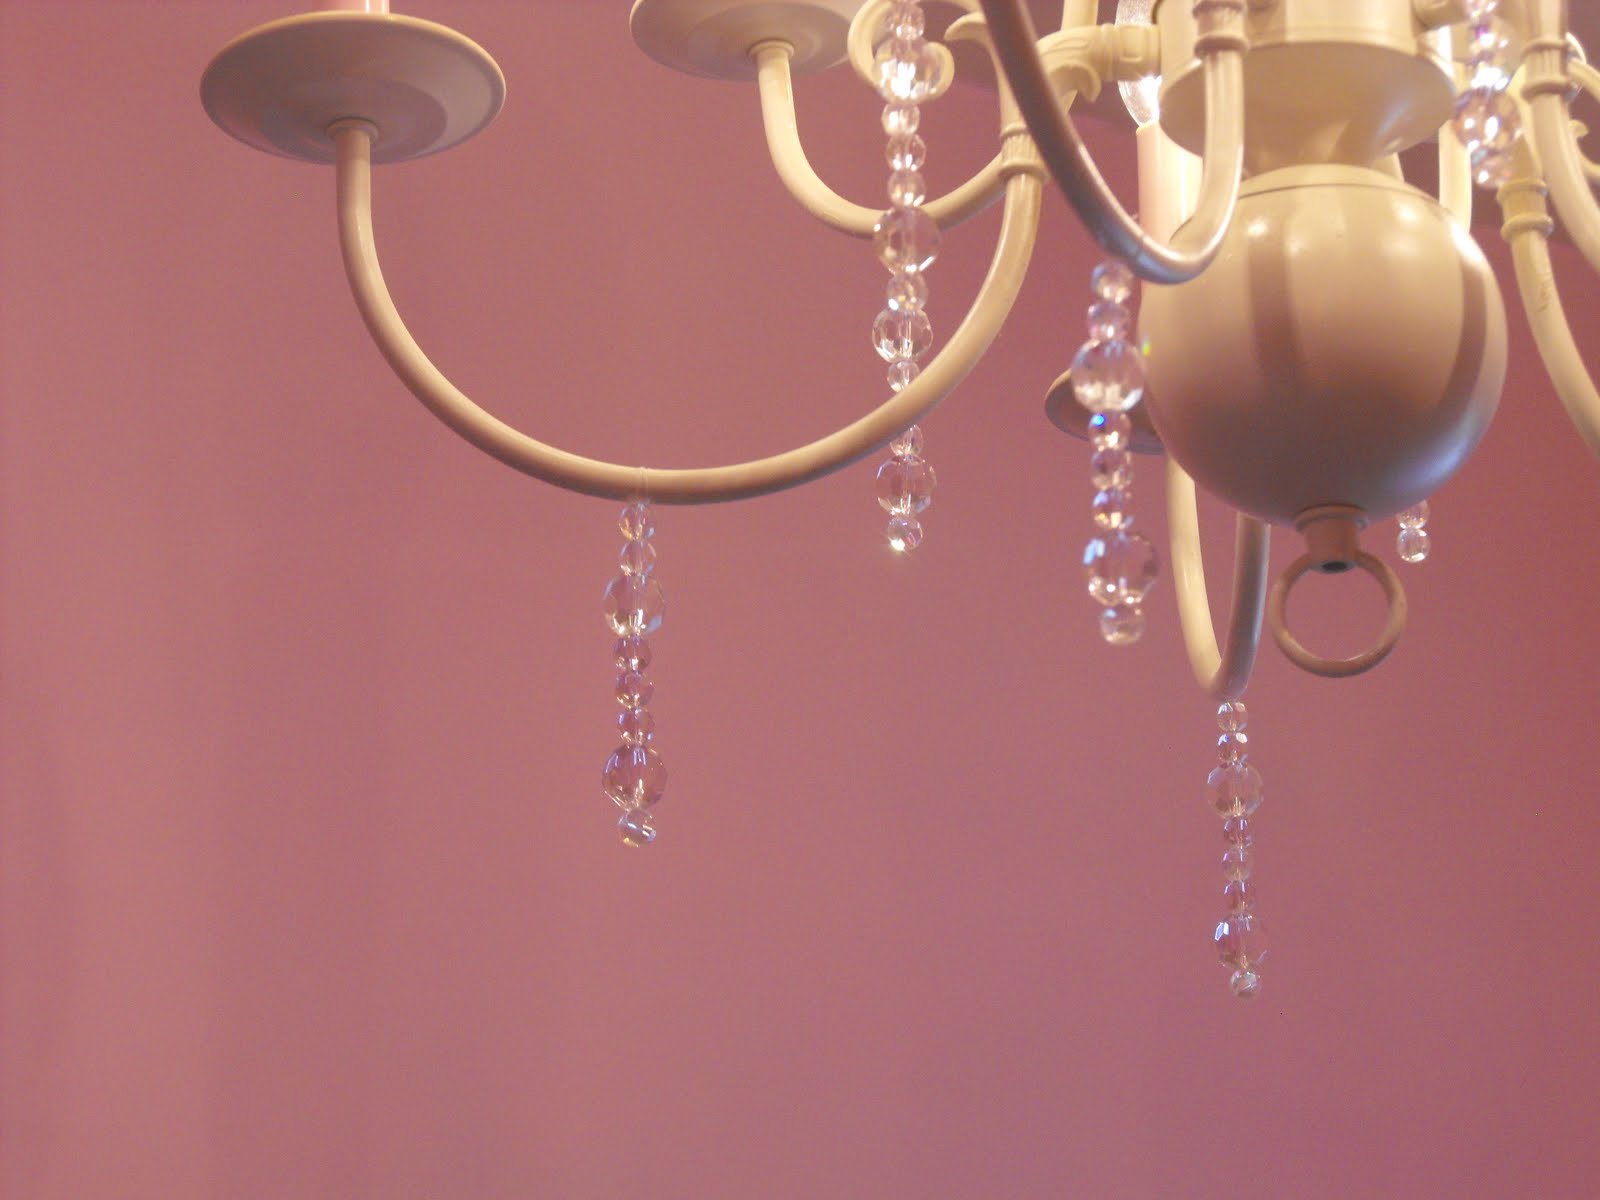
  • I liked it, but thought it was still missing something…..Crystals!  This thing needed some bling 🙂
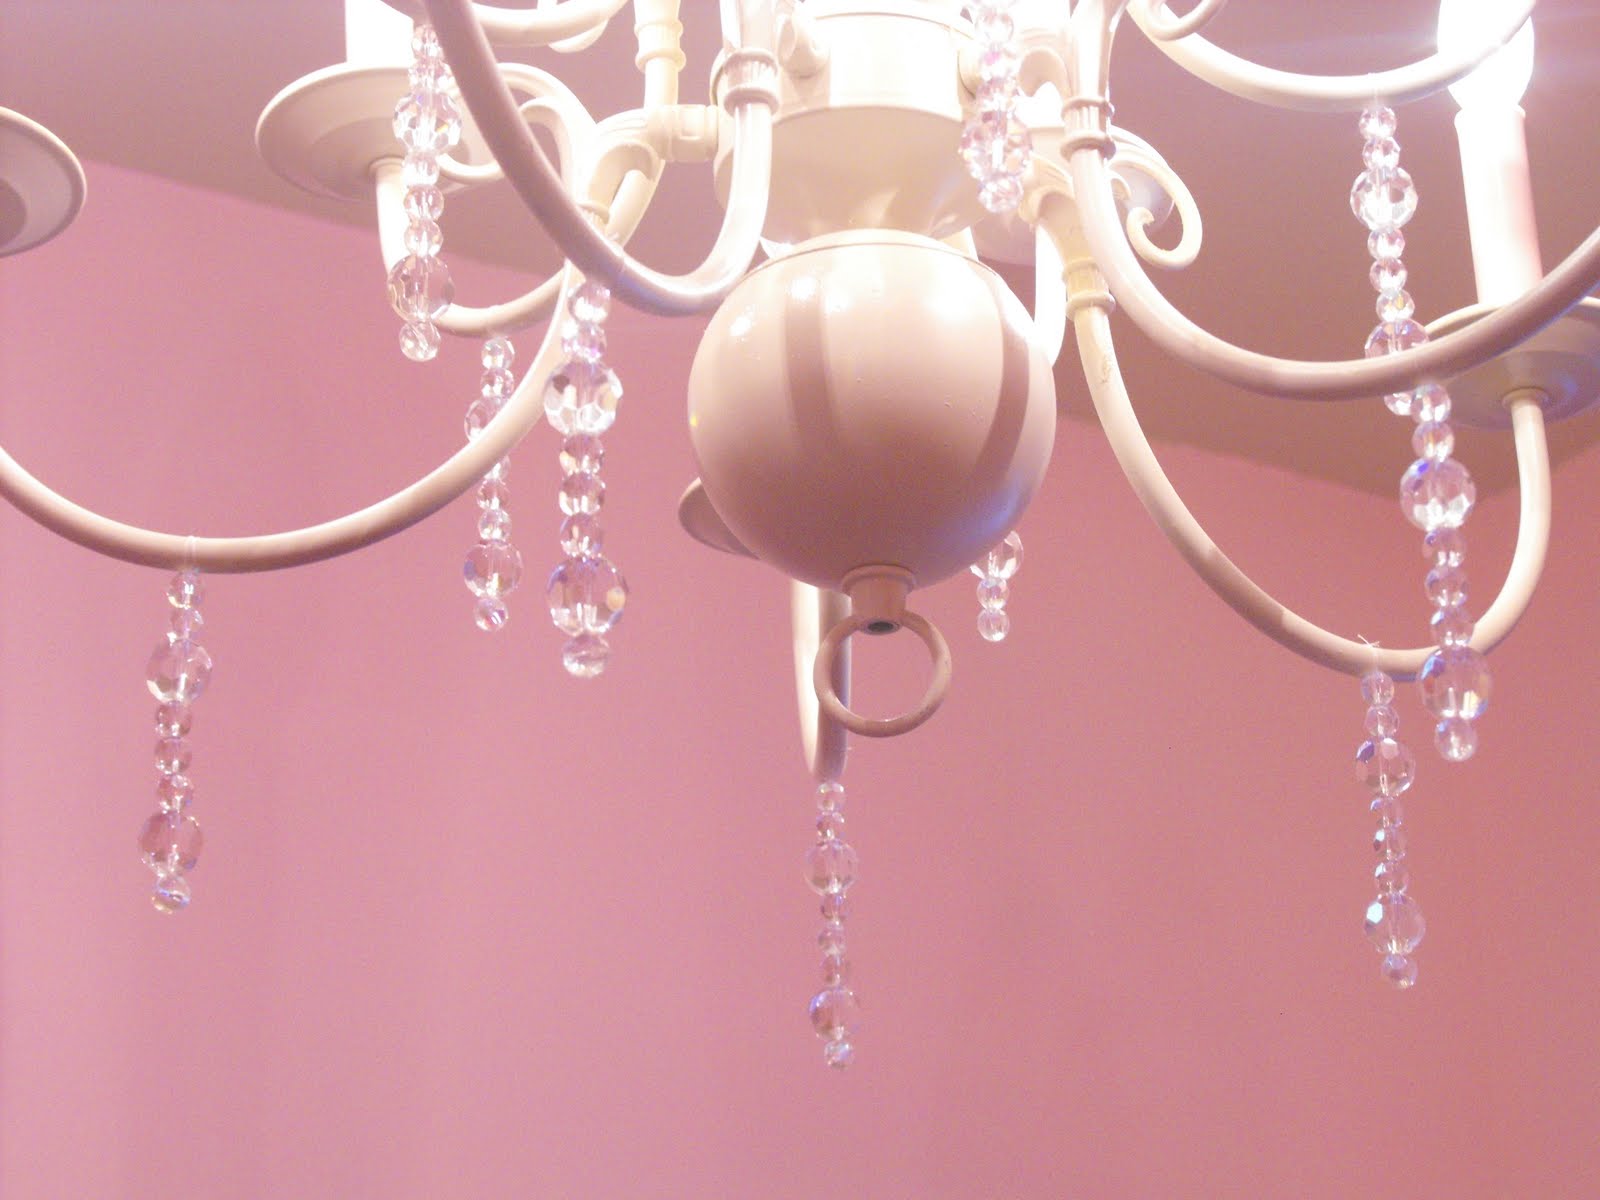
  •  Miss J really likes her “fancy lights” as she calls them.

Just another BEFORE


and AFTER


Isn’t that beautiful?
I love how sweet and feminine it is now!  I need one for my daughter’s room!
  • Facebook
  • Twitter
Remodelaholic is a participant in the Amazon Services LLC Associates Program, an affiliate advertising program designed to provide a means for sites to earn advertising fees by advertising and linking to amazon.com. Please see our full disclosure here.

Published: September 17, 2010Filed Under: Guest Bloggers Tagged: Before and After, Guest Bloggers, Lighting

About Cassity

Cassity started Remodelaholic with her husband, Justin, to share their love for knocking out walls together. She is an interior designer, wife, and mother of two. She and Justin have remodeled three homes from top to bottom and are working on their fourth. Making a house a home is her favorite hobby.


free email bonus

Kitchen Organization Boot Camp

Is your kitchen a zen paradise? It can be. I'll show you how.

Previous Post
Remodelaholic’s Anonymous 37: Blog Link
Next Post
Little Cabinet Remodel

Comments

  1. Christina says

    September 17, 2010 at 12:03 pm

    >Love it! SO girly and adorable!

    Reply
  2. rward1994 says

    September 17, 2010 at 12:10 pm

    >I actually have a chandelier like this that I took down and I couldn't bring myself to get rid of it. (It currently resides in my shed.) Now I know what I'm gonna do. Thanks for the inspiration!

    Reply
  3. Michaela Noelle says

    September 17, 2010 at 12:46 pm

    >So elegant! I just love it (:

    Reply
  4. lyndyjo says

    September 17, 2010 at 1:30 pm

    >That turned out so pretty. A dream light for a little girl's room.

    Reply
  5. Jen says

    September 17, 2010 at 1:45 pm

    >Beautiful!

    Reply
  6. Tara says

    September 17, 2010 at 1:48 pm

    >WOW! Talk about a before and after… I couldn't see a beautiful end product from that before shot, but I'm so glad you could!

    Reply
  7. ericka says

    September 17, 2010 at 1:59 pm

    >Adorable! I will be on the look out for a chandelier now! Thanks!

    Reply
  8. Centsational Girl says

    September 17, 2010 at 2:02 pm

    >Fabulous !! I too transformed a brassy chandy last week!

    https://www.centsationalgirl.com/2010/09/brassy-to-classy-my-free-chandelier/

    One tip: no need to physically install to test. Simply splice the end of a cheapo extension cord, twist the wires together, cover with electrical tape, then plug in. If the lights go on, you're good to go!!

    Kate

    Reply
  9. Vicki says

    September 17, 2010 at 2:23 pm

    >Oh so sweet! Love it! Great job!

    Reply
  10. [email protected] Not Just Paper and Glue says

    September 17, 2010 at 4:37 pm

    >These always intrigue me. I am going to make one one of these days. Yours is just too cute.

    Reply
  11. Jeni G says

    September 17, 2010 at 5:17 pm

    >adorable! we did one it turquoise for the dining room and i playing around with idea of doing one in apple green for my daughters room….maybe! Yours is so very sweet

    Reply
  12. Prior says

    September 17, 2010 at 9:33 pm

    >I love the pink on the candle part…How sweet! LEzlee

    Reply
  13. panamamama says

    September 18, 2010 at 9:18 am

    >That is adorable! My daughter's been begging for a chandelier and I keep seeing those at the Habitat for Humanity store wondering how I could revamp them. Awesome!

    Reply
  14. Terry says

    October 5, 2010 at 9:52 pm

    >We just found a faux brass chandelier at our local thrift store…..we painted it Ballet Pink and the "candle's" (light covers)white! I love the transformation!! My ten year old daughter and I added crystal beads hanging in long strands.
    Thanks so much for the inspiration!

    Reply
  15. Emily Ungar says

    December 7, 2013 at 2:59 pm

    I know I’m about 3 years late to the party, but I LOVE THIS. Can’t wait to try it this weekend–gonna repurpose the builder-grade dining room chandelier for a Shabby Chic laundry room. 🙂

    Reply
    • Justin says

      December 20, 2013 at 9:14 am

      Emily, we are glad that you stopped by. It’s never too late!

      Reply

Leave a Reply Cancel reply

We love hearing from fellow Remodelaholics, so let us know what you like about this and leave any questions below in the comments. If you have followed a tutorial or been inspired by something you have seen here, we would love to see pictures! Submit pictures here or by messaging us over on Facebook.
Recipe Rating


Hey there, I am Cassity! Nice to virtually meet you!

This blog is about DIY at its finest. We are obsessed with it and so are you, so while we're working and have nothing to show you of our own projects we show off yours. So submit your projects! More About Us…

Categories

  • Facebook
  • Instagram
  • Pinterest
  • RSS
  • Twitter
  • YouTube

Meet The Team

Privacy Policy

Remodelaholic is a participant in the Amazon Services LLC Associates Program, an affiliate advertising program designed to provide a means for sites to earn advertising fees by advertising and linking to amazon.com. Please see our full disclosure here.

© 2005-2016 Remodelaholic LLC, All Rights Reserved

  • Facebook
  • Instagram
  • Pinterest
  • RSS
  • Twitter
  • YouTube

Copyright © 2021 · Remodelaholic

  • Pinterest
  • Facebook
  • Twitter