Furniture Makeover by The Painted Hive
This cute little cabinet makeover is a stunning before and after, with a great solution for salvaging damaged wood veneer on top.
Read more about how to refinish wood furniture here and see more painted furniture makeovers here.
Refinished Cabinet with Papered Top
Hey guys! Once again I’m stoked to be back here at Remodelaholic to share another project.
If you maybe missed my previous guest posts, please allow me to introduce myself: I’m Kristine and I write The Painted Hive blog. I’m still a bit of a newbie in town so you’re forgiven for never having heard of me 🙂
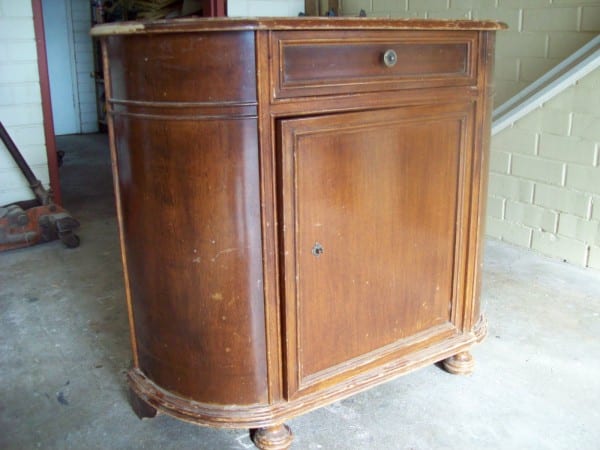
Anyways, I love a good furniture makeover and here’s one of my most recent ones. I found this cute little cupboard in the gutter.
Needless to say within a few minutes it had magically teleported itself to the back of my car!
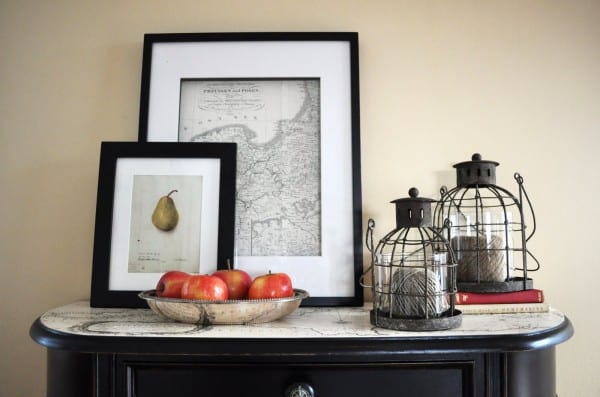
I knew that with a little love someone would eventually prefer this little guy inside their home so got to work painting the body in rich ebony before distressing and sealing it.
Learn more about painting furniture and what type of paint to use.
Well, that was the easy part though because here’s the main reason I imagine it was on the curb to begin with:

Someone had been waaay too zealous with an electric sander. Not only is there chipboard showing through the veneer, those lines you can probably make out are actually deep ridges.
Sure I coulda just filled, sanded and painted the whole top though I wanted to make a bit more of a statement than that. Enter….my good friend gift wrap.

I adore gorgeous paper and for some reason have always been drawn to vintage maps – which I thought would be just perfect for this project.
The sheet of gift wrap I bought wasn’t quite big enough to cover the whole top of the cabinet so I took it to my local printer who scanned, enlarged and printed a new copy for just $20.
Before I started hacking away at my gorgeous new print I first created an accurate template using baking paper which I could use as a guide when cutting it out.


This just helps protect the ink and stops it from running if the paper becomes too damp during the gluing or final sealing process. It also helps to stiffen the paper and avoid bubbling.
To attach the paper I applied a pretty thick coat of slightly diluted PVA to the cabinet then smoodged (hey, it’s a word) my map into place.
I then applied about five coats of satin clear sealer using a paint bush making sure to cover all of the edges really well.


To tie-in with the map theme I also created these cute little compass knobs using basic DIY decals. Anyone with a printer and standard copy paper can do this at home!
Simply paint a plain timber knob any colour you like then find or create a design on your computer and print it out onto normal paper.
(It’s best if the background colour of your design matches the colour of your knob so it blends in seamlessly).
Here’s my compass design if anyone wants to use it. Just re-scale it to the size you need

The process of attaching it to the knob is basically the same as that I used for adhering my map to the cabinet top.
Give your design a few light coats of clear matte spray, cut around it closely and then glue and smoodge (word of the day) it into place on your knob. Finish with a few coats of satin sealer to protect it and voila!
I loved making these and the possibilities are practically endless – you could use letters, numbers, symbols, little clock faces, cartoon characters…anything!
Seriously – LURVE it!
Anyways, before I sign off here are a few final before and afters just for comparison’s sake:


>wow~ beautiful! great tips.
Hi! Gorgeous cabinet! I am curious though–did you paint it with a lacquer after you re-did the top with the map? And what brand name did you use? Many Thanks, Amy
>That is absolutely ingenious! I adore it!
>That's amazing! I LOVE this idea. Thanks!
>Oh, so nice… Great idea about the knobs. Just became your newest follower.
>What a transformation! I wish I could find treasures like that to transform!
>I think this is one of my new favorite makeovers. The map is freakin hot!
>This cabinet is fabulous! One of the
best makeovers I have ever seen! Thank
you for the inspiration! Just goes to
show you what you can do with found furniture!
Jane
Flora Doora
>I love the map idea! I think I may just have to borrow that one since the piece I was refinishing didn't get out of the rain in time and the veneer is splitting in one spot. 🙁
Amanda (from: myramblings.ca)
>Oh my gosh! This is one of the most beautiful furniture transformations I have ever seen. Not only is the map top totally cool, the compass images on the knobs just tie everything together! Fabulous!
>GORGEOUS!! You did a fantastic job! The best I have seen in a long tme 🙂
>Another beautiful transformation!
>I love it! She did a fabulous job. The use of a vintage looking map and compass design on the knobs was quite ingenious!
~ Tracy
>what a great find, i adore this!!
lifeofperks.blogspot.com
>What an amazing job on such an awesome find!!!!
Your design is simply magnificent!!!
>That cabinet has such a beautiful shape that I can't believe someone threw it away! Well you did an AMAZING job with it! It is just beautiful! That gorgeous map print on top and the compass knob are just inspired. *applause*
>Wow, this blows my mind! I've always liked vintage maps as well, and this is just…incredible! I'm tempted to say it's perfect, even though nothing is.
https://downonsanford.blogspot.com/
>I love this idea!! I'm wondering why she didn't use Mod Podge?!? I've been dying to try that technique and have heard it's pretty foolproof – this is another ingenius take on it, though!!
>WOW! That is an AMAZING transformation!!! And to think it was FREE! So impressed.
>This is gorgeous! I want to find a piece like that! 🙂
>now thats what i call a transformation…..amazing