Inexpensive Board and Batten Wainscot How To
Find out how you can add a wainscot to a room like Rachel did: inexpensively and beautifully. Wainscot how to.
Submitted By: Our Small-Town Idaho Life
My name is Rachel and my husband and I are building our first home ourselves here in beautiful southeast Idaho. Because my husband is a builder and we save on labor costs, we have been allowed to add pretty little details like this wainscot to it.

So, here’s a tutorialon the board and batten wainscoting…using old pictures already edited on my computer.
We always loved this look, but felt it was more costly than we wanted for all that extra wood. Then we found a cheaper way that requires a lot less, but looks just as nice.
We installed it in the front room, entryway, and the maser bedroom. I’ll use the front room to demonstrate the process.
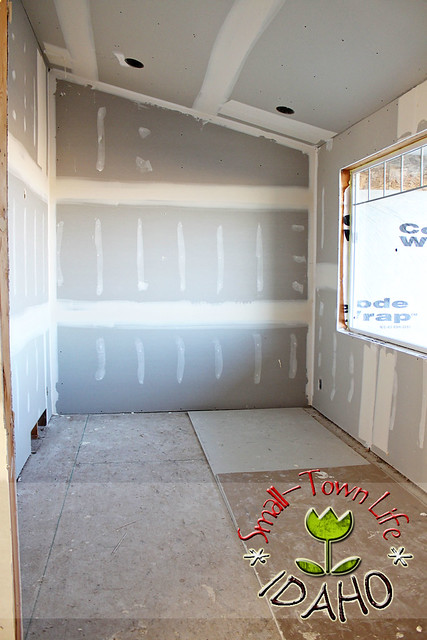
Here is the sitting roomwith bare drywall and mud. If you notice, there is no texture yet.

When we did apply the texture,we only hit the areas of the walls above where the wainscot would be. The bottom section was left smooth. This would create a contrast between the two and mimic the look of flat wood panels (after being painted).

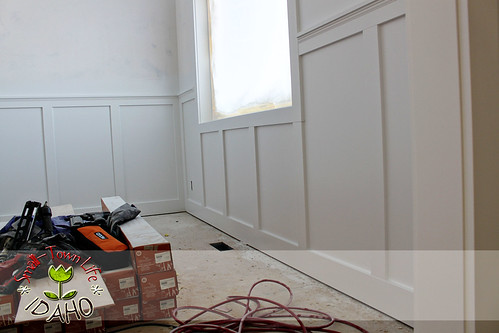
1.)Using a nail gun, 1×6 baseboards were installed along the bottom of the walls.
2.)Next, 1×4 battens were set vertically on top of the baseboards and nailed into place about 20 inches apart.
3.)1×4’s were then attached in a horizontal line above, parallel to the baseboards to build shadow boxes.
4.)The shadow boxes were capped with 1×2’s that created a shelf-like look at the top.

Here is a closer lookat the 1×2 wood at the top.

Finally, a piece of decorative moldingwas installed just below the “shelf” of 1×2’s with a pin nailer.
.
Then there came the exhilarating (not!) taskof filling in every blasted nail hole with putty, sanding them down, and caulking every blasted seam in prep for paint.
.
My only advice at this pointis to enlist every family member, friend, neighbor, pool guy, mail man, etc., you can find to help with this. If you have as much trim as we do, you’ll be glad you did.
Using a sprayer,semi-gloss white paint completely transformed the look. Even without using any flat paneling, the wall in each shadow box appeared smooth and seamless with the battens.
I wish I had a picture of Andrewwhen he was finished with this. White brows and lashes just aren’t his best look.
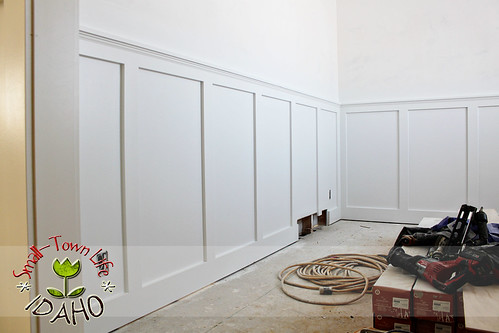
If I didn’t witness the process myself,I never would have assumed the bottom section was actually the wall rather than wood.
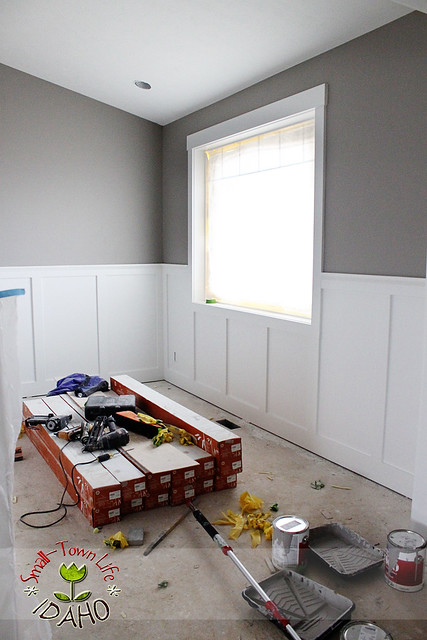
I love the finished, contrast-y lookof the painted, textured wall above the clean, white glossiness.
Not using the real wood panelingsaved us an estimated $800-$1,000 through the entire house.

Just for fun, here’s a beforeof the entryway…

…and an after!
Check out these similar projects as well!


That looks amazing!!!!! I would LOVE to know two things: What color is the paint on the upper half of the wall? And what is the finished height of your wainscoting on the wall? Love, love, love!!!
The paint is Sherwin William’s Pussywillow. It’s my favorite of all the colors we chose. The height is about 50 inches.
I have always loved the timless look of wainscotting and you have done a perfect job recreating it in your home. I look forward to seeing more of what you do. Beautiful!
Regina
Hello, Love it! What paint color did you use on the walls…. I am sure you put it but…. well I am going to play my man card if it isn’t right in front of my face….Just kidding!
Sherwin Williams Pussywillow
Thanks for the feature!
That looks absolutely gorgeous! And it’s so similar to what we did here:
https://sixteenfourteen.weebly.com/2/post/2012/06/reston-remodelista-aimees-powder-room.html I’m hoping to convince my husband to do the hallway next. Great work!!!
This is beautiful. Thanks for sharing.
Thanks for posting this! Great project and awesome photos! I shared it and pinned it too. You are wreak help to us! We sure appreciate it.:)
Such a beautiful, professional job.
Awesome Job!!! What did you do if there wasn’t a stud behind the vertical boards? Did you just nail into the drywall?
Do you mind me asking what color you painted the top half of your walls? I love the contrast of the dark/white on your walls and your color is a great warm grey.
Hi there, love the entry! Where did you get the door?
Hi Debbie, This was a guest post, so if you’ll head over to the guest’s blog (linked at the top of the post) then you can ask there and hopefully they have an answer for you. Thanks!
Rachel, The finished room is beautiful.
I am getting ready to do my new Grand-daughter’s room like this.
I see where you used Semi-gloss paint on the board and batten wainscot.
Did you use the same finish on the top part of the wall…Semi-gloss?
Hi Cherie! You’ll have to click over to Rachel’s blog (linked up toward the top of the post) to ask her there — I’m not sure she monitors the comments here very often. Sorry I can’t be more helpful!
Where did you get your door??? I’ve been searching for something like that!!!
Hi Margie, this was a guest post so I’m afraid I can’t answer your question, but you can click the link at the top of the post and ask there. Thanks!
love the front door….. Where did u purchase it ?
Hi Janet! This is a post from a guest so I’m not sure, but you can try asking at their site (linked up at the top of the post). Thanks!
Where did you buy the batten? Did they come already cut to 1×4 and 1×6 or did you have to cut them? If so, how long do they come?
Thank you. Beautiful job. Beautiful job btw
Love this! Exactly what I am doing to my dining room now. How far apart did you space the vertical 1×4’s? I am doing either 30″ or 23″ based on how it will space evenly throughout the room. I like how the spacing looks here.
Thanks!
Like what you did. Looks great. What type material did you use for wainscot?
Hi Bobby – if you read the steps, Rachel tells how they used 1×6, 1×4, 1×2, and molding. The wall was just drywall left untextured — so no extra board, just battens.