Remodelaholic

Let us help you remodel your house from builder grade to BEAUTIFUL! DIY projects that reduce, reuse, recycle, repurpose, and remodel on a budget!


  • Home
  • About Us
    • About US
    • Contributors
    • Facebook
    • Pinterest
    • YouTube
    • Instagram
    • Disclosure and Advertising
    • Contact Us
  • Shop
  • Project Ideas
    • Our Houses
      • Birch House (current projects)
      • Canyon House
      • Park House
      • Downing House
      • Logan House
    • Free Project Plans
    • All projects
    • Barn Door Baby Gate
    • Dutch Door
    • Framing A Wall Mounted TV
    • Indoor Playhouse
    • Beach Themed Living Room Design
    • Chicken Coop Building!
    • Computer Desk
    • Computer Desk Plans
    • Custom Newel Posts and Stair Remodel
    • Family Room Sneak Peek
    • Headboard Tutorial
    • Living Room Progress
    • Mood Boards
    • Scrabbled Family Names
    • Pets
  • Design By Room
    • Bathrooms
    • Landscape
    • Kids Bedrooms
    • Kitchen
    • Living Rooms
    • Laundry Rooms
    • Master Bedrooms
    • Mood Boards
    • Office
  • Holiday
    • Christmas
    • Halloween
    • Patriotic
    • Easter
    • Fall
    • Saint Patrick’s Day
    • Thanksgiving
    • Spring
    • Valentines Day
    • Winter
  • Crafts
    • Printable
    • Art
    • Paper Crafts
    • Kids
    • Fabric Crafts
    • Decorate
  • Recipes
    • Appetizers
    • Beef
    • Beverages
    • Breakfast
    • Chicken
    • Desserts
    • Dinner
    • Fruit
    • Healthy
    • Holiday
    • Lunch
    • Main Dishes
    • Salads
    • Sandwiches
    • Sauces
    • Seafood
    • Side Dishes
    • Soup
    • Vegetables
  • Videos

The Next Step, Staircase Remodel Project

Written by Cassity

  • Pinterest
  • Facebook
  • Twitter

Sorry I am so slow with posts…. honestly it drives me crazy not having the time to do it, but hopefully when I grow up I will be really good at it!  (that is IF I ever grow up…hum)

The last time we talked about the staircase remodel we had removed the railing and all the carpeting, and begun to redesign the newel posts.

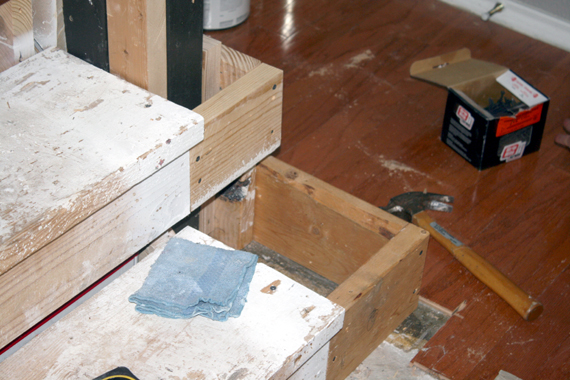
So let’s show you what we did next.  We were left with this:


If you remember our plan rendering, the bottom two stairs are wide to help make it feel more custom and not so builder grade.  Which means we needed to build them out a bit.  Well, that translates to a longer “Honey Do List”.
 
Poor man, I am not sure he was planning on a life of servitude when he asked me to marry him.  (good thing he actually likes this kind of work!) THANK YOU HONEY!

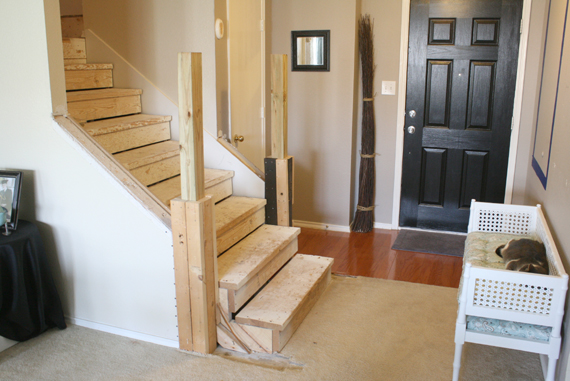
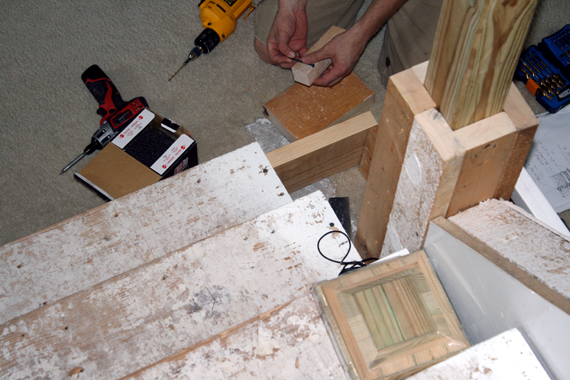
When working on these sort of projects, we usually put the babies to sleep, grab a treat, and a bunch of scrap paper and wood so that we can discuss (in 3d) how we each see it working, and what looks right.  We move these little scraps around, do a lot of measuring, discuss a little, draw a lot of little sketches and then when we are happy and the project gets on it’s merry way!

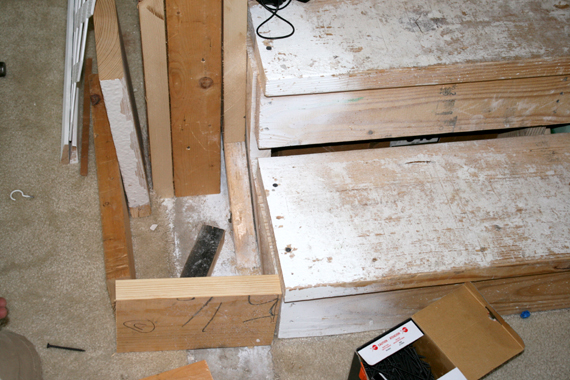
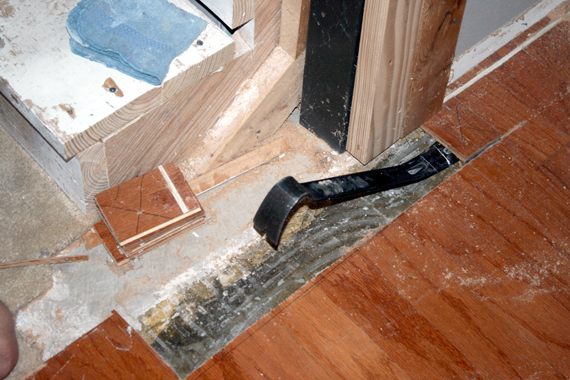
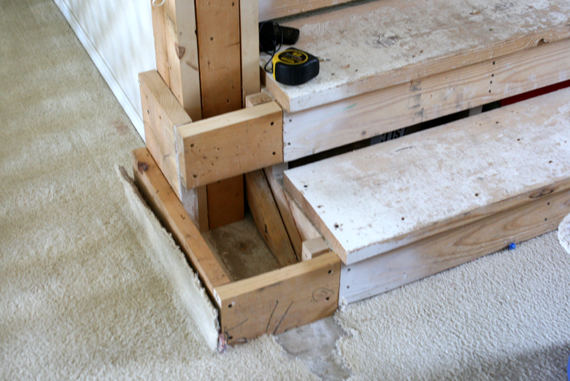
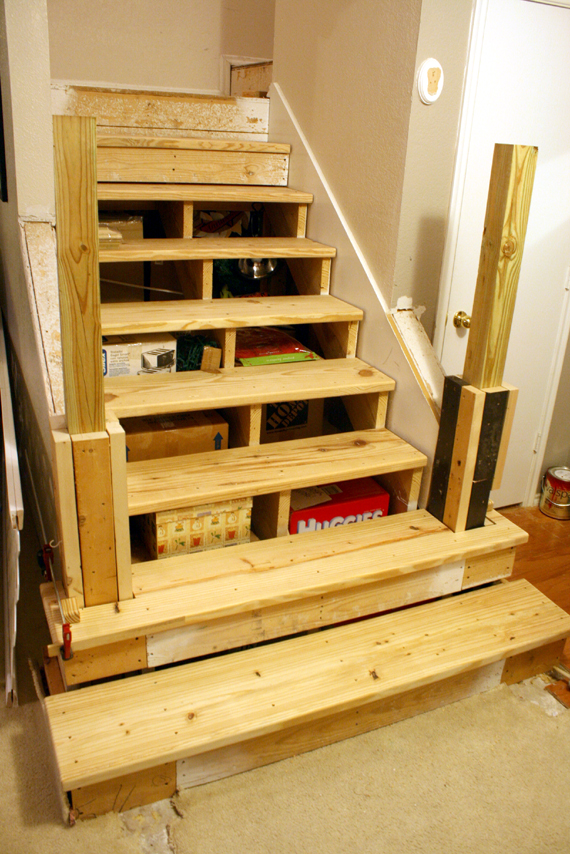
Once the pieces were all measured and ready to install, we (okay, maybe not we exactly just Justin) cut the flooring out of the way.  Then nailed and glued the new stairs supports in place.


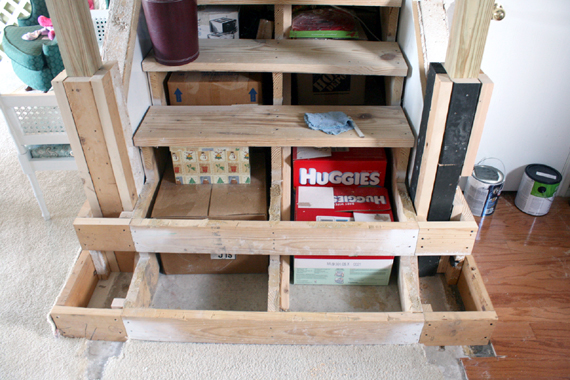
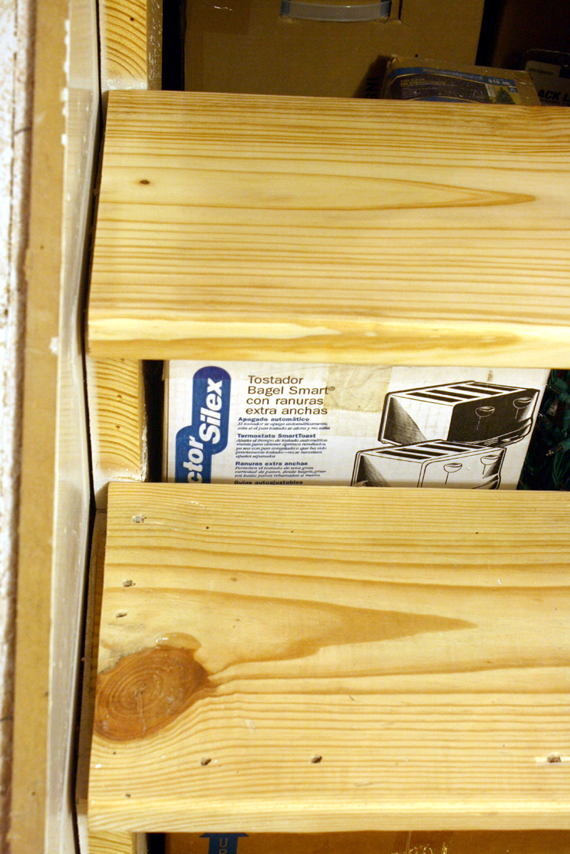
We also took off all the stair treads one at a time and sanded them, to get all the junk off- namely the heck-a ugly plaster texture that landed on the stairs from the walls- (my love for this house would be so much more if it didn’t have that darn texture on the walls (and everywhere else it landed…urgh!)

Anyway, while the stairs were off we also routed the front two edges, to give them a prettier nose.  Then we put them back down temporarily held in place with a few screws (there were still a few problems that needed  to be addressed- that I will show you next time)

Like all the Christmas and other holiday storage boxes under my stairs?… No I didn’t spend money on pretty boxes, darn!


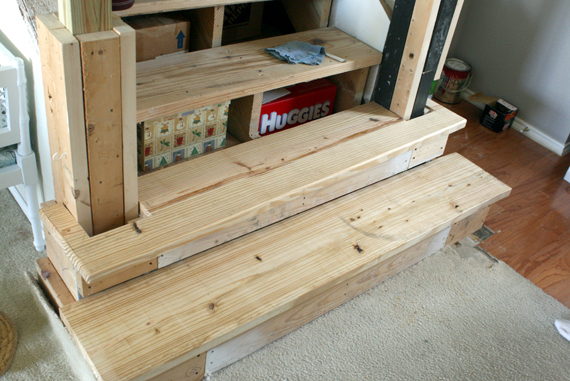
Next Justin installed the bottom two treads, by gluing them with construction adhesive and the framing nailer.

We actually had to buy two more 2 x 12’s, and since the stairs were so much bigger, and we couldn’t use the original.  In order to make them look sorta older like the others, we choose to just nail them right in and not hide the nail holes, because the other boards still had theirs showing.

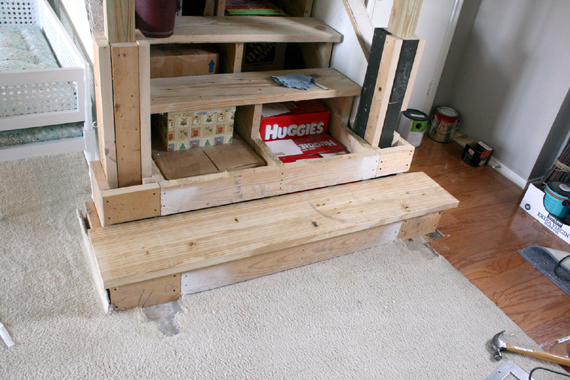
The second stair tread slid into place around the future newel post support.


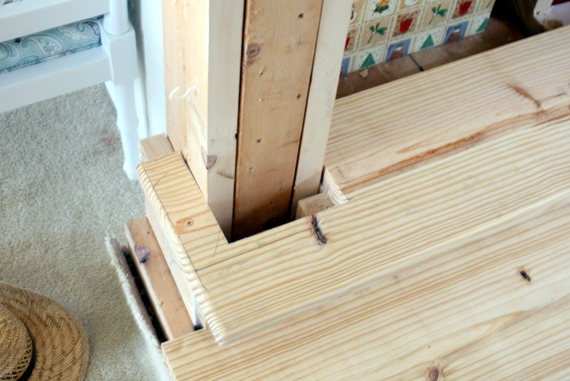
Okay, so now the treads are in place, sanded and ready to be finished, the problem?  A minimum of 1/2 inch gaps on either side of the treads (see picture below).   So we had to figure out a way to fill the gap.  Which I will explain next time.


In case you want to follow along, check out these posts too:

the plan

post 1: Starting the project!

post 2 : Demo & Rebuilding

post 3: More Rebuilding

post 4 : Filling the gaps

post 5 : Walnut Stain… at last!

post 6 :  Adding the Stair Risers, Finishing the Runners

Post 7 : Custom Built Newel Posts


Remodelaholic is written by Cassity and Justin.  Cassity has a degree in interior design and Justin is a landscape architect, so we adore everything that makes up a HOME!  We love to share home remodeling ideas and projects we’re working on. From huge kitchen renovation ideas to small bathroom remodels, there isn’t anything we won’t try to tackle (at least once!).  We  are in the midst of our third whole home renovation, so there should be a lot more inspiration coming your way.  We hope that you will stop by often for home design inspiration, tutorials, interior design tips, delicious recipes and what is going on in our family life.
  • Pinterest
  • Facebook
  • Twitter

Related

Remodelaholic is a participant in the Amazon Services LLC Associates Program, an affiliate advertising program designed to provide a means for sites to earn advertising fees by advertising and linking to amazon.com. Please see our full disclosure here.

Published: June 8, 2011Filed Under: *Our Projects Tagged: Building, Construction, Park House, Park House Entry, Park House Stairs, Stairs

About Cassity

Cassity started Remodelaholic with her husband, Justin, to share their love for knocking out walls together. She is an interior designer, wife, and mother of two. She and Justin have remodeled three homes from top to bottom and are working on their fourth. Making a house a home is her favorite hobby.

Previous Post
Budget Friendly Kitchen Remodel
Next Post
Powder Room Transformation!

Comments

  1. Jenni says

    May 26, 2012 at 10:55 pm

    Thanks! That’s the link I was looking for! Great idea for filling the gaps! Too bad it won’t work on our new stairs. Our gaps are because the stairs are less than square, but the treads are nice and square — so no gap is the same size 🙁 At least they’re all really thin gaps.

    Reply
  2. Randi says

    May 15, 2013 at 9:21 am

    Hey, love the stairs! I was wondering though where did you all find ( or how did he make) the wood that goes on the stairs so that the edge was rounded and molded to the stair like it is in the finished product?

    Thanks!

    Reply
    • Cassity says

      May 17, 2013 at 10:07 am

      Randi, I am not totally sure about what wood you are asking about. The next post in the stair project might help you out… https://www.remodelaholic.com/2011/06/filling-the-gaps-stair-remodel/ Check this post out and tell me if that was what you were asking about, and I hope it was!

      Reply
  3. Brittany says

    July 27, 2013 at 11:29 am

    Hi – my husband and I are going to update our stairs from carpet to wood, just like this post. My question is, for the bottom stairs that are larger than the majority of your treads, how did you get those wood pieces? Did you buy the plank and then use a router to round the edges? Any direction is appreciated!

    Reply
    • Justin says

      July 31, 2013 at 4:09 pm

      Brittany, yes we did buy a long 2×12 and routed the edges round. Just look for the straightest pieces.

      Reply

Leave a Reply Cancel reply

We love hearing from fellow Remodelaholics, so let us know what you like about this and leave any questions below in the comments. If you have followed a tutorial or been inspired by something you have seen here, we would love to see pictures! Submit pictures here or by messaging us over on Facebook.

Hey there, I am Cassity! Nice to virtually meet you!

This blog is about DIY at its finest. We are obsessed with it and so are you, so while we're working and have nothing to show you of our own projects we show off yours. So submit your projects! More About Us…

Categories

  • Facebook
  • Instagram
  • Pinterest
  • RSS
  • Twitter
  • YouTube

Meet The Team

Remodelaholic is a participant in the Amazon Services LLC Associates Program, an affiliate advertising program designed to provide a means for sites to earn advertising fees by advertising and linking to amazon.com. Please see our full disclosure here.

© 2005-2016 Remodelaholic LLC, All Rights Reserved

  • Facebook
  • Instagram
  • Pinterest
  • RSS
  • Twitter
  • YouTube

Copyright © 2019 · Remodelaholic on Genesis Framework · WordPress · Log in

  • Pinterest
  • Facebook
  • Twitter