Amazing Plank Look Plywood Flooring Tutorial
Ever wondered how to install your own DIY hardwood flooring? Learn how to make your own plank flooring and install it with this plywood flooring tutorial.
Read more about installing plywood floors and our 10 tips for hardwood flooring installation success.
Amazing Plank Look Plywood Flooring Tutorial
Contributed by Shannon @ Quarry Orchard
When recently redoing the room above our garage, we decided that we were DONE with the carpet. Our plans were to rip it up, plank the floor, and then paint it.
We never expected the plywood planking that we made to look good enough to STAIN!
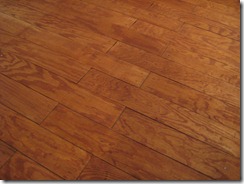
Yup, that’s plywood!
Here are the instructions:
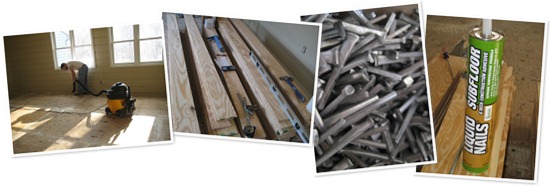
Materials:
- 16 sheets of 15/32 pine plywood @ $16.49 per sheet
- 9 gigantic tubes of Liquid Nail @ $4.75 each
- 10 lbs of cut nails (ordered from Tremont Nail Company) @ $69.63 (includes s&h)
- 4 gallons of Varathane polyurethane @ $37.46 per gallon
- 2 quarts of stain @ $9.99 each
Square footage of the room: 533
Rough estimate of cost: $520
DIY Plywood Floor Installation
Step 1: Making Planks from Plywood Sheets
We started the project with sheets of plywood. We ripped them on the table saw into 6 inch strips that were all 8 feet long.
Then, we (Dustin) carried all of this up to the house so it could sit and “acclimate” to the room. I don’t know if that helped, but that is something that is recommended when laying hardwood flooring.


It, surprisingly, only took us an hour and 45 minutes to cut the sheets into the planks.
Step 2: Subfloor Preparation
With the materials purchased and gathered, Dustin cleaned up the room with the shop vac. He made sure all the subfloor panels were nailed down securely. Some required him to add some screws to make sure they were tight.
Step 3: Measuring and Installing
Then the fun started. We measured and figured… measured some more.. and some more…
Before we began, we made sure to figure out our pattern so that each row of flooring would alternate where the nails were. We also knew that we would need to cut shorter pieces for the end that were around 11 inches long. We wanted those “short” pieces to alternate back and forth with each row.

We started with the first board and squared it with the wall, leaving a 1/16 inch gap between the first board and the wall.
We dry fitted it before applying a bead of Liquid Nail along the length of the board. We put the board in place and Dustin hammered in the nails on the marks.
Later, he went though with a nail punch to make sure that the nails were at least flush with the flooring.
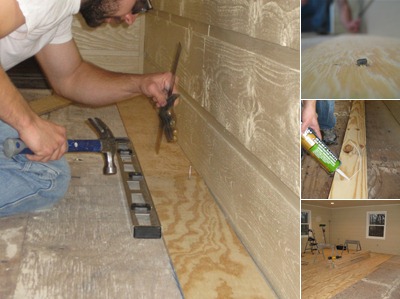
Between each board and each row, we left a 1/16 gap. The plan all along was to paint this flooring, so we wanted it to LOOK like planks instead of just a solid, painted panel floor.
We worked our way back and forth, alternating which side we started on with each row. We didn’t worry about the 11 inch pieces we needed for each end until we were completely finished with the room.


We wanted the nails to be in line, so we started this process by marking them as we went. (Later, I started marking them ahead of him because I wasn’t much help anywhere else).
This also really sped up the process since he didn’t need to measure every 16 inches.
After a while, Dustin made a jig to help with the measuring and marking for where the nails went. Then I just had to line it up with the previous board and mark rather than measure for every single nail.

We ended up using 11 nails per board by alternating two nails then one then two, etc, as you can see in the above picture. We wanted it to have some order and thought they would look nicer lined up. We originally only nailed every 16 inches with two nails.
When he took the first break, we realized that we needed to secure it a little more. The Liquid Nail was still wet and the board were moving up and down when we walked on them. That’s when he went back and added the single nail in line with each board.
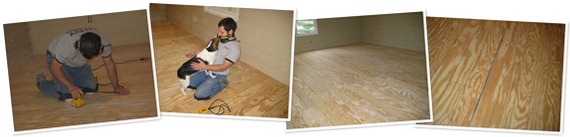
Step 4: Sanding
Once it was all finished, we sanded the rough places and the spots where there was a little bit of blue and green paint from the lumber yard. As always, we had animal support throughout the whole process.
Up until this point here, we planned to paint the boards dark brown. We wanted a dark farmhouse plank floor look. We never imagined when we started that this would be a stainable project.
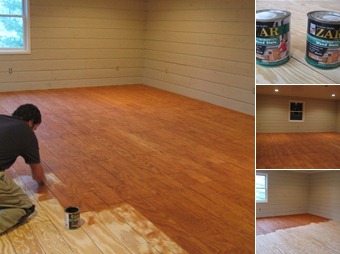
Step 5: Staining
We hand stained the whole plywood floor. There are tools that are made to make it easier and faster. We’ve never used them and wanted to make sure the stain went on evenly. And, we were dealing with plywood so we weren’t really sure what it was going to do. It went on perfectly… and in 4.5 hours.
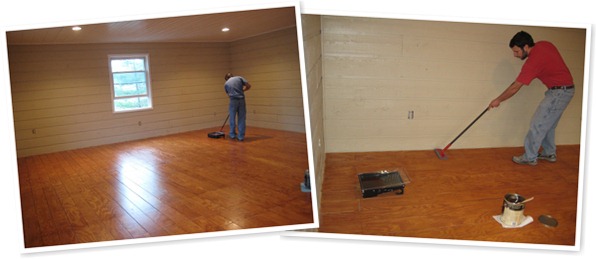
Step 6: Sealing
We coated the floor with four coats of poly. The first coat took about 8 hours to dry. We really didn’t want to have to sand between coats, so we made sure to recoat within 12 hours.
He used a bristle applicator rather than a wool one. It seemed like he had better control over the thickness with it. We had to evacuate the house at night while it was drying. It was in the 30s outside, so opening the windows wasn’t’ really an option.
He’s not wearing it in the above picture because he had just started, but he did wear a face mask the whole time he did the coats of poly.
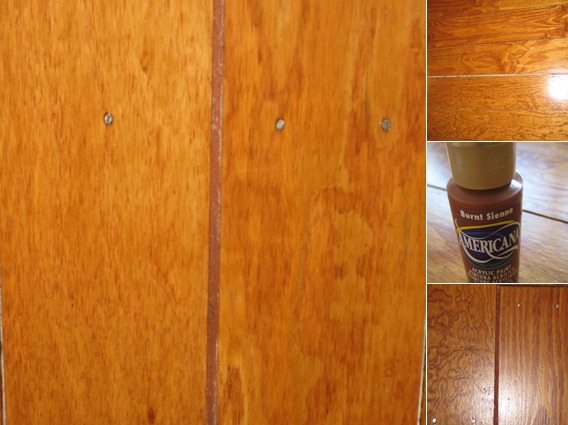
Step 7: Painting the Plank Gaps
Since we didn’t plan to stain this until the last minute, we weren’t concerned with the fact that you could see white spots on the subfloor beneath. We knew that those would get covered up when we painted the floor.
Since we didn’t do that, something had to be done. At night, with the overhead lights on, those places GLARED white.
I went out and bought some Burnt Sienna Americana paint. One night, while Dustin hung the new ceiling fan, I scooted around on the floor with my Americana paint and a tiny paint brush and filled in the cracks.
I wanted to wait until the floor was completely poly’ed and dry because if/hen I got it on the flooring, it wiped right off with a paper towel. It was the perfect color and was the perfect solution for our dilemma.
You could save yourself this work by painting the subfloor before installation, though.
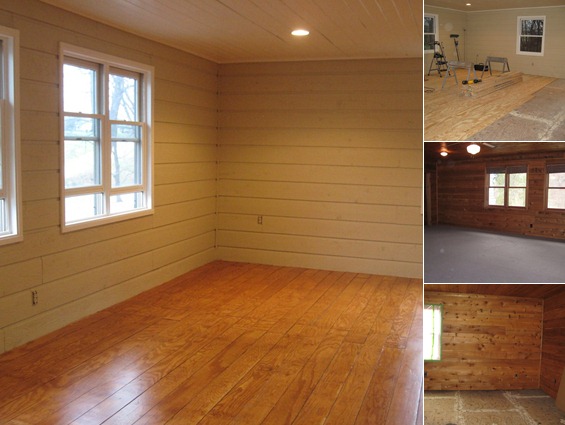
Can you believe that this is the same room? Or, that this floor started its life as plywood?!
We are so happy with this flooring and our decisions! By doing this, we have saved well over $1500 that hardwood flooring would have cost. We like it so much, that we plan to do this in our kitchen soon. We plan to paint or whitewash it there though, hope you liked this plywood flooring tutorial!
We’ve moved all the furniture in and I’m just trying to figure out what to hang on the walls! I’ll definitely be putting the starburst mirror I made in here somewhere! The rest of the wall space is still up for grabs 🙂


GREAT¡¡¡ A QUESTION : HOW DO YOU FILL THE GAPS
Wow thank you so much for being our life/pocket saver!! We have been going back and forth with what to do with our bedrooms…they are carpet and we have 6 kids and a dog, need I say more about the condition of the carpet. We are so excited to this flooring, love it and love the price!!!
We love hearing that, Brooke! And we’d love to see pictures when you’re done!
Hi! Using your tutorial in December 2012, my husband and I laid plywood flooring in most of the fixer-upper we bought that year. We were able to move in March 2013 and I’m happy to report, 4 years later the floors are still beautiful and I still love them. Visitors compliment us on our hardwood flooring and I just chuckle. You can imagine their surprise when I tell them it’s plywood. Thank you for sharing your creativity.
Way to take a leap of faith!! That is amazing might have to try this one myself.
Awesome floors!! What did you use to fill in between every wood pieces?
I’m excited to do this on our floors this summer! What type of plywood was this? Was it made of pine?
Where did you purchase it?
I appreciate your help.
hi! how does it hold up against doggie nails? thanks so much!
Hey there! Beautiful floor. What color stain did you use, please? I can’t access your full album.
Thank you!