Special Guest Post: Beautifying the Master Bedroom
**If you get the chance, please help her out by voting for her in the Ivory Homes Interior Design contest if you can! All you have to do is go to Ivory Homes Facebook page, “like” them, and then “like” my submission. Last day to vote is today!
I am thrilled to do a guest post here today. I feel honored to be amongst the pages of such talented bloggers and DIY-ers!
My very humble and oh-so-small blog,
Little Miss Penny Wenny began late last year in attempt to share the joy with others in some of my favorite domestic and creative hobbies- furniture revival and reupholstery, cooking, sewing, decorating, and thrifting. The transition for me from a fast paced professional career to a stay at home mom was a difficult one to say the least. Finding the joy in this chapter of my life has truly changed my perspective. I feel so blessed and happy to be where I am! My goal is to help others find that joy as well.
My hubbs and I recently tackled a huge project in remodeling our Master Bedroom. This space hadn’t really been decorated at all since we built the house last year. I had slowly been collecting pieces that I wanted to refinish or decorate with for the space, when my friend informed me about an interior design contest that he suggested I enter into. Me? Interior Design??? HA! Having had no professional experience or training in my life on the subject I thought it was a laughing matter. However, I do love a challenge. So within about a week (and absolutely no sleep) our bedroom went from this:
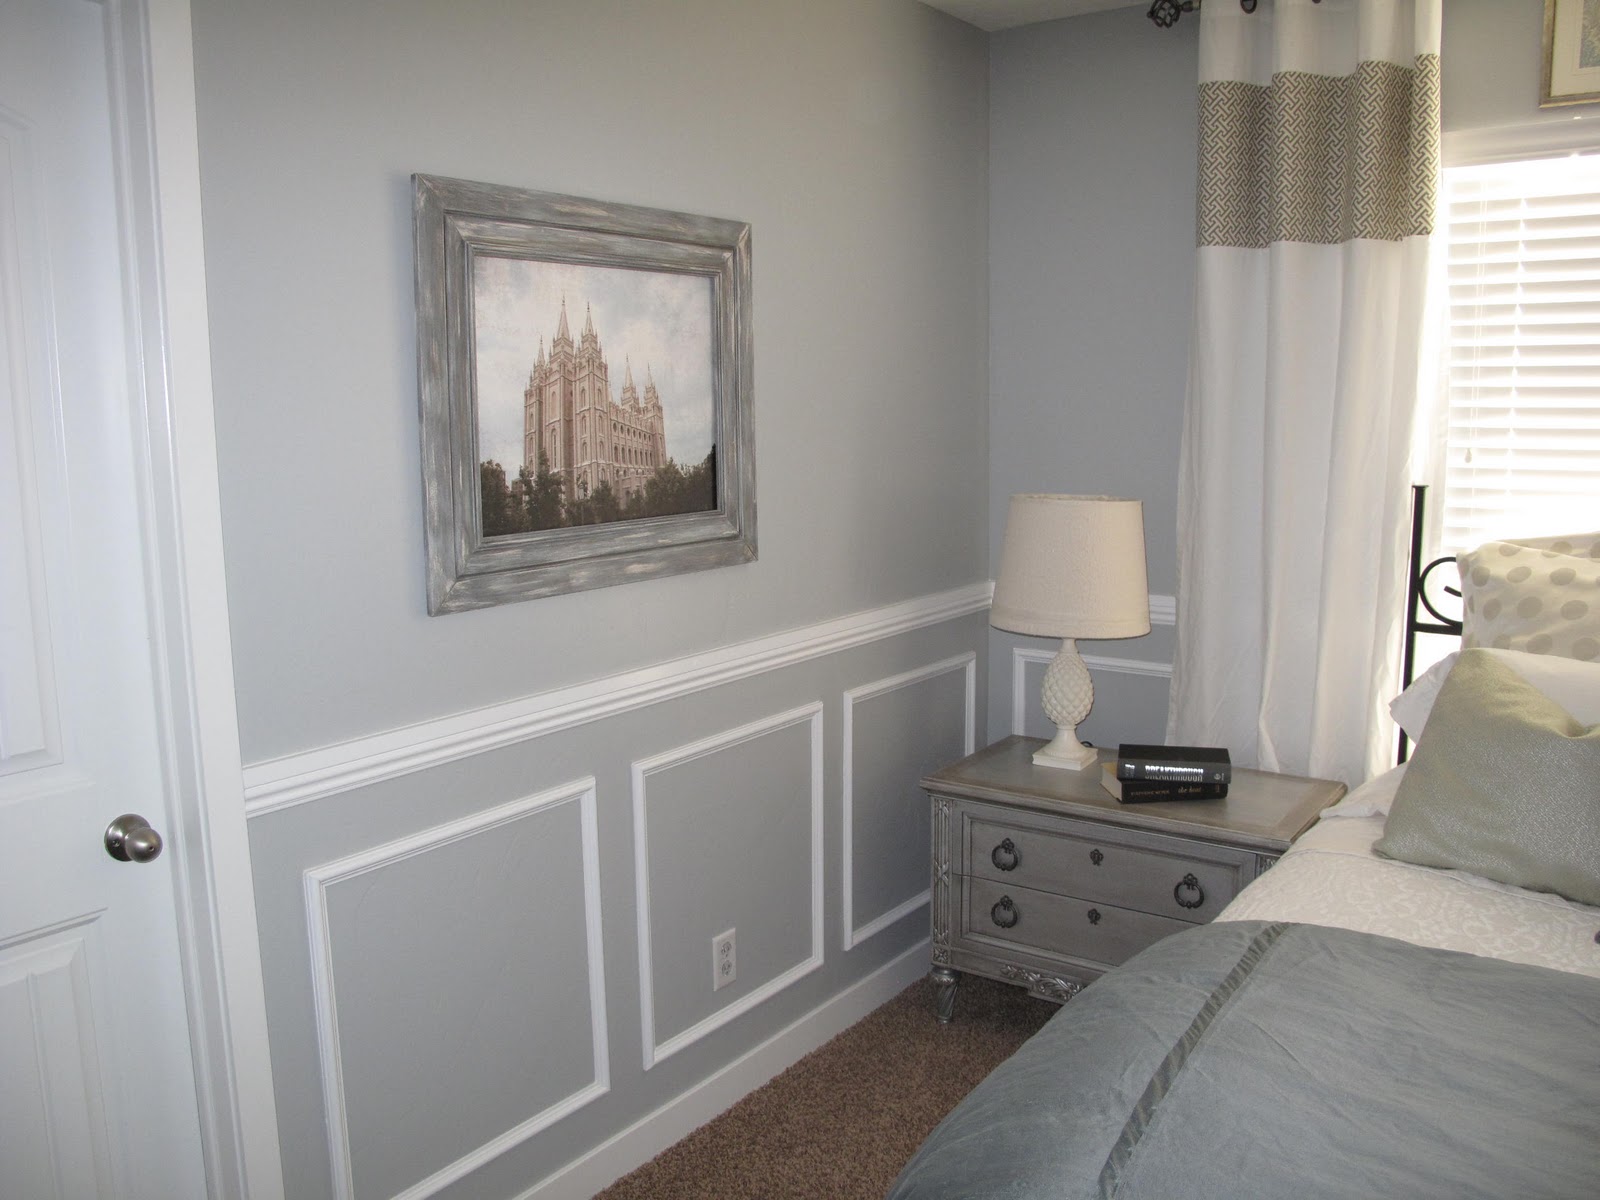
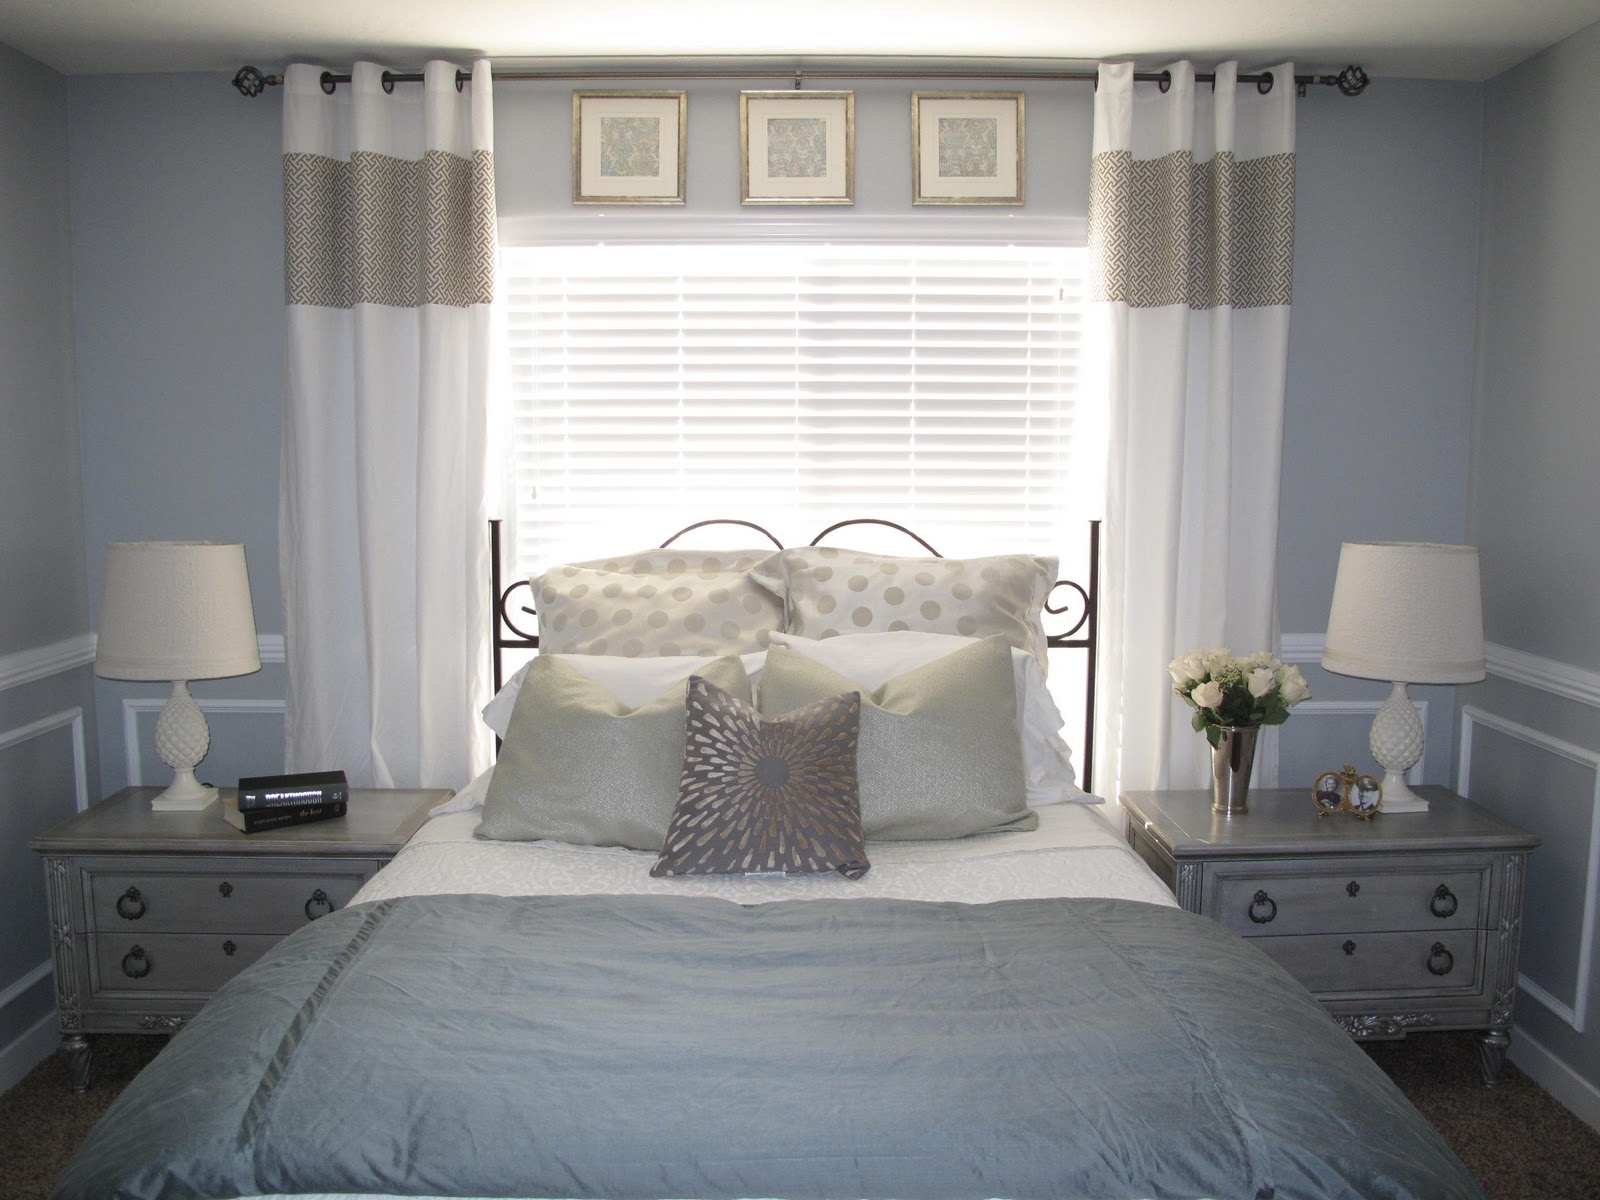
to this:
Wanna know the best part? We did this entire bedroom remodel for $539 including chair rail and picture frame moulding.
Here’s an overview of what went down during our weekend of chaos fun:
We painted the walls a soft calming gray, in an accidental cross between Valspar’s “Gravity” and “Silver Leaf” custom mixed by Home Depot in Behr Paint and Primer in One (try and say that five times fast…);
We installed chair rail and picture frame molding;
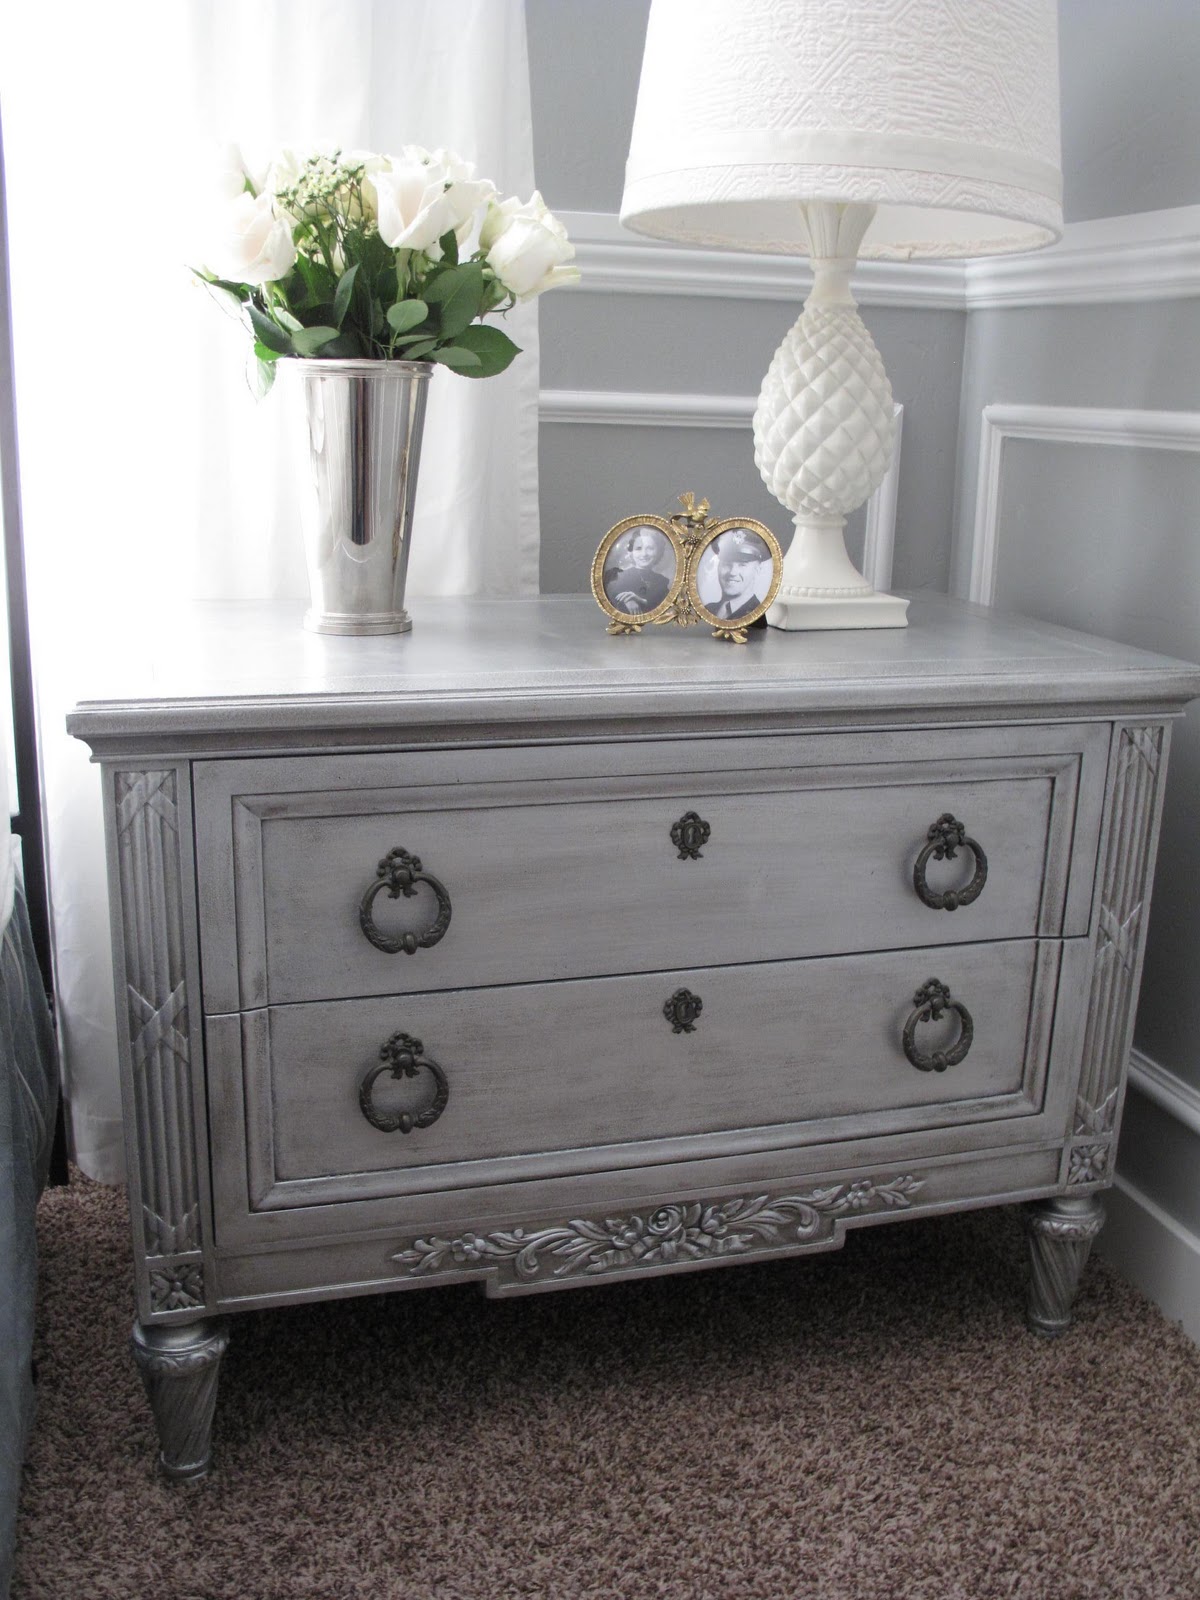
I painted and glazed these fabulous vintage Henredon night stands;
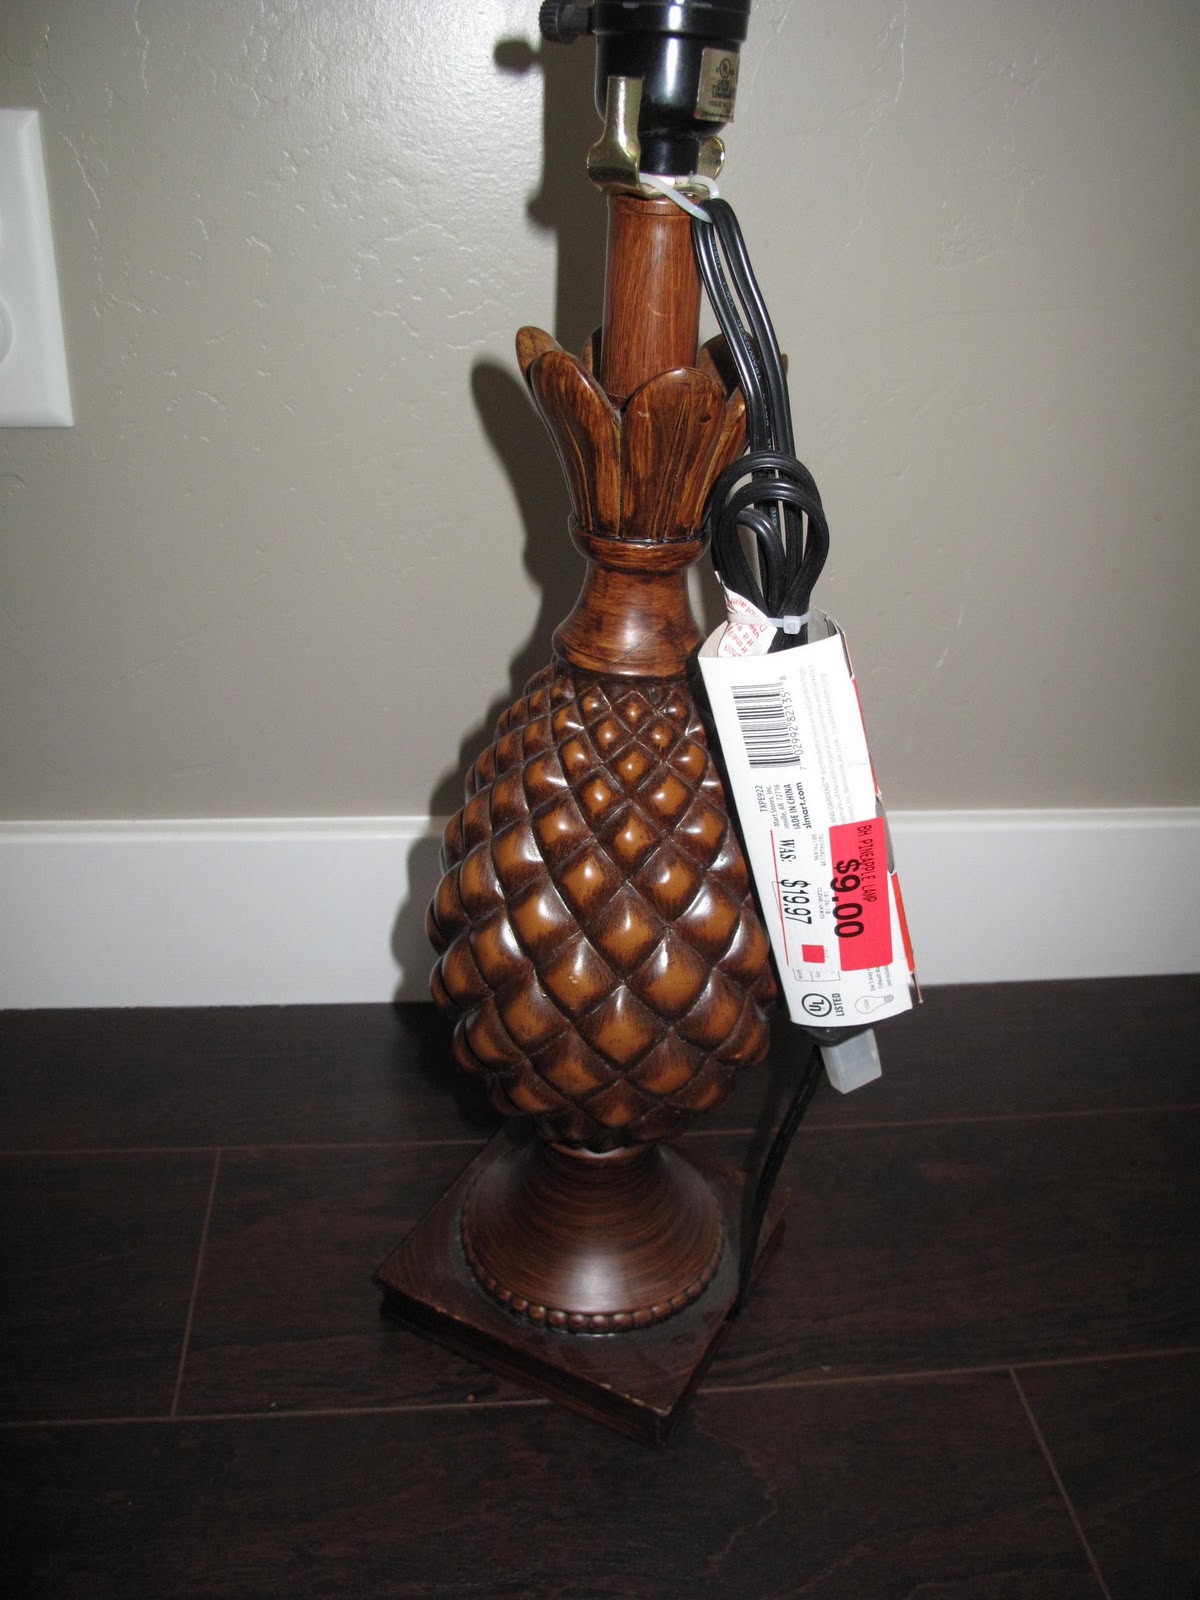
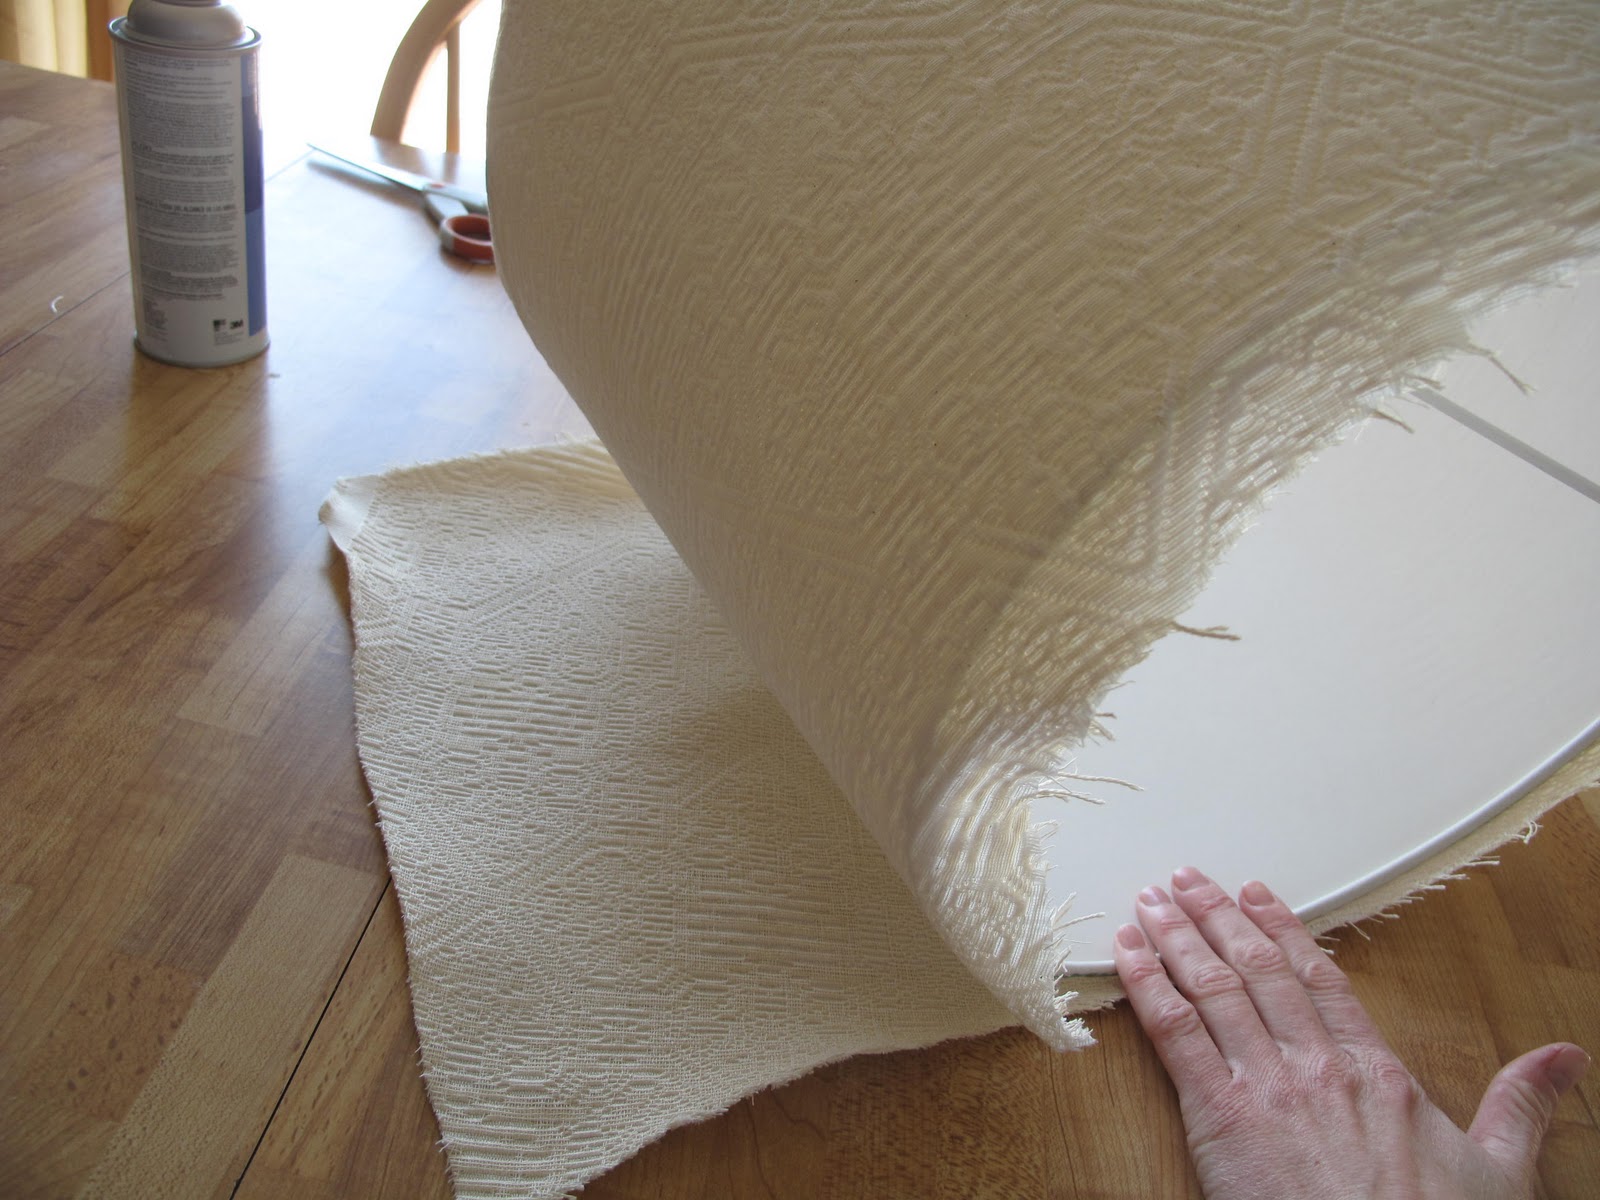
I painted these Better Homes lamps (on clearance at Walmart) and recovered these thrifted lamp shades,
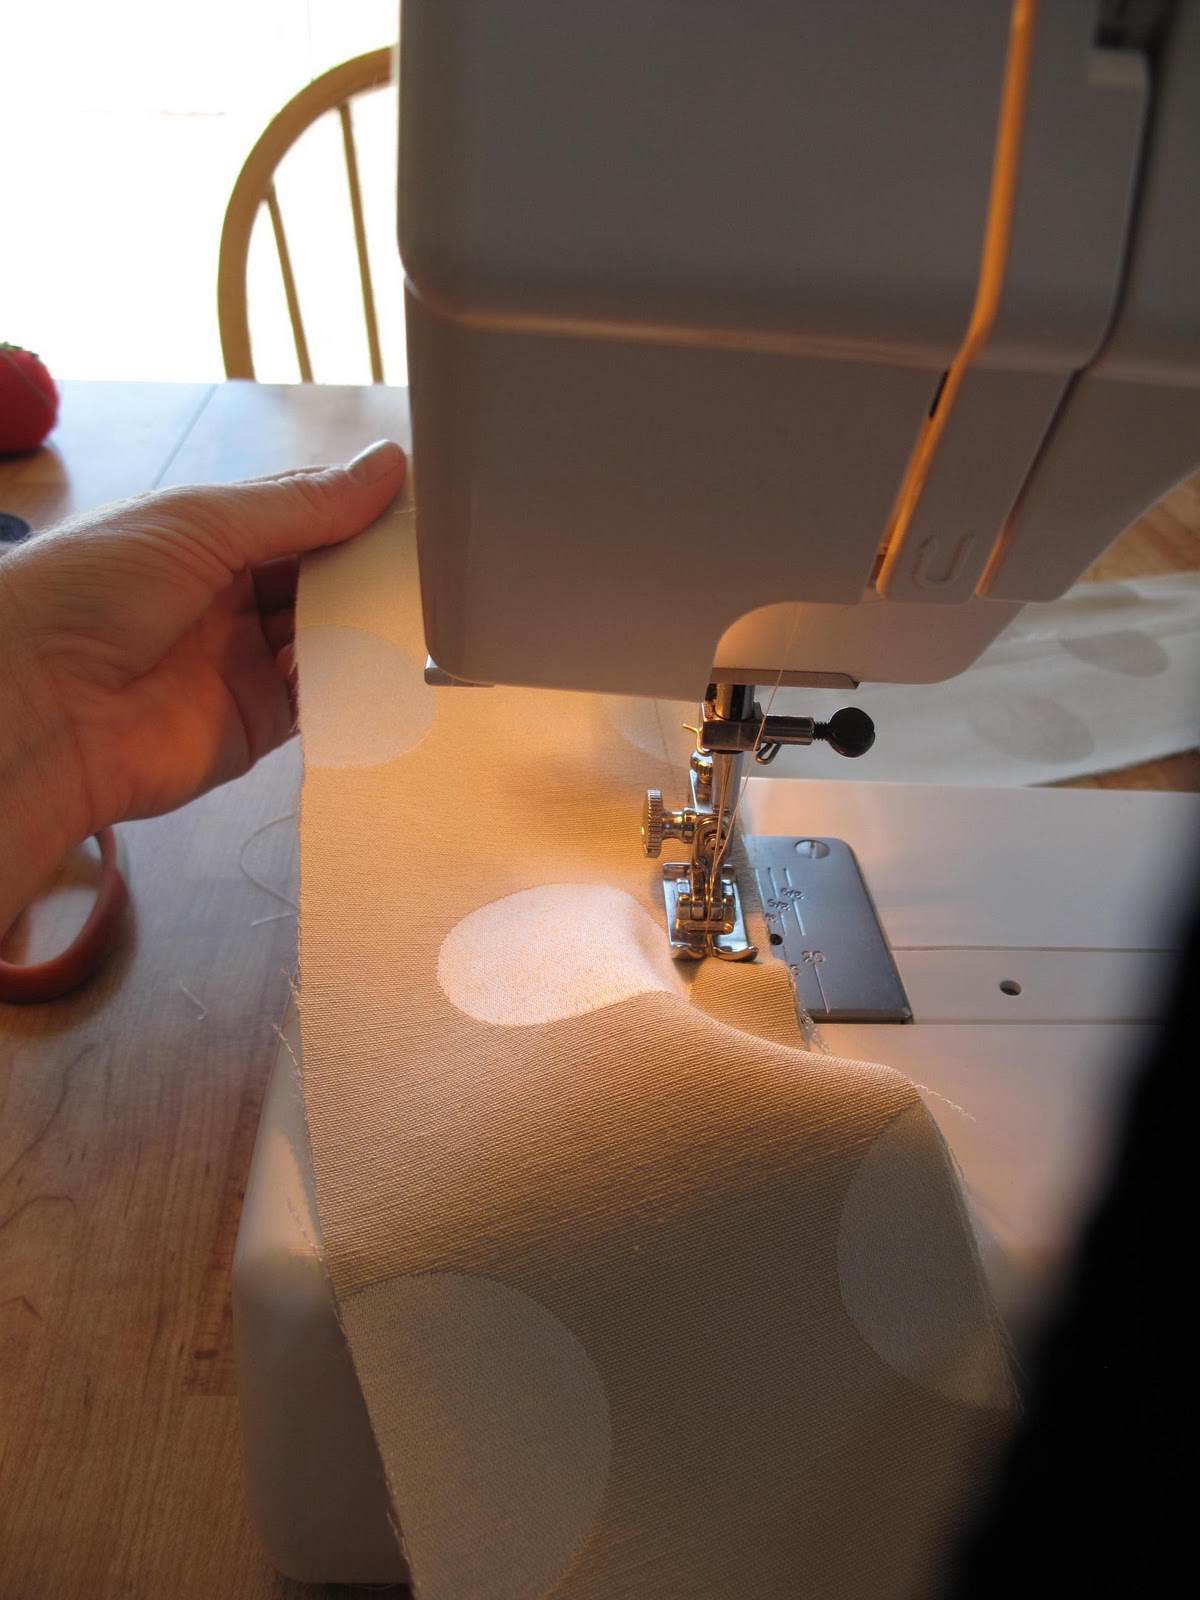
I (with the help of my amazing and patient mom) sewed these euro shams and standard shams to go along with my gorgeous gifted white coverlet and teal silk duvet, and Target toss pillow;
I sewed this Waverly cross section charcoal fabric into my existing white curtains to extend the height and add some pizazz;
I spray painted and cut to size a 1/2″ electrical tube (10′ long) from Home Depot for my curtain rod;
I replaced the pictures in these frames from Family Dollar with my own scrapbook paper (and removed the glass for a more vintage feel) and assembled them above our bed;
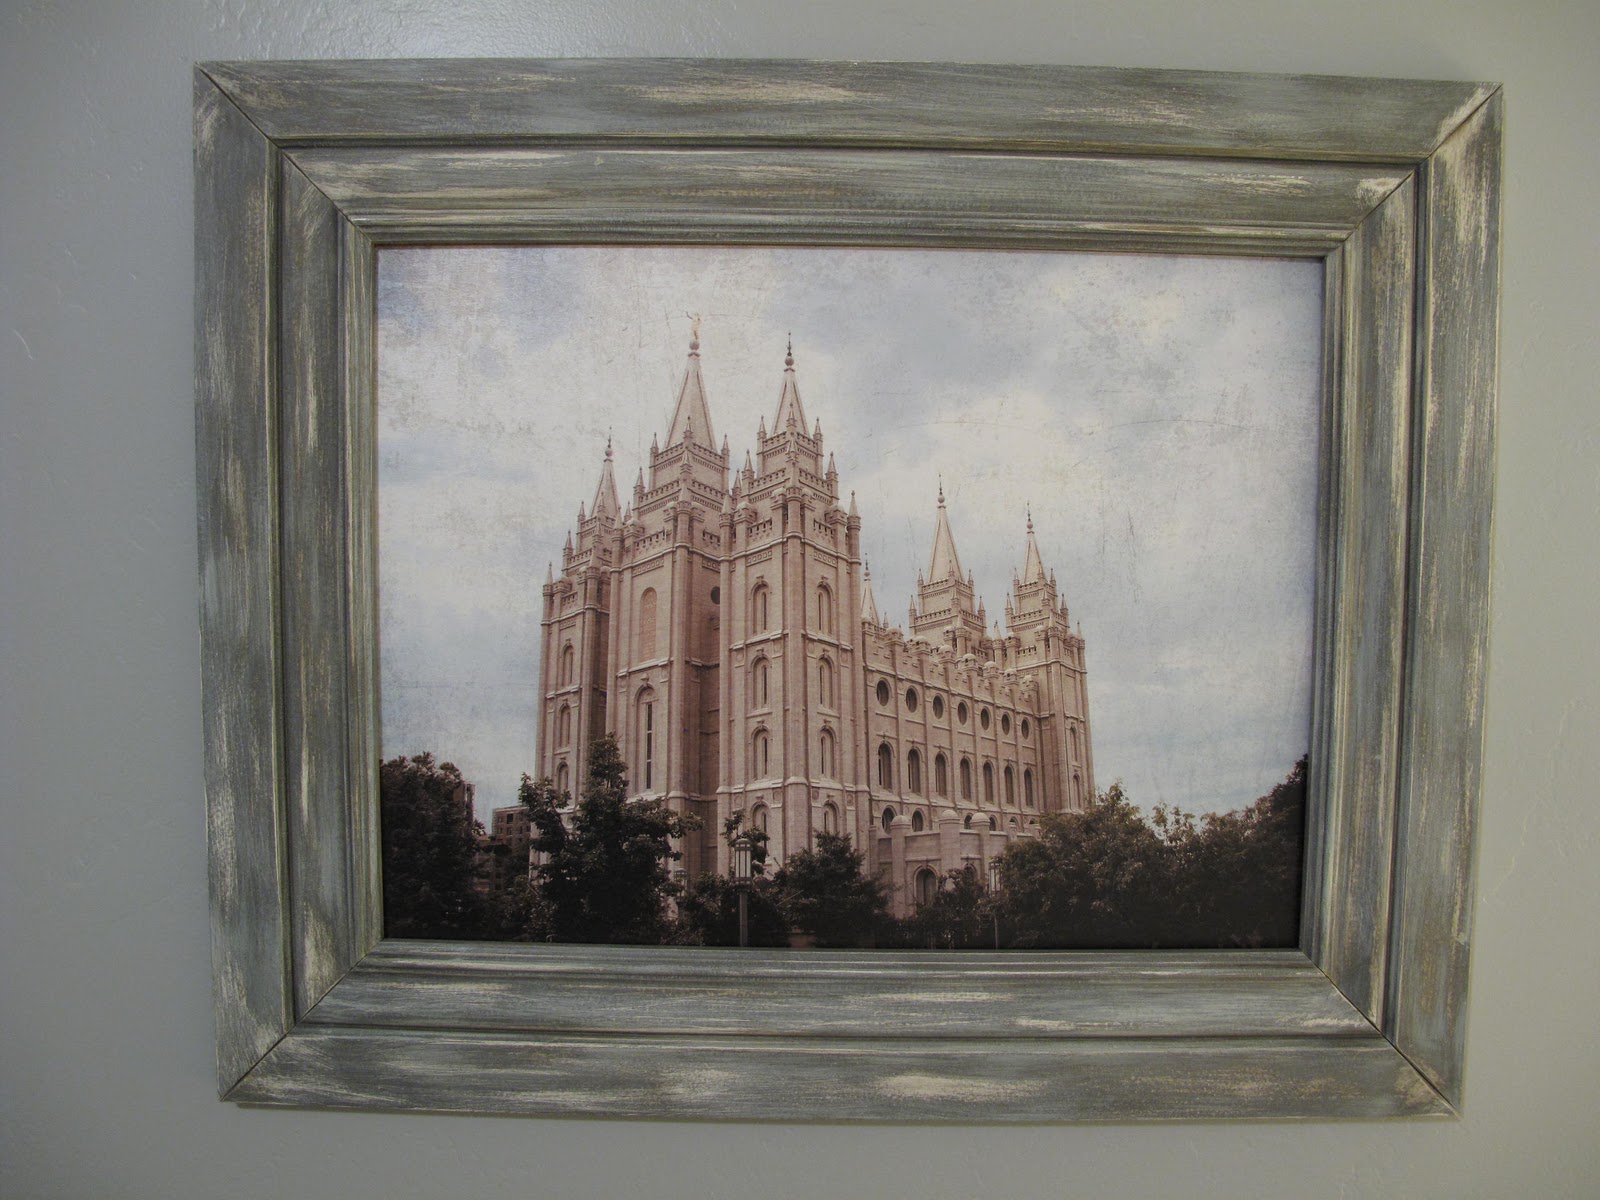
I painted and glazed the frame to my
PoppySeed Salt Lake City Temple print, where my hubbs and I were married;
I hung my $10 Sunburst mirror from Family Dollar above the French Wingback Chair that I painted and reupholstered;
and added some vintage pieces to tie together my theme, including this gold picture frame (thrifted);
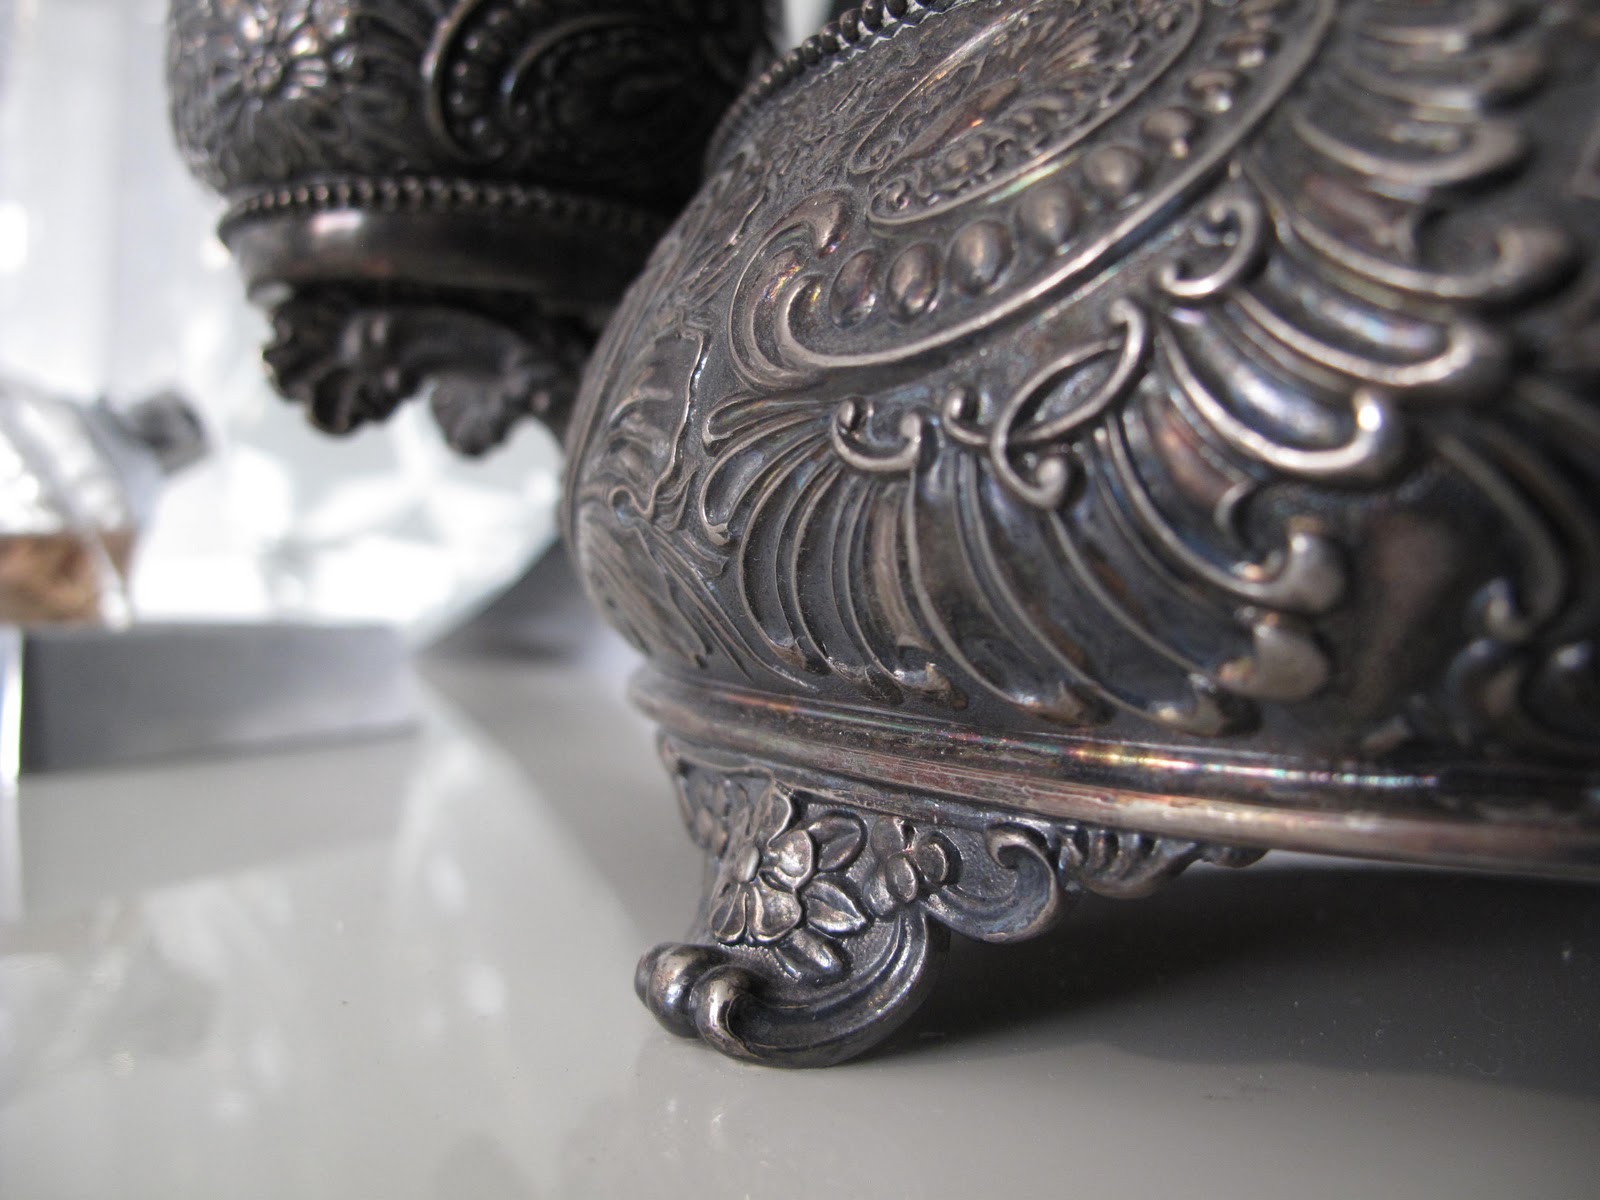
and this antique silver kettle (a family heirloom).
After all of that, we ended with this beautiful and tranquil space:
I finished this remodel with literally not one minute to spare just in time to enter it into the interior design contest. With a bit more time, I would have completed the following:
– hung a new light fixture (I would like a lantern for a unique feel)
– finished reupholstering the ottoman to my French Wingback Chair and staged it at the foot of our bed to serve as a bench and ottoman to the chair
– hung black and white prints in an eclectic assortment of vintage white frames on our longest wall
I will post pictures of the additions when the room is complete to my liking. Still, our submission was selected as one of the finalists, and 50% of our score is based on votes. So far we are doing really well! If you like what we did and would like to vote for us, please go to Ivory Homes Facebook page, “like” them, and then “like” my submission.
I am still so flattered to have been chosen as a finalist. I hope our crazy efforts will inspire others who don’t have any formal experience to step out of their comfort zones and take a stab at remodeling and decorating. Trust me- if I can do it, so can you!
For more details and tutorials on how the pieces in this room were created, stop by my blog. Thank you so much for reading, and a special thanks to Cassity for hosting me!
~ PW
Related


>What a beautiful space! Love all the sophisticated touches that you added – it looks serene and elegant. Hope you win!
>Your bedroom is beautiful!! I love how you recycled and re-purposed things in your house!
>Wow! First off, props to the hubs for helping! I love so many of your ideas particularly using scrapbook paper for artwork. I am headed to Michaels to see if I can find any contrasting pages for my living room mantle. Loved that you had the vision to see beyond white curtains and a brown lamp. Thanks for the inspiration!
>This is so beautiful and serene. I love all your personal touches. Good job!
>This is so elegant and serene. Good job!
>This room is GORGEOUS!!!! I LOVE IT! GREAT JOB!!
>Simply gorgeous! I love the lines of vintage items and the combination of old and new. Beautiful!
>Oh my! That is beautiful, you should absolutely enter that contst (then hop on over to my house – I need some serious help)!
>WOW, this is gorgeous!!! I love everything about! The color is so beautiful and I just love the shams and curtains you sewed and the lamp looks so perfect white!! Amazing job!!
>i like very beautiful bellissima
>I LOVE this room! I will have to check out Family Dollar now! LOL 🙂
>AWESOME!!! I love that you added your fabric near the top of the curtain instead of on the edges or the bottom. Definitely stands out, and very inspiring. Fantastic!
>I am still wondering how you did those night stands. AMAZING! Does something have to be solid wood to re-paint? Do you have to sand it first? Everything looks amazing, but those night stands!?!?!? BREATHTAKING!
What kind of paint did you use on the lamps? I’ve been thinking about doing this to some old lamps I have sitting around…
How did you paint/glaze the side tables?? That’s exactly what I’m wanting to do to mine but have no idea how to do it! Thanks!
Where did u get those pictures frames?
Sorry Ruby, this was a guest post so I don’t know. There is a link to the original owner at the top of the post. Thanks!
Could you share, what the paint you used for this perfect grey color of your night tables?