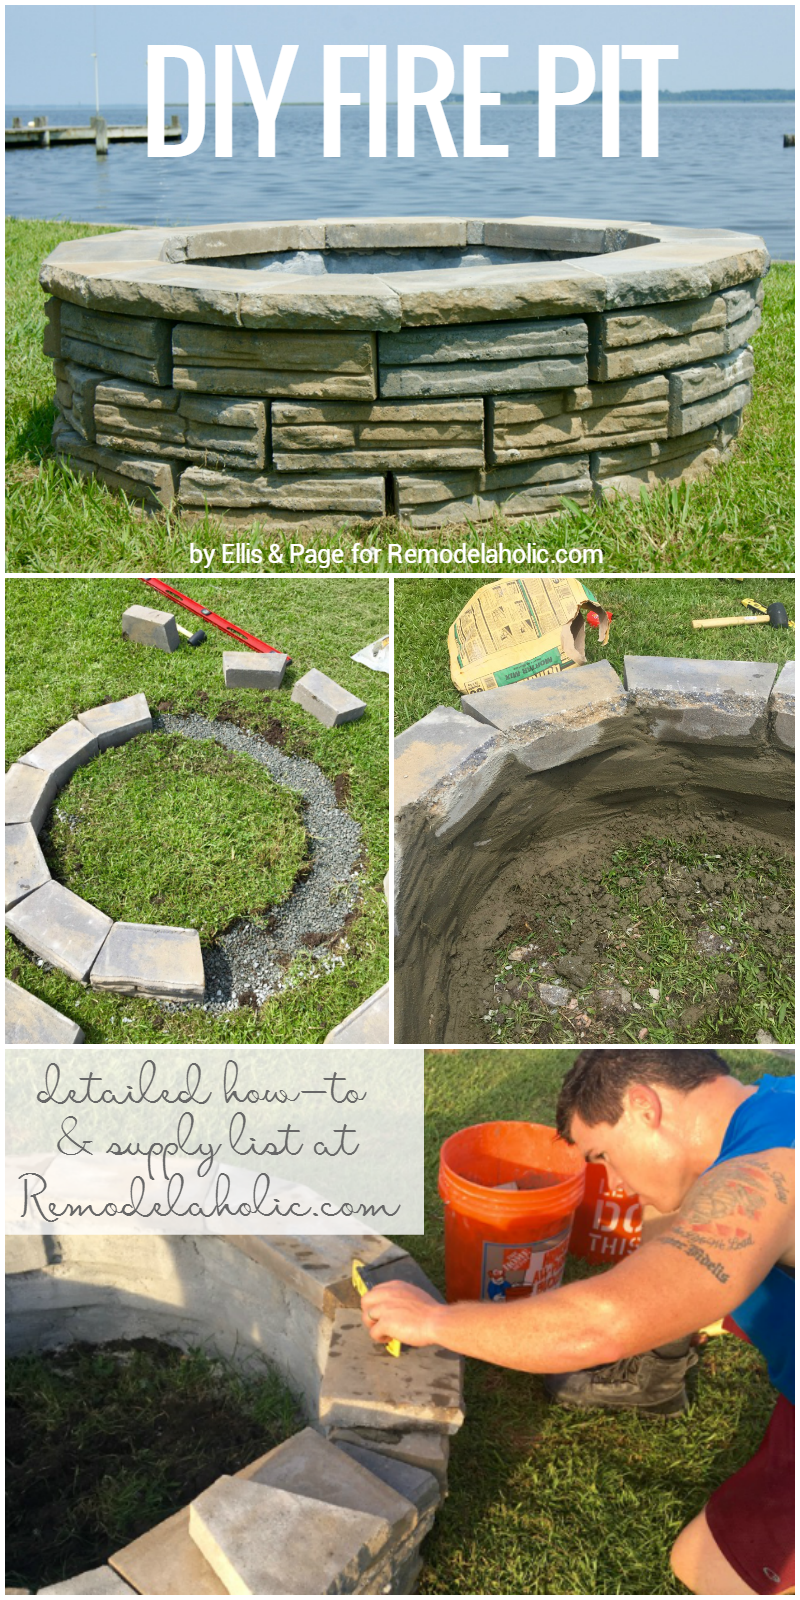
DIY Retaining Wall Block Fire Pit
Hi y’all! Madeline from Ellis & Page here. I am so excited to share my project with you today, a DIY retaining wall block fire pit.

When we bought our new house, we bought it because of the view. The inside needs so. much. work (you can see some befores here and here), and it is hard for me to focus on the outside. But, we bought the house for the view. We need to enjoy it, right? So, my awesome husband convinced me to build our own fire pit and then did most of the work!
We were first looking into fire pit kits from home improvement stores, but they were so expensive! In our first house, we built a retaining wall with blocks from Home Depot and I really liked the look of it. So that retaining wall was the inspiration for this project.
We decided to figure out a way to make our own so we didn’t have to hire a contractor!

HOW TO BUILD A RETAINING WALL FIRE PIT
using retaining wall blocks
Our fire pit ended up being about 4 feet (49 inches) in diameter on the outside and 3 feet (35.5 inches) in diameter on the inside. If you want something bigger or smaller, you will just need more or less blocks.
Our fire pit walls are 16 inches high with three layers of blocks.
This post contains affiliate links. Learn more and read our full disclosure policy here.
Supplies
- 36 Retaining Wall Blocks: $105.12
- 16 Wall Caps: $46.72
- Quikrete: $5
- Gravel: $10
- Total: $166.84
*We also used a high-heat spray paint on the interior of our fire pit. This is completely optional.
Tools used
- Rubber Mallet
- Shovel
- Circular Saw and Diamond Blade
- Wheelbarrow – This really comes in handy to move the materials to the site and remove the old sod.
- Masonry Trowel – for smoothing out the concrete in the inside.
Step 1: Select Site, Measure and mark the fire pit area
First, decide on where you will select the site for your fire pit. It’s best to keep it a minimum of 25 feet from any building. You can also look up your local fire code to help find the best location for your area you live in. You could place this on a patio or cut out a section in the grass. In our case we had well enough room in our backyard and picked based on the view we loved to see on the back lawn.
Next, figure out the size of your fire pit and how big you want it to be. Then create a perimeter using a stake in the center and a piece of string. We then marked off ours with spray paint on top of the grass. Remove the sod, tamp down the area (we used a mallet and a piece of wood) so it is level and fill with gravel or (sand if you prefer). Tamp again, so you have a level starting surface.

Step 2: Lay retaining wall blocks
Lay your first layer of blocks. Remember, these blocks are square and you are making a circle, a round fire pit, there will be gaps at the joints! Make sure the blocks look like a circle from the outside.

Next, dry fit the next layer. Make sure that the blocks cover up any gaps in the previous layer. You might have to remove the lip from the back of the blocks used to make the wall. Remember to make sure everything is level!
Step 3: Secure the retaining wall blocks for stability

Then, use Quikrete to cement the blocks together (note: some people don’t cement them together, but we wanted to make sure ours was very secure. This area often floods and I didn’t want it taking my fire pit too! Repeat for the third layer.
Step 4: Fill holes and finish sealing interior

Use the Quikrete, as a mortar, to fill any holes on the inside of the fireplace and create a uniform interior edge. We then sprayed the interior with high heat spray paint to help prevent cracking. This is an optional step. We haven’t used ours yet, so I don’t know how much it helps!
For the bottom of your fire pit you could use lava rock or gravel as a base. It is not necessary but it makes it look nice.
Step 5: Install capstones
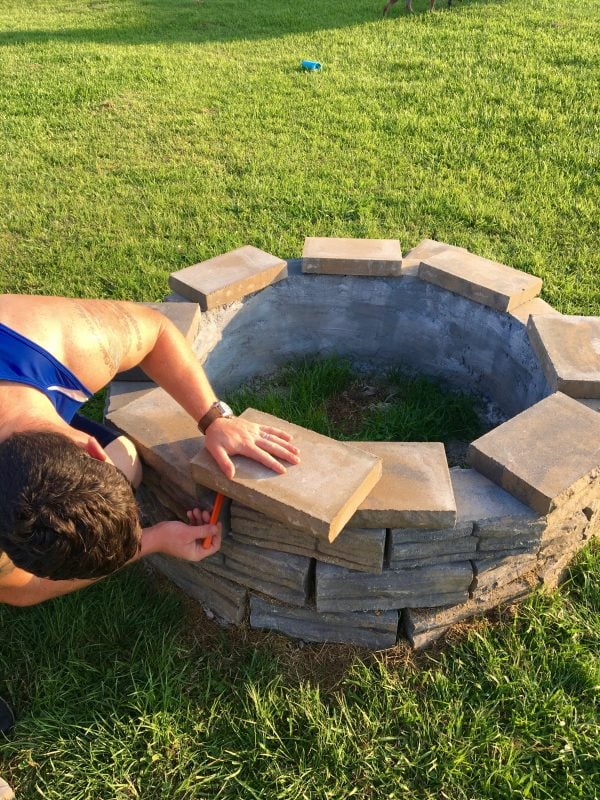
For the capstones, you will need to cut every other one to form a circle. We used a diamond blade on our circular saw and it worked great.
First, place them on top in the best circle you can. Then, place another block on top and trace the pattern needed to complete the ring. Make sure that you are paying the most attention to the outside edge (meaning it will line up when you cut it. You don’t want to cut the block and it be longer than the others. Remeasure after each block.

Step 6: Secure capstones

Finally cement the capstones in place. We also “grouted” between the capstones so there were no visible cracks. Then we added gravel to the inside of the pit.

If you look closely, our top capstones are not perfect, but you don’t even notice it. And if you do, don’t tell me. : )

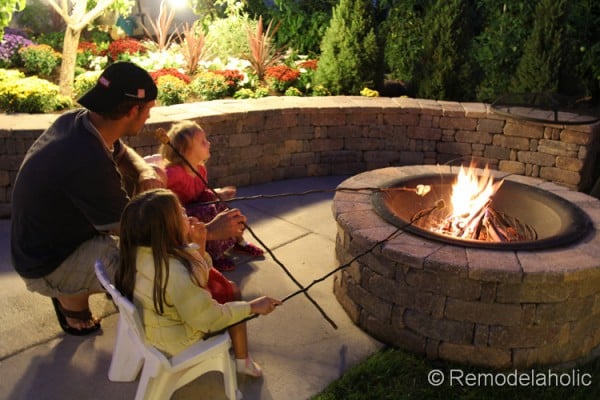
Our new fire pit looks so great in the backyard and from the house! I can’t wait to add some additional accessories like, chairs and some string lights so we can have fun areas to sit, talk, relax, and roast marshmallows to enjoy the warmth and charm of the fire!
This project was definitely a labor of love, but nothing about it was really hard. I would call it a medium on the DIY difficulty scale, only because you have to cut the capstones. I was definitely thankful for Dan lifting everything though!
So what do you think? Would you try it out?
Wanna see more projects in our new home? We showed you guys how we refreshed our dated tile floors for less than $15 here & how I made lots more storage space in my closet while I was living with my mom. I surely need to do that again in the new house!
More ways to make an awesome fire pit area:
Build a curved seat wall and fire pit with a fire pit insert.
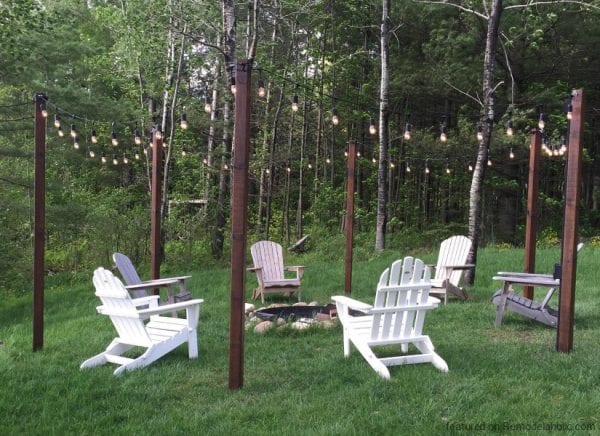
Add outdoor lighting on posts (plus more outdoor lighting ideas here)
build a pergola structure with swings (and a movie screen!)

or try one of these other DIY fire pits


I’m a DIY noob– how did you cut the capstones?
Hi Chris! We just used a normal circular saw- no special blade or anything!
Have y’all had any issues with the blocks cracking under high heat, the link says they’re not fire rated? Curious to know how they’ve held up over the past few years…thanks for the post!
I’m a Boy Scout trying to build a fire pit. For the blocks, there was a ridge on one of the sides. Did this get in the way for the fire ring?
Thanks!
Hi there! What a great Boy Scout project. The ridge didn’t get in the way for Madeline, but if your blocks are different, you could adjust by filing the ridge where needed. Good luck!