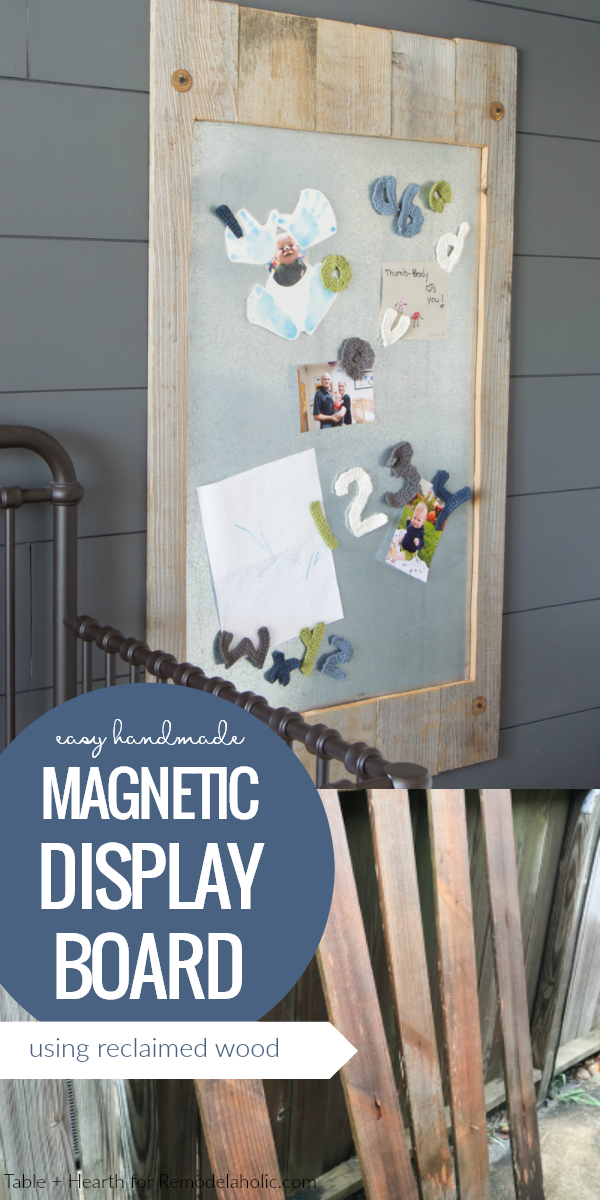
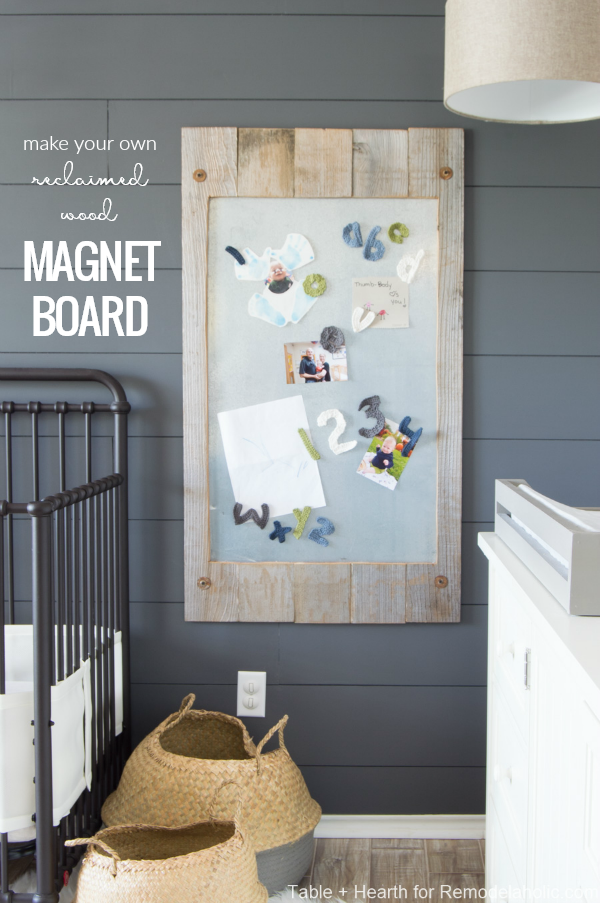
Child’s Masterpiece Gallery: Easy Metal Magnetic Display Board
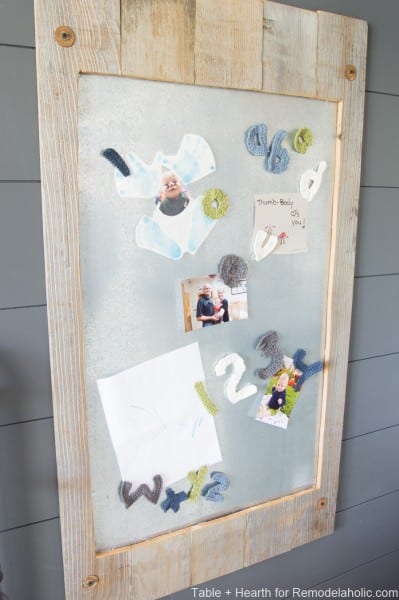
Happy day everyone! Emily from Table & Hearth here again to share my favorite type of project: something for our little guy’s room! I knew we would be getting super cute artwork from him at his daycare but I completely underestimated the sheer amount of these pieces, sometimes we’ll get a whole stack of masterpieces in one day. Thumbprint bees, random crayon scribbles, feet print fish…and I can’t bring myself to throw away any of them, so I made an easy metal magnetic display board where we can display our current favorites!

We’re always working on something new, so be sure to subscribe to our newsletter to get regular updates about our newest projects and our best past projects!
How to Make a Metal Magnetic Display Board using Reclaimed Wood
This post contains affiliate links for online shopping convenience. Learn more and read our full disclosure policy here.
Supplies
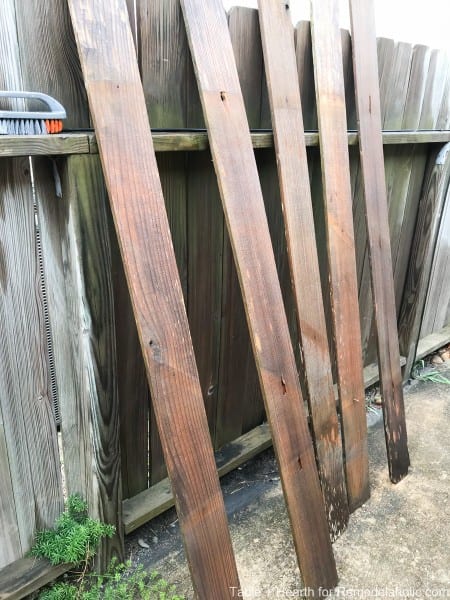
Making things out of random trash wood has become my MO and thanks to Hurricane Harvey I’ve got a nice pile of material to keep me stocked for the foreseeable future.

- boards – I used some old fence boards
- magnetic metal sheeting
- miter saw or table saw
- jigsaw
- palm sander
- pocket hole jig
- heavy duty adhesive
- clamps
- speed square
- tape measure
- metal snips
- screws, anchors, and washers
- magnets
- hot glue gun
- fabric/crocheted alphabet letters
Instructions
I gave my fence boards a good scrub and wash down since they’re going in the nursery. It’s amazing how much dirt and algae these things hold!
Once they were all clean I cut them down to the size I needed on my miter saw. The metal sheeting was 36″ long so I cut some of it off using my metal snips so that there would be a few inches of wood at both ends and it would still be the size I wanted. The metal will be on the backside of the wood so you want it to overlap by a couple of inches so you can glue it later on. (And don’t forget work gloves to protect your hands!)

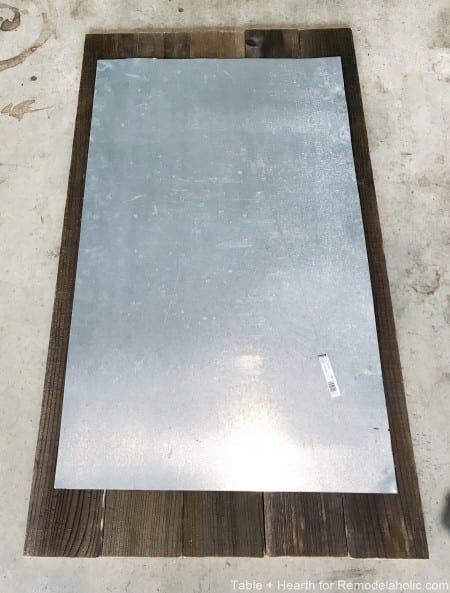
With my metal centered on the boards I marked its outline so I knew where it would sit.

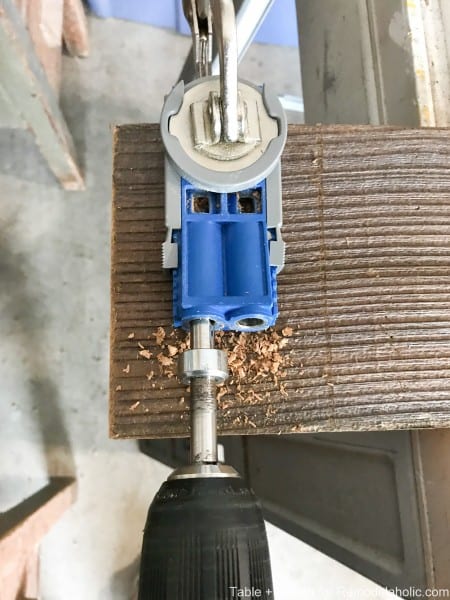
To join the boards together I chose to use my pocket hole jig so that the piece would hang flush with the wall. I figured this would keep little fingers out from behind it better than putting a board across the back to screw them to. I put two pocket screws in each board on each end of the piece. The instructions called for 3/4″ screws based on the thickness of my boards but that size didn’t hold very tight so I used the 1″ screws instead. They didn’t poke through to the front, but to be safe go ahead and do a test on some scrap pieces.


To hang my board I chose to use washers and screws and screw through the front of the piece to give it a more rustic look and have a more secure attachment than hanging on hangers. I drilled holes in the corners about an inch or so out from where the cut out was going to be.

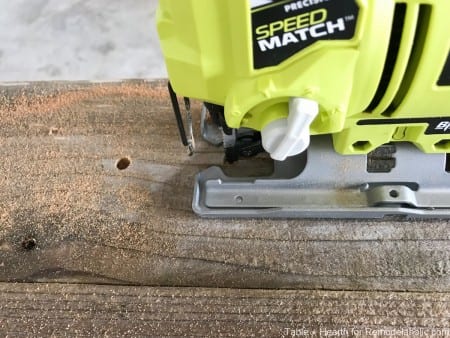
I measured about 2″ in from the edge of the metal and marked lines for my cut out. After drilling some pilot holes in the corners I cut it all out using my jigsaw.

Once it was all cut out I came back and trimmed it a bit more to even out my squirrely cuts, then gave the cutout area a good sanding so that it wasn’t a sharp edge anymore. Now you’ve got your frame ready for the metal! I set the frame up on sawhorses so that I could get clamps all around it, then put my adhesive around the edge of the cutout and pressed the metal into it. I used this adhesive and it worked great, but you can use any heavy-duty adhesive you’d like.
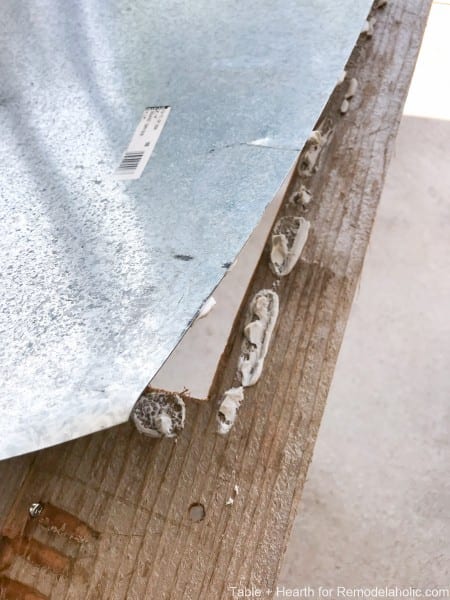
I clamped it together everywhere I could and put heavy items on the ends to get it as flush as I could, then let it sit like this until it was fully dried.

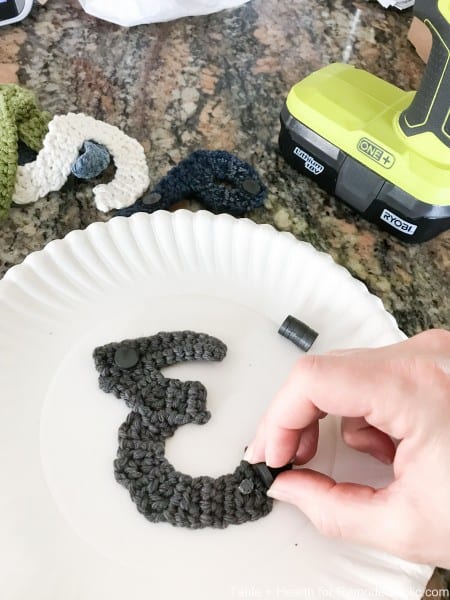
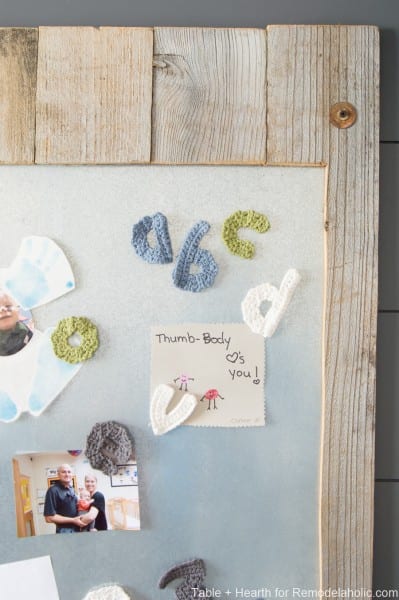
I had my super talented aunt crochet me small letters and numbers which I then glued magnets to the back of with my hot glue gun. Due to the size of the magnets, keep an eye on little ones while they use them and make sure the magnets stay glued down well.
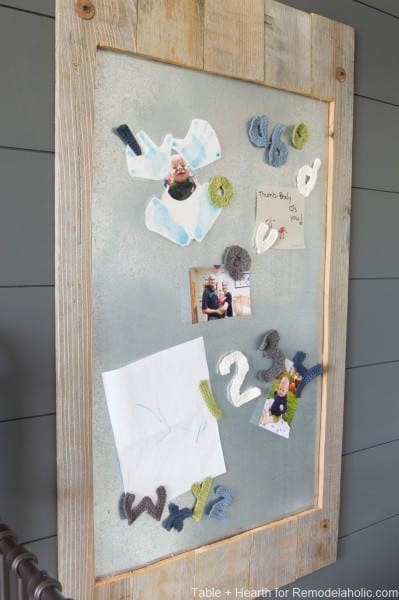
Here it is all hung up and ready to display new pictures and masterpieces! We’ve already got some of our favorites up there, along with some cute pictures from his earlier days at daycare (HOW does time go so fast?!) and he’s already loving playing with the letters and numbers.
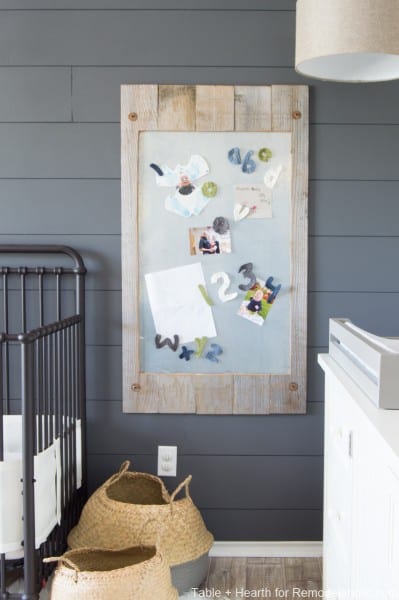

I hung it at a height where he is able to reach the bottom third or so right now but not the rest so that we can display photos and pieces we don’t want him to destroy up higher but he can still play on it with safer items down below.
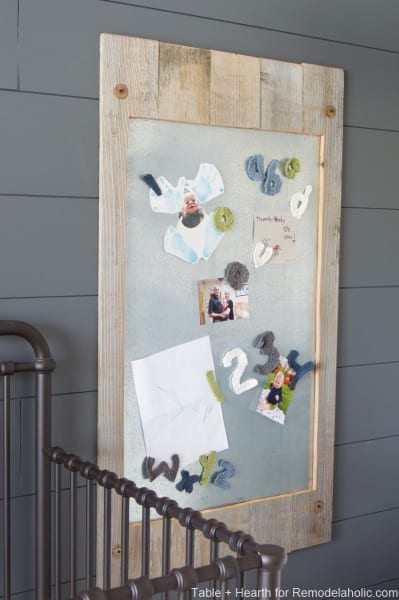
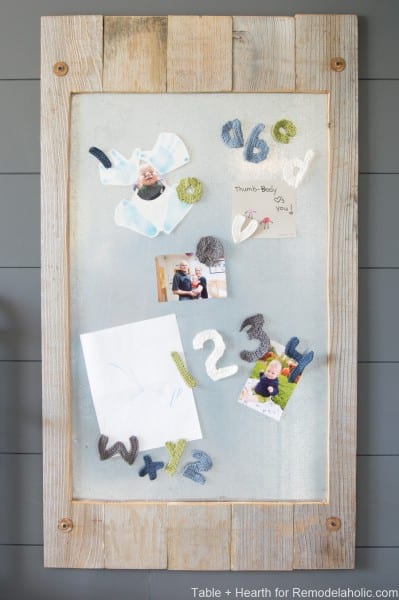
The crocheted alphabet is so adorable! Hopefully it’ll be fun way to practice for him down the road when he’s learning his letters and numbers. The magnets are actually really strong so they hold pieces up well on the board which is nice so I don’t have to worry about things falling off.


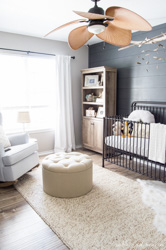
Aside from the functionality, I’m also super in love with the added texture in his room. I prefer to decorate through textures more than colors and his nursery is full of various textures; dark metal on the crib, driftwood accents, a plush wool rug, chippy paint barn door, velvet rocking chair…and now some reclaimed wood and silver metal as well. It also fits perfectly in this open space next to his crib and balanced that wall out more.

My favorite type of project hands-down are ones for our son and I’ll never get tired of revealing fun new things I’ve made to him and watching him play with and enjoy them. Now we’ve got about 294858 items to go through to pick what to display next!
I hope everyone is having a great month and I’d love to see you over at the blog soon!
Here are a few of my other favorite nursery posts you may like as well:
Want to see more of what we’re building? Click here to be the first to receive our new building plans.
More DIY display board ideas:
pallet wood and wire memo board


how to build a magnet board from scratch

upcycled crib magnetic display board
plus 50+ ways to display art and photos


Love the crochet magnets but they are not safe for infants and toddlers. We just had a scary situation with my granddaughter.
I’m so sorry to hear that! As I mention in the post, we do not let our son play with them unattended and I make sure they’re all very secured. None of them are left within reach on the board unless we are playing on it until he’s a bit older. It could be an option to have a back on the letters that would cover up the magnet.