We, Nancy and Tony, spent almost 5 months DIY renovating our mainfloor bathroom. Let me first show you what the
 |
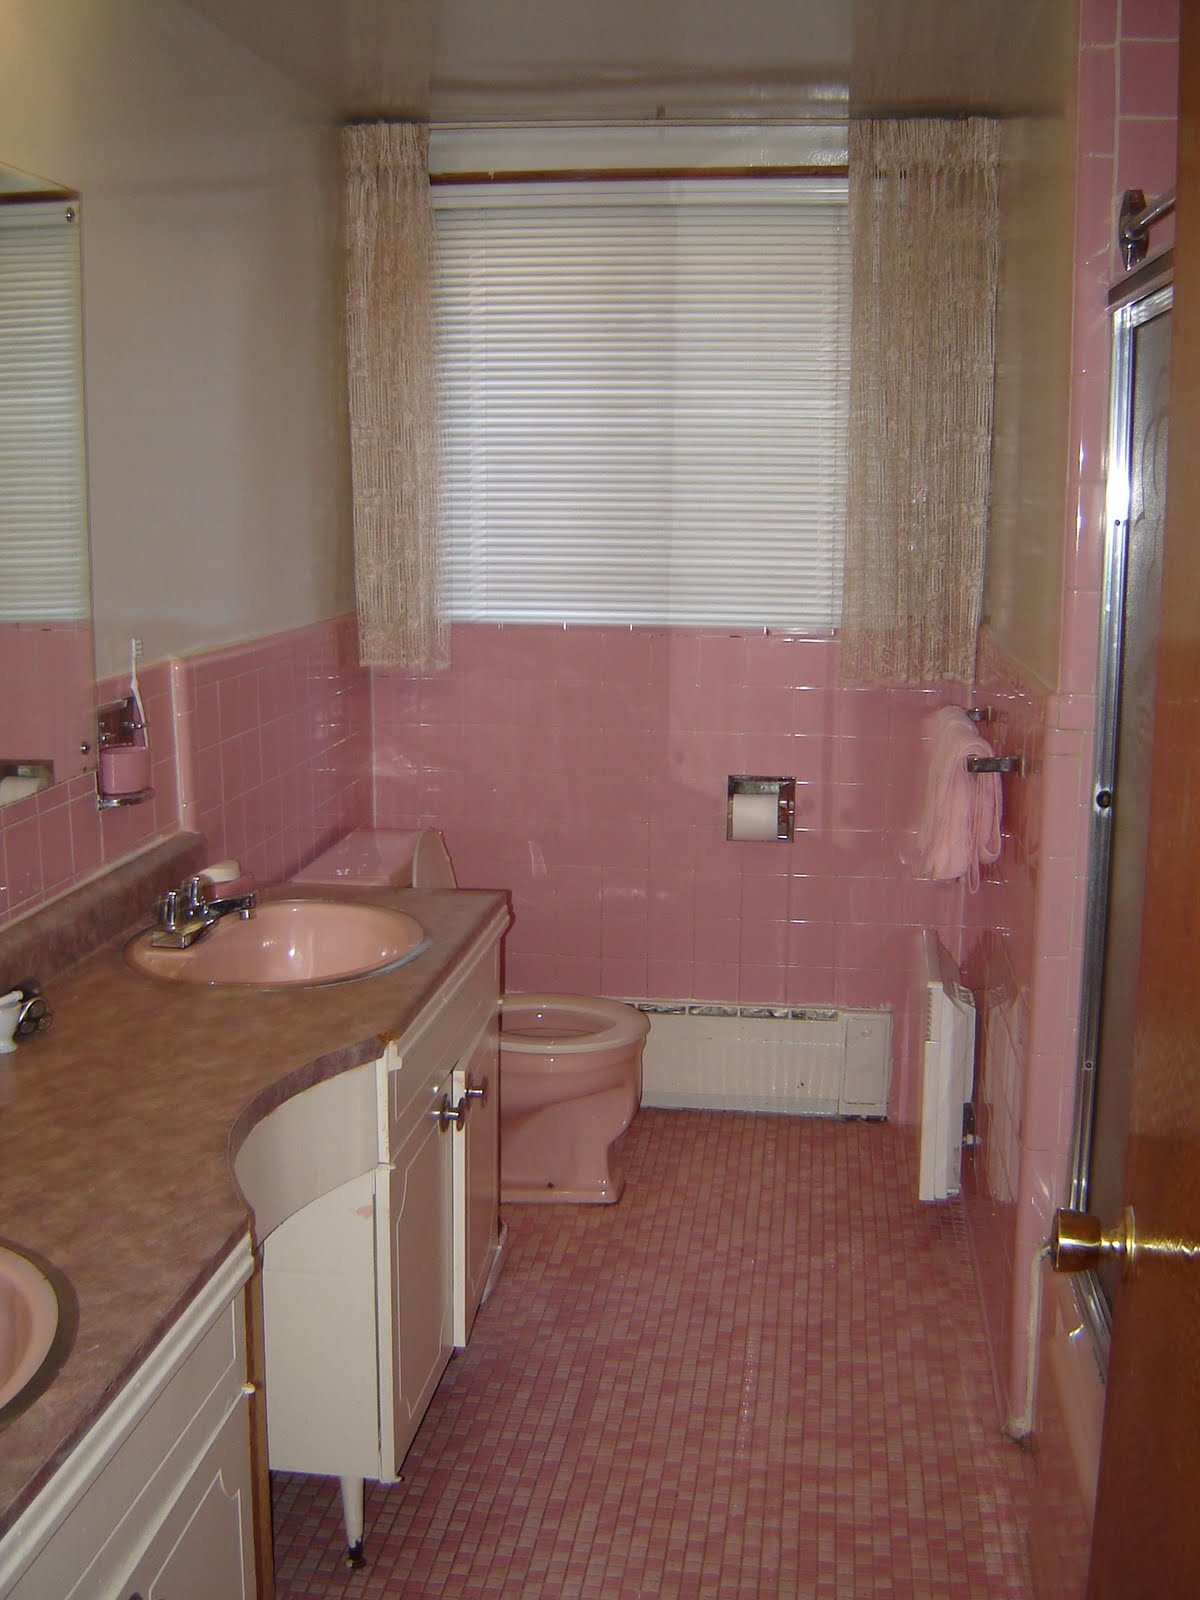
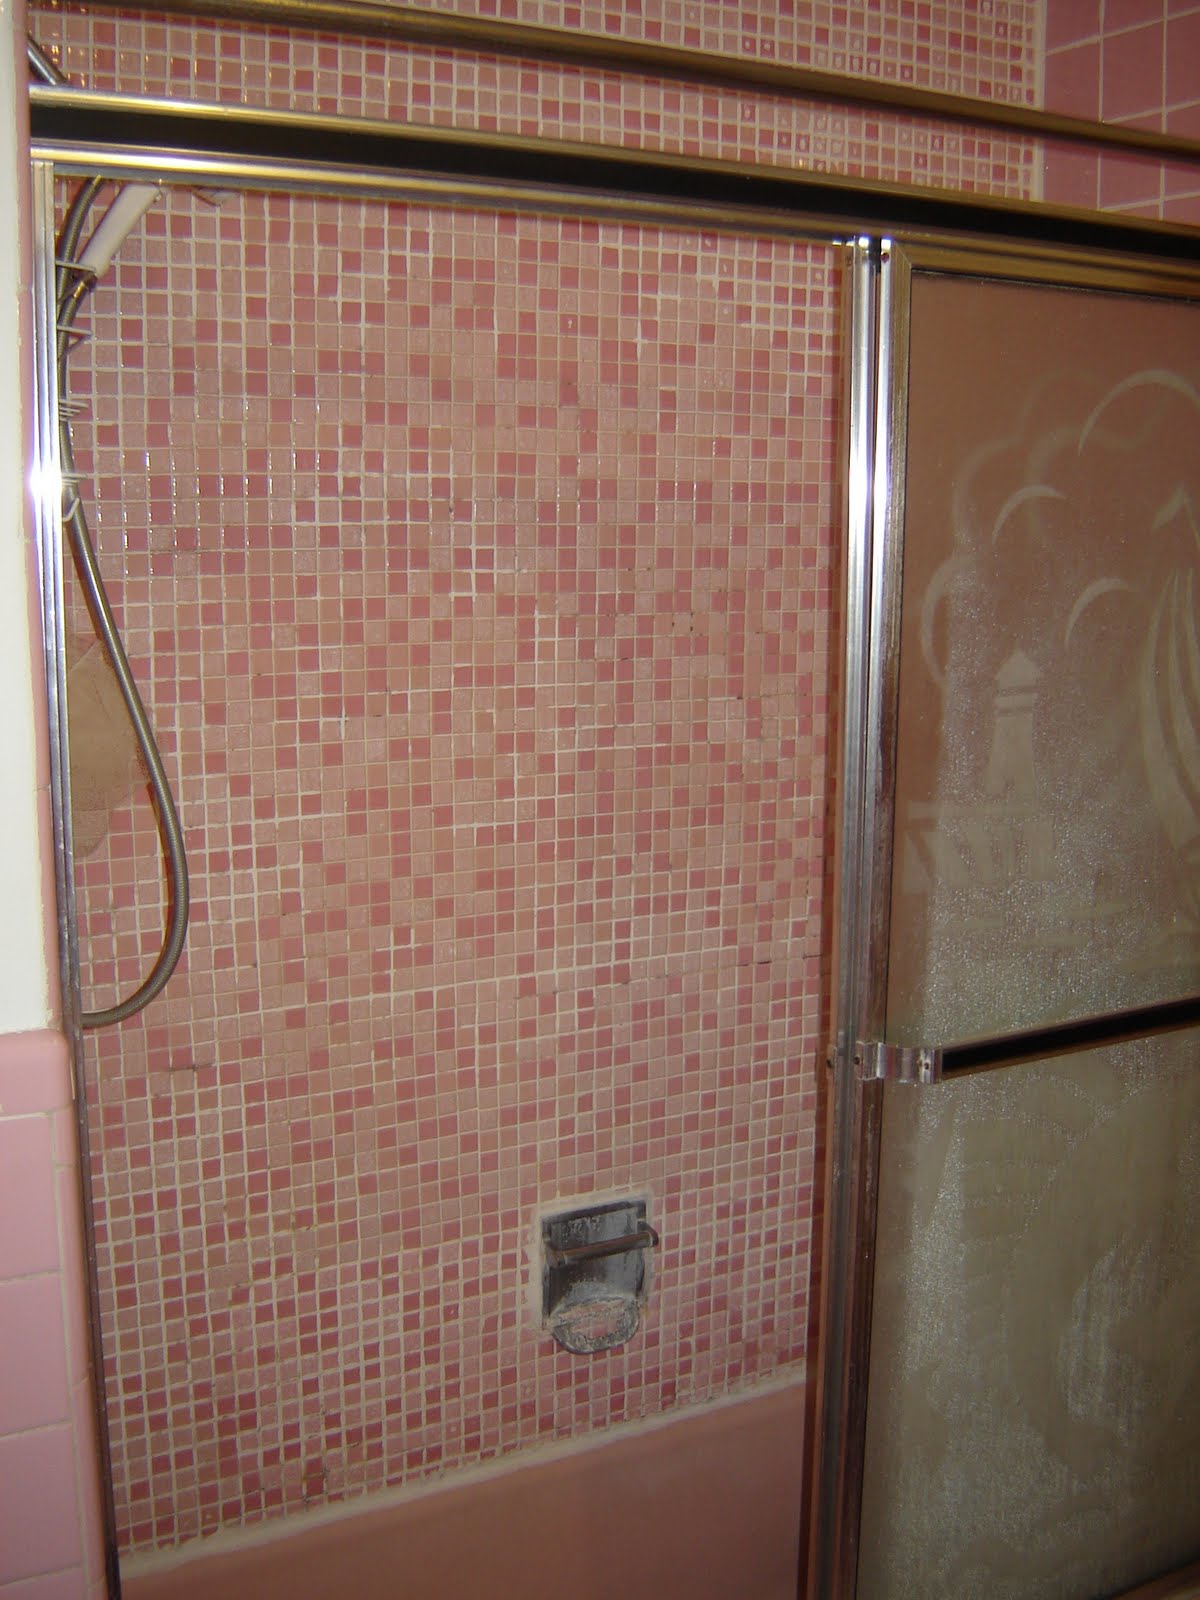
| Could there be any more pink in this room??? |
I am very well aware of the Save the Pink Bathroom movement and also the historian in me felt that the 1960s bathroom belonged in a museum and that it would be a shame to get rid of it. BUT, it was in such bad condition that it was honestly gross! There was sooo much mold in the grout of the walls and floors. There were silver fish (humidity bugs) crawling in the flooring (nasty!). The cabinetry was falling apart. The tub was permanently dirty. And much of the plumbing needed to be changed.
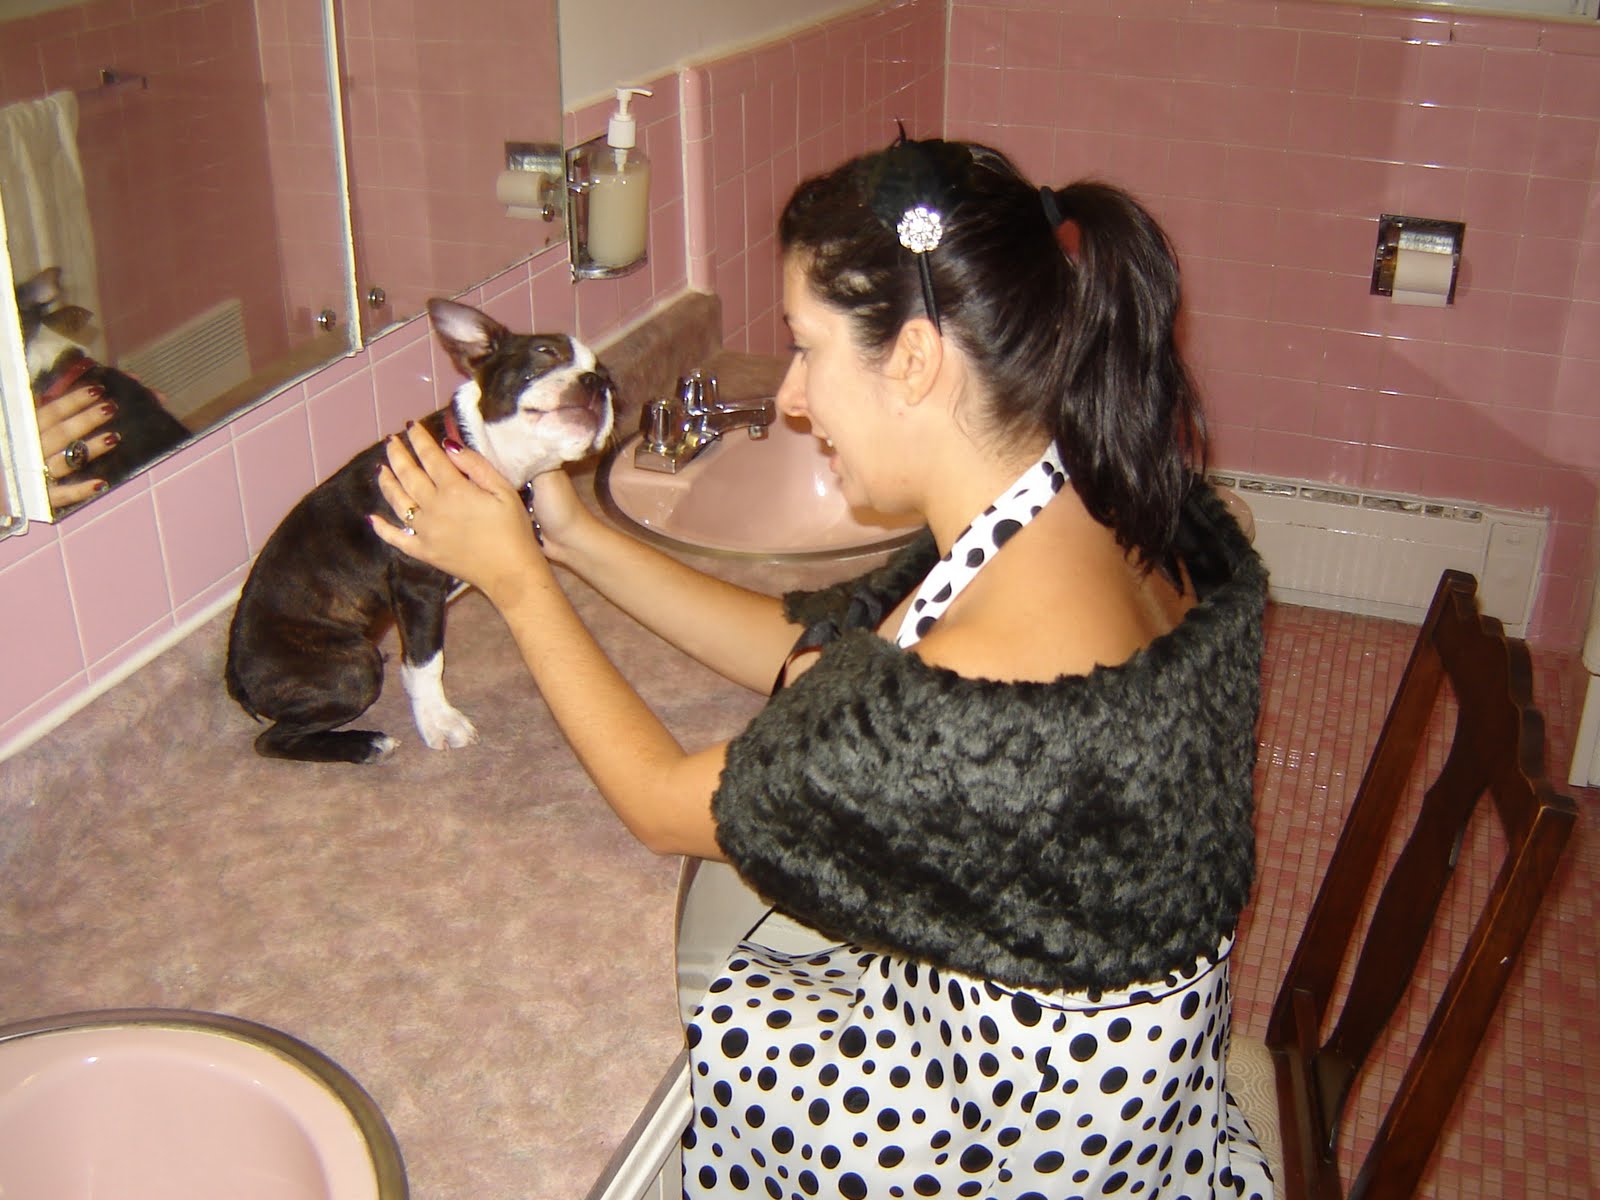
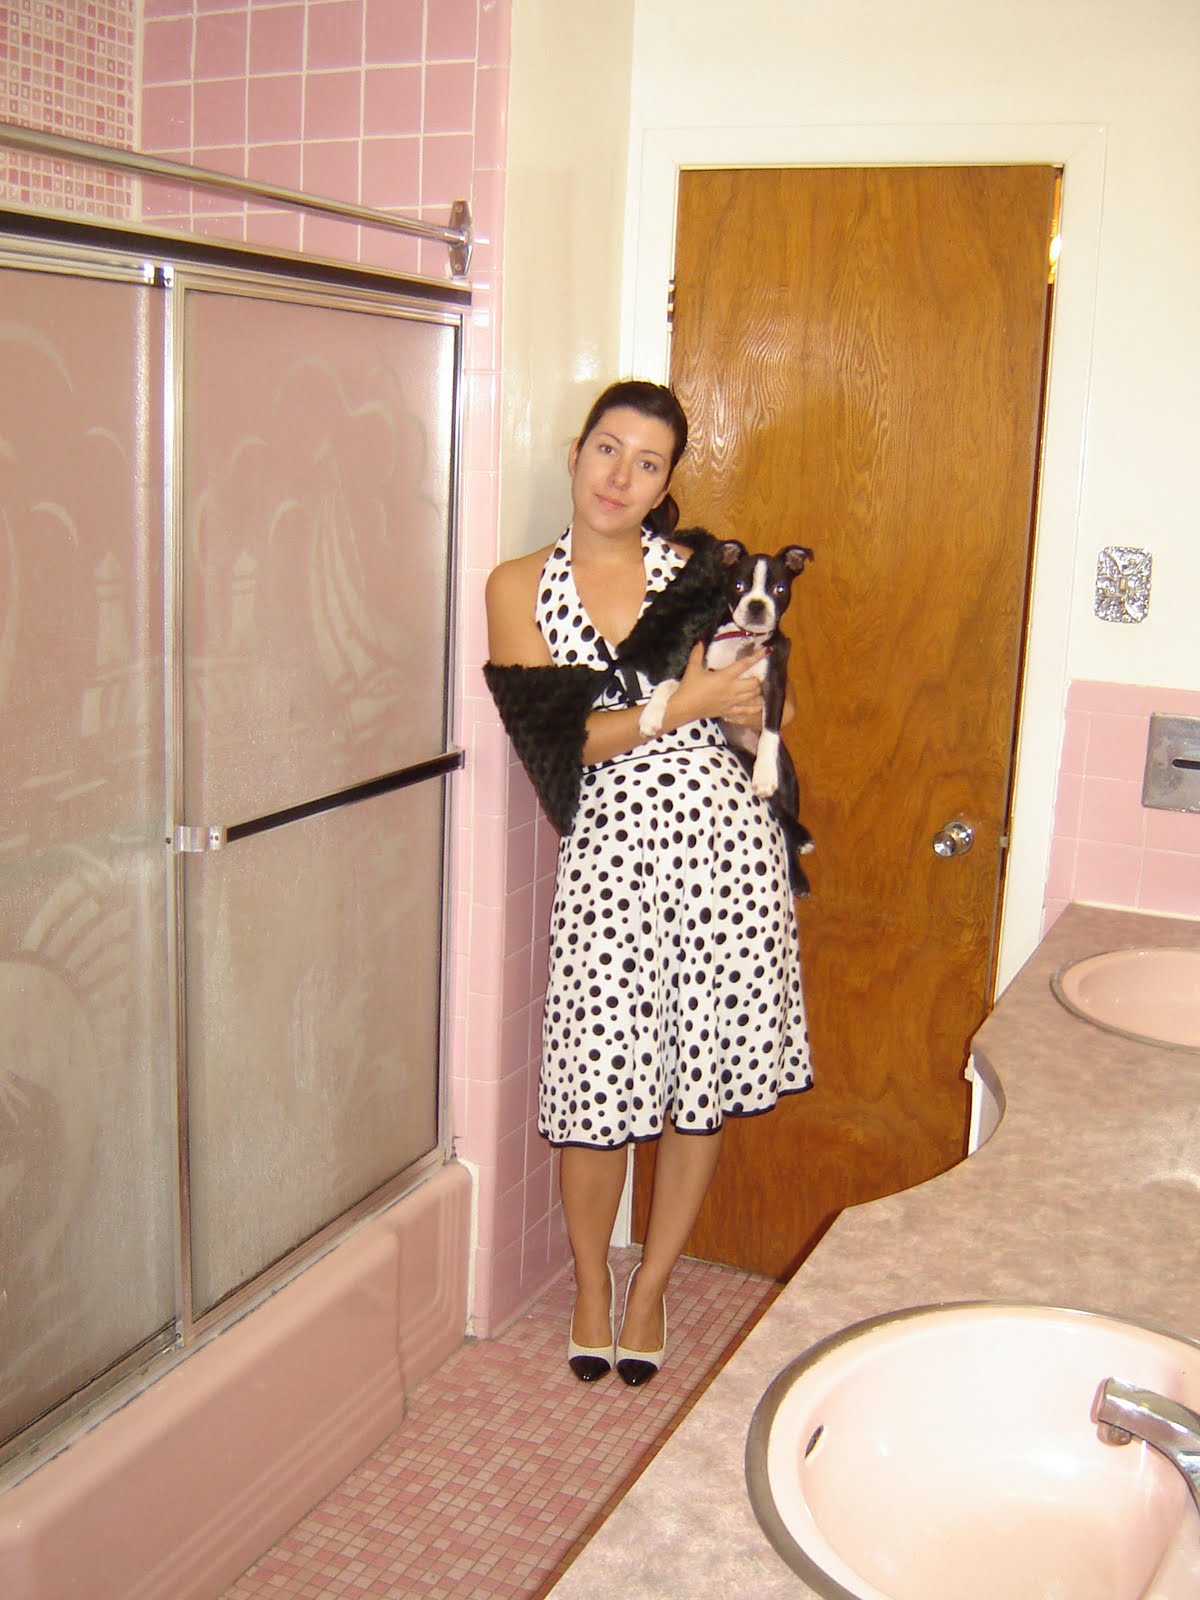
So the demolition began in October 2010. The night before the demo, dressed in my most 1960s inspired outfit with my pets in hand, I enjoyed posing in my Mamie Pink bathroom.
And two days later it looked like this:
And so the rebuilding process began. Notice my forced smile- this is heavy work! But luckily I have my pink steel-toe construction shoes to keep me stylish.
This took us, no joke, almost 5 months. We worked on it mainly on weekends and also during the Christmas holidays (on Christmas eve, day and new years eve and day we worked on the bathroom!).
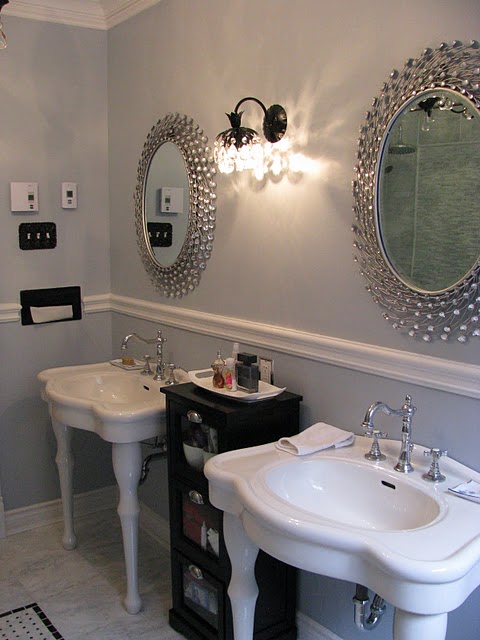
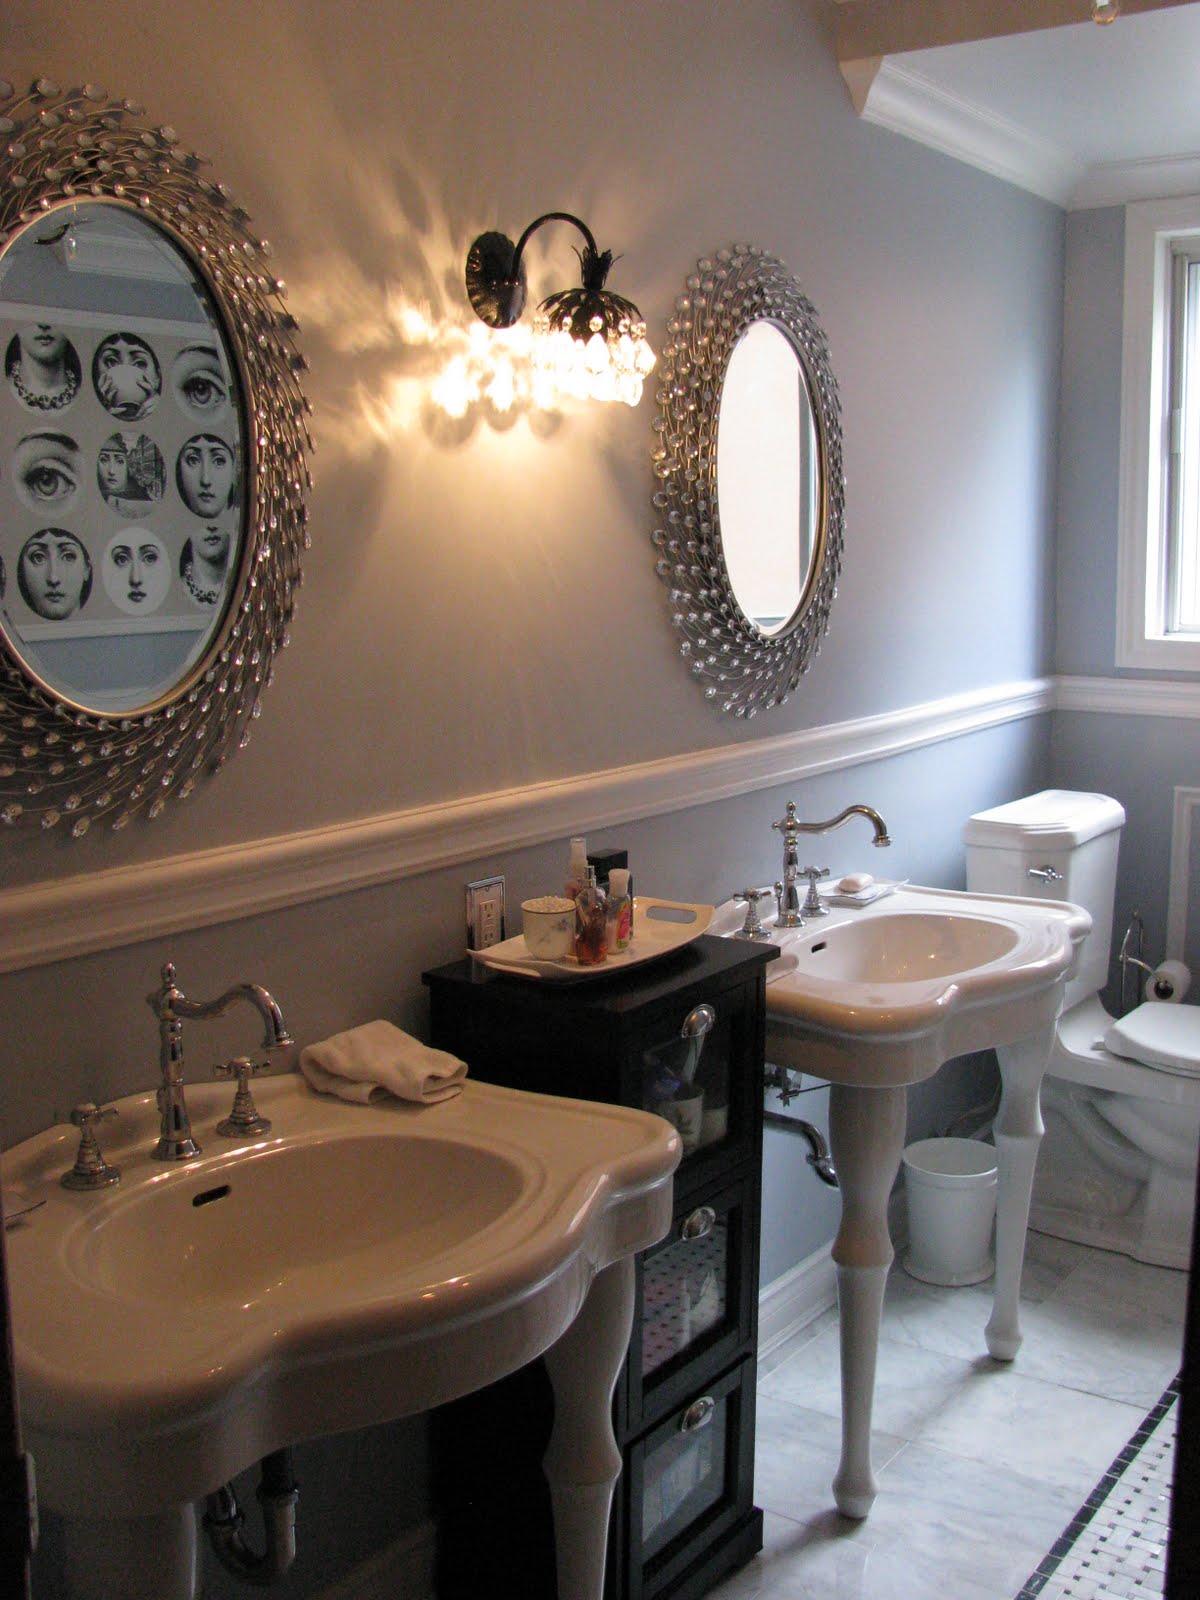
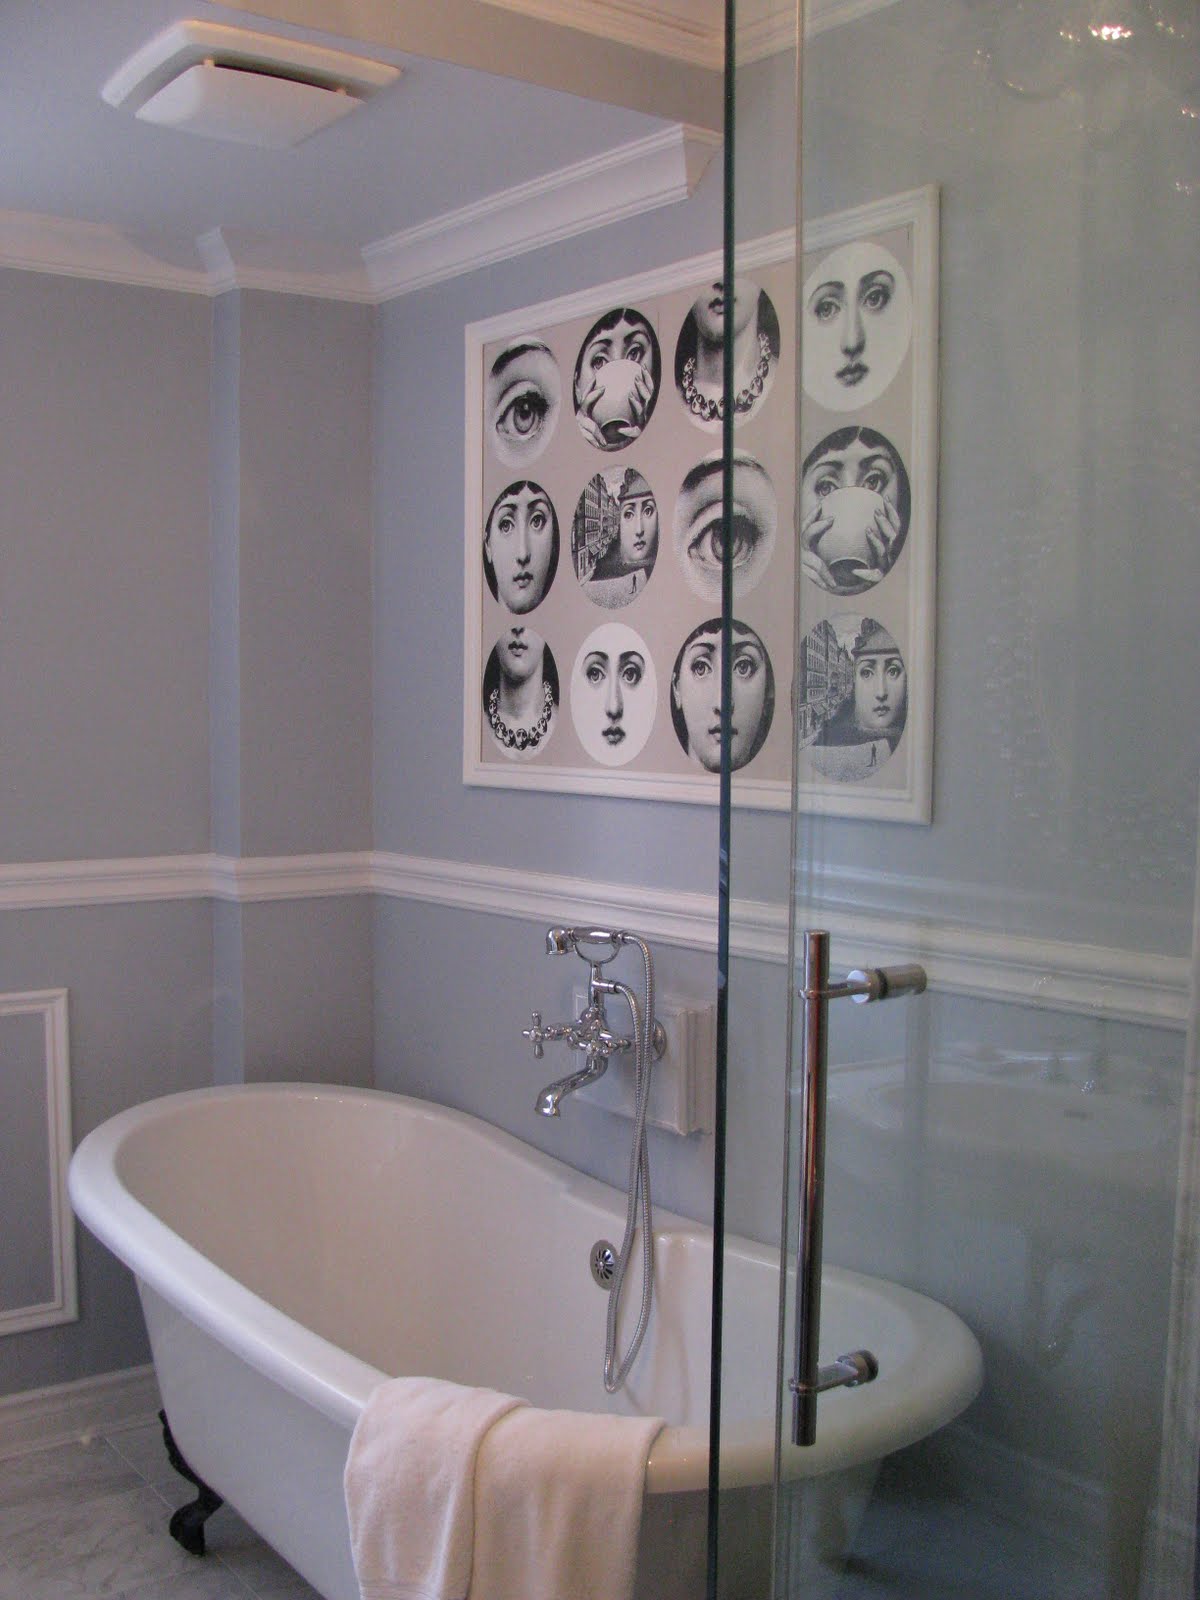
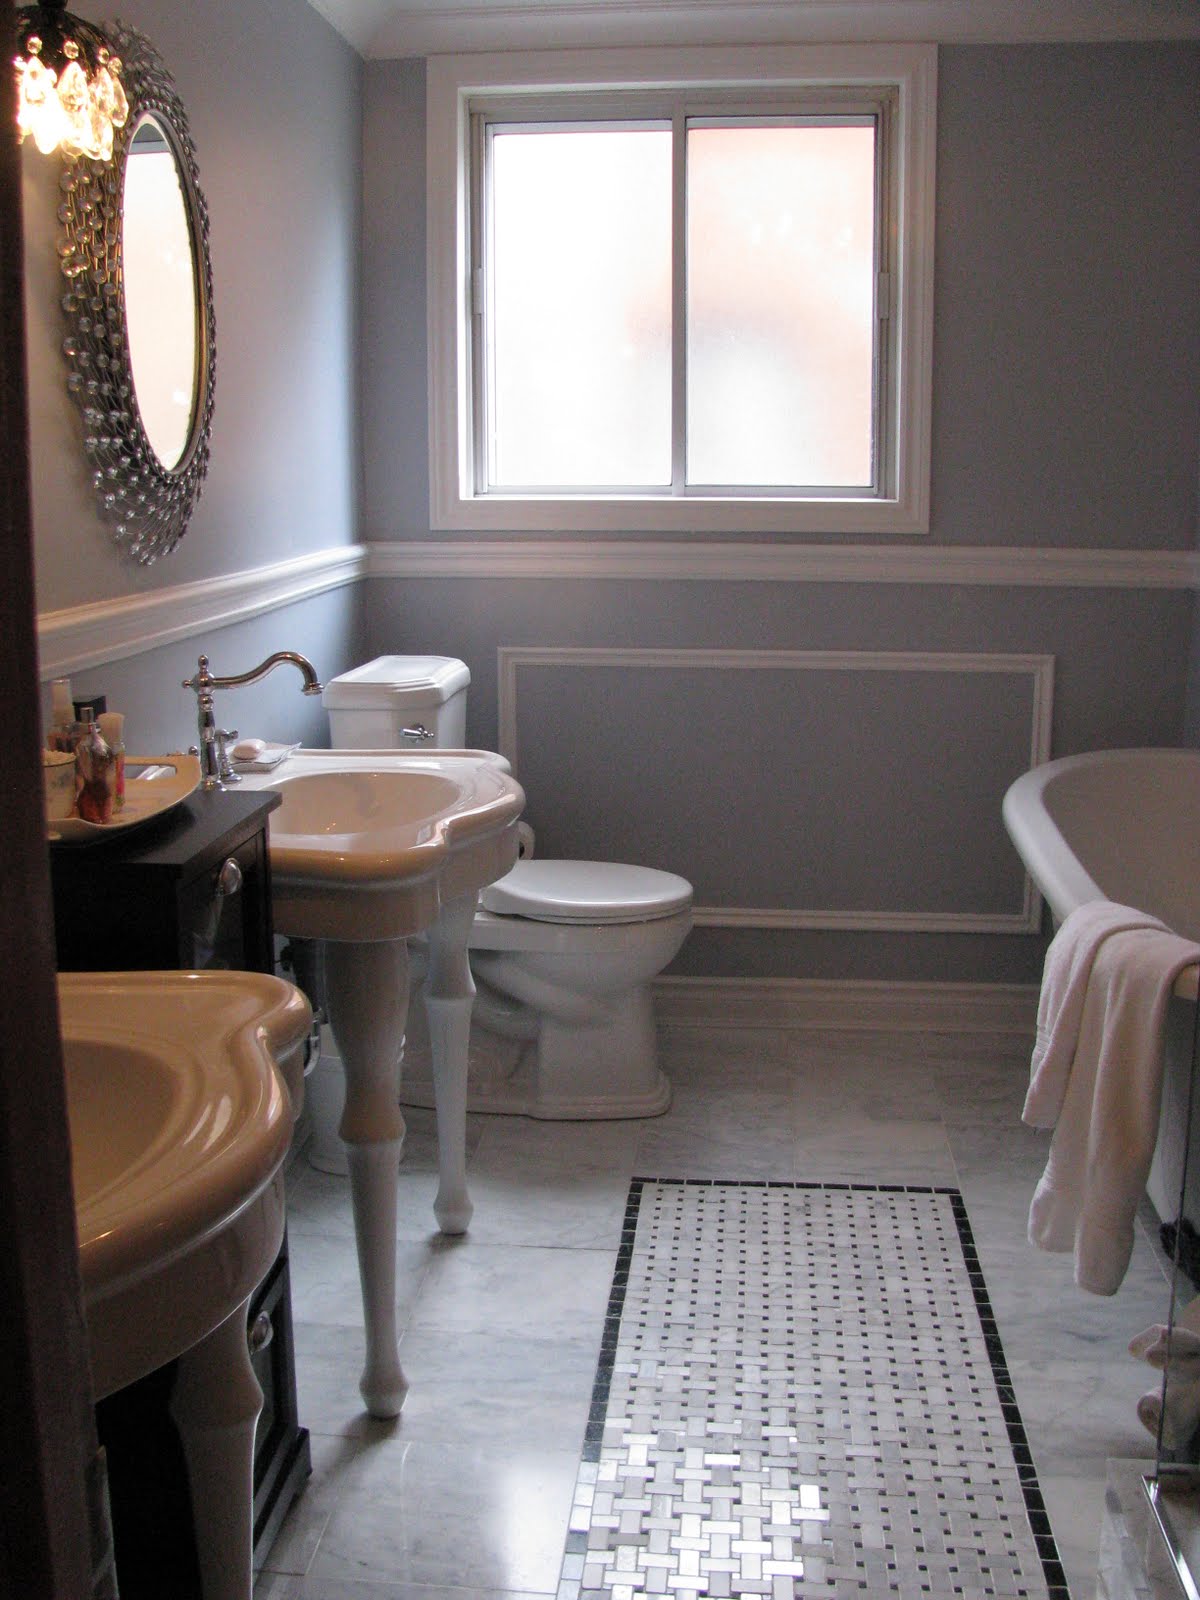
Regarding design and layout there were many changes. We removed a linen closet from the hallway and a bedroom closet to expand the bathroom. We installed a separate shower and bathtub, heated floors under the marble tiles, double pedestal sinks, and much more.
 |
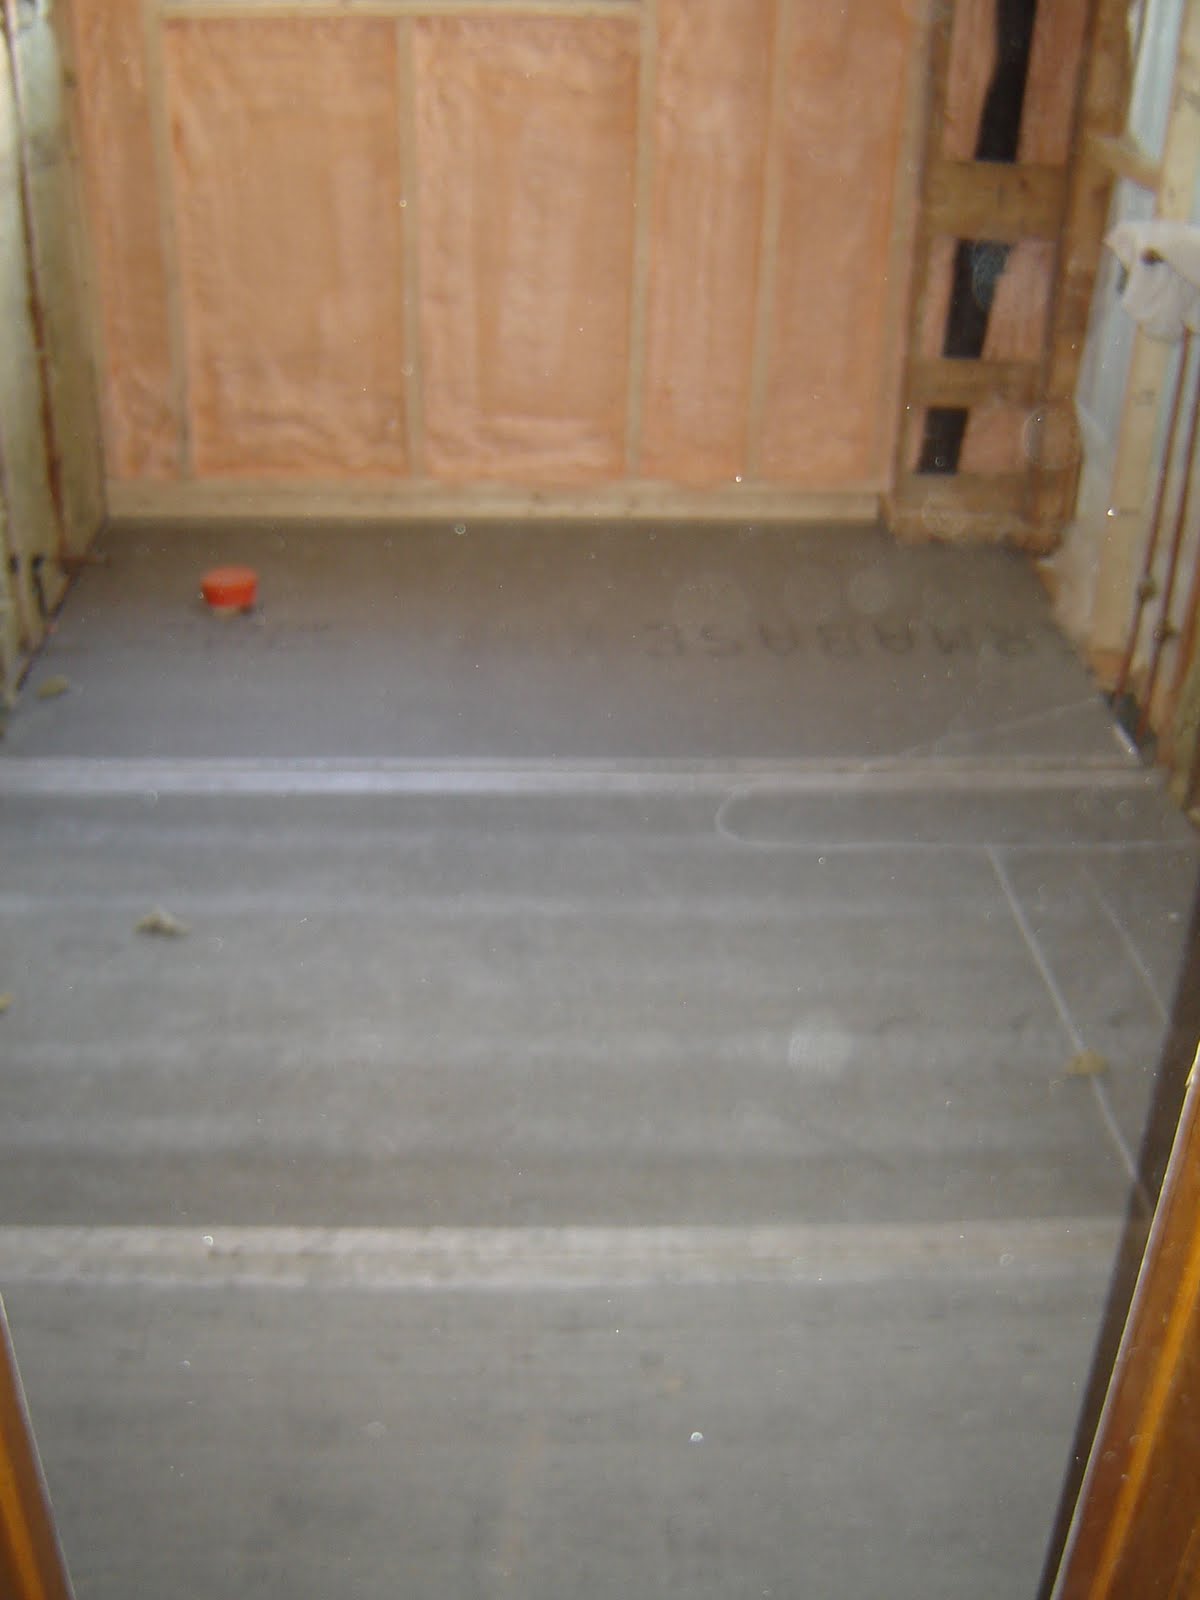
Cement board was placed on the floor- better than plywood for a bathroom because it’s mold resistant.
Click here for detailed installation instructions. |
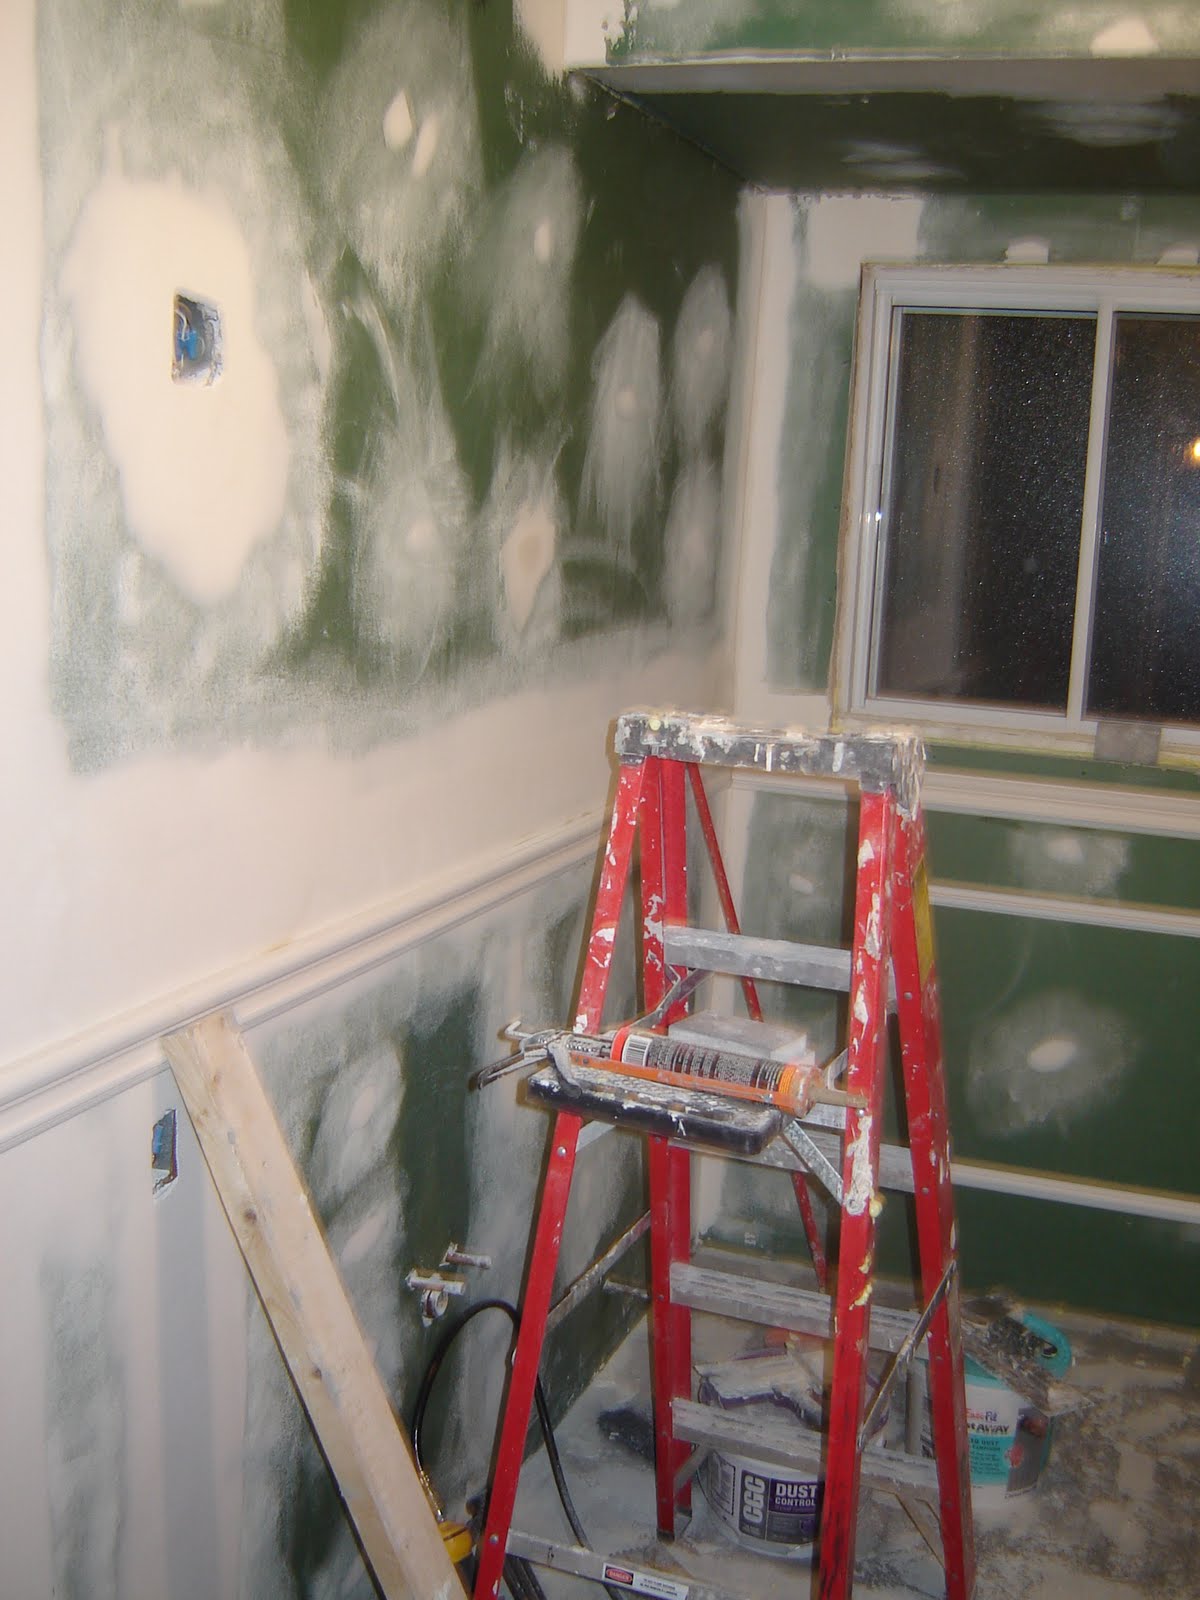
Then the gyprock (plasterboard- walls) was installed and the moldings followed by plaster work. In a bathroom use mold resistant gyp since there is a lot of moisture. Click here for gyp installation instructions and see this site for plastering tips.
 |
| Hard at work sanding the plaster. Notice the forced smile:) |
|
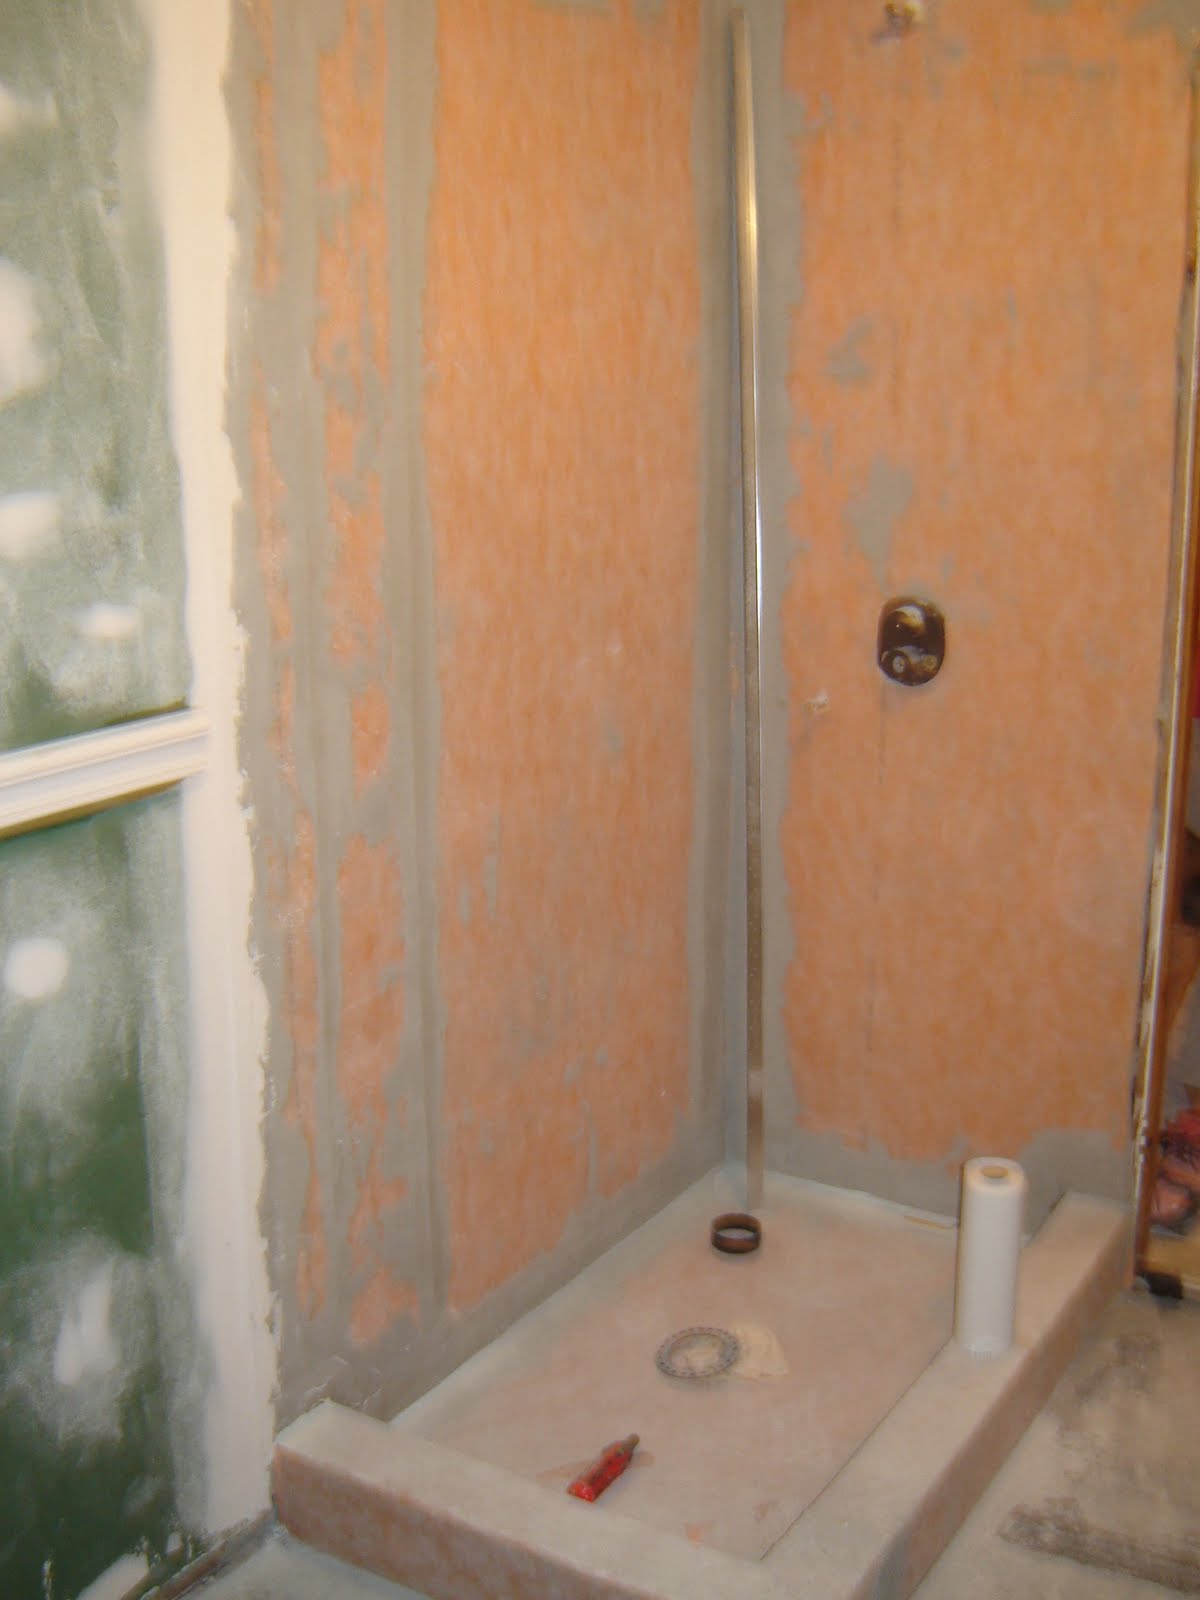
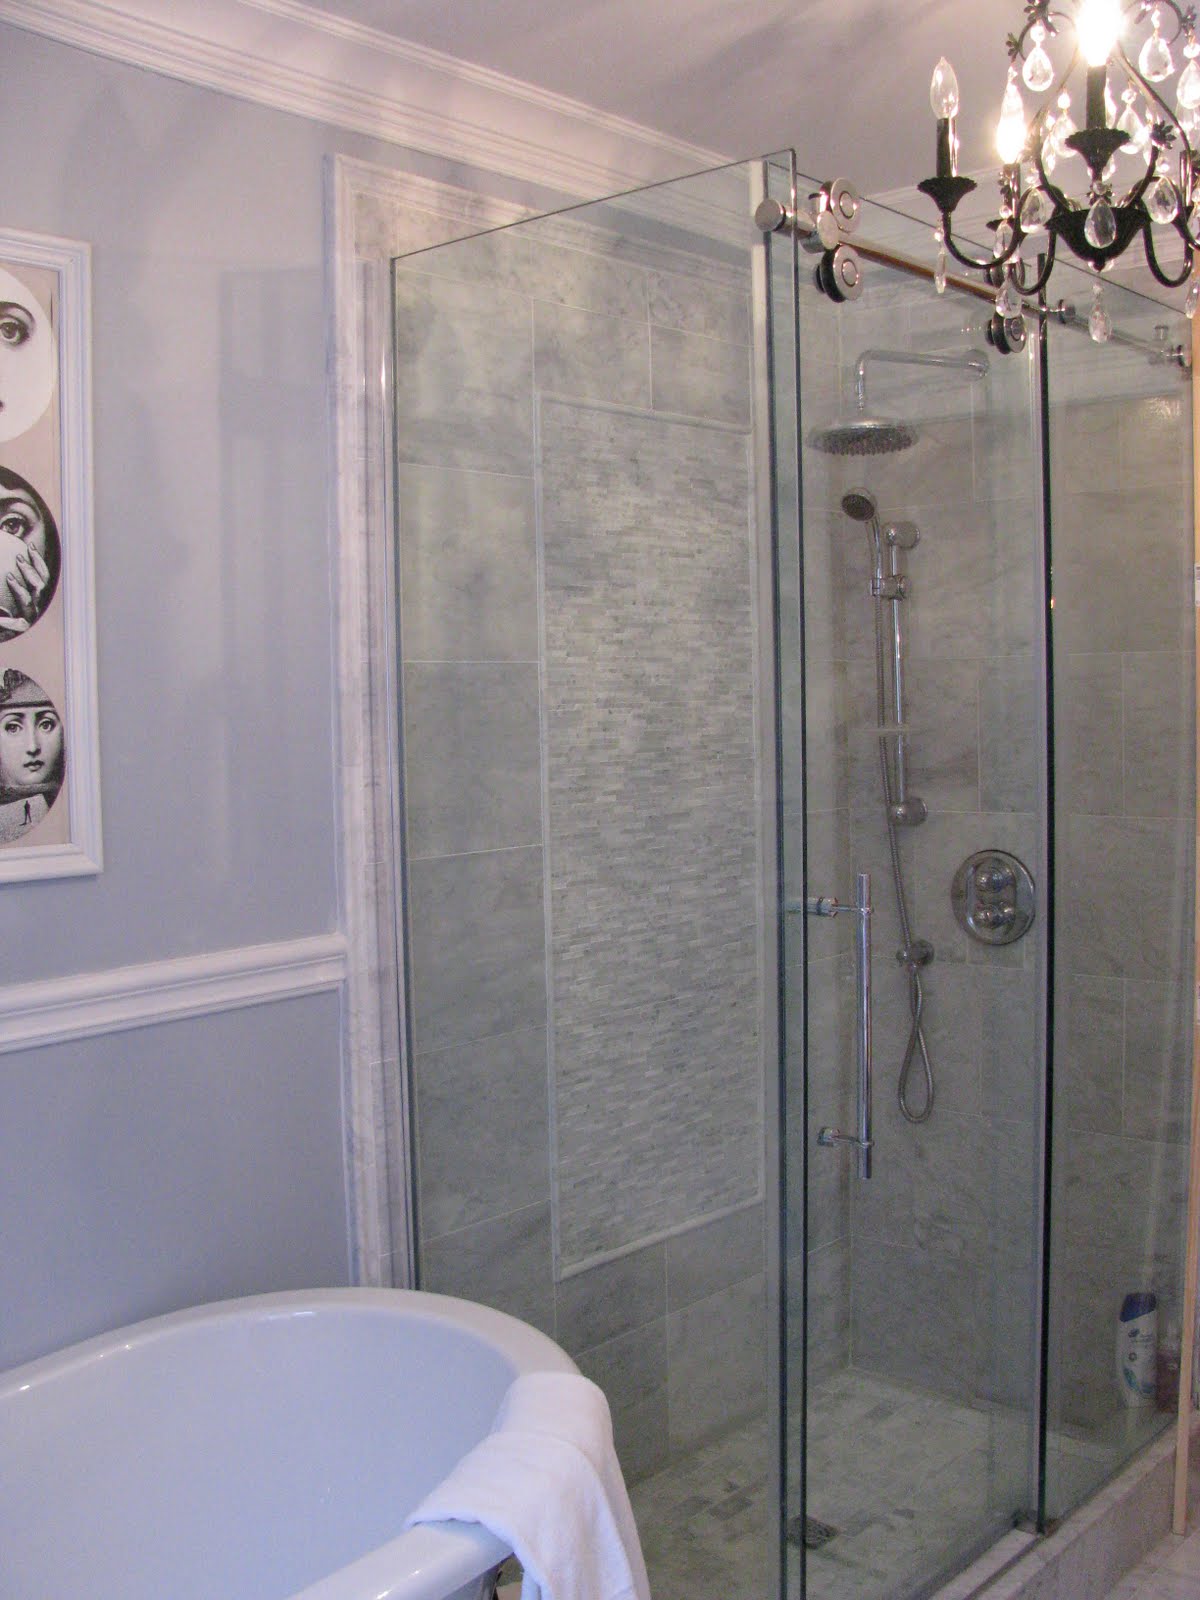
| We went with the Schluter Shower System, which was actually very easy for DIYers. Very important to properly prepare your shower since it is exposed to water. |
 |
| Notice my pants-I’m just a tad bit messy when tiling the floor:) |
| Tiling the shower. If you are using natural stone you’ll need to rent a wet saw. We rented it at Home Depot. |
The location of the inset is key. In our case, it needed to be lined up with the door and not the center of the room. It honestly took me almost two hours before I placed the first tile since the room isn’t square and the inlay isn’t centered in the room. Tony kept saying “Please, just lay the damn tile!”
| Tip: use thinset that is the same color as the grout that you intend to use. In case it seeps between the tile it won’t show once grouted. |
Here is a list of what we did:
Demolition, framing, soundproofing (Roxul and resilient channels) putting up gyp and concrete board, Schluder shower system, wall and crown moldings, installation of heated floor, tiling the floor and shower, painting, made the wallpaper art, sealed the tiles, and all the other little stuff!
What we didn’t do was plumbing and electrical- these are best left to the professionals.
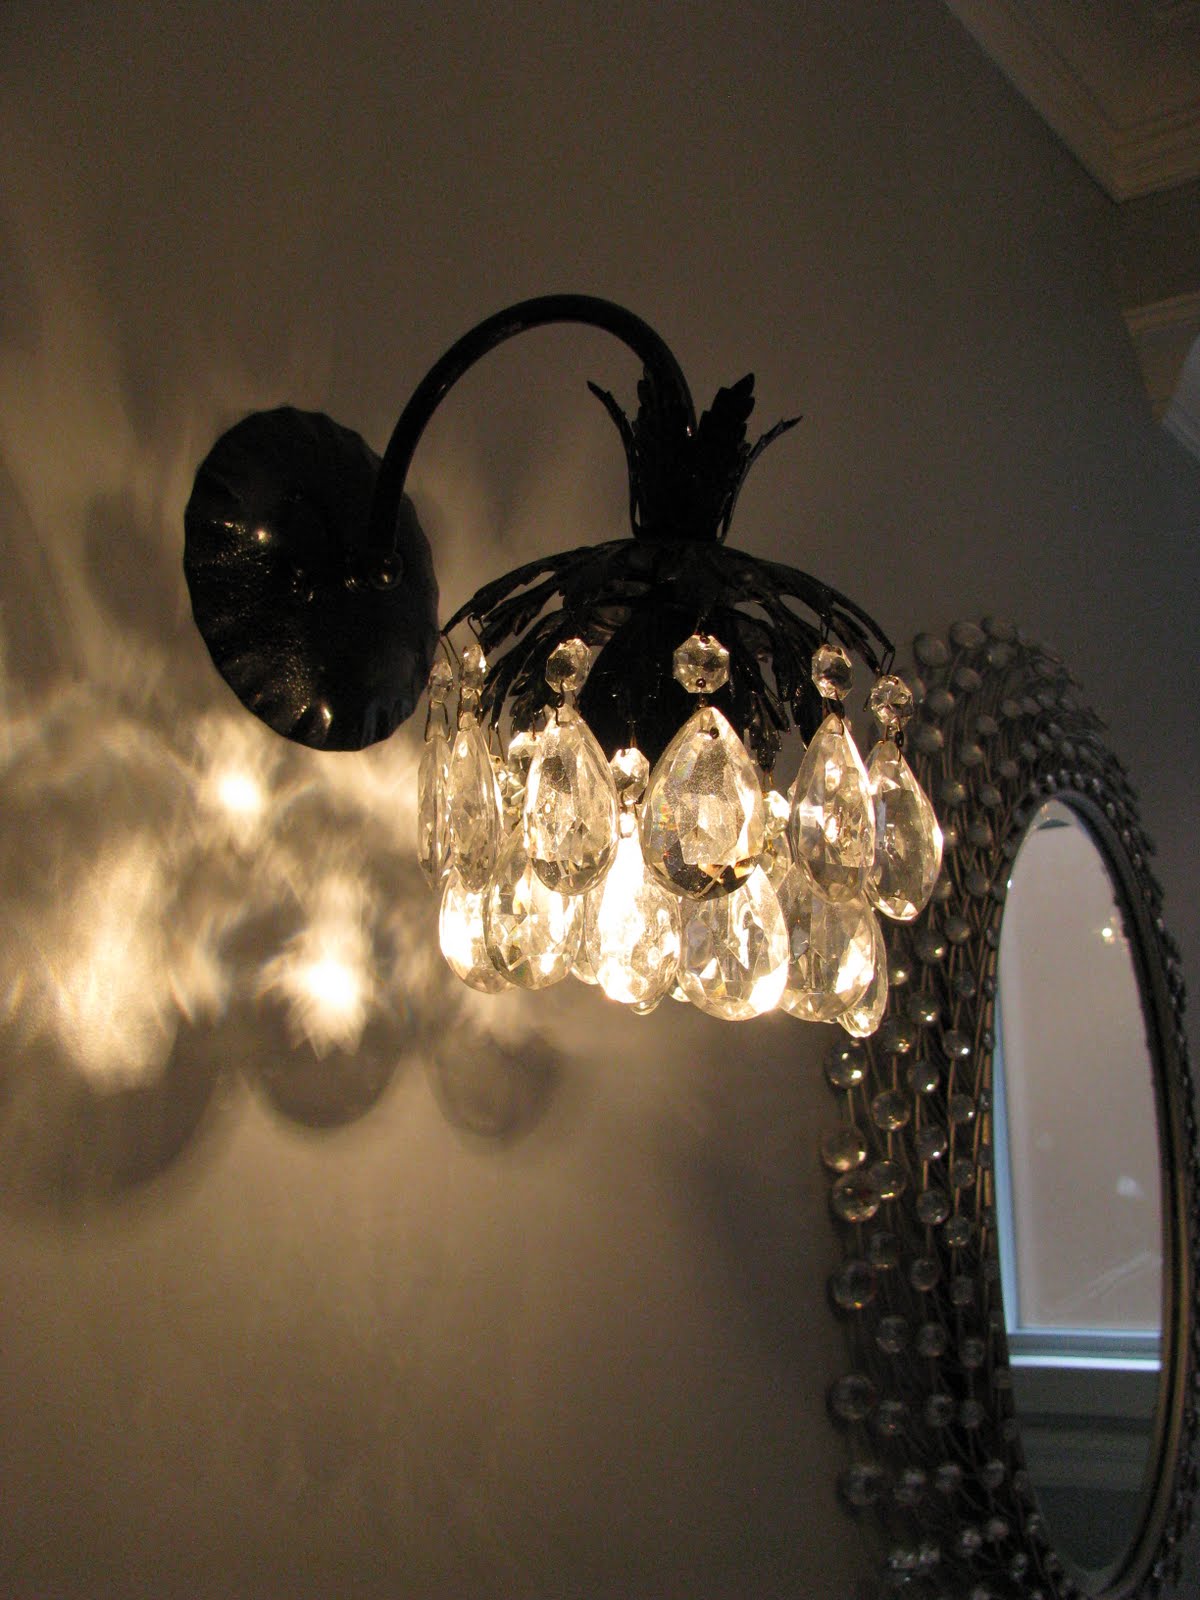
The sconce was a generous gift from friends who renovated their home and were kind enough to give into my pleas for their light fixtures. It was originally gold in color and I sprayed it black.
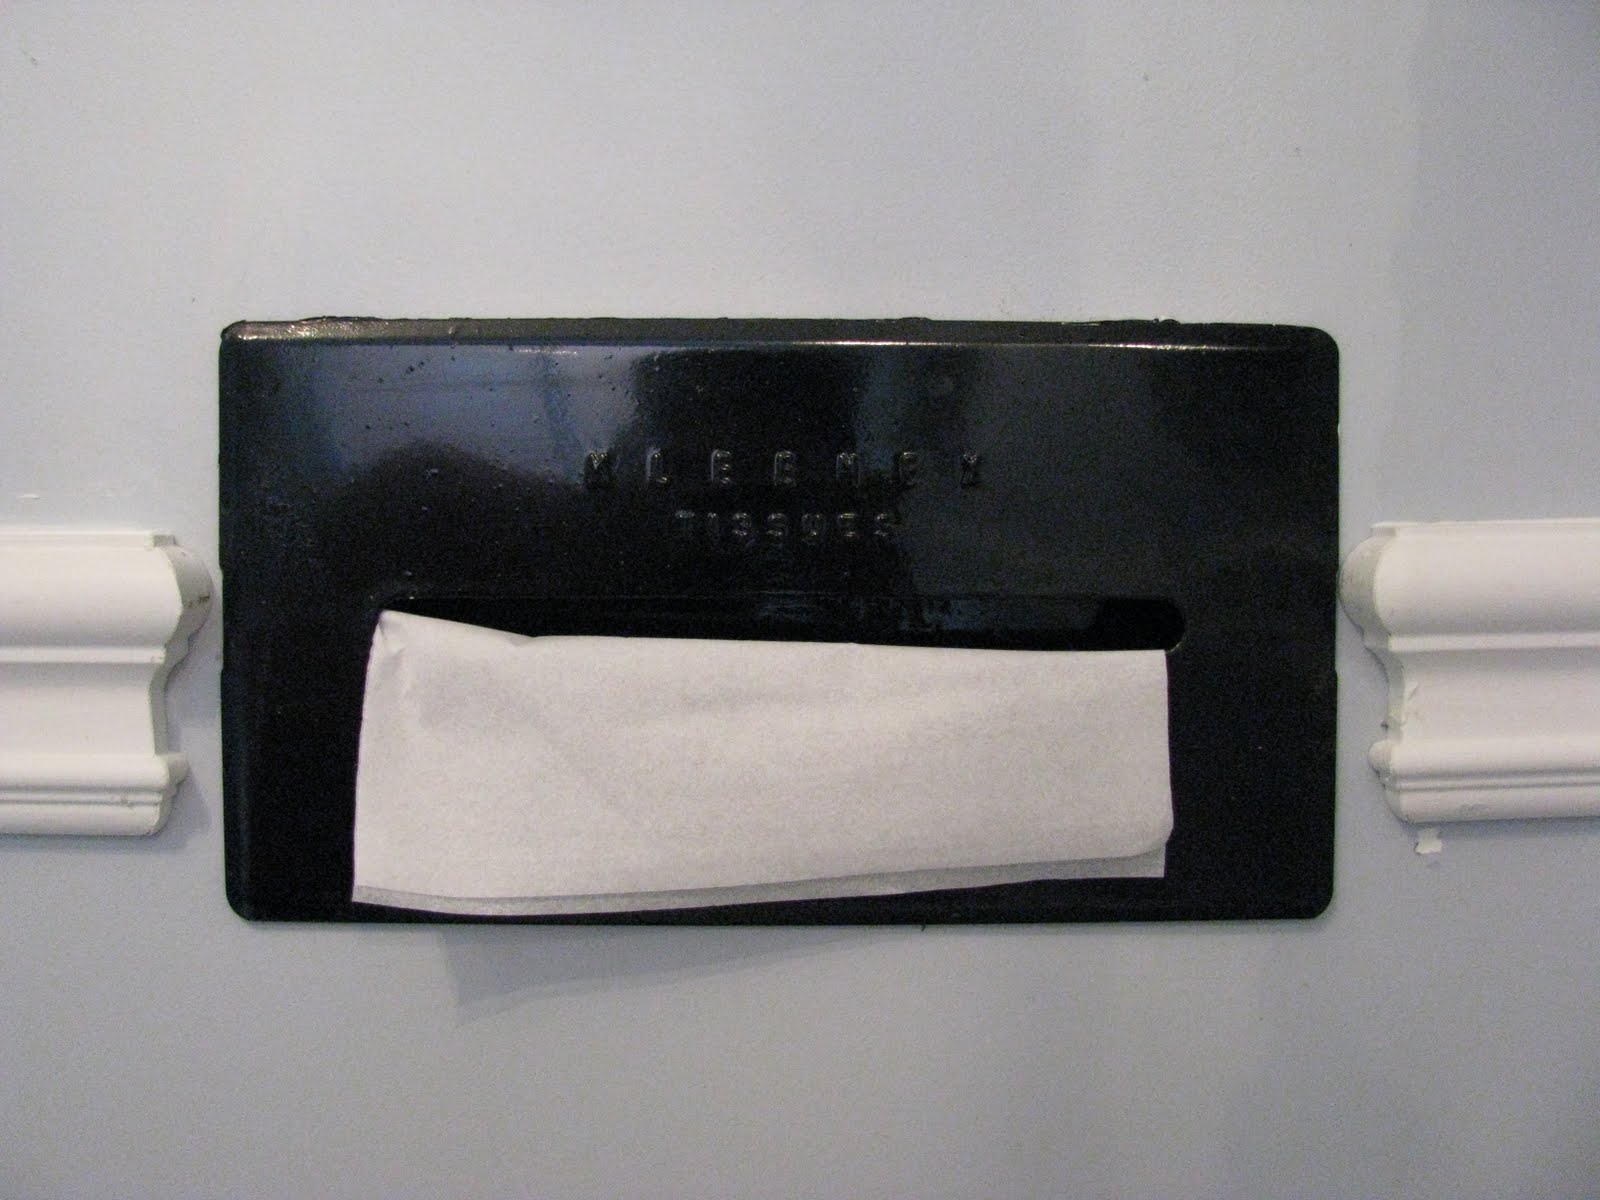
This was an original feature of the bathroom and we kept it. It was the only thing that made it back into the bathroom. Again, I sprayed it black.
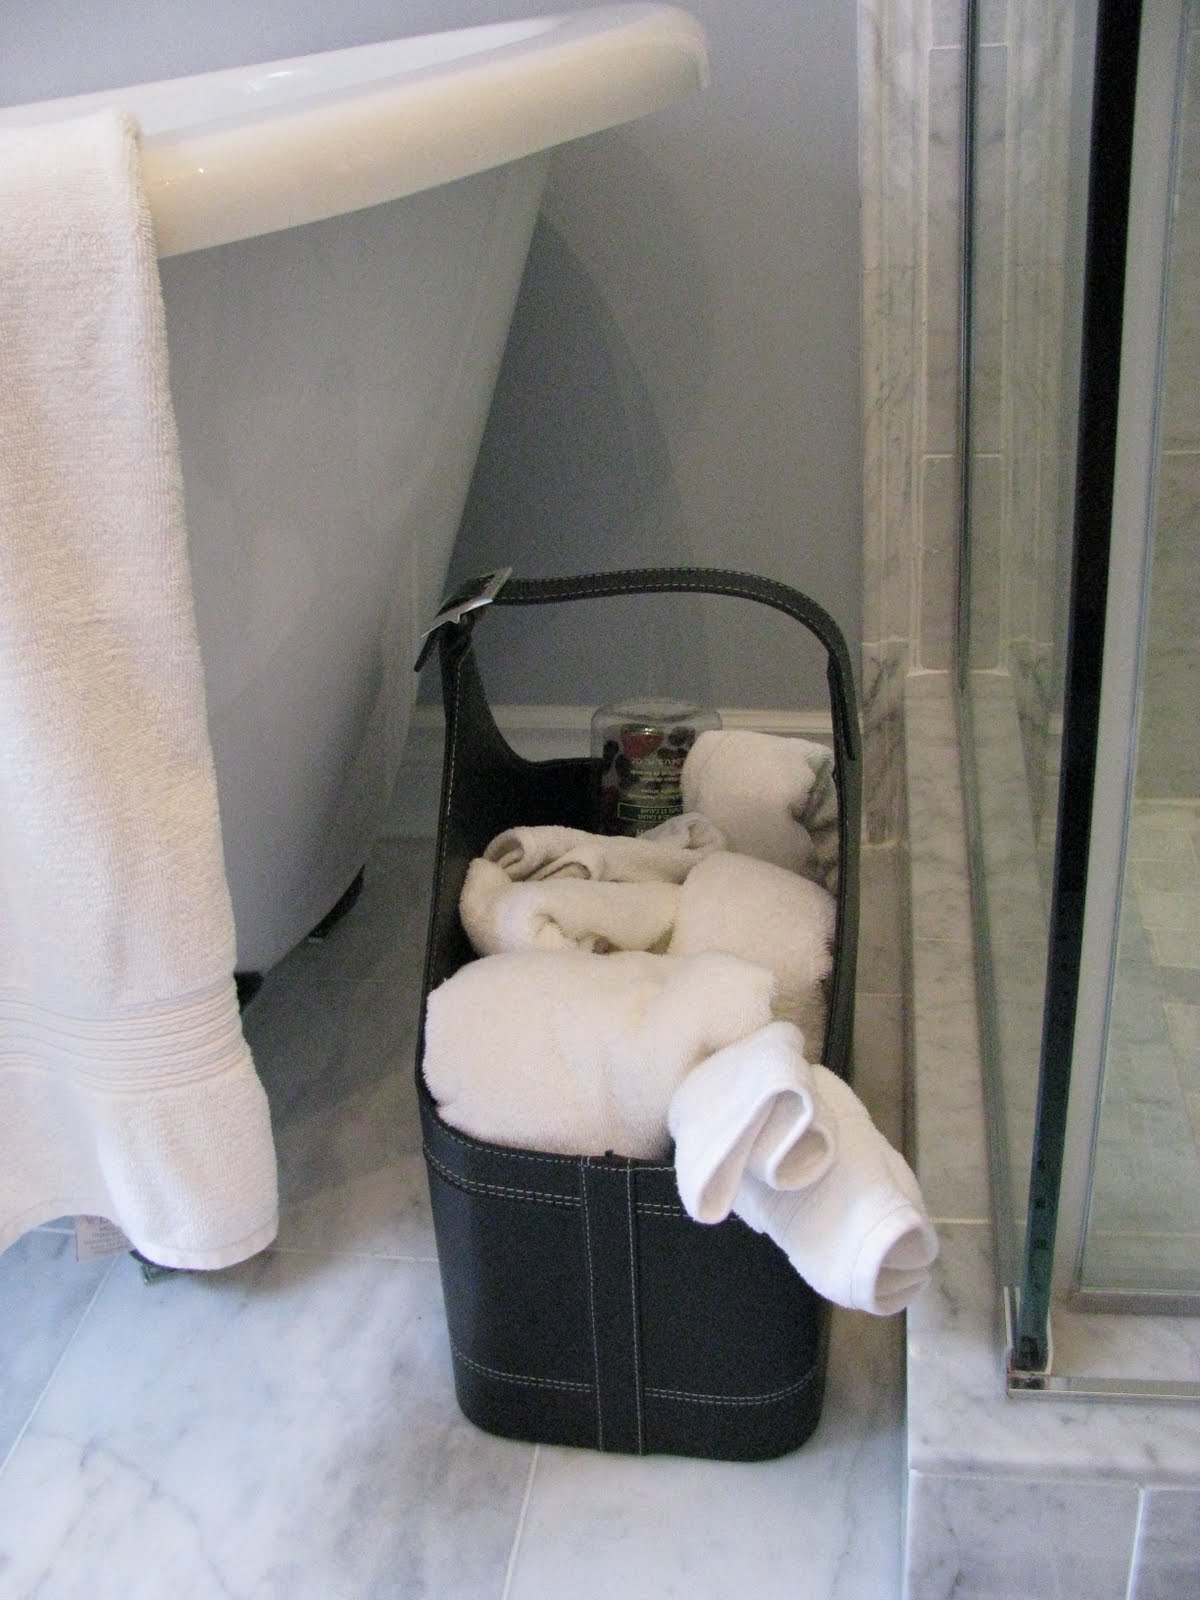
Black leather basket used to keep some extra towels on hand. I drape the towels over the tub instead of having a towel rack.


 This project was contributed by one of our fabulous readers! We love to share your projects with this great blogging community. So, if you have projects from kitchen renovation ideas to small bathroom remodels, overhauled and repurposed furniture, spray paint updates you name it please send it in! Thanks for reading Remodelaholic!


Where did you get those beautiful mirrors? This bathroom looks fantastic! It looks so much larger too.
Hi Gina! This was a guest post, so if you’ll head over to the guest’s blog (linked at the top of the post) then she can help answer your question. Thanks!
Where did you get your sinks? Love them.
Hi Holly! This was a guest post, so you’ll have to head over to the guest’s blog (linked up top in the post) and ask her there. Thanks!
Just came across this post through Google images. Thought I’d leave a comment to say well done!!
I love authentic 60s design and you nailed it.
EDIT: Sorry, that meant to say “vintage” design!
The 1930s-esque touch on a modern bathroom really works.