Head of the Board! Headboard Tutorial

I have been living without a headboard for the last 4 years. Well, technically I have never had a “real” headboard, but I have been wanting one. In college, I made one out of an old door that we had sitting around, (in this post you can see it) it was a great headboard, but I wanted a “real” one so I left it when we moved, and I haven’t had one since! Such is life.


Well, the thought of having a “real” headboard has been on my mind for a while now. If you have read this blog, or searched the archives, you probably know I am not going to go out a buy one. . I just can’t swallow the price tag of the cardboard furniture that they make nowadays. That and I definitely cannot afford the “real deal”.
So, I’ve let the desire ruminate for a while.
And a golden idea struck me… Kitchen cabinet doors! Yea!..uh…What?


That is right kitchen cabinet doors. They are pre-made raised panels, which removes the need for expensive router bits and table saws.
So, now I am going to share the plans with you, because what are blog buddies for, right? Wanna sneak peek at the finished product first? I feel like a genie in a bottle granting your wish, and now I have that Christina Aguilera song in my head… not what I meant at all!

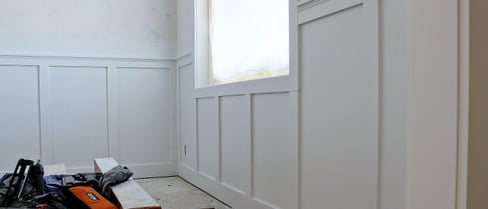
As we made this, we learned some things and figured out how we should have made it (to simplify it). So, we have a TON of pictures that are not exactly right. So, we built a model, and made an instruction sheet so when building this follow the steps on the instruction sheet and not the order in the images. And as always if you have any questions, please just leave me a comment, I will clarify when necessary through the comment section below.
We have worked very hard on this project, and have spent a lot of time creating this tutorial, so I have a request, please! This project may not be reproduced on any blog without receiving written permission before posting. If you receive permission, you may use the finished headboard image only, and link back to Remodelaholic for the tutorial. No part of the tutorial may be copied except for personal incidental noncommercial home use. If you build the project, and post about it, please link back to the instructions on Remodelaholic. Thank you.
Now that the tough stuff is out of the way, I want to clarify one more thing, this project is meant for those of you without a lot of tools, and just a basic understanding of building, so BE careful! On that note, IF I were going to spend real money on the wood (and buy walnut or poplar or some other nice hardwood) I would have built this very differently!
Headboard Tutorial instructions:
Supplies needed:
2 – 4 old kitchen cabinet doors
Various 1 x __ Mdf boards (size depends on cabinet doors!!)
(we used: 1 x 3’s approx 16 linear feet, for the bottom rail and all vertical stiles
1 x 6 approx 12 linear feet, for the top rail and top shelf)
9 linear feet of small base board molding
1 -8 foot 4 x 4 cut in half ( I had Home Depot do this)
3 – 8′ long 2 x 2’s
(optional: to hang on wall an 6′ long 2 x 4
cut in half on a 45 degree angle on a table saw)
Tools:
Miter box and saw
Screw driver, drill bits and screws
Hammer and finish nails
Nail set
Sanding block (or sanding paper wrapped around a piece of wood)
**Measurements are all relative for this project.
They depend on a number of things, like the size of bed you have,
the size of doors you find, how many doors you use etc.
So, I have attached an image with a few of our our measurements called out
so you can get a better understanding of scale, just keep in mind you will have to make it
according to your supplies.

*TIP*
When you buy MDF boards the length wise front edges are chamfered (or rounded off on corners) So, in order for butted edges to look clean, and well planned, after cutting all the vertical stiles to length, sand the top flat edge to match the horizontal edges. That way a straight angular end won’t butt up to a curved edge, instead both will be rounded off and look even, and well planned!

If you want to make a matching foot board,
instead of the 2 x 2 frame you would just attach the doors to another face frame on the back.
And use pocket screw on the inside of that face frame to attach it to the posts.


To better understand the headboard, and see clearly what is what,
I color coded an image, and called out some things on the next.


To hang this on the wall attach the bottom half of the optional 2 x 4 that has been cut in half at a 45 degree angle to the wall like so. The other will hold the headboard to the wall!


This project can easily be customized. I saw a headboard online while surfing that could be made using these instructions. See, you could easily make the headboard below as well, by only using two large doors, and aligning the top of the posts with the top of shelf and attaching that top shelf all the way across.

I must tell you that we actually spent much less than $30.00 on this project by using old scraps from other projects. That price is more likely what you will spend buying all the wood etc. But, I thought it would be fun to give you our cost breakdown anyway, because honestly I am such a deal lover that it is fun to share.

Our Final Cost Estimate:
$8.00 – 4 Kitchen cabinet doors
$7.00 – 8′ long 4 x 4 (we have scraps and an AWESOME project planned for these!!!)
Used old wainscoting molding(from Asheville Kitchen Remodel)
Used old 2 x 4’s cut to 2 x 2 (from Asheville Kitchen Remodel too)
MDF (left over’s from our Screen making tutorial)
Screws and nails from our stash
Tools already owned
Paint (left over from Laundry room remodel)
Caulk (laundry room remodel left-overs)
Plaster for patching (left over from our unfinished column project)
Grand Total: $15.00


Remodelaholic is written by Cassity and Justin. Cassity has a degree in interior design and Justin is a landscape architect, so we adore everything that makes up a HOME! We love to share home remodeling ideas and projects we’re working on. From huge kitchen renovation ideas to small bathroom remodels, there isn’t anything we won’t try to tackle (at least once!). We are in the midst of our third whole home renovation, so there should be a lot more inspiration coming your way. We hope that you will stop by often for home design inspiration, tutorials, interior design tips, delicious recipes and what is going on in our family life.


>Fan-tabulous!! Thank you so much for sharing this. It looks beautiful!
>It is so fantastic! Great job! I'd love to feature you this week as a highlighted project on My Backyard Eden. Let me know if it's OK for me to link to your tutorial and photo!
Thanks for linking up to Make it Yours Day at My Backyard Eden!
>Are you kidding me? Oh my…I love it…Can I just give you $15, and you can make me one? lol! Seriously…LOVE this!
>Thank you so much for linking up to It's a Hodgepodge Friday! I love what you have been up to. Thanks again!
~Gay~
itsahodgepodgelife.blogspot.com
>This is a most astonishing piece of work, a superb result and amazing graphics and tutorial. Wowowowowow! You put hgtv to shame!! Hope you will take a rest now and tour the Architectural Digest Home Design show with us. — Jane F
>oh my goodness this rocks!
>This is incredible! I have been trying to find a fun and inexpensive way to revamp my bedroom! Thanks for the great post! I am a new follower from Friday Follow! Please come by and follow me too:)
>LOVE the headboard and many of your other posts!! We have 5 kids and are both fairly handy, but YOU'RE MY HERO TODAY!! Thanks for the awesome tips! I've followed you and will be back very often!
>Wow girl I'm impressed bit a little too intimidated to try it myself! =0) Thanks for planting your creative seed at Plant a Punkin Seed Party!
Kristi
Punkin Seed Productions
>Oh my gosh!! That's amazing. What a makeover. I love seeing us ladies taking the man tools head on and making amazing stuff. I LOVE IT. Great job.
>awesome awesome i love it. We just bought a new king bed but could not get a headboard (cost to much) so this is perfect. When i told DH about building it with cabinet door you should have seen the look on his face. I'll have to show him all this when he gets home.
My only question is do we have to the attach to wall??
>I don't know what's more amazing….your head board or your tutorial!!! FANTASTIC job on BOTH!!
Thanks for linking up and have a GREAT weekend!
>Seriously brilliant! Way to think outside the box!
>OUTSTANDING…your instructions are incrediable…the cost!! I can't believe the cost! The result…OUTSTANDING!
>Wow, that is amazing! Great job on the headboard.
Toni
>WOW! This is totally awesome! I love it.
Thanks for sharing!
Thanks for joining Get Your Craft on Thursday at Life as Lori. Please join me next week for another great party!
>Thank you so much… I have wanted a similar headboard for years and couldn't afford to buy one. This will be just perfect and I think I can build it myself! WOW!
>Following from Friday Follow! I am officially hooked on your blog! Since buying our really old house on a lake that had previous owners with horrible taste we are addicted to remodeling. You have some great ideas that aren't expensive which is even better because I am SO cheap!
>Just beautiful! You did a fabulous job.
>Hi, visiting and following from Follow Me Friday.
Please come by and follow me back when you get a chance. Have a wonderful weekend!