Almost! Okay, so it isn’t quite the kitchen of my dreams, but it is pretty much as close as our budget can get us at the moment. I won’t bore you with a big long explanation, I’ll just put captions under the pictures for those that want to read them.
The original before (or click on the links for the full story!)
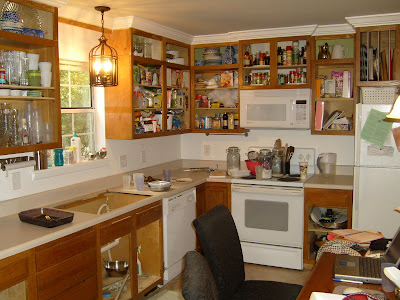
Before
The Plans
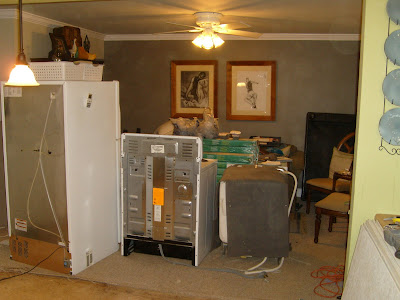
During 1
During
So, without further adieu, I’d like to introduce you to my new Kitchen (with a capital K):

We enlisted the local missionaries for more than their share of work, but they have been a dream in our time of desperate need! Thanks SOOO much Elder Crandall and Elder Bennion! They ripped out the second layer of vinyl after my shoulder and arms were so messed up that I couldn’t hold a hammer any longer (before this I removed about 2000 staples from the first layer of vinyl and plywood, and each had to be hammered to loosen then ripped out with pliers the rest of the way)
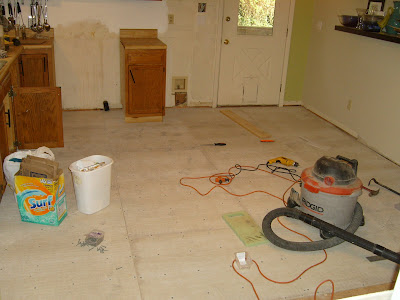
The floor all cleaned off and ready for the new layer of junk we are about to install.
Here is the view into the living room, I think it is too funny! Our best Friends in college always though that we were mad for being able to live with the mess that remodeling makes, but it is a high that can’t be explained. Besides when you’ve lived through this for 4 or 5 days when you finally get everything in order it is like a dream come true!
About 5 or 6 hours later we had all the cement board cut and screwed in place. If you look at the pictures you will notice that it has to be screwed about every 8 inches, and I think we went through about 15 screw heads, they just kept snapping off! Annoying!
Buddy is such a good helper! I think that he really likes how cold the tile is. As soon as I laid it down he came and made himself comfortable on the tile and didn’t move for like 6 hours!
I have to get proof every once in a while that I work on the house. I am the informal, not so professional, self assigned
documentor of our house remodeling projects so that means I am never in the pictures unless I take one of myself or request one. This one if funny because if you notice the bottom of my shirt is soaked. The tile saw soaked me and I was freezing the entire time I was laying the tile.
This is the before picture of the upper cabinets before I tried staining them to match the other cabinets to match the existing oak.
This was almost immediately after staining. At first it looked great! But then the poplar got all wavy and irregular. (yes, I conditioned the wood before applying, but to no avail, it did nothing whatsoever)
So here we are prepping the doors for paint, actually Justin is. I sanded and painted the body of the cabinets inside, while he faced the mosquito filled tropics of our carport. But while I had to use a brush he got to use our brand spankin‘ new spray painter.
Oh and by the way, I got this great idea for painting the doors off of This Old House (I LUV TOH)- You put small screws in the top of the upper cabinet doors and in the bottom of the lower cabinet doors then you attach wire to the screws and you can hang them so they don’t get knocked and you can paint both sides at once.
Justin rigged a rope with a hook that got more elaborate as the day went on with more and more tarps to catch the over spray from the painter.
Now please don’t focus on the mess inside my cabinets. (alas, you all just looked at it again) About a week before this project, I took down my extra, sort of ghetto looking, pantry shelves from the laundry room and shoved everything haphazardly back into my cabinets and anywhere else they could fit, ah, the joys of food storage. So normally they do not look this bad, but yet again this is just another example of what I can deal with in order to get a project done!
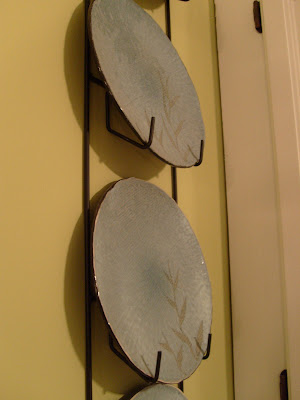
I thought it would be fun to take a few pictures of details. I may add another post later when I have more time and more finishing touches ready to photograph in the house.
Hey Mom- check out the cool piece of pottery you bought me! I love the color!
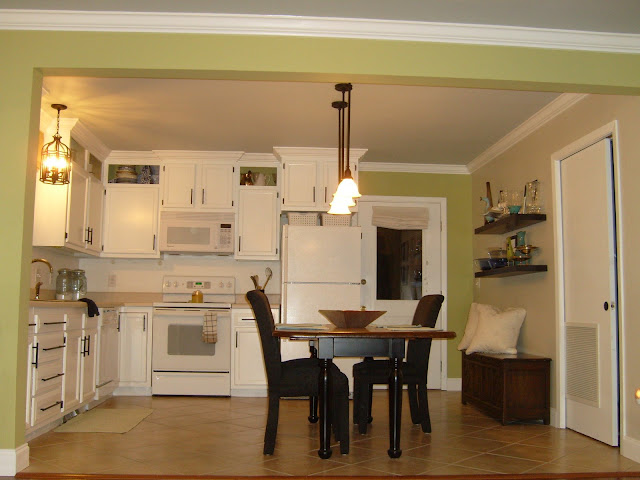
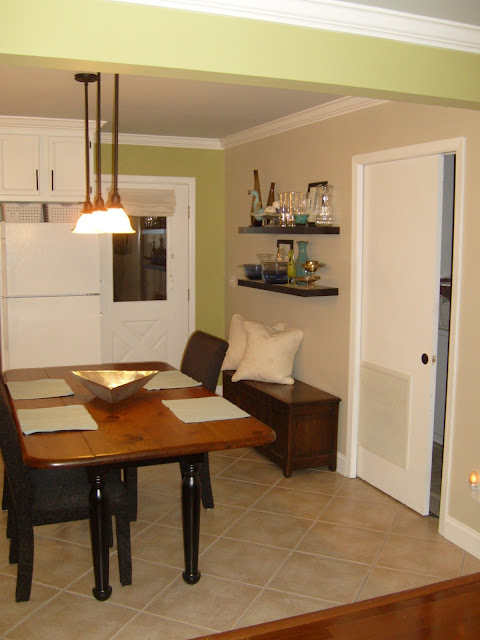
The view from the front room of the new improved cabinetry!
The full Kitchen!
Finally it is done! I can hear the heavenly host singing!
p.s. I thought I should give you an idea of cost.
flooring :
tile: A total score at $1.56 a box,
plus 2 free boxes (from the day before) because they couldn’t find the price in the inventory
Cement board about $100 with screws, a million new screw heads etc.
Grout and thin-set : $50.00
Cabinets:
Reused master bath cabinet free.
Cut several cabinets in half, free.
boxes above cabinets, recycled wood from a local church, free.
Paint, Ace hardware water based enamel 2 gallons about $60.00
Hinges and handles, clearance approx. 100.00
Lighting:
above sink, Habitat for humanity $10.00
Above Table Lowe’s Clearance 8.00 a piece
Counter tops
Prefab (ran out of time) approx $200.00
Paint on walls,
Back-splash left over from other projects
Green wall color, mis mixed 5.00 gallon
Valance:
I made from approx 1 yard of $5.00 fabric.
Faucet:
Lowe’s approx $80.00
Sink:
Habitat for Humanity $75.00
Grand Total: Approx $715.00
I guess that doesn’t include the price of the microwave, which I think was about 150.00 or less?


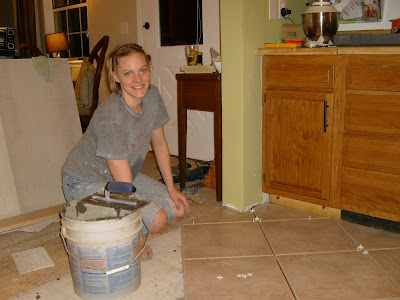 I have to get proof every once in a while that I work on the house. I am the informal, not so professional, self assigned documentor of our house remodeling projects so that means I am never in the pictures unless I take one of myself or request one. This one if funny because if you notice the bottom of my shirt is soaked. The tile saw soaked me and I was freezing the entire time I was laying the tile.
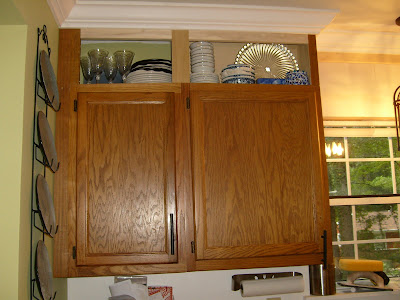 This is the before picture of the upper cabinets before I tried staining them to match the other cabinets to match the existing oak.
 So here we are prepping the doors for paint, actually Justin is. I sanded and painted the body of the cabinets inside, while he faced the mosquito filled tropics of our carport. But while I had to use a brush he got to use our brand spankin‘ new spray painter.


Amazing! Thank you for the inspiration and reminding me that all things are possible!!!
This is incredibly impressive! All for under $800?!? You did an amazing job and have a beautiful kitchen now. 🙂
Awesome job! I love how the cabinets turned out.