How to Keep Your Picture Level! A Simple Trick!
How to Keep Your Picture Level! A Simple Trick!
I know I am not alone when I walk by a framed photo or artwork on the wall, stop, walk back a couple steps, fix it “just a tad” so it isn’t crooked, and continue on to where I am going again…am I???

Well, I had to find a solution…and I did!! I found this great tip to be a lifesaver with my own OCD “levelness”.
All you need are:
1.) Thumb tacks
and…
2.) A hot glue gun!
After you measure and figure out where you want to hang your photo, glue on one tack in each of the bottom corners of the frame –
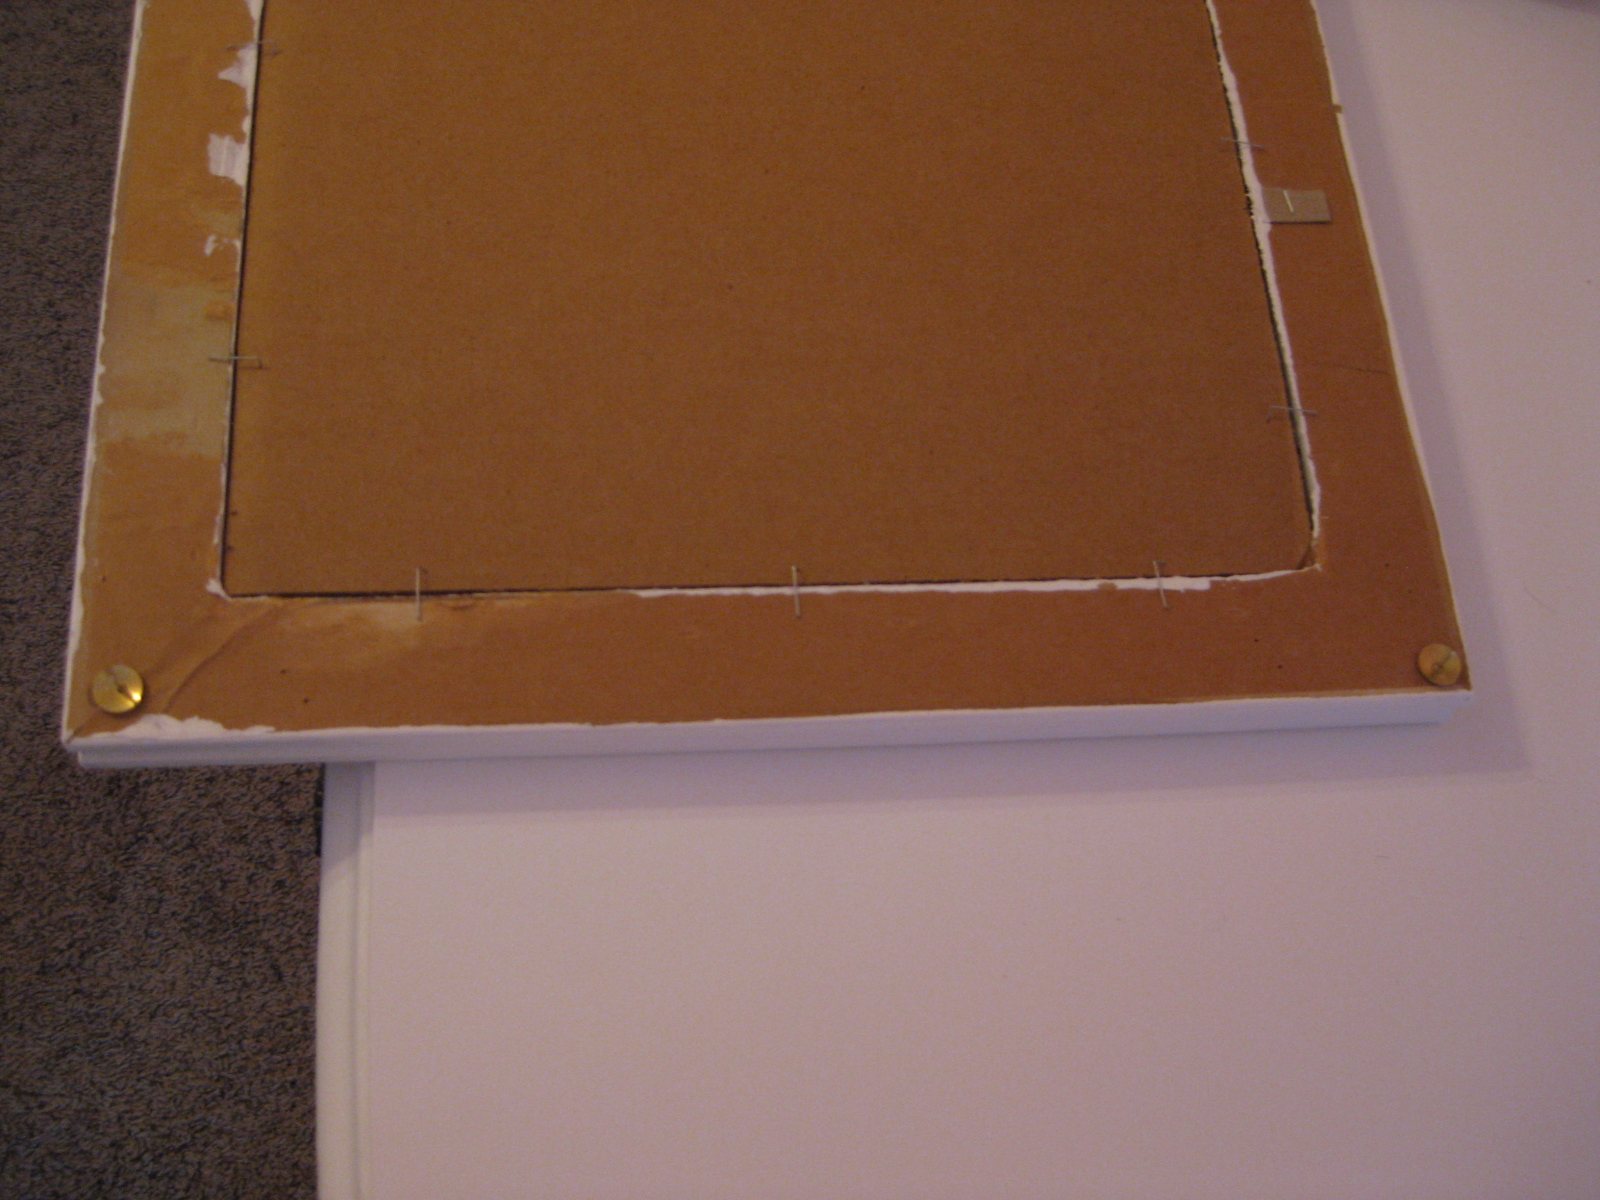
Hang your photo without pushing the tacks into the wall. Next, place your level above the photo –
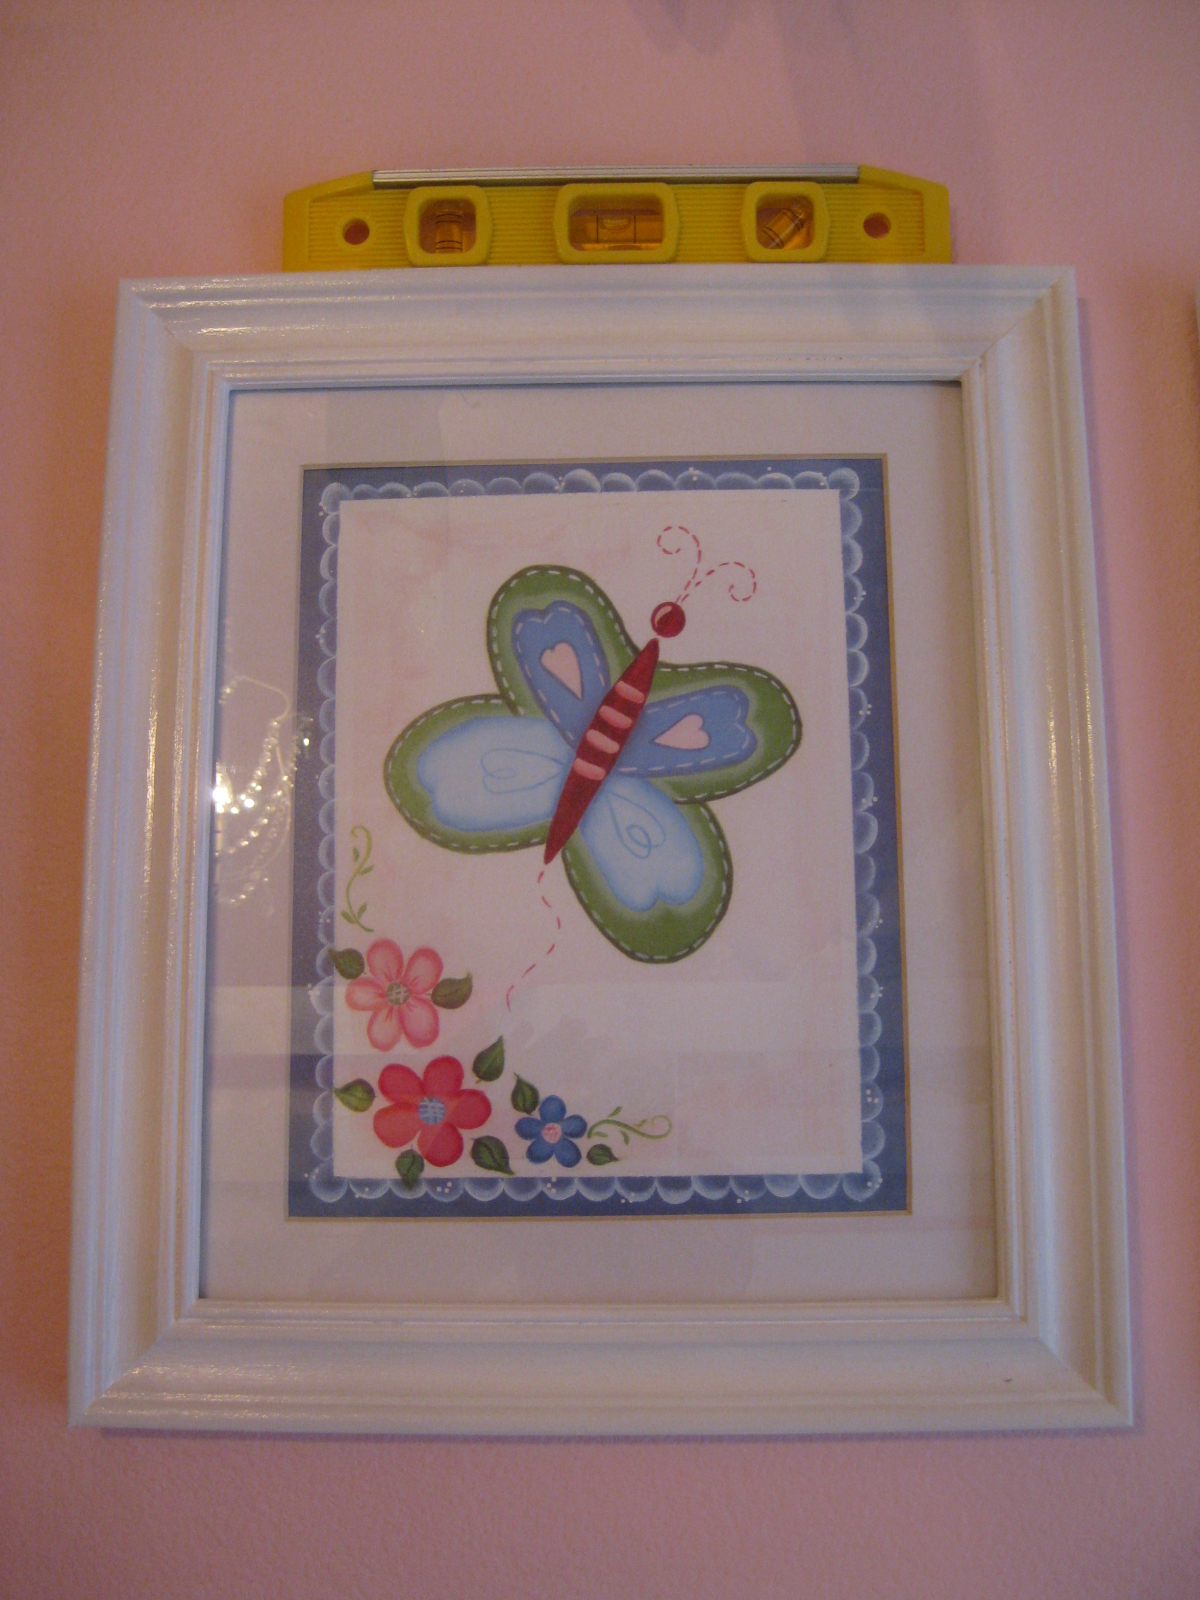
Once it is level, push the the bottom of the frame placing the tacks into the wall. And….stand back and let those kids go crazy because those photos aren’t going ANYWHERE!
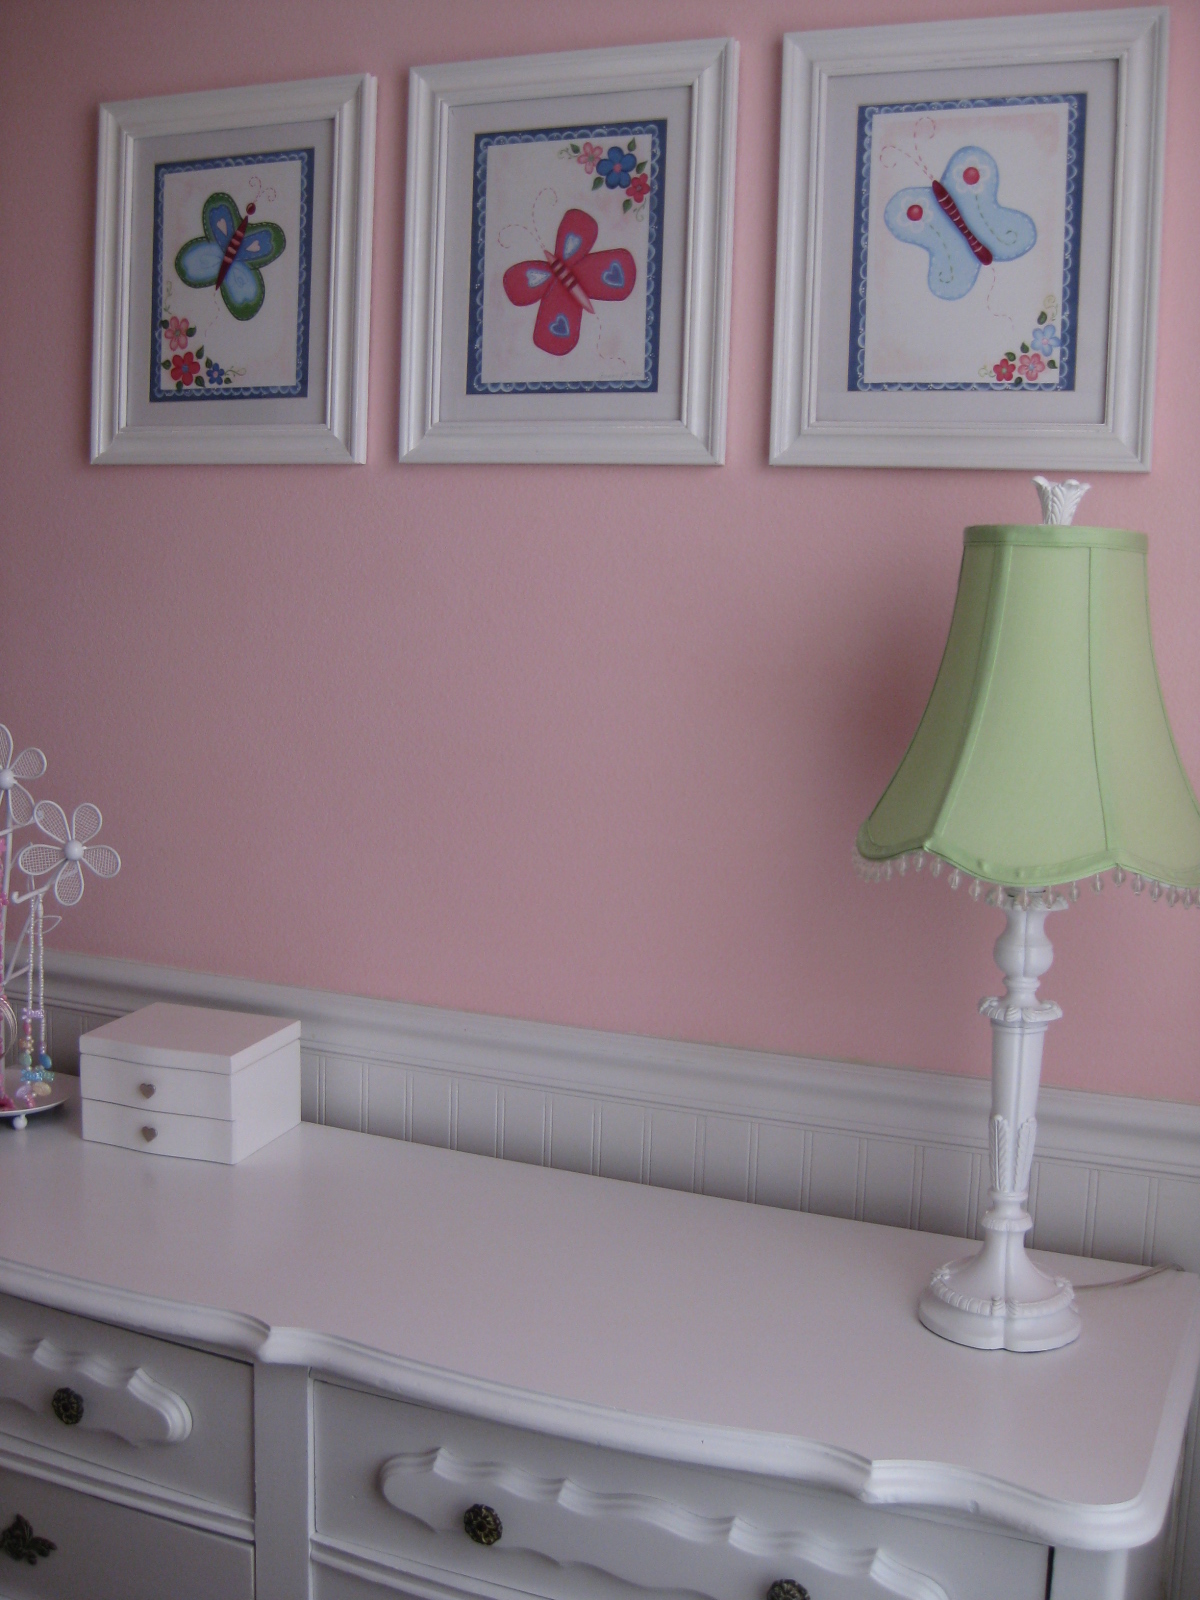
Now, I can walk by the frames in my house and just keep walking. :0)
Check out these other fun and colorful ideas!
get the reader favorite
Cleaning Binder & Custom Cleaning Calendar
This 18-page editable cleaning binder printable pack will help you establish a cleaning schedule based on the custom tasks you actually need for your home. From the spring cleaning checklist to everyday cleaning recipes, this printable set is great for kick-starting a cleaning routine and staying on task with annual and semi-annual tasks, too.


GENIUS!! I found you on Pinterest and had been wanting to get to this for awhile, but thought it would be a chore. In the meantime I kept walking by pictures, adjusting here and there. Finally today I bit the bullet and did this to all of my pictures. It wasn’t so bad, and I’m so happy I did! What a clever idea… the pictures just seem so much more “sturdy” on the wall. You don’t have to worry about walking by and accidentally bumping one. Thanks so much for sharing!
This technique has saved my sanity! Thank you so much for sharing! I’ve done this pretty much everywhere in my house, including on a canvas gallery wall I just blogged about here: https://www.mommade.org/2012/10/distressed-canvas-gallery-wall.html
Thanks again!
Sarah
Sarah! That it so good to hear! Your gallery pictures are SO cute, it would make me smile to pass those everyday!
You are definitely not alone! A little more calm & order in our hectic, crazy world has got to be a good thing, right?
They also make these kind of sticky ‘bumper’ dots for the bottom corners. Not sure which brand it is, but one of them is gooey enough that it’ll help keep a crookery frame in place. I have a few of them, but it’s just a high-end version of my go-to solution for typical frames: a rolled up piece of packing tape tucked under one of the bottom corners. Works like a charm.
And, I agree with Cassity – artwork that makes you smile every day is a very, very good thing.
I’ve been going crazy adjusting pictures. Every time the door slams, there I go re-adjusting…..thank u for this tip! Off to get my glue gun!!
Also try Faber Castell’s Tack-It and Blu-Tack by Bostik especially on concrete walls.
Thanks for the tip!
My husband would freak with all those extra holes in the wall! lol. I do like the tack-it idea posted above though…
Quick question, works only on pictures frames? Because I have a huge mirror on my hall and is always moving…
I imagine it would work just fine there, too!
i use poster putty dots. They’re in the office supply section.
Smart tip! Thanks for sharing, Tess!
Two small blobs of blue tack also work , or you can get self adhesive velcro pads
Also good options! Thanks for sharing!
This is great. Now I just need a good tip to keep my area rugs from sliding around. Rug gripper does not work more than a day or two!
Have you tried the caulk trick? I first saw it over on Martha Stewart. I pinned it here, ages ago! 🙂 https://www.pinterest.com/pin/270145677617567588/
Genius! I literally just hung a gallery wall in my hallway today and have already walked by multiple times readjusting the frames. Thanks for the great idea!
You’re welcome!
Bless you, my friend. I can walk by ANY picture now in peace ! ????
🙂 Glad to be over service!
We use a 3M Command Strip (their version of velcro) on the bottom of the frame. To make them go further, I cut them in 3 lengthwise because you don’t need a ton of holding power. If you ever need to remove them, they are a synch and you have no more holes in the wall.
Smart tip! Thanks Michael!
I started doing this the first time one of our frames along the stairs got knocked down 3 M strips work like a charm. The hot glue works great on brick and painted cinderblock walls.
You can also use sewing pins (the kind that have a coloured ball on top-take this off). You then pound the pin into the wooden back of the picture and then hang the picture, pushing the farm into the wall and it is secure. Will have to try the so and strip on my set of twelve pictures that have metal frames.
Thanks for the tip, Jean!