Toy Box Bench Make-Over
Toy Box Bench Make-Over
contributed by All Fresh and Clean
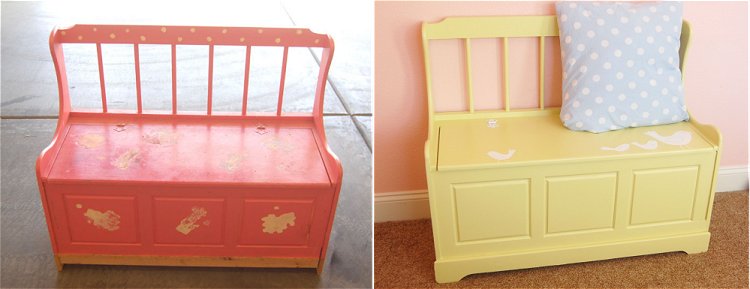
I picked this toy box up for $6 at the thrift store a few weeks ago. I liked the design and knew I could make it adorable. =)

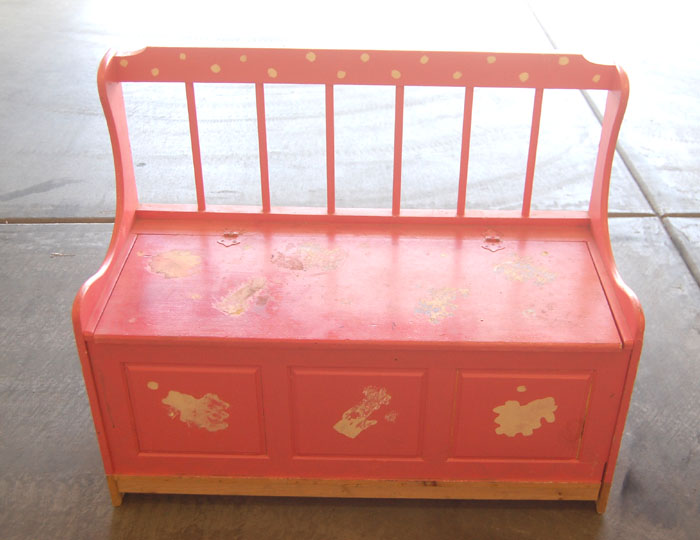
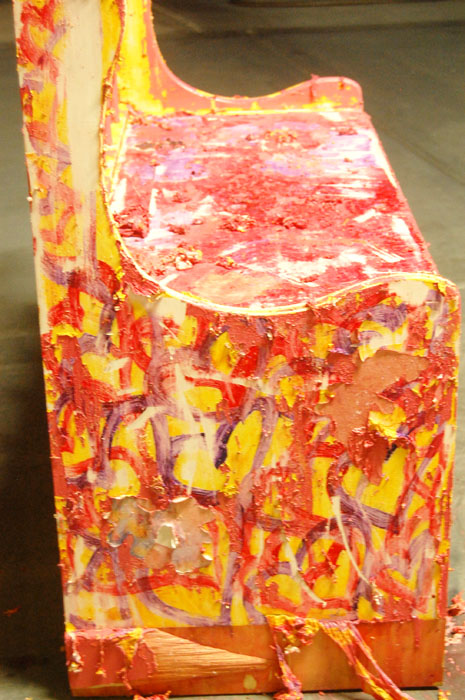
The first thing I did was apply paint stripper. It worked really well, except for the parts where all those darn stickers were! If anyone can explain the mess under this pink paint, please do!!! lol So first was the pink, then red and purple finger paints (?) then bright yellow, then white.
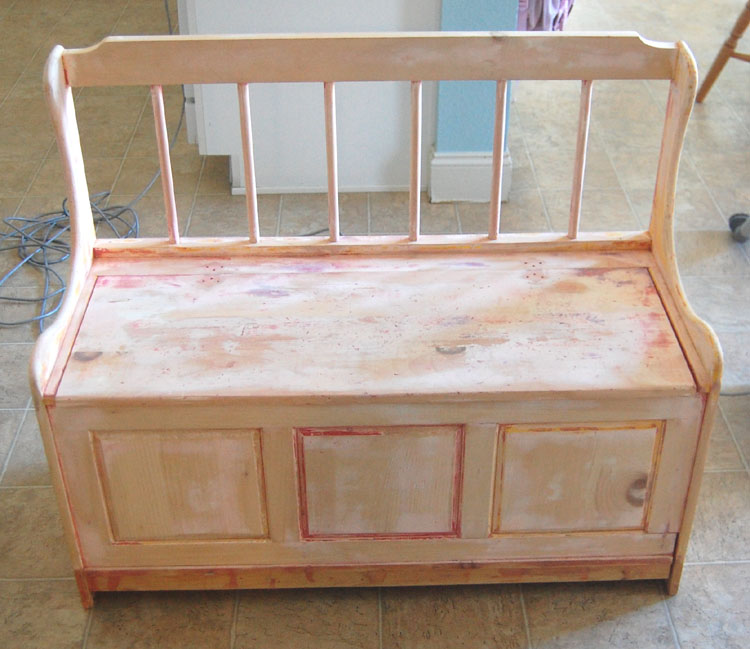
I sanded for hours. And gave it a good scrub down with Basic H.
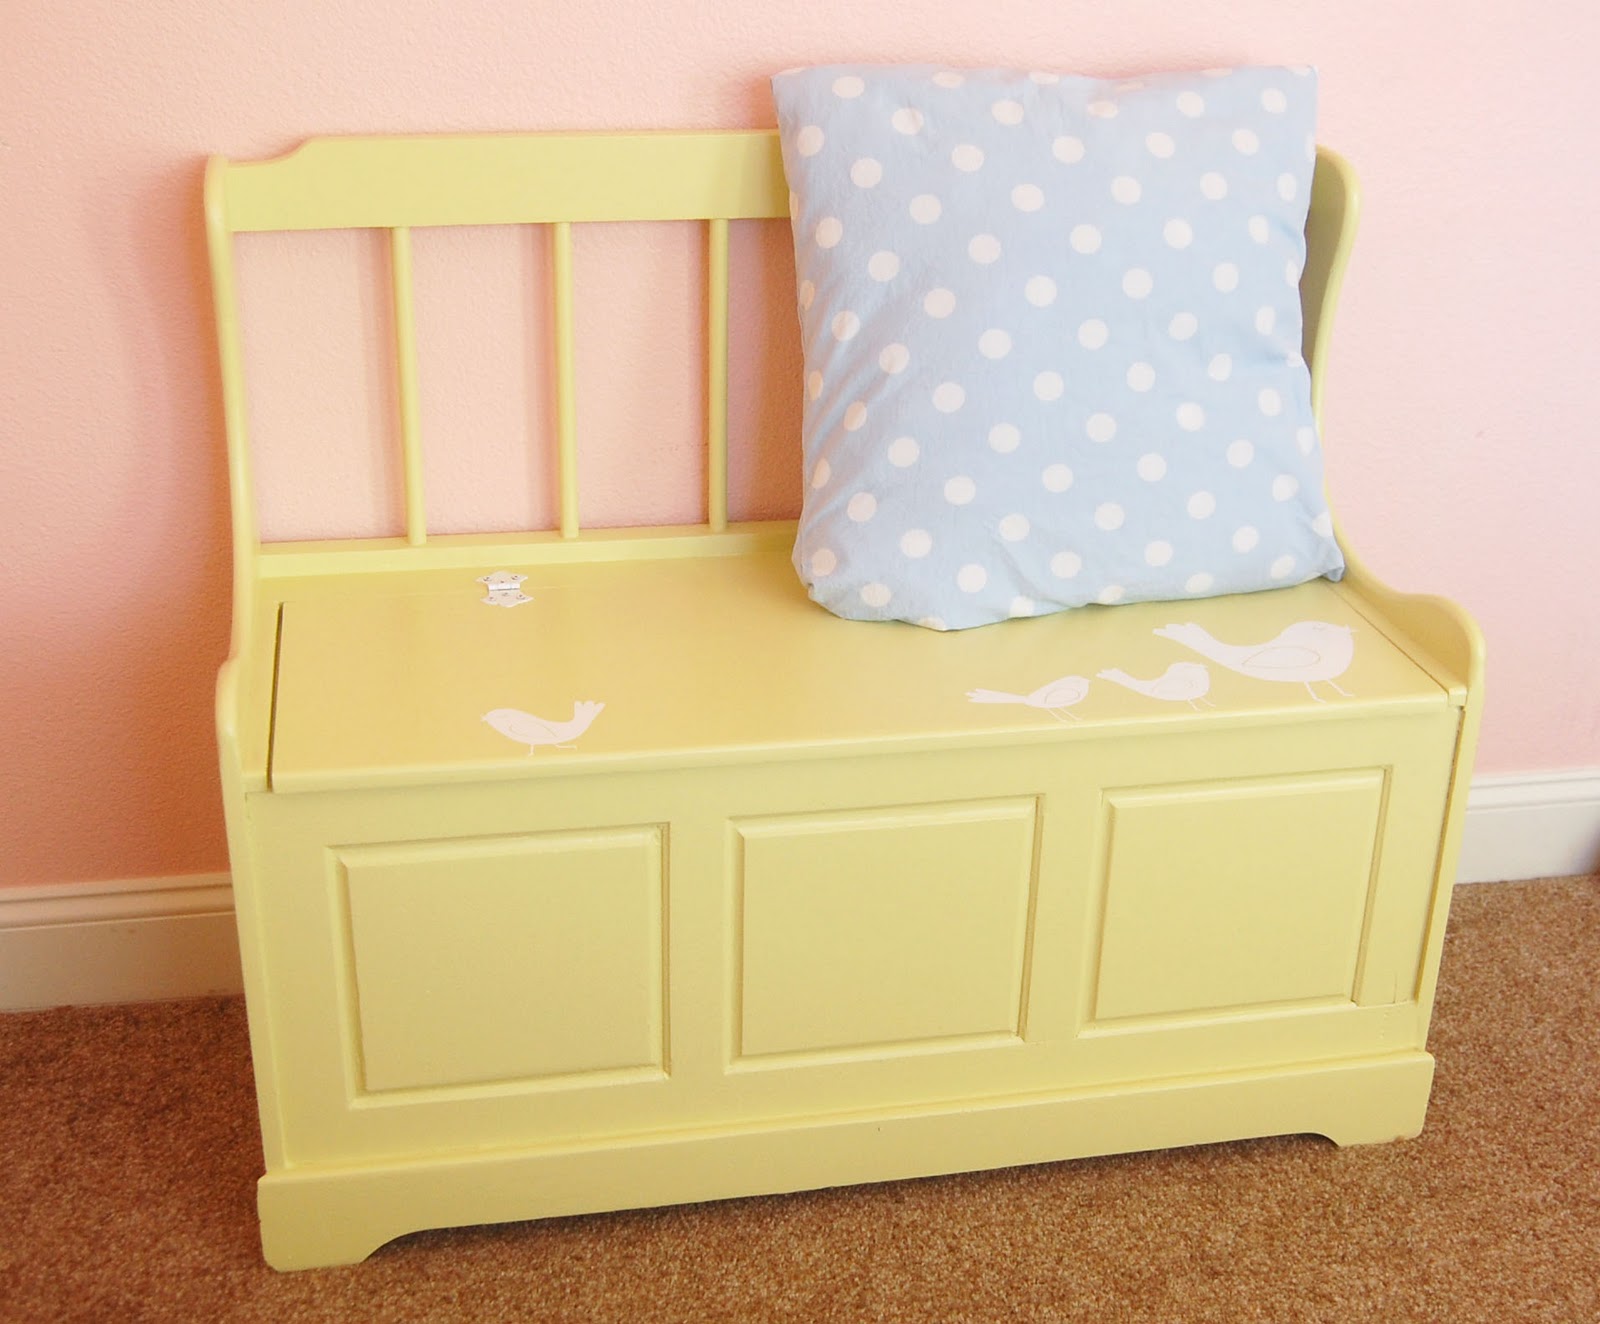
I wanted to make sure the paint color was ok, because when I bought the paint they were out of some of the mixer colors, so the paint guy just winged it! UGH, I had a florescent green! Luckily I had a gallon of yellowish beige. I mixed the two and it came out perfect. yay!!!
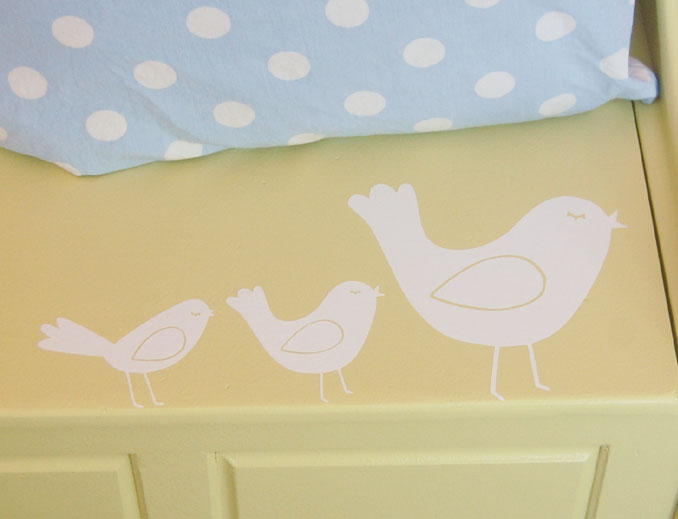
I cut some little vinyl birds with my cricut for the finishing touch!
Before and After


>wow… I must say it was well worth the elbow grease. It turned out so cute!! Awesome job!
>It is so fresh and sweet! Nice job.
>The yellow is very fresh; I like!
>Really cute! Love the birds.
>That turned out really cute. I love the birds and the color is amazing.
>Wow that's a lot of crazy paint under there! Nice re-do though! Looks adorable now!!
>That looks great! The birds are such a nice finishing touch!
>That looks amazing!
>That turned out so very cute! Great job!
>BEAUTIFUL!! I never find anything good at thrift stores and garage sales. Probably just lacking on that designer eye of yours! It looks wonderful!
>Very cute! Good job!
On an unrelated note, Remodelaholic's posts are not showing up in Google Reader. The title comes up and about 3 sentences, but no pictures. It was working yesterday…maybe my google reader?
>I am impressed how well your stripper worked. I recently used some and it basically just glued ontop of the finish… I ended up having to sand everything including the stripper off. I got my money out of my hand sander…
>oh how I need one of those for our play room. It turned out so great!
>Gorgeous!
>wow this is super cute. love the birds
>This is darling! What a sweet cottagey little bench you now have! Love the little touch of the birdies too 🙂
>This is so cute! I haven't attempted a stencil yet, but you've inspired me. My stepdaughter is about to revamp a toy box for her baby girl who is due next month. I shall send her your link!
Megs 🙂
>The end result is absolutely adorable! 🙂
>Wow! This project is a winner! I love the color!!!