Easy DIY Desk Calendar or Photo Display Tutorial
Make an easy DIY desk calendar or photo display from a piece of scrap wood. Use it as a bookend, desk decor, or on a shelf.
You’ll also want to check out our free printable art collection and 50 more ways to display photos and art in your home.
DIY Photo Display or Desk Calendar Stand
This last-minute gift tutorial will help you cross those last few friends, neighbors, and coworkers off your gifting list AND get excited for January to come rolling around — AND you can do it all for nearly FREE with a trip to the scrap wood pile. If your scrap pile is dwindling, it’s still only a couple bucks to make an easy DIY desk calendar like this:

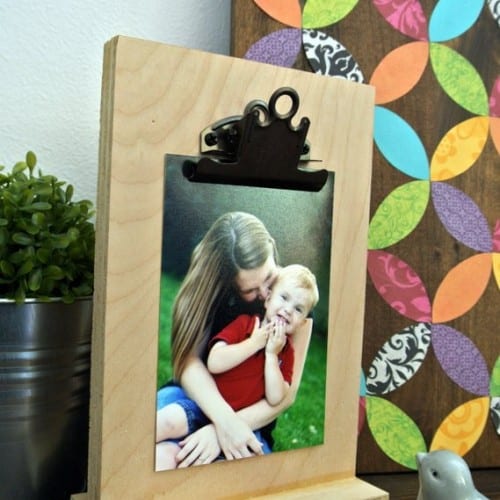
And, bonus, it can also double as a photo display stand — a perfect easy gift for the grandparents or your work bestie.

Our printable calendars have been discontinued, but you can get some darling printable mini calendars here on Etsy. Check out a few of our favorites:

Love printables? Sign up here for our printable newsletter! Email subscribers get new printables delivered straight to their inbox.
DIY Desk Calendar Tutorial
To see how we made these super easy desktop calendar stands, watch the tutorial here on our YouTube channel, and please subscribe so you can be the first to see our new videos each week!
This post contains affiliate links. Learn more and read our full disclosure policy here.
As you can see in the video, the Canon TS-9020 printer handles the beautiful watercolor ink style beautifully, whether you’re printing on letter-sized cardstock or matte photo paper or using the print-to-edge to print directly on 4×6 matte photo paper (which also saves a little bit of trimming time). And if you want to print larger (up to 13×19 poster size), we recommend the Canon PIXMA iP8720 crafting printer — printing poster-sized art prints at home is amazing!

We made several different calendar stands to show you just how versatile and easy these scrap wood photo display desk calendars are to make.
Just print your chosen 4×6 calendar and trim using a cork-backed ruler and a craft knife (and don’t forget a cutting mat!). Use a piece of scrap pallet wood and some jute twine (with optional clothespins) for a super easy rustic look:

Unfinished plywood scraps make for a more modern Scandinavian look with the visible banded edge — and if you’ve built with plywood, you have random scraps like this!

We used these clips and a clipboard clip like this — but here’s a money-saving tip: ours came from a cheap dollar store clipboard! It took a few minutes of elbow grease to get it off the board… but it’s cheaper than buying the clip alone, even at the best price we could find on Amazon.

Of course, you can add some paint for color, using our go-to color washing stain technique on a scrap of 2×6:

Let your inner artist shine with a woodburning tool and a rough pallet scrap board — did you know that woodburning is also called pyrography? Fun fact. We used a clip with a pin-back, meant for cork message boards, but it would be easier to use a regular black bulldog clip.

Or set your inner artist loose on a stained scrap of 2×6 with a white paint pen — and a gold paint pen makes boring nails look fancy!

How to Make a 4×6 Photo Display or Desk Calendar Stand
This desk calendar stand doubles as a photo display or art holder and is so easy to make a bunch as gifts.
Materials
- Wood
- 2×6 or 1×6 cut at 7″ long (for nails) or 9″ (for a clip)
- Plywood cut (1) at 5.5″ x 7″ (for nails) or x 9″ (for a clip), and (1) at 5.5″ x 2″ (base)
- Scrap pallet wood or 1×6 cut at 7″ (for nails) or 9″ (for a clip), plus an extra piece cut at 2″ (if you’d like a base)
- Wood glue
- Paint, stain, or paint markers
- Small nails, clipboard clip, or bulldog clips
- Photo or printed 4×6 art of your choice
Step by Step Tutorial
- Sand the board(s).
- Attach the nails or clip to the board.
- Glue the base piece to the larger piece and let dry.
- Paint or stain and decorate the boards.
- Add your photo or printed art or calendar!
How to Make a 4×6 Photo Display or Desk Calendar Stand
Ingredients
Wood
- 2×6 or 1×6 – cut at 7" long (for nails) or 9" (for a clip)
- Plywood – cut (1) at 5.5" x 7" (for nails) or x 9" (for a clip), and (1) at 5.5" x 2" (base)
- Scrap pallet wood or 1×6 – cut at 7" (for nails) or 9" (for a clip), plus an extra piece cut at 2" (if you'd like a base)
Wood glue
Paint, stain, or paint markers
Small nails, clipboard clip, or bulldog clips
Photo or printed 4×6 art of your choice
Instructions
- Sand the board(s).
- Attach the nails or clip to the board.
- Glue the base piece to the larger piece and let dry.
- Paint or stain and decorate the boards.
- Add your photo or printed art or calendar!
We’re so pleased to partner with Canon each month to show you fun and easy print-at-home projects for holidays and every day.

Please check out our full printable library and pin and share your favorites for year-round easy decorating and crafting! And don’t miss these coordinating watercolor style prints so you can have the same lovely style framed on your wall and counting down to the next holiday.


set of 10 watercolor holiday printables // easy DIY holiday countdown calendar boards

[pinit url=”https://www.remodelaholic.com/watercolor-printable-2018-calendar-easy-diy-desk-calendar-tutorial/” image_url=”https://www.remodelaholic.com/wp-content/uploads/2017/12/easy-interchangeable-desktop-calendar-and-photo-display-printable-calendar-set-instant-download-@Remodelaholic.png” description=”Super simple and affordable last-minute gift idea for the grandparents — an interchangeable desk calendar and photo display! Get the tutorial and printable calendar set at Remodelaholic.com. Easy gift idea for friends, neighbors, coworkers, and teachers, too.”]
Lorene has been behind the scenes here at Remodelaholic for more than a decade! She believes that planning projects and actually completing them are two different hobbies, but that doesn't stop her from planning at least a dozen projects at any given time. She spends her free time creating memories with her husband and 5 kids, traveling as far as she can afford, and partaking of books in any form available.


I just tried to download the link, through my email, the the DIY watercolor desk 2018 calendar and the download isn’t working?
I love the calendars!! Will you be putting out one for 2019? I would love to make them for Christmas presents.
Yes we will! We are working on them now to have out in November or early December, so stay tuned! 🙂