Boxer; Garden Display Box
Hey, This is Fawn from Frugal Home Design. My fence by my garden was BORING! I was trying to think of something to put on them then came across this great idea in This Old House magazine. Reclaimed lumber boxes for pot display sounded perfect.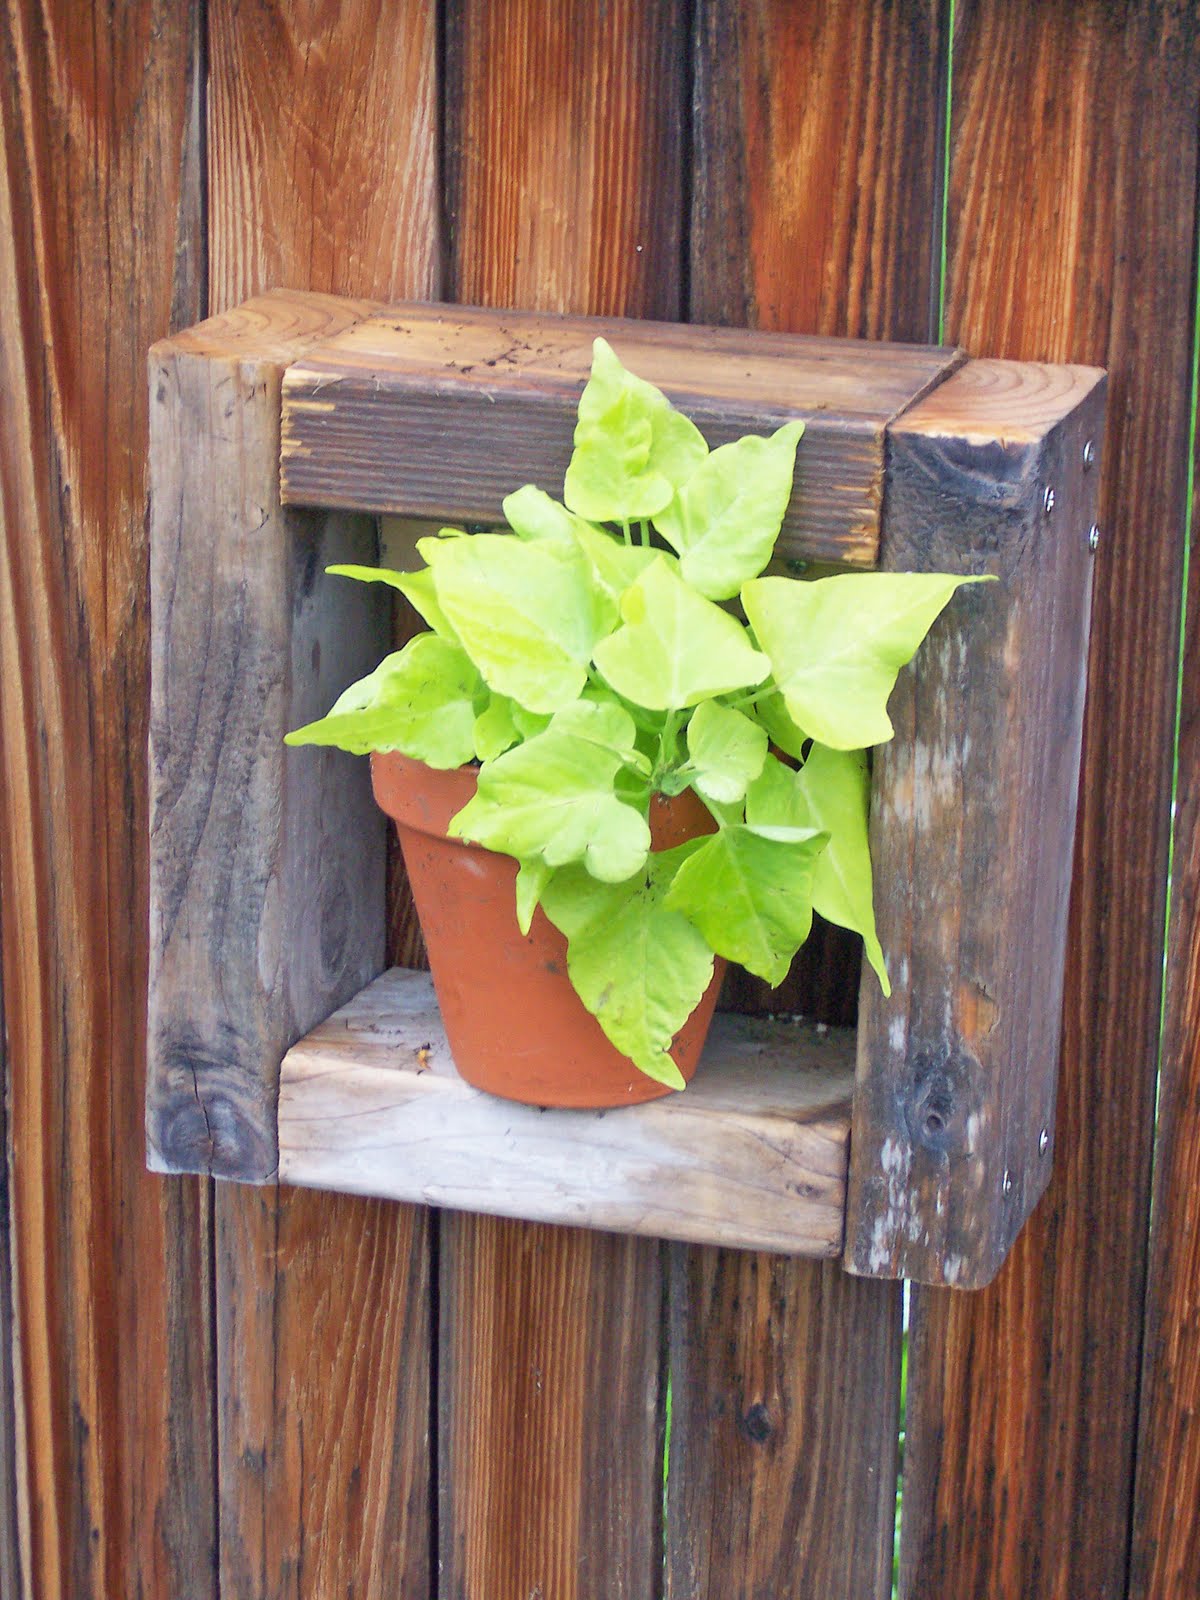 I planned on making these for a while but needed the lumber. I couldn’t have been happier when I was away for a girls weekend with my friend and it happened to be BIG TRASH DAY in Glenwood Springs. We scored some awesome stuff, and the lumber for my boxes.Just in case you have a really boring fence and you need something to spice it up, here is a tutorial just for you.Step One: Cut Lumber. Decide how big you want your boxes and cut the lumber. I used my handy dandy skilsaw.Step Two: Pre-Drill holes for assembly. Take two sides and drill 4 holes, 2 on each end. You will see in the picture below. To determine where to drill my holes, I measured the width of the side it will be attached to and drilled in the middle.That sounds a little confusing, but you can see my light pen marks that illustrate the width of the side I will be attaching to.
 Step Three: Assemble. To assemble all my sides together I used screws. Make sure your screws are long enough to go through your lumber and deep enough into the other side you are screwing into. I used 3″ screws.You will see in the picture below I used my speed square to make sure my sides were at a 90 degree angle.
 Here is a view from the top after the box is assembled.
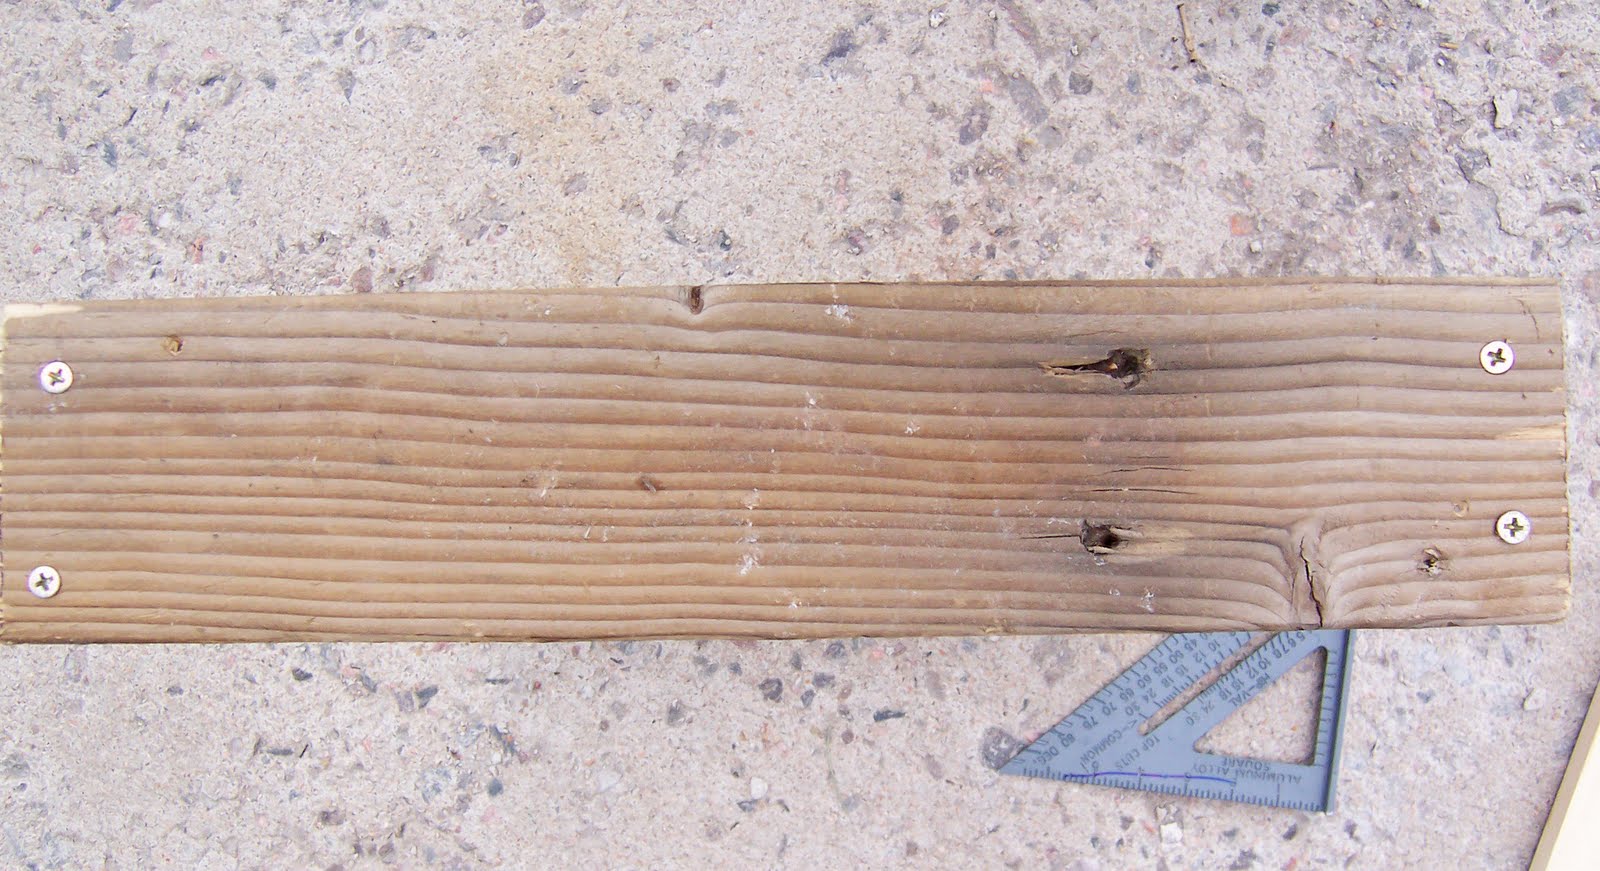 Step Four: Attach cleat for fixing to the fence. To hang the box on the fence you have to make a cleat. The cleat is a piece of wood inside the box that is used to screw to the fence.Measure the interior of your box and cut a piece of lumber to that length. I had a 1×2 laying around in the garage so that is what I used.
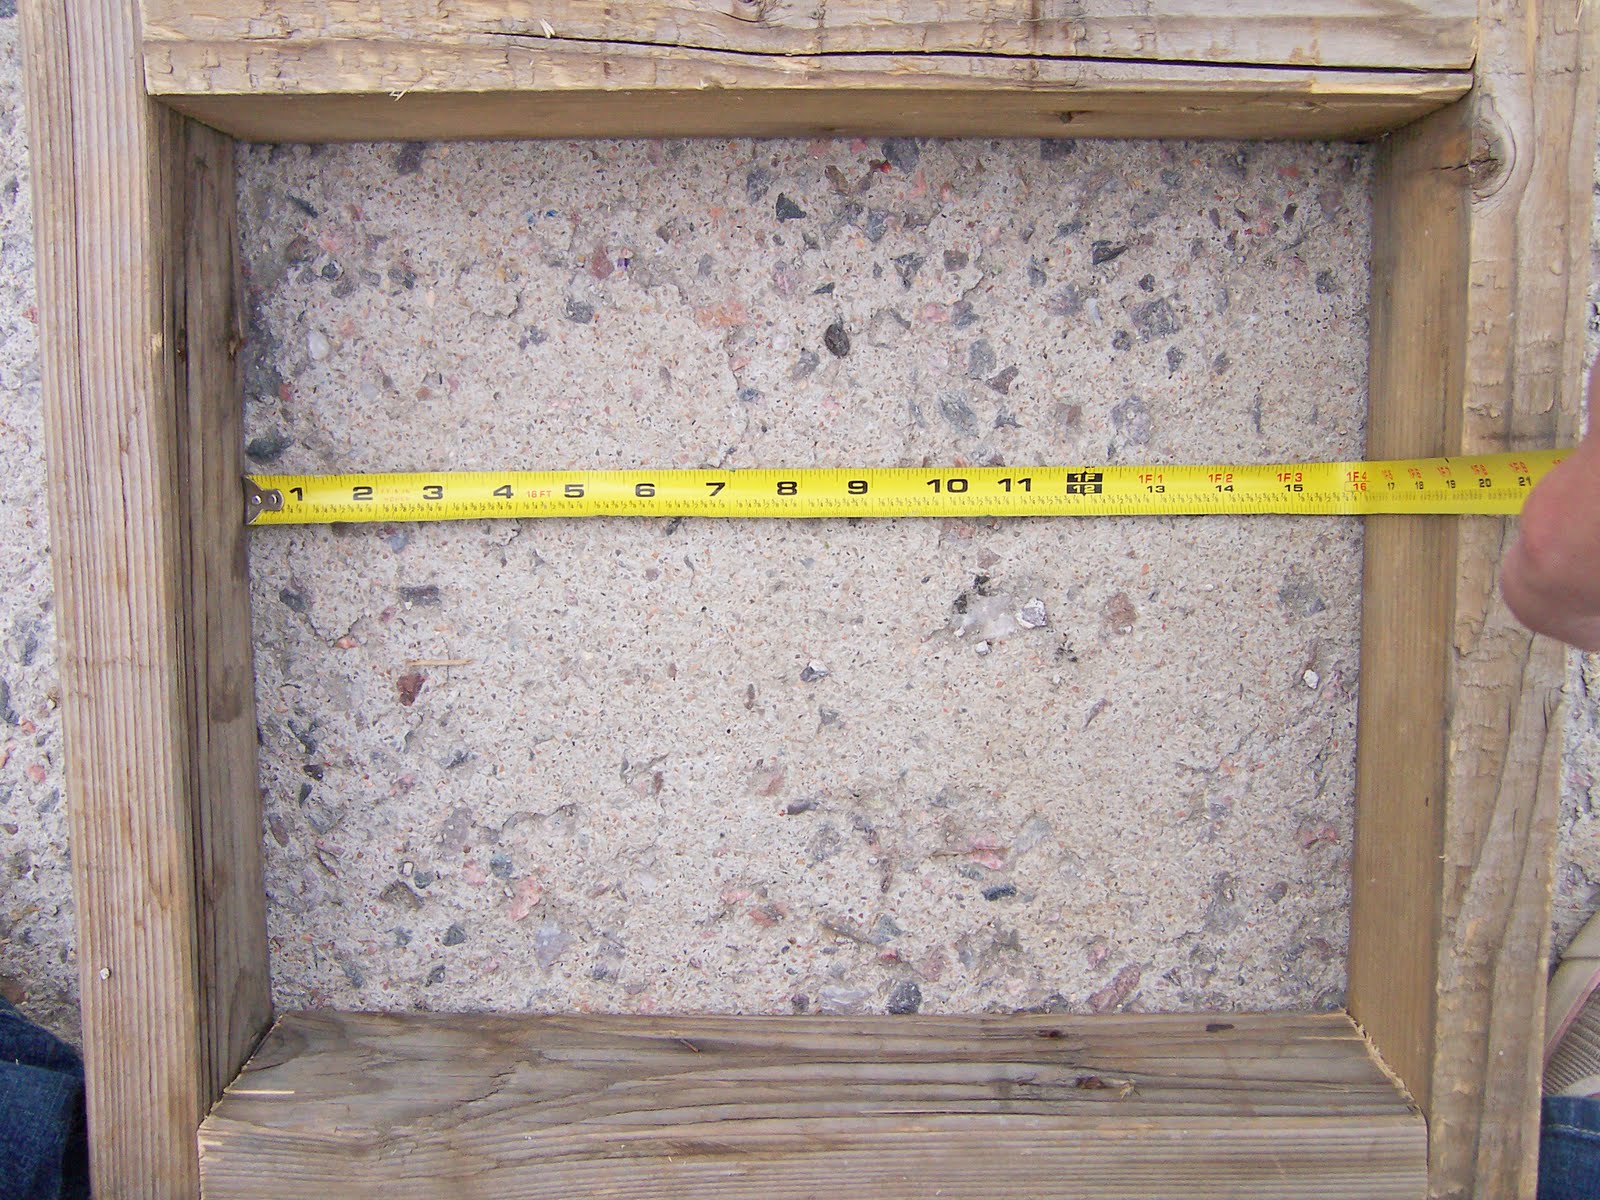
Now it is time to attach the cleat to your box. Pre-drill the hole on the side (by your other screws) and attach. There will be two holes, one on each side. 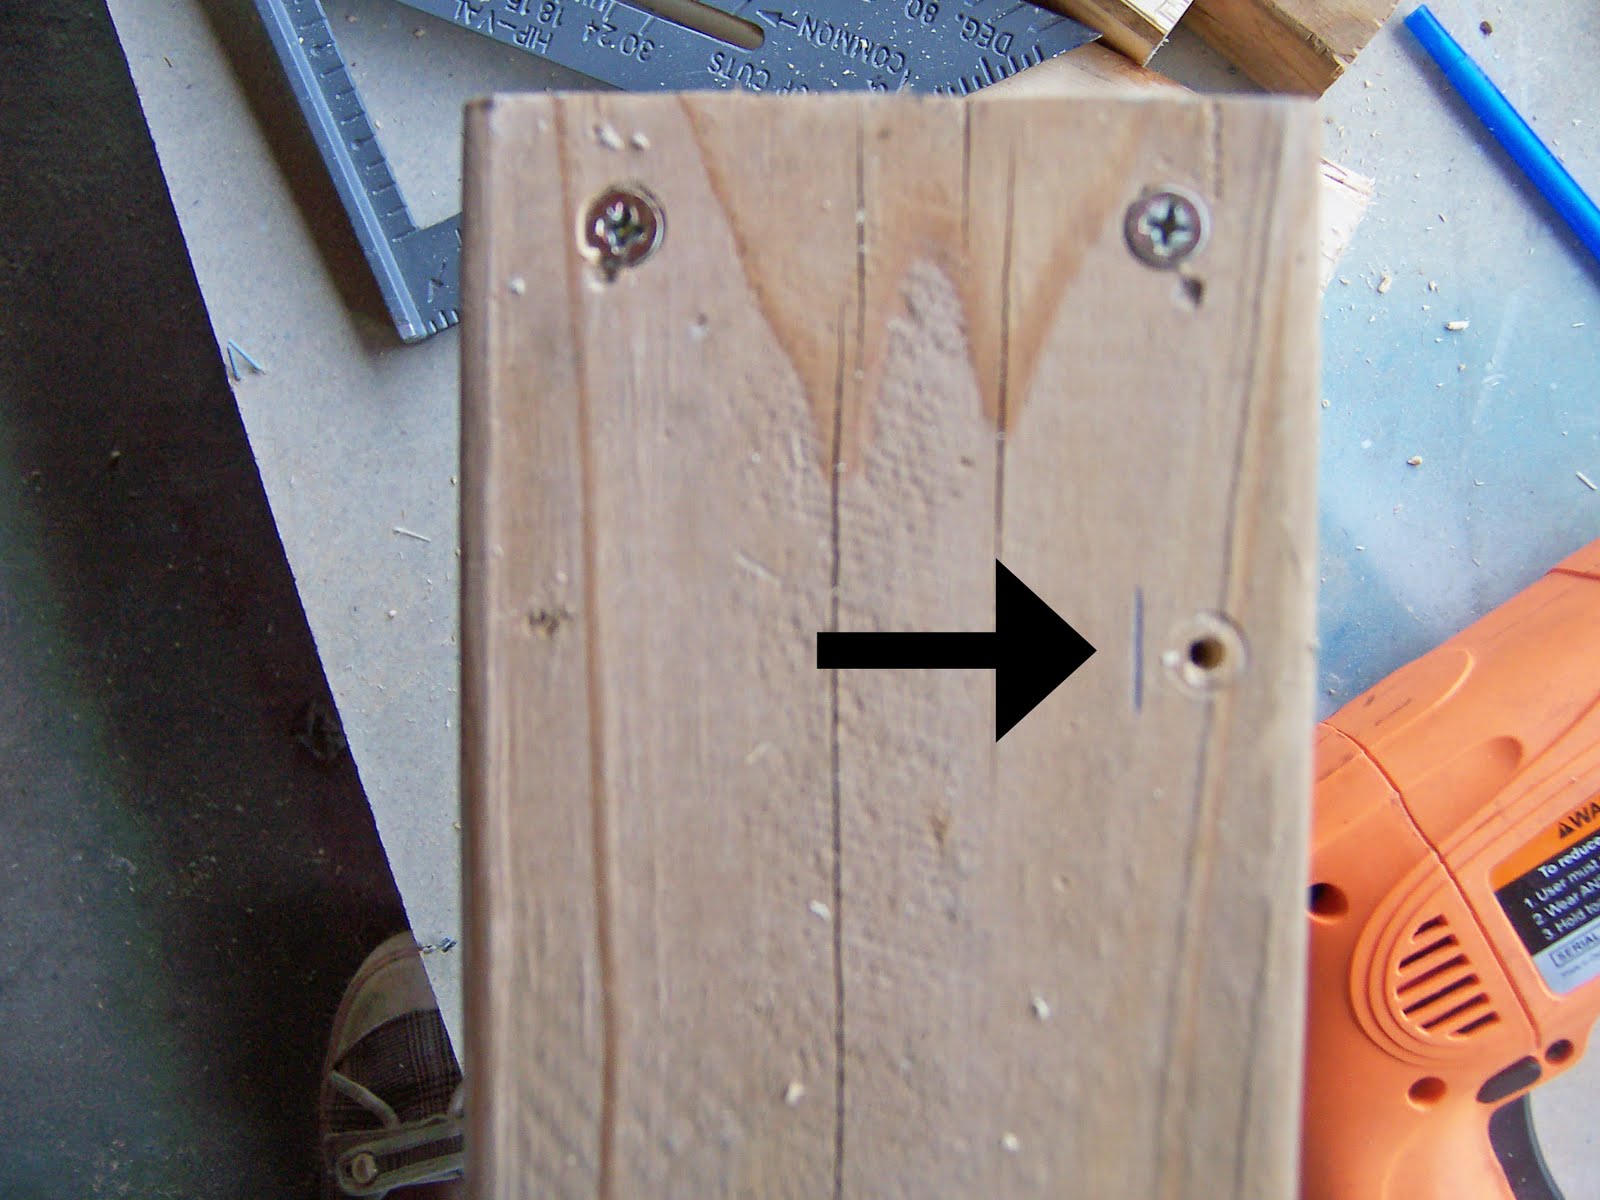
Attach cleat to box. Here is a picture of the cleat in the box. You can see the pre-drilled hole on the top.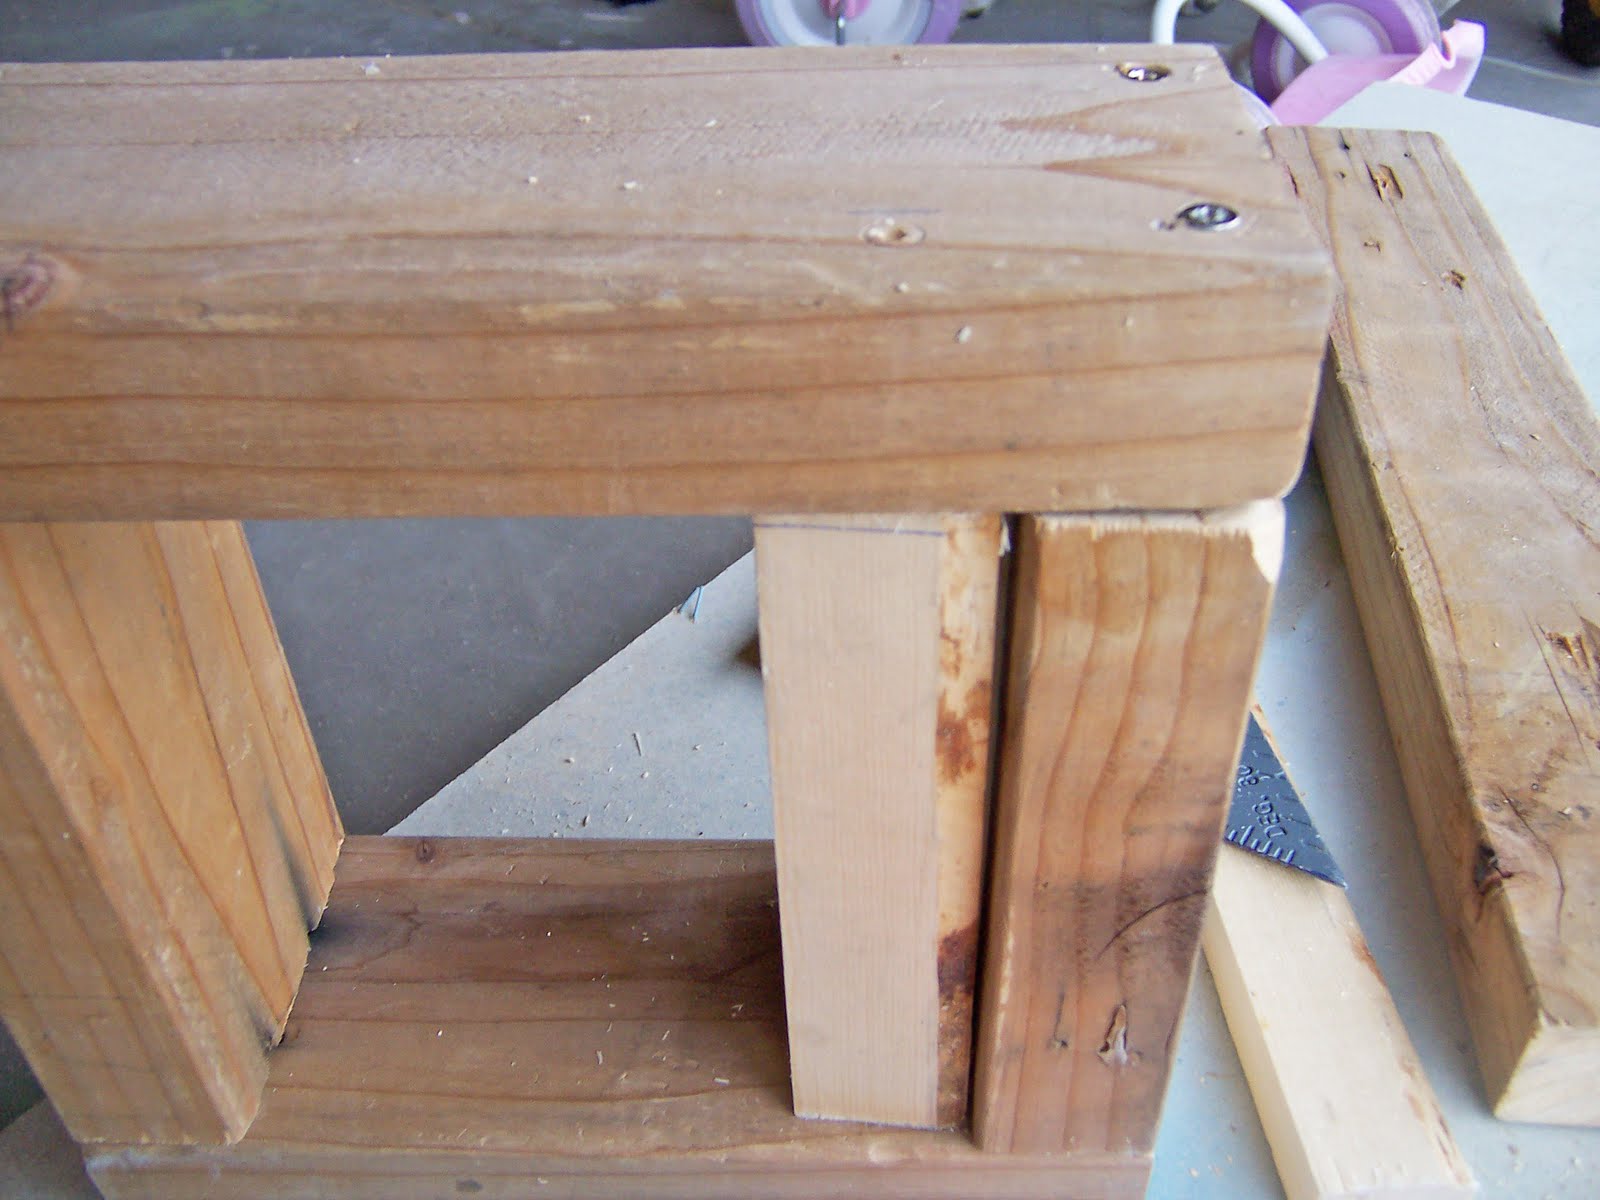 Screw together.
  Step Five: Attach to Fence. Now you are ready to attach to your fence. You are going to have to pre-drill the cleat, but I found it easier to take the box to the fence and decide where it will be placed, then pre-drill that way you don’t pre-drill where there is a space between planks on your fence. Depending on your lumber width you may need a shorter screw for this step that way it doesn’t go through your cleat and through your fence.
 I made three boxes. I wish I would have made the squares a little bigger, but they still work well and I figure I will just put sweet potato vine in those because it is a trailing plant and doesn’t need room vertically.The possibilities are endless with these and they make my fence look a little more interesting. Unfortunately, we had a snow storm 2 days in a row and it hurt the flowers a little. I am hoping they will spring back. I did have to replace the sweet potato vine.
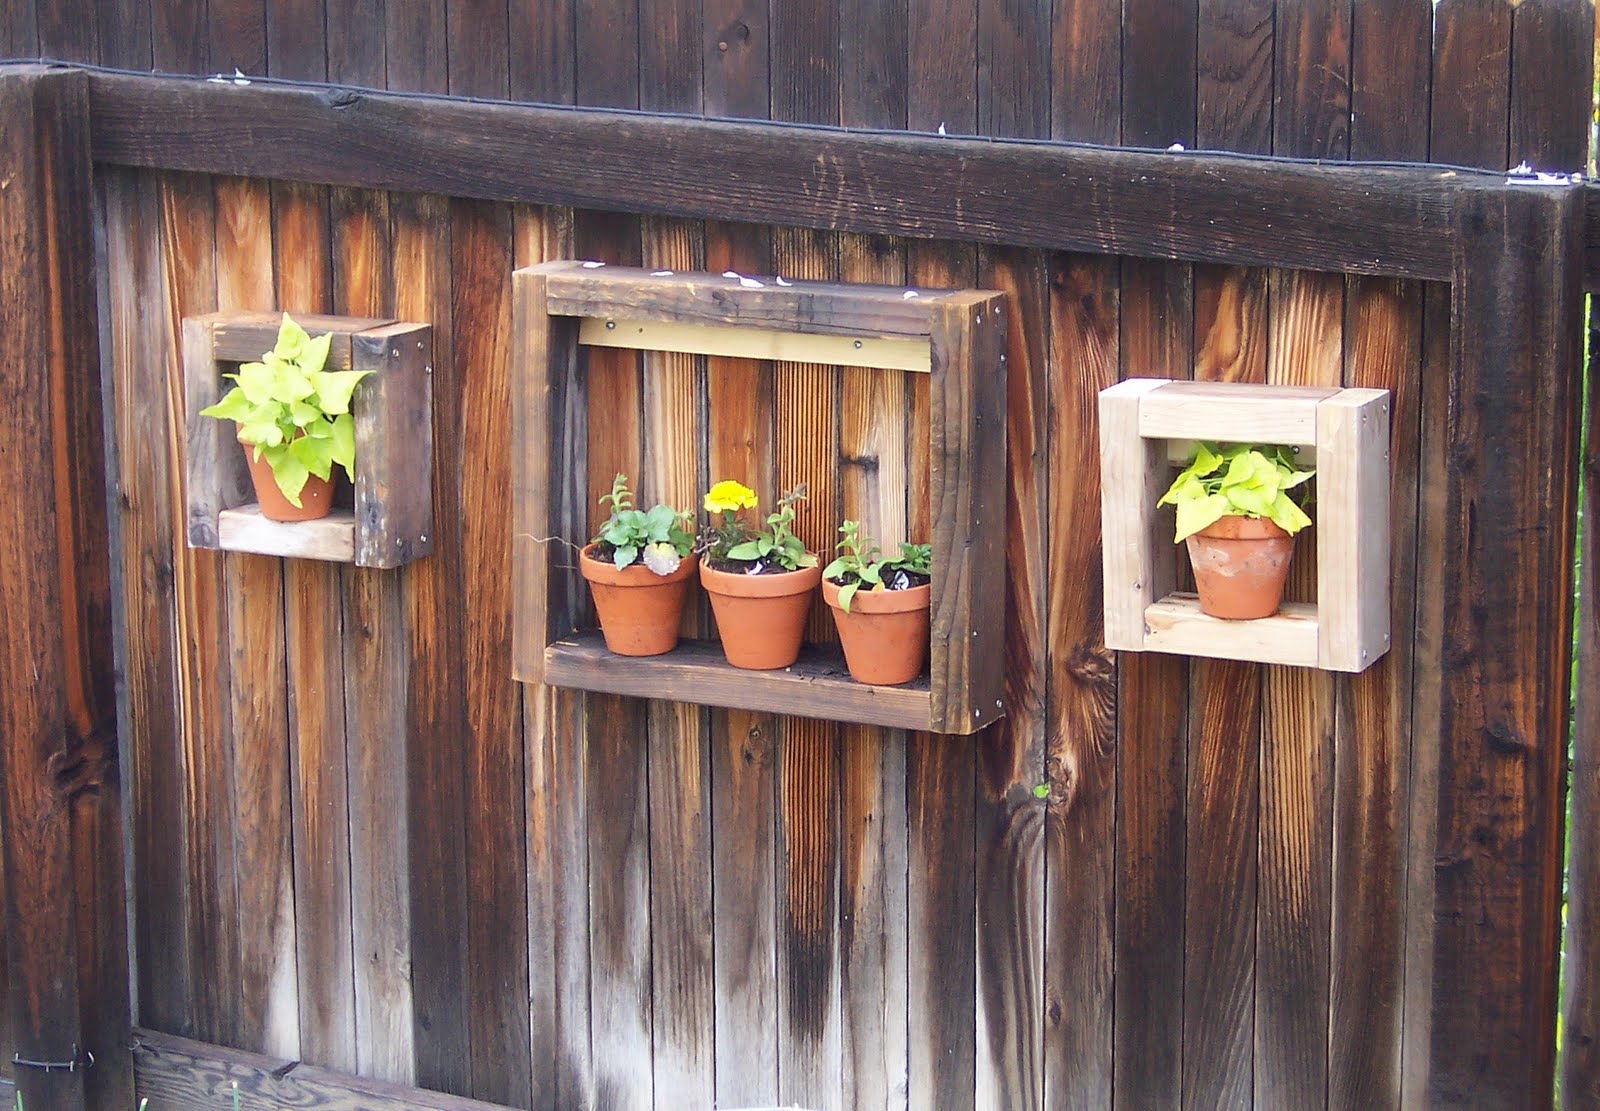 Here is the view from my deck. I think it looks pretty good. Yes the fence needs to be restained, but at least they don’t look boring. I also planted a clematis in the corner and I am hoping it will creep along the corner sections of the fence.
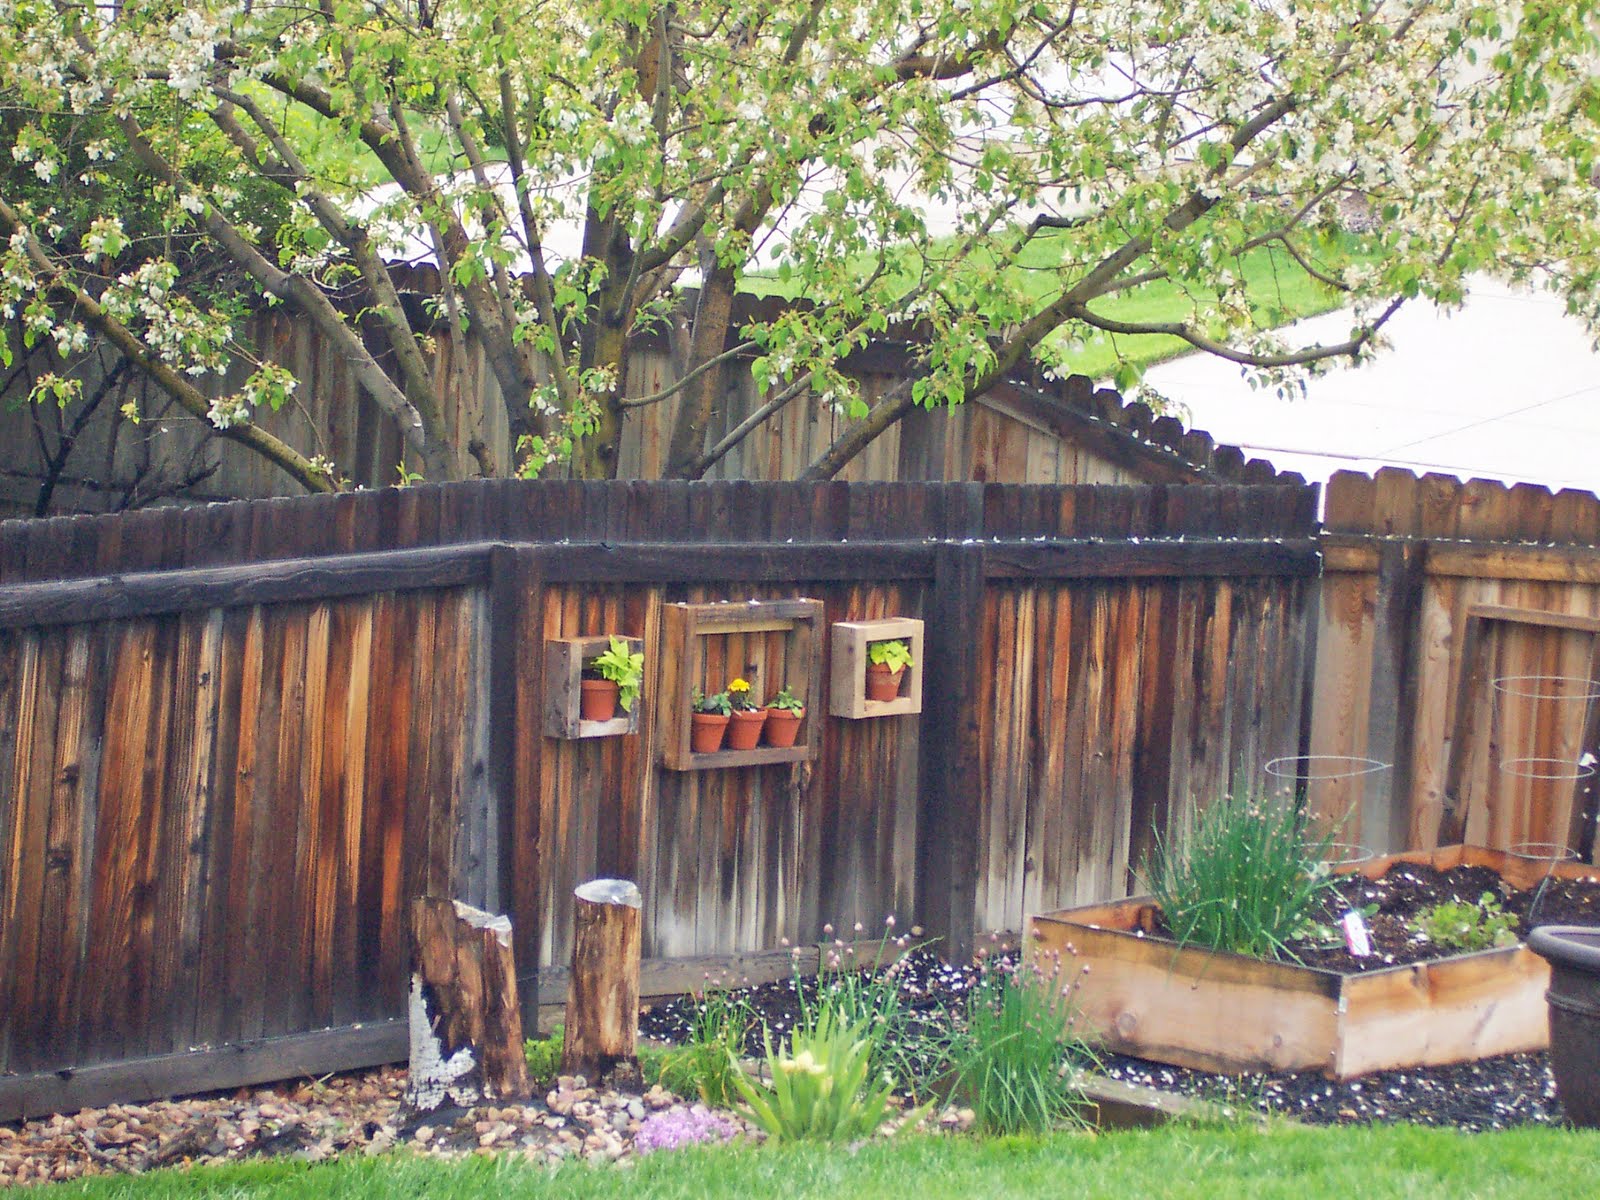 Stop my blog Frugal Home Designs and let me know what you think. While your there take a look around.


>I love it! Too bad I don't have a wood fence 🙁 Maybe I'll take that idea indoors!
>What an excellent idea! I never thought of putting flower colors on the fence. As a landscape designer I always have planted plants in front of the fence not on it. Nice job!
>I love this idea! We are redoing our very small backyard and this is a great way to decorate as well as give me a place to keep my little plants. Thanks!
>Great idea Fawn! I love Sweet Potato Vine – it gets so big & full and you gotta love the lime green color!
>I love this, they are so cute.
>Now that's one CUTE idea! I luv to plant flowers…so idea is just right for me!
Blessings,
Linda
>I saw this in my TOH magazine and my hubby just built a new fence/gate across our driveway. On one side of the gate the "fence" is only 3 or 4 pickets wide, the other side is like 9 feet and when I pull up in the driveway after work I keep thinking "that fence is screaming for decoration" – I can't believe this didn't dawn on me until I saw your blog post. The guy 2 doors down from me is a painting contractor and has piles of wood out for trash day twice a week so I'll be able to get "distressed" lumber so it doesn't look all yellow and new. Awesome. Thanks for the reminder!
>Looks perfect in your garden!
Hugs
Charo
>That is so simple and yet so beautiful! I love it!