Build a Wood Storage Crate with Handles
A good crate or box is an incredibly versatile tool for storage and decorating around your house — and it seems like lots of retailers know that and want to charge us all the big bucks for them! Thank goodness for sales… and for being able to build our own! Especially when you need a storage container that is a specific size to fit your space, DIYing is a great way to go. These wood storage crates that Paula and her husband built are awesome!

Read below for Paula’s instructions to build your own, and start thinking of where you need a good crate in your house…. You could stack ’em (securely, of course)

roll ’em under the bed

or just roll ’em around to where you need ’em!

How to Build a Wood Storage Create
By Paula from Sweet Pea
Hello everyone! It’s Paula from Sweet Pea. When I’m not at school teaching science to 6th graders, you’ll find me busy at home working on a DIY, garden, or craft project. A few of my favorite projects include DIY Adirondack chairs, a knockoff chevron end table, and a pallet wine rack.
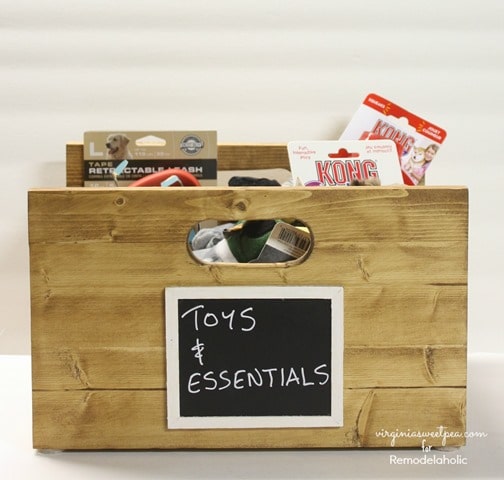
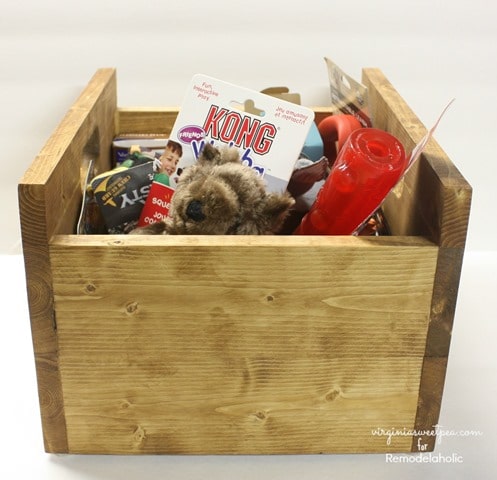
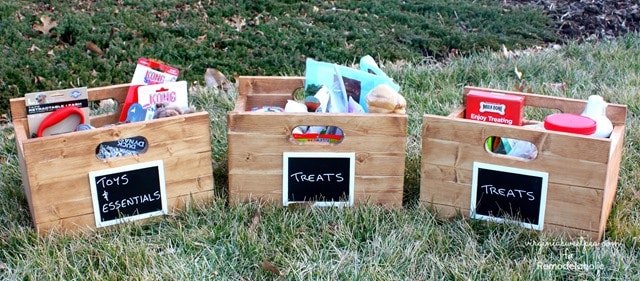
Today I’m sharing one of my favorite woodworking projects, DIY wooden crates. We designed and built three of these crates for a shelf in our kitchen’s pantry to organize our dog’s supplies.

Since these crates were designed to fit shelves, they are opposite dimensions of a regular crate; the width is longer than the depth. Handles made them easy to slide on and off the shelf. We also applied felt pads to the bottom of each crate to make them easy to slide on and off the shelf.

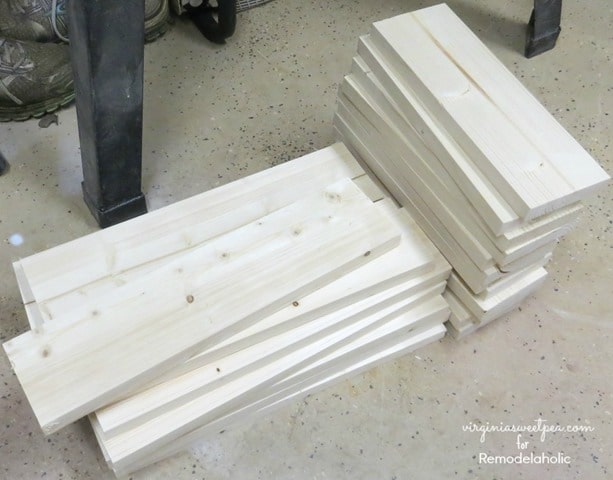
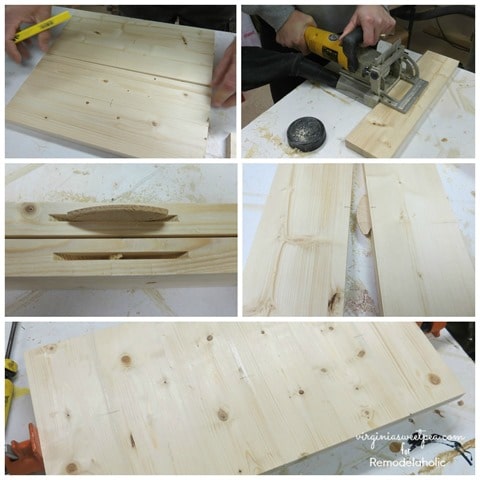
The first step in making our DIY wooden crates was to determine the dimensions of each crate. We designed the crates so that they would be 14 1/2” wide x 12” deep. The front and back sides are 8 3/4” tall and the sides are 7 1/8” inches tall.
We used 4” (3.5” nominal) wide x 6’ long pine boards from Home Depot. We cut 12 (14 1/2”) pieces for the fronts and 12 (10 1/2”) pieces for the sides. The intent was to glue the boards on edge to make a wider board for use (i.e. glue 2 boards edge to edge per side).

We decided to biscuit the boards together to make the joints stronger, and to align the boards during glue-up. Each pair of boards were lined up, and were marked with a line where each biscuit joint would be cut. The pieces were also marked a,b,c, etc. so that we could easily match them after the biscuit joints were cut. The edge of each board and the biscuit joint were given a coat of glue and pressed together. (Glue not shown in the photograph.) We clamped three sets of sides or ends together at a time until they dried.

To make the front and back of the boxes taller than the sides, we used the table saw to rip one of the 4” boards in half. This smaller piece was then cut to match the front width of the boxes (14 1/2” inches) and joined to the other two front pieces with more biscuit joints. We used one on each side of the board since the handle was to be cut in the middle of each front and back.

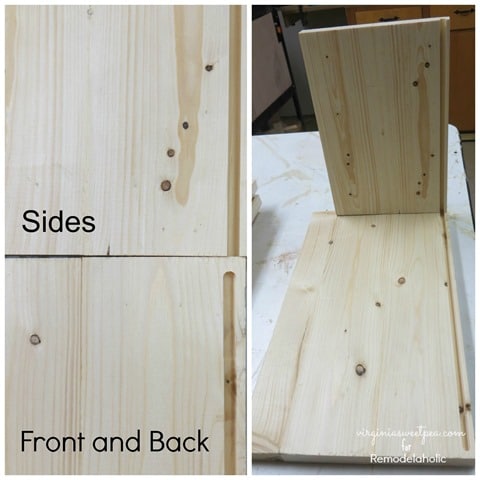
Next we used the router to cut a 1/4” wide, ~3/8” deep channel along the bottom of each side for the bottom to slide into.

The bottom of the box was then cut from scrap luan that we had on hand. We cut these slightly larger than the inside dimension of the box so that the bottom would be held within these grooves then the box was assembled.

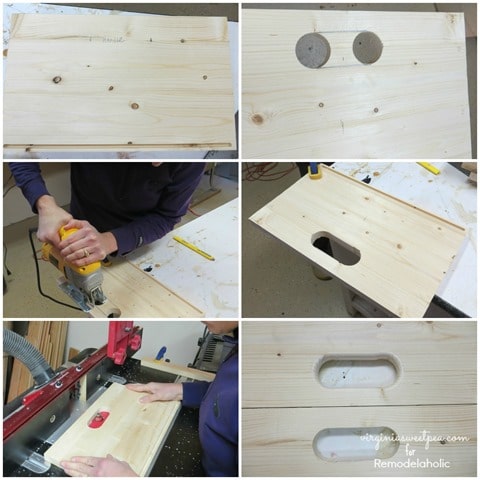
The next step was to make the handles for the front and back of the crates. The handle location was marked and the drill press was used to cut the 2 holes in each opposite ends of each handle with a 2” forstner bit. A sabre saw then was used to cut between each circle. To make the edges smooth, each side of the handle was routed with a 1/4” roundover bit. Note the difference between the routed and unrouted handle.

Two biscuit joints were then cut into the edge of each side piece at the corner interface. The two sides were glued into place, the bottom was slid into the bottom channel, and then the back was glued on. Clamps made sure that the box stayed square while it dried.
After the boxes were dry, they were stained with Minwax Early American stain. Chalkboard labels from Michaels were glued to each crate and a chalkboard pen was used to label them.

This project took two weekends to complete and cost $47 which includes the lumber, chalkboard labels, and chalkboard pen. The other supplies we used for this project we had in our workshop.
————————————-
Thank you so much for sharing with us, Paula! Love the look and sturdiness of these crates.
Head over to Sweet Pea to see more from Paula — don’t miss her Chippendale-style railing tutorial, and I love this Plow and Hearth knockoff end table!


Thanks so much for featuring me today!
Thanks for being our guest, Paula! Great tutorial!
I love these and I as we’re in the process of moving into a house, I can think of so many possibilities for their use! Thanks for the great instructions.
I love these!! Wonderful tutorial, Paula. Thank you for sharing!