Welcome back to our final Holiday Guest of the season! Our amazing guest today has a beautiful project to show you… she took out a wall in her dining room area and added in a table, but it’s bar-height on one side, table height on the other, and built on top of the remaining half wall. She calls it a “barble” and we couldn’t decide if we should call it a breakfast bar, or a built-in table, or just a rockin’ AWESOME place to dine… what would you call it?!?

Read below for all the details from Kammy, and if you’re looking for other built-in table or breakfast bar ideas, we found a few more we love, too:
1: Table as island extension via Southern Living
2: Desk into table by Handy Father
3: Industrial live edge bar via LA Times
4: Half wall breakfast bar by My Fifties Kitchen Redo
Here’s Kammy with all the details of her breakfast bar table… barble.. beautiful whatever you want to call it!
(And don’t miss the other amazing projects she’s doing in her house, too!)

DIY Built-in Breakfast Bar Dining Table
by Kammy from Kammy’s Korner

Hello, Remodelaholic readers! My name is Kammy and I blog over at
Kammy’s Korner. I was going to tell you that the focus of my blog is about redoing a huge old home we bought spontaneously on an online auction – and while it is
now – it sure didn’t start out that way! I started out hardly knowing what a a blog was, and not knowing a thing about how to take a good photo. I wanted a way to share with my family back in Iowa the way I transformed a nasty piece of furniture I picked up on the curb, or how I manage to spend $200 a month on groceries feeding a family of five. And then one day my hubby came home and said “I set up a blog for you, I called it Kammy’s Korner”, and now here I am blogging about upcycling, refurbishing, and repurposing everything I can find to make our home look like a million dollars on a nickel. Perhaps the best example of that would be the
window seats we made out of an old plank walkway we found in the rafters of the corncrib!

Since buying our old historical “mansion” in Michigan a year and a half ago, we have put plenty of blood, sweat, and YES tears (just ask the electrician about when he told me to tear down my newly painted wall) into our home and today I’m going to share with you how my dream of the “barble” came to be!
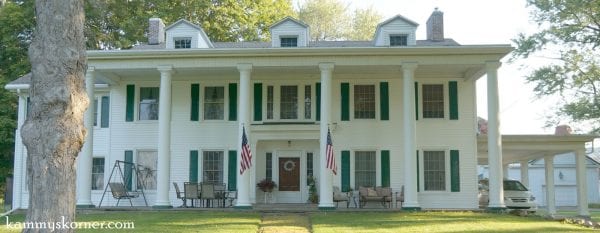
Curious as to why
Kammy’s Korner is such a conversation piece? Have a little look-see at it’s grandeur:
 |
| Check out all of the exterior updates it took to get it’s present state (click here.) |
So today I’m going to talk to you about our “barble”. What the heck is a “barble”? Someone recently told me they thought they had an extensive vocabulary and couldn’t believe they had never heard the word. Well folks, that is because it is totally made up. It was born out of trying to describe the vision in my head to my husband and dad, who would be wielding the hammers. My hubby is an electrical engineer. He says my ideas aren’t logical and make no sense to him. I wanted a kitchen bar…. but a table. A permanent table that sat on the wall. But we’d have to tear down half the wall of course… to table height… so in combining the words “bar” and “table” you get “barble”. The table top is also made out of boards from the old barn floor, so I guess the “bar” could also be for “barn”. Now if I haven’t confused you enough, let’s just get started with some photos.
Here is what we started with. This is what the eating area looked like when we bought our home a year and a half ago.:
And yes, that really is layer upon layer of wallpaper, not just on the walls, but the ceiling as well!
Pay attention to that wall on the left. It is about to be (partially) history.
Well what do you know – an old sunroom was hiding behind that wall and through that little pocket door! Oh joy – sunlight! Macaroni and cheese tastes so much better with the suns rays beaming down upon you.
Here’s an angle from the sunroom:
(Note – there was a closet where the ladder is. And a whole lot of support in the closet wall holding up the cast iron bathtub in the room above! There was so much more to just taking down half the wall but space does not allow for the novel I could write!)
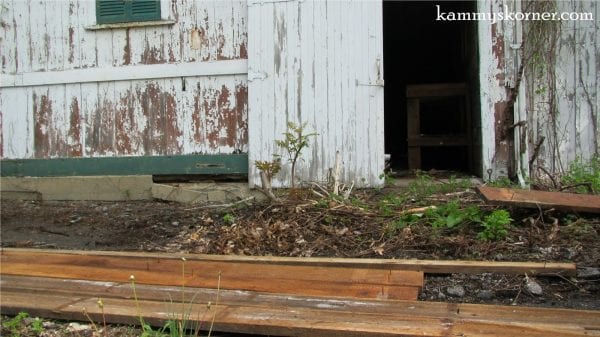
So now that we are getting ready to cut down those 2×4’s and secure a table top, we need to go out to the barn to find the table top!
And here’s where we go to find the first two boards – on the floor of this dilapidated corner of the barn:
There were years and years of old manure and dirt on those floor boards. But nothing a whole lot of sanding and polyurethane can’t take care of! Up came two of those big planks!
And in another part of the barn – we find some the same height here on this work bench. My Dad and I scoured all the old buildings, measuring tape in hand, to find boards long enough and with equal height, so we wouldn’t need to plane any. I wanted to preserve the rustic hand sawn grooves already on the wood.
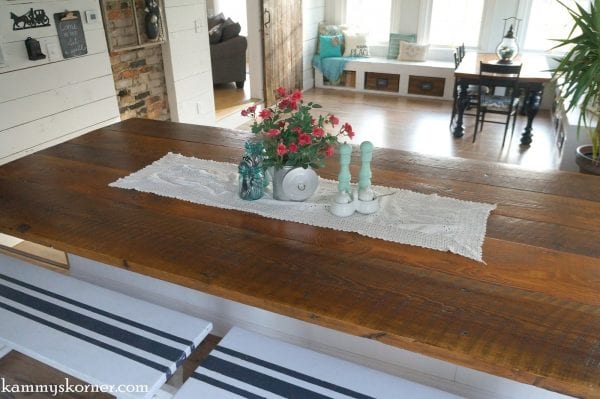
After collecting them all, we measured and cut each board to be 102 inches. We quiet often have extra people around our table so I wanted it big!
Then my dad, bless his heart, took all five planks five hundred miles back to Iowa where he cleaned, sanded, and put them together using wood glue and angling screws. Being a man, he did not photograph this process. A month later, in pulled his big truck with the “barble” top in the back.
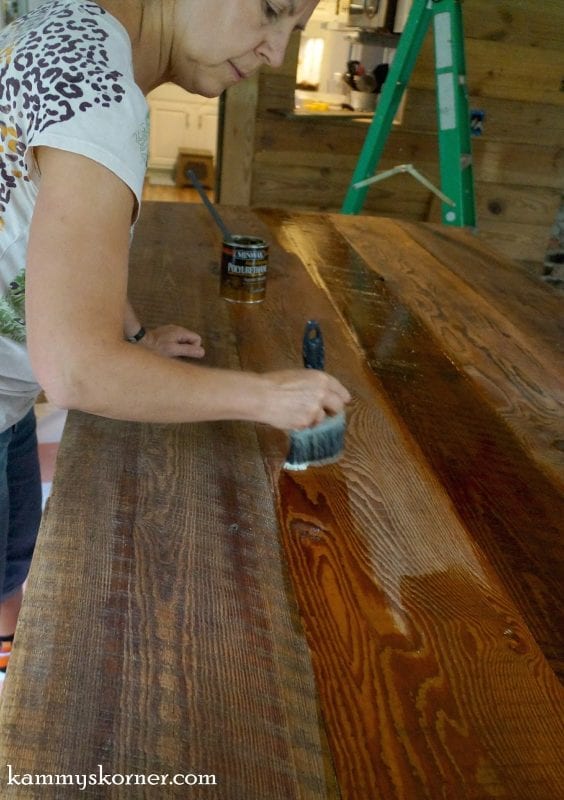
My mother and I layered about eight coats of polyurethane on the top, lightly sanding between each coat.
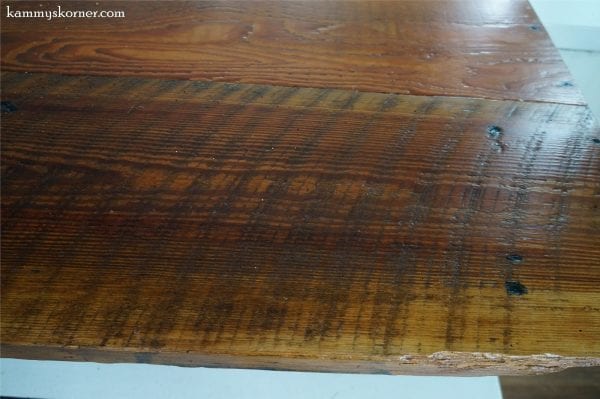
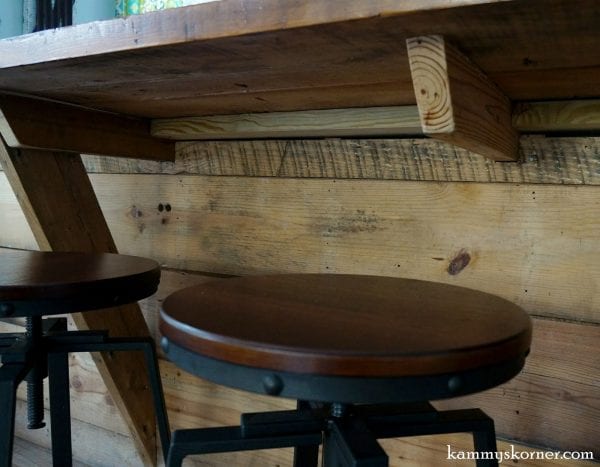
So what to do with those old knots in the wood so food didn’t collect and be a royal pain? We put stainable wood filler in cracks, holes, and knots, and then using a black Sharpie permanent marker, we drew lines to mimic the wood’s grain. Then we put a dark stain over top and you can’t even guess by looking at the table which is the “real thing” and which are our little “fixes”.
Then using lots of screws and some more cut boards, my Dad secured it on to the half wall:
The rustic ship lap wall you see is original. We did not know it was there when we started taking off old paneling, plaster, and other layers, but were so pleasantly surprised to uncover it!
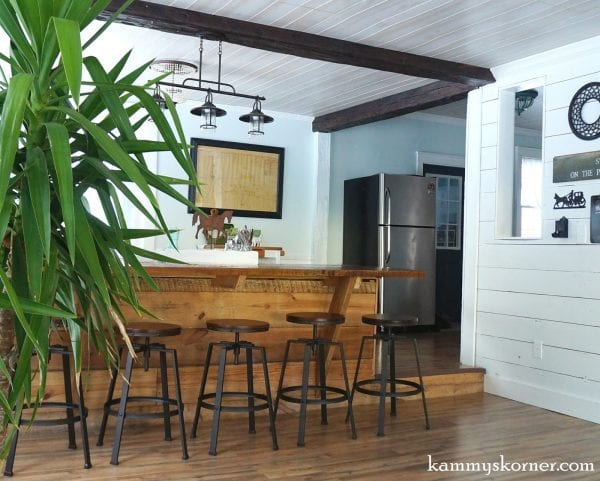
Here is the final result! As you can see, there are benches on one side and barstools on the other because the sunroom is a sunken room. There is a step on the end of the table in the doorway, which has surprised more than one person. I may need to invest in some yellow caution tape to avoid a lawsuit!
There isn’t much to list for the price breakdown since we
used salvaged items but here are our expenses:
Polyurethane from Lowes – $12
Kreg Pocket Hole Screws – $10
Grand total – $20
Non barble-related items of interest:
Triple Pendant Light Fixture was purchased at Menards.com
White paneling on the ceiling – Lowes 0 4′ x 8 ‘ panels for $15.97 each
Barn wood door – taken off an old barn in Iowa
Arch window frame – $5 from a thrift shop
faux wood beam – found in barn
Thanks so much for stopping by and I if you like what you see please follow Kammy’s Korner on
Facebook where you can see all of our latest projects and repurposes!
—————————————-
Kammy, your transformation is amazing! Can’t wait to see what you do next in that beautiful home of yours!!
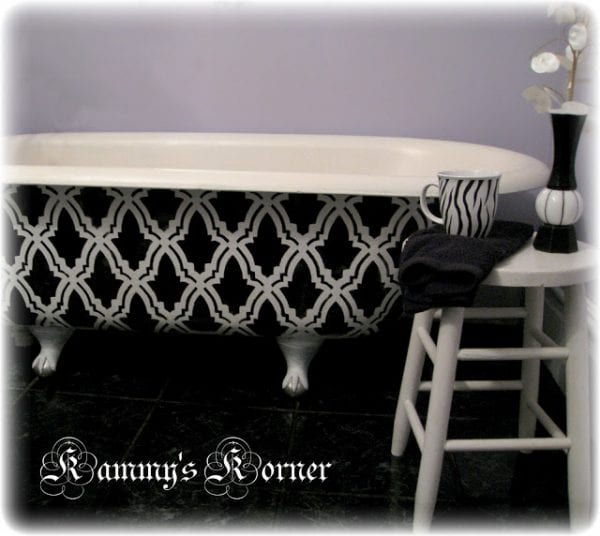
Remodelaholics, hustle over to Kammy’s Korner to see more — start with her home tour (and the kids reading area) and don’t miss seeing how she painted her bathtub (inside AND out!)
Related


Great transformation Kammy I love it and thanks for the tip on filling in gouges in old wood. I’d love to make over our counter tops with wood cladding but I don’t want to have to deal with all the crud that gathers in the holes so this was a timely tip for me – Yay! You have a beautifully transformed home. So glad I found your blog today. Seasons greetings and Happy New Year from Paint It White in Ireland:-)
Isn’t Kammy amazing?? Thanks for stopping by, Marie!
Thank you, Paint It White! The wood filler idea was a combination of my brain and my mom’s. It worked GREAT! 🙂 Good luck on your counter tops. I’m sure they’ll be awesome. Thanks for stopping by and Happy New Year to you as well!
Incredibly gorgeous and useful. I love everything about it! When can I move in? I’ll be your live in cleaning lady! ???? Happy New Year to everyone.
Live in cleaning lady? Sounds like a plan to me!! 🙂 Thanks for the sweet comment, Hope!
And what about the dark beam running across the ceiling. Did you remove the old lumber and put that there? Or is it a facade around the existing lumber? It looks great, I just want to know what you did there. Also, are you sure that it is structurally sound to take out all of those studs?
Looks beautiful. Thanks for documenting.
Hi Eric! It is a Styrofoam beam that we hollowed out to fit around the existing beam. It’s a little complicated, but they did have do some resupporting to make it structurally sound. The ceiling has about a 10 inch gap between it and the upstairs floor, so it was not the “norm”. Sorry for the delayed response!!
http://www.kammyskorner.com
Just what I would like to do!!! Thanks for the post, helped me explain my thoughts to my husband 🙂
Hey, thank you for recommending my DIY recycling an old door into a new desk project. It works great for a breakfast bar!
I like your use of white space and lots of images on your blog!
Thanks, Curtis! Love your desk!
Love it! Where did you get the sage green and turquoise curtains? Thanks!
My mother actually made them from fabric we found at Joann’s. 🙂
great blog! Where are those barstools from?
I have a question! I’m doing the same thing to my house, but I’m wondering how you made the bottom half level enough to put Down the countertop? mine is a bit wider so I can do storage underneath.
I have the same question! We are in the middle of a kitchen renovation and what I thought would be an easy project has become more difficult. Also, I’m worried about the stability of the half wall. Did you do anything extra to stabilize it? Thanks!
Did you have any luck answering this question? I have the same question with regards to the wall stability.
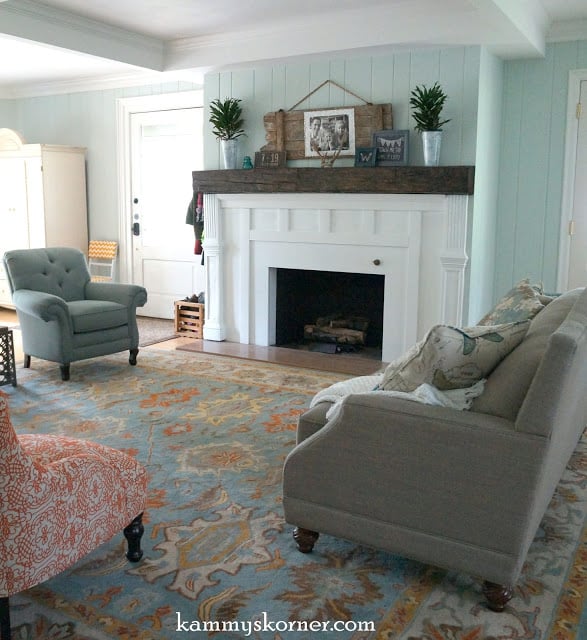
I was wondering what color you painted your kitchen in the picture above.