DIY Plank Backsplash Using Peel and Stick Vinyl Flooring

Hey, hey Remodelaholic peeps! It’s Jessica from Mom 4 Real, back to share a fun and budget friendly idea for your kitchen! I have seen plank walls everywhere, and absolutely love them! When I started making over my kitchen, I was looking for an inexpensive way to change my backsplash in a hurry. I didn’t want to spend a ton of money, and since eventually we are going to have new countertops put in, I didn’t really want to invest in tile. So, I decided to try a plank wall backsplash. I headed to my favorite home improvement store to buy wood. While taking a shortcut through the flooring section, I noticed that they had vinyl peel an stick faux wood flooring planks for sale for around $1 each. (You can also find similar tiles online at Amazon or Home Depot, you will just have to watch for sales!) My brain immediately went into overdrive! I thought it would be so much easier to use the peel and stick vinyl flooring to create my backsplash instead of regular wood, so I bought a bunch and headed home to give it a try!
This post contains some affiliate links for your convenience. Click here to read our full disclosure policy.

I laid them out on my table to show my husband, and he basically told me I was nuts. That’s pretty normal around here, but he is usually pleased with the end result.

I tested the tackiness on the back and was very pleased! You seriously just peel the wax paper backing off and stick them on the wall…well, erm…that’s where I stuck mine. I guess they really belong on the floor. I’m all about bending the rules when it comes to DIY.

I placed mine in a staggered pattern, and made sure each end was as tight as possible. The great thing is that you have a bit of time to reposition the planks. Just be sure to press them onto the wall really well.

You will have to cut the vinyl to fit around electrical outlets. You will also likely have to cut different lengths once you get to the edge of your wall to be sure they fit well. These things are easily cut with scissors…no tools required!

Once I got all of my planks pressed tightly to the wall, I decided to paint them. I wanted a really cohesive look in my kitchen since it is so tiny.

I grabbed my favorite grey chalky finish paint and gave the wall two thin coats, then finished off with a clear wax.

I love the way it turned out…just a little rustic!
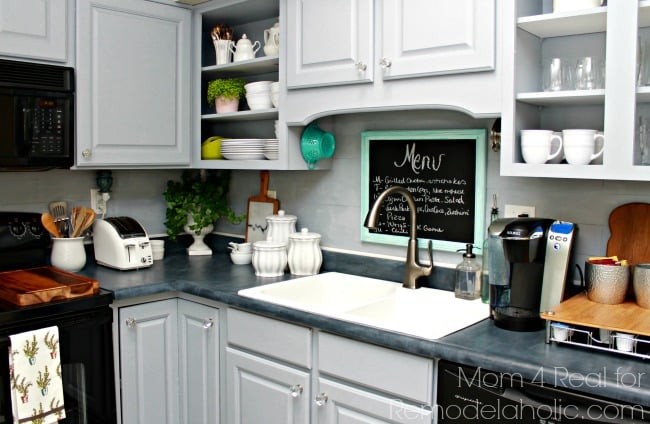
I can’t wait to use these vinyl peel and stick planks other places in my home! They are so easy to use, and ridiculously inexpensive! It cost less than $20 to do the entire backsplash area!
Today over at my blog, Mom 4 Real, I’m sharing a fabulous garden trick…How To Start Seeds In 3 Days…hop on over and check it out!


I found your post while researching vinyl plank flooring as a backsplash. My biggest concern is the backsplash behind a gas stove. Did you place your plank behind the stove? If so, have you had any problems with the heat from your range?
Carol
Hi . I have been thinking of using regular laminate flooring that has a built in plank look and painting it with chalk paint for a media wall for my fireplace and tv. No one seems to have done it which makes me worried about why that is. I like your idea anyway. How much can you see the planks? Did you have any problem with the paint adhesion?
did you do this on flat wall or over tile that was there?
This was on the original wall, not over an existing backsplash.
I had to laugh about your husband telling you that you were nuts. Believe me, you are not alone on THAT island! There is a lot of head shaking going on around here, too. The sweetest reward, though is when the project is finished and I’m serving up some crow for dinner! I absolutely love the idea of using peel and stick flooring on the wall. Since I don’t have a lot of power tools, or experience with them, this may be the answer to my “ship lap” wall in the guest room. I love your ideas. Thanks for the inspiration.