Mini Master Bedroom Makeover
Submitted By: Because I Like to Decorate
I told you I had something up my sleeve! It all started when my husband had to go on a two-day business trip to Dallas. After he left on Tuesday morning, I got to thinking… what if I could pull off a mini master bedroom makeover before he returned on Wednesday evening? You see, our master bedroom has been neglected big time! Because nobody goes up there, it’s received no attention whatsoever. I wanted my husband and I to have a nice place to retreat to at the end of the day.
Let me preface this by saying that it was a “mini” makeover. I had less than 24 hours and two children to care for at the same time! I have many, many more plans for this space, so look for “master bedroom makeover 2.0” in the future. 🙂 Without further ado… introducing the final product:

And for comparison, this is what our master bedroom looked like before.

Does this look at all familiar? Since moving in, we just placed our furniture in the room and walked away. Have you done the same thing? Notice how the cords are stretching to plug in all our “necessities.” And one of our lamps were moved to the guest room to accommodate out-of-town company. Tacky, I know… it’s embarrassing.
First things first, we needed an actual bed frame — or in the very least, a headboard. Since upgrading to a king-size bed, our pretty queen-size Z Gallerie bed that we had been using moved to the guest room. I’ve seen DIY headboards all over the internet, so that’s what I set out to do. Fortunately, Home Depot stocks 6′ long pre-cut boards for about $5.50 a piece. I used six boards, stained them, and screwed them to the wall using a course drywall screw.

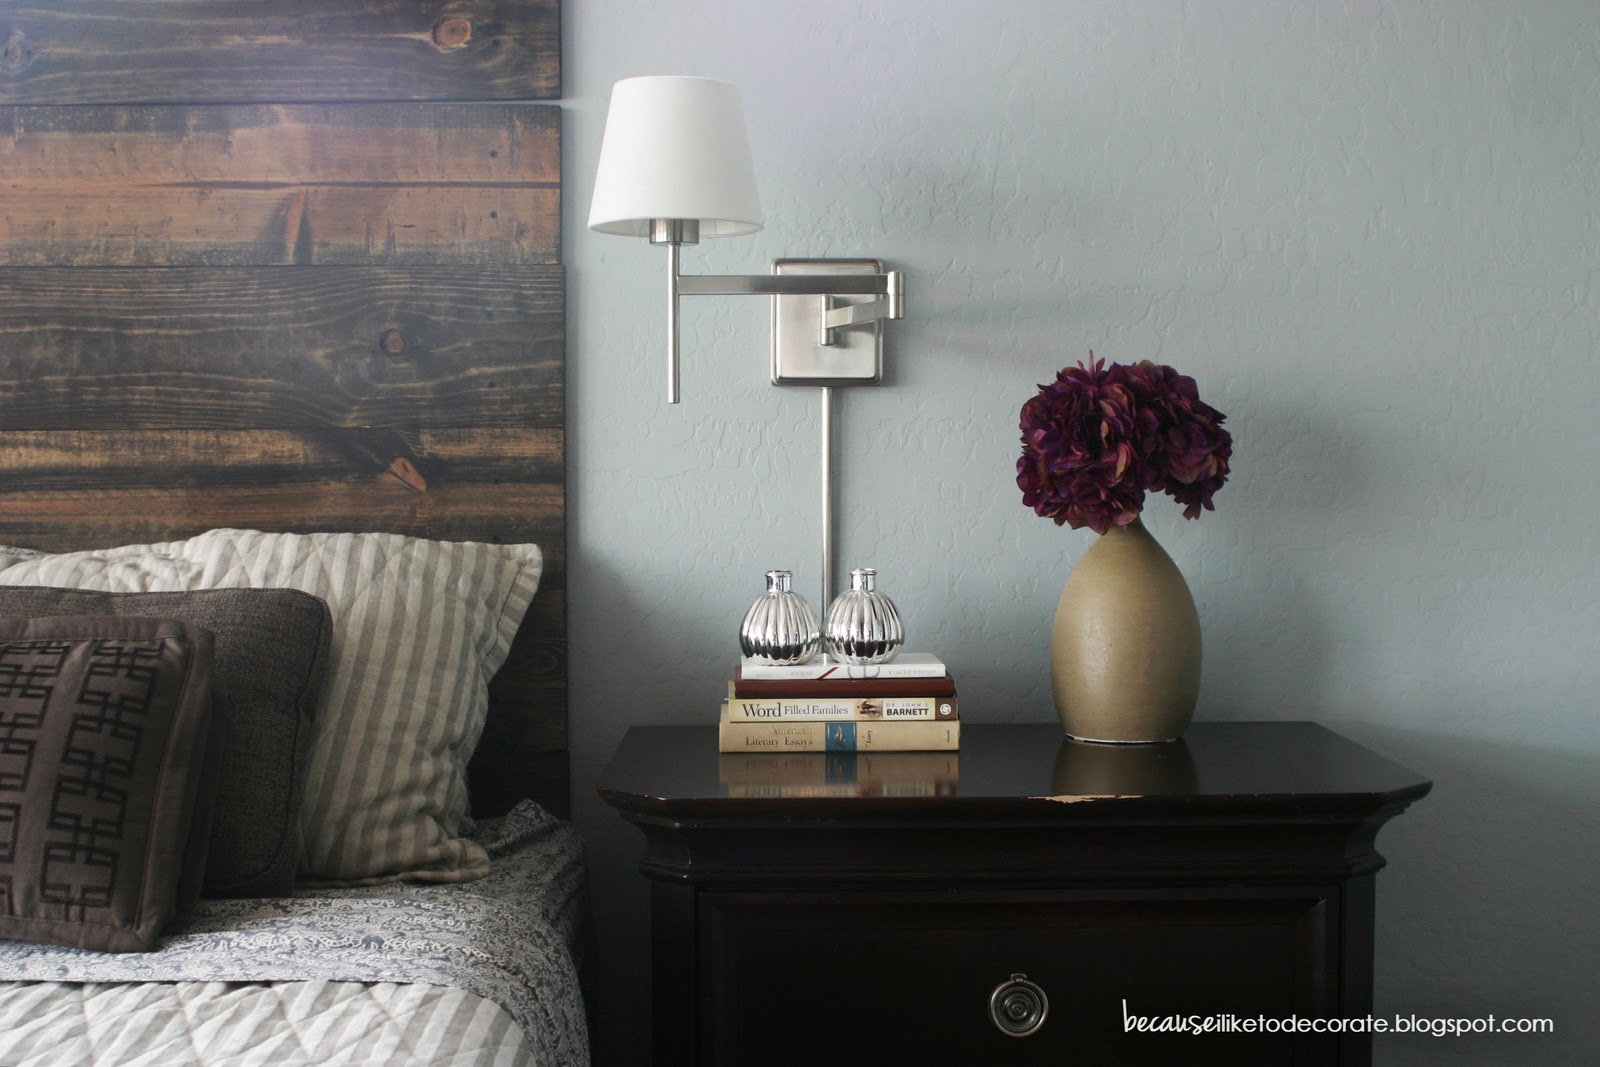
We also needed some lighting changes, so I picked up these nightstand lights as well as the ceiling fan and called a very generous friend to come install them last-minute for me.
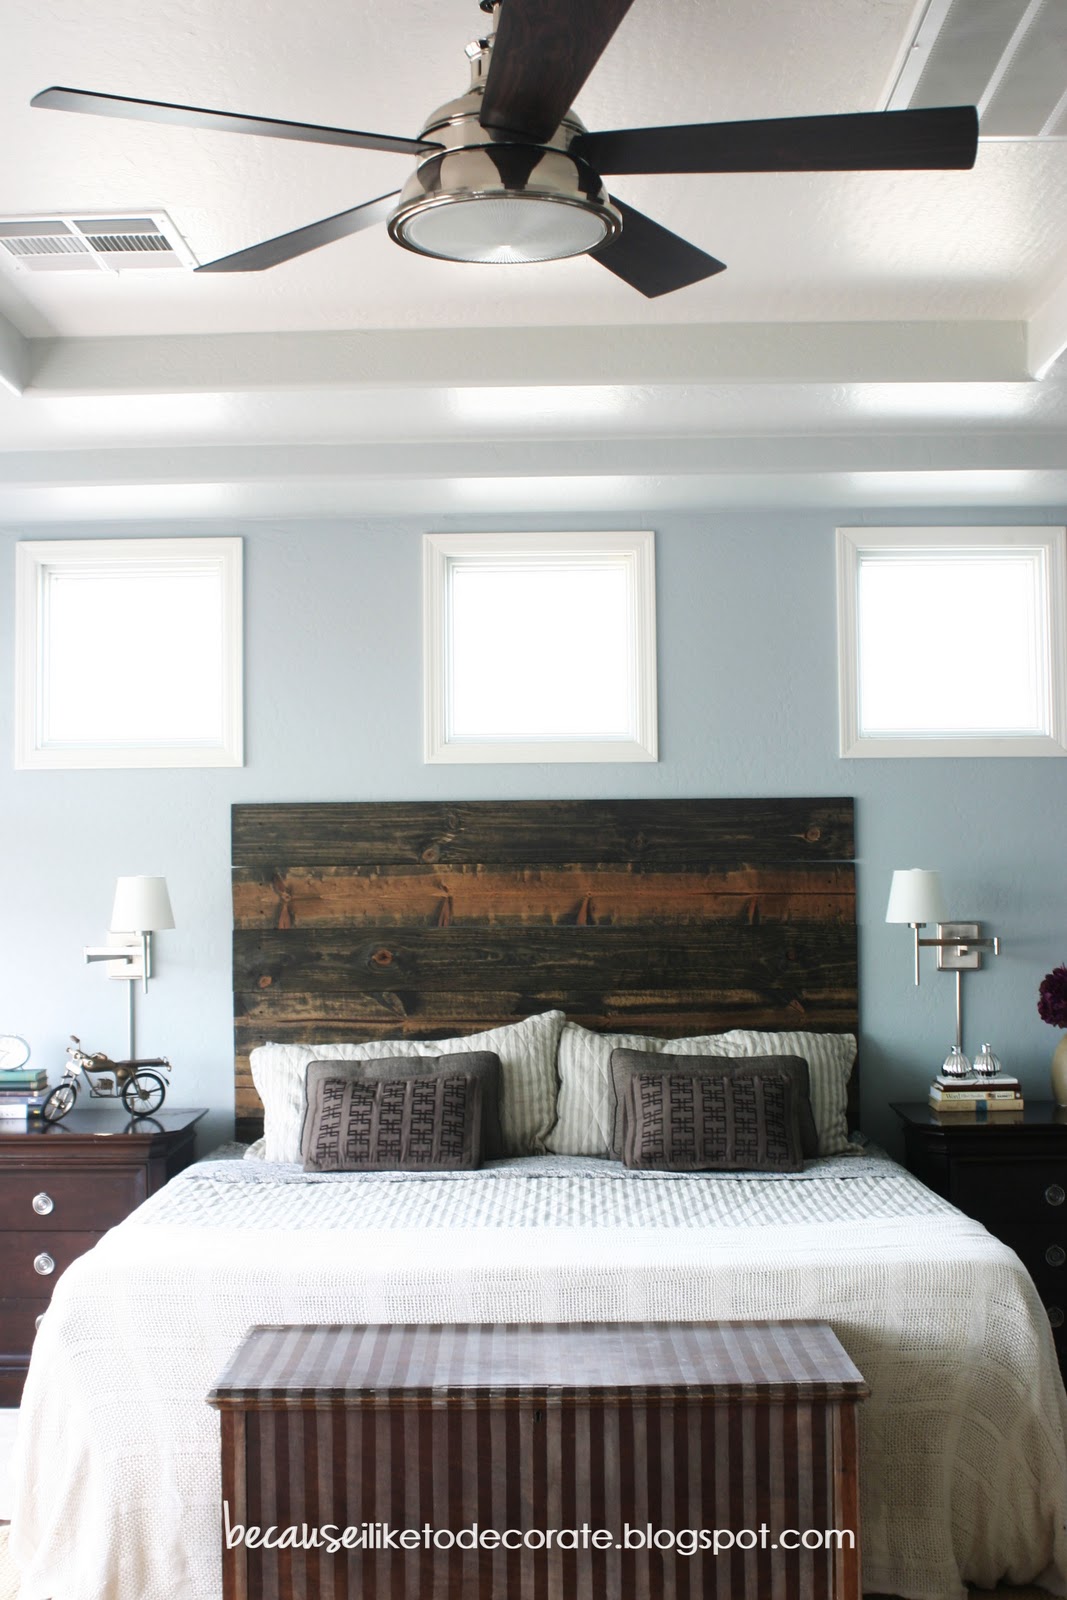
I brought in Hayden – the antique cedar chest to frame the foot of the bed, and also picked up a few nightstand accessories…
…including this super-cool motorcycle statue that I couldn’t resist for my husband’s side of the bed.

To keep it practical, I used books that my husband actually reads topped with a couple vintage, old-looking books.

And finally, I purchased this rug to frame out the space and add a little texture and dimension.

Now that this much is done, I want to do more! (Oh the lack of time and resources). Until next time…


I L.O.V.E. this!!! My husband and I were just talking about needing to update our master since we’ve been in our house for 2 years and it looks the same as the day we moved in! What an easy but wonderful idea and thanks for sharing!!
I love it! I love the serenity of the blue walls and the organic feel of the headboard! Lovey job!
Love the headboard! Very creative–way to go, girl!
It looks really nice,great job in 24 hours! I’m in the process of doing our master too. Love the headboard and the scones. Thanks for sharing
Looks great! Good idea!
The headboard is fantastic!!
Thanks so much for all the love and support! It’s an honor to be featured here and share with all of you. 🙂
What a great job! It’s so close to what I want to finish up in our Master, but I don’t think I could do it without my hubby and the kids around! Way to go!
Leanne @ Because (I think) I Can
Wow! Looks terrific! It’s amazing what you can do in a day!
Headboard for under $35. I’m a Believer. I love the look of the stain with the wall color. My Grands would “remodel” the motorcycle, but I love the look. Great Job!
I LOVE Wood! I seriously have been planning on doing this and you were just the push that I needed to get to gettin’ and I’m glad I waited because the stained look is the perfect touch. Thanks for sharing…
I love this – Our master is in the same boat yours was -just seems wrong that the room that should be one of the most important to you is always last – the headboard is my favorite part!
I love this…so talented…
You did a great job! I love it!
Thanks everyone! If your interested, I have since posted a more detailed tutorial on just the headboard project of this makeover. Here’s the link: https://becauseiliketodecorate.blogspot.com/2012/01/diy-rustic-headboard-tutorial.html
I like the look of your headboard, great job!
i’ve looked for these “6′ long pre-cut boards for about $5.50 a piece” at Home Depot and they are non-existent. i even asked a sales associate and they had no idea what i was talking about. can you tell me which area of Home Depot did you find them in ?