No Sew Stocking Tutorial
Stockings are one Christmas tradition that pretty much every Christmas-celebrating family has — the size, shape, color and style vary, but the concept is the same — an extra place for goodies on Christmas morning! I made my own easy sewn version last year, but I know that many of you Remodelaholics out there get along much better with a nail gun than with a sewing machine, so when Roxanne sent us her no-sew stockings (plus the awesome story of how they came to be!), I really wanted to share them with you before the holiday this year. 
There’s still plenty of time to whip up a set of stockings! Read below for Roxanne’s tutorial and story, or check out these other stockings that we’ve shared previously:
Easy Stockings with Free Pattern
Brown Paper Bag Stockings from Hating Martha
Make a Stocking from a Sweater
And don’t miss this tip from Tasha about how to hang stockings without a mantel!
Now here’s Roxanne with your no-sew stocking tutorial… and a story of how DIYing doesn’t always go as planned! 🙂
DIY No-Sew Stockings
by Roxanne of The Honeycomb Home
Hello there! I’m Roxanne from The Honeycomb Home. I am very excited to be guest posting here on Remodelaholic! My project today is how to make a no-sew Christmas stocking. This is for all of us who are sewing machine challenged.

My Christmas stocking story is a long one. It all began last year when we completed construction on our family room. We added a feature wall with a fireplace. It was the first time I’d ever lived in a house with a mantel, so I couldn’t wait for Christmas to hang those stockings!
When Christmas finally rolled around I searched through endless boxes of decorations to find my kid’s stockings. And I couldn’t find them anywhere. So I decided I’d make my own.
Now, up until this point all of my interactions with my sewing machine ended in frustration, with many obscenities spoken. Not very merry. In my excitement, I thought this time would be different. It wasn’t. Once again, the machine was packed away, needled jammed, and not a thing sewed. No stockings were hung last year.
Fast forward to this year. I had the perfect fabric for Christmas stockings just sitting in my closet. A no sew alternative idea formed.

I used a stocking that I had picked up at an after Christmas sale last year, and traced it onto poster board to make a template. [Remodelaholic note: If you don’t have a spare stocking, you can use our free template here!] I traced this template onto my deer fabric and carefully cut it out. When cutting the second one, make sure you have the template so that the two pieces will have the correct sides facing out. I wish I thought of that before cutting mine. Luckily, I had enough fabric to spare that mistake.

Once I got two pieces facing the right way, I lined them up. I folded around the edges to create a hem. I ironed the edges first, then used fabric glue to hold them in place.
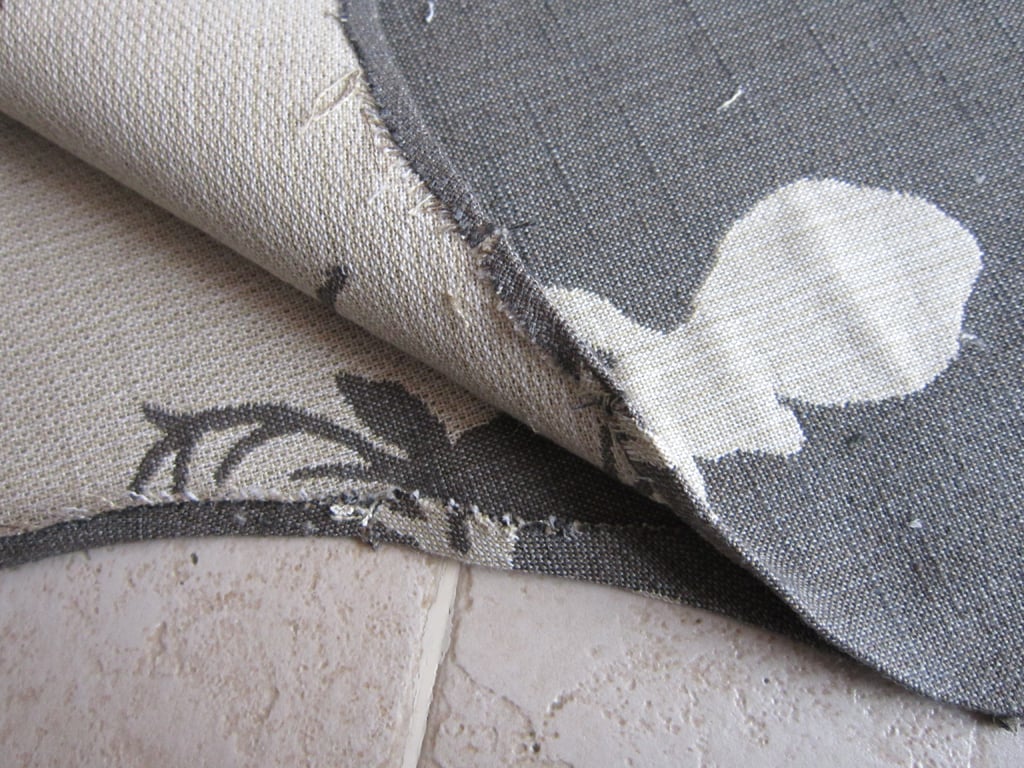
Around the rounded areas, I had to make little cuts to get them to fold nicely without creases. Make sure you get a nice rounded heel too.

I’m not gonna lie, all the folding and gluing gets tedious. I started wondering at this point if learning to actually use the sewing machine might really be easier. Once the two pieces were even in size, I used the fabric glue to glue them together. Try not to glue the stockings to the kitchen table. And leave the top left corner unglued because this is where you will put in your hanger. I used a ribbon, folded it over and glued it in there.


At this point, I was moving right along, so I added some ruffled trim to the top in lieu of a cuff. Later I would hand sew two buttons on for added detail.

It was later in the day now, but I decided I had enough time to get a second one done. I was about halfway through that when the phone rang. School nurse, my daughter needed to be picked up. To paint this picture for you: My house was trashed from gathering up all the supplies for this project, my fingers were glued together, my yoga pants were covered in dog fur and I’m pretty sure there were donut crumbs in my unbrushed hair. Great.
Luckily, the nurse released my daughter to me anyway and I was able to get home and get my stockings done, finally! When my husband got home, I proudly presented him with my finished stockings, expecting him to say “Wow, you made that? Good job!”.
Instead, after examination, he broke out into fits of laughter and almost choked on his dinner. “Why is the heel square?” is what he actually said.
At this point I was really over making my own stockings and considered just leaving them this way. But I knew that would drive me crazy. So I just used a protracted to retrace a rounded edge around my heel, cut and reglued it.
They’re really not perfect but I love them anyway. My original plan was to make four. The next two were going to be white, maybe sweater material, with the leftover deer fabric for the cuffs. Maybe next year. 😉
——————————
Haha, thanks for sharing you stockings and story, Roxanne! We all know those kinds of projects!
Remodelaholics, go visit Roxanne at The Honeycomb Home and check out her other projects, like her $27 Restoration Hardware orb chandelier and how to get a galvanized metal look using just paint.


Being an avid crafter of all types, I have to say that YES, learning to use the sewing machine is much easier than the process you went through! And it opens so many doors to other projects that require sewing.
I love them, and your creativity!