Well, today yesterday was one of those days, we ran out of diapers, forgot about our play date (but did make it a little late), the babysitter just didn’t show up, or call… I’m still sorta ticked about that… we ran out of towels…(which means 4 loads of just towels to wash, and I am not exaggerating…) I feel like nothing got done… and really the ONE thing I did get done (cleaning off the kitchen counters) was undone when I made dinner, which is still there since I am typing this…… sigh.
But, I thought I would show you a little more of the stair project. In case you want to see the rest of the story, check out these too:
The Plan,
Part 1,
Part 2,
Part 3,
Part 4 and
Part 5
A quick preview of things to come!
Sorry in advance these are so long! It takes me about 3 days per post just to narrow down images.
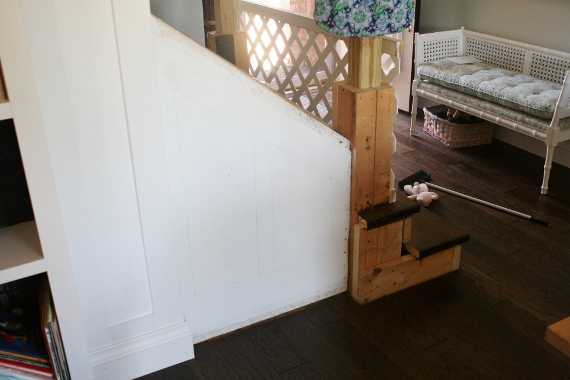
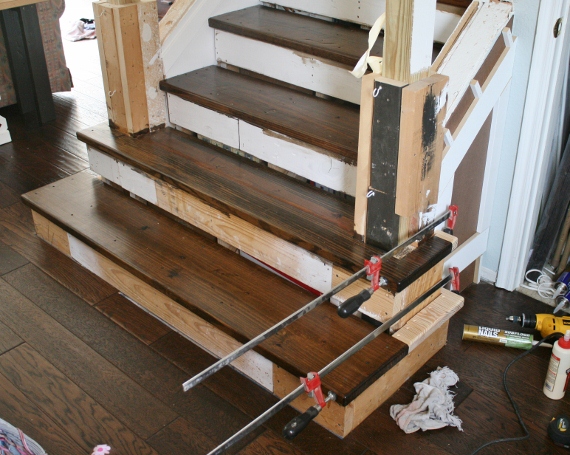
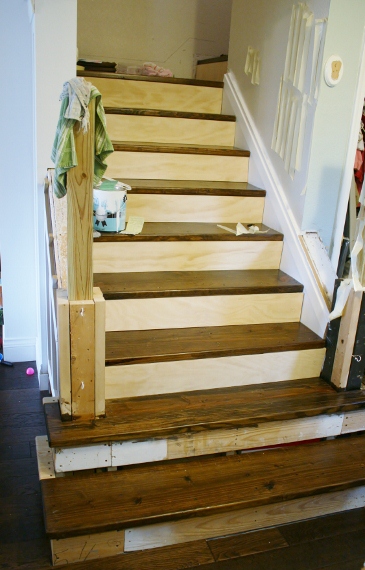
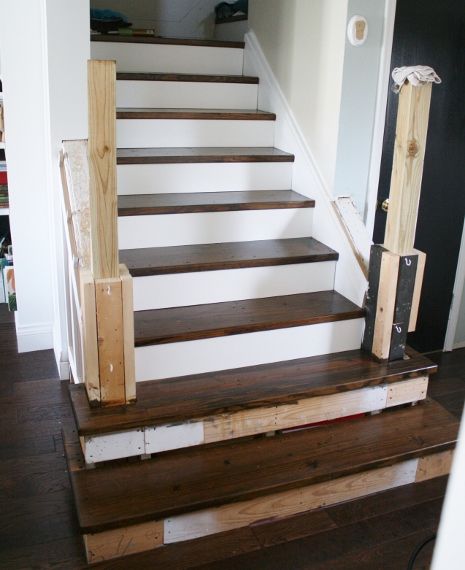
This is where we left off, I stained the treads in place. But, if you will notice, actually- I take that back Buddy is in the way. The bottom stair tread is technically not all there. We needed to finish the side walls of the stairs in order to add the treads. We waited on finishing the walls since we weren’t sure how it was all going to work out when the stairs got finished… But that is how we do things- figuring them out as we go.
You can see in the picture below how the tread just sort of ends. But the whole point was to have it wrap around the side. In order to figure out all the dimensions, we measured everything out so we would know what exactly we would need, and Justin got to work… of course we had some “help”
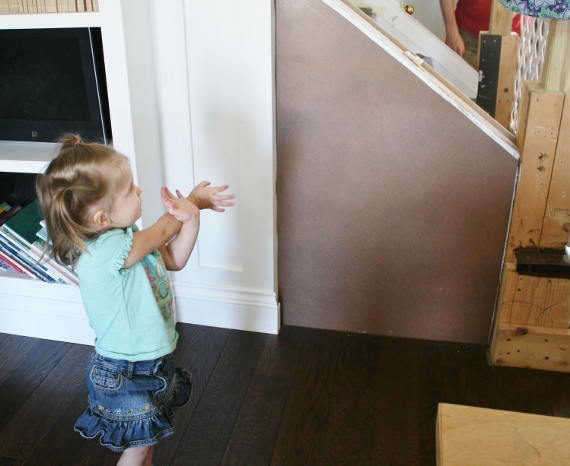
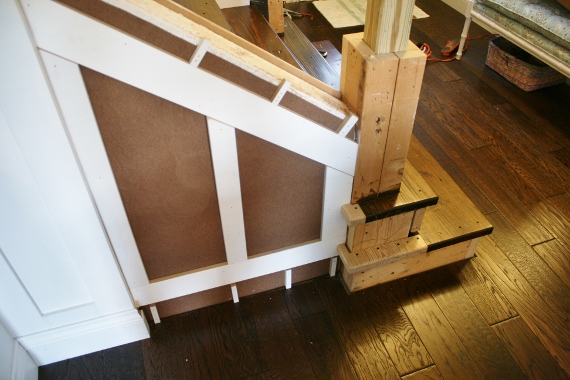
We decided to put up a backer board, which I may or may not do in the rest of the living room too, cause I am so sick of the heavy orange peel, or whatever it is called on my walls.
By adding the backer board, the panel is smooth, and makes it look more professional, and not just like we nailed molding to a plaster wall (which is what we did 😉
I had to show this funny picture of Etta doing her best impression of Vanna White… (even though she doesn’t know who that is)
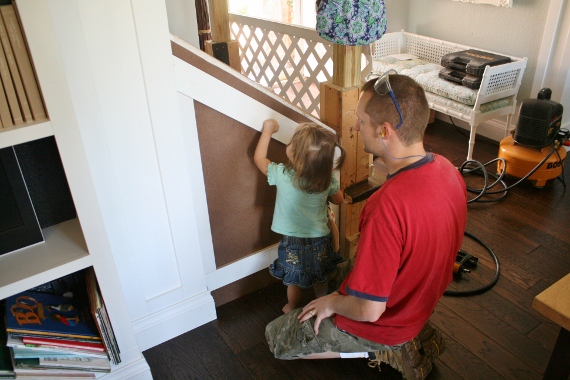
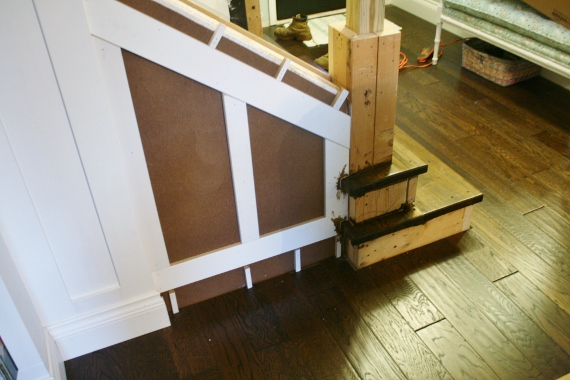
Getting the moldings up (these match
the wainscoting we did in the rest of the front room.)
This picture is Etta “Knocking on wood” that someday we will actually finish this project…
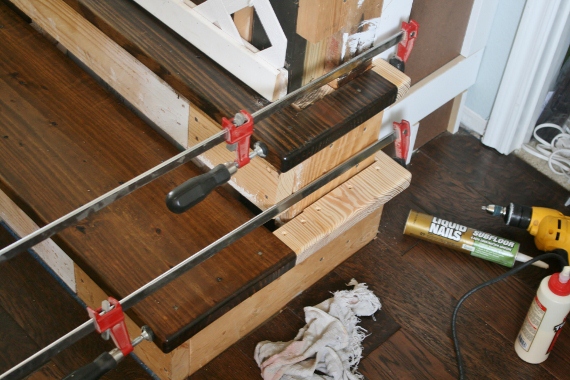
Okay once the moldings were in place we could install the ends of the treads. Below is what that looked like
After it looked like this…
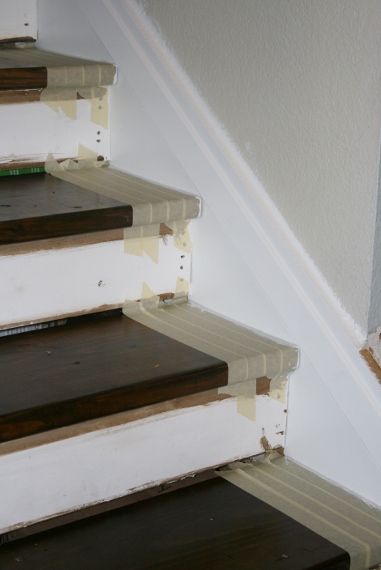
Then I stained them in place, and yes, I was too lazy to tape.
A few coats of poly and we are set to move on.
Technically the stairs treads hadn’t been nailed back in place yet, so Justin did that now. He glued and nailed those babies all in.**Disclamer here is one of the little truths about the stairs that some people might hate – we left the holes from the nails open. It is sorta rustic anyway, since the wood we used was existing and beat up to begin with. I like the look, but it may not be for everyone. You could fill the holes and sand and stain, and then poly… we just went a different route.AND, just so you know, I am happy to say that when I knocked our packing tape roller off the ledge upstairs and it gouged out a 1 inch long hole into one of our stair tread just the other day, well you can’t even tell it happened!
I somehow lost the image of the construction adhesive that we put under the stairs before nailing! SO keep that in mind, glue and screw… or nail in this case.
We LOVE our Bostitch framing nailer. We bought it to nail the big huge beams when we removed the wall in our Asheville house way before we blogged, but that baby is worth every penny! I almost cried when I thought it was stolen(from the thief in the night.. jerk!), but luckily it wasn’t! PHEW! Although, we technically haven’t had the cash to replace the compressor, so it is sorta useless at the moment!
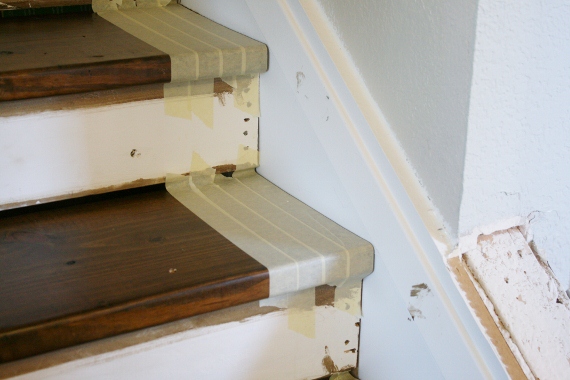
When I stained the stairs treads, I got stain everywhere, so I had to repaint the sides. I was extra careful to tape because I didn’t want white paint to get into any of the holes that are in the stair treads.
Painted…
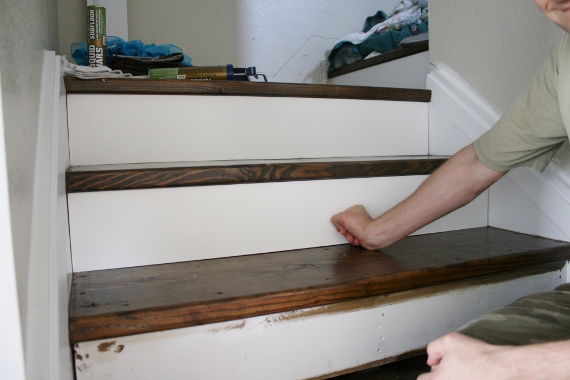
Now for the risers! Justin measured each riser… all of which were totally different by the way! Then he had to cut each riser to fit perfectly on their respective stairs. We painted them before installing. In the image below he was dry fitting them.
To put them up we just liquid nailed them in place. No holes to fill! NICE!
Holding them in place for a bit!
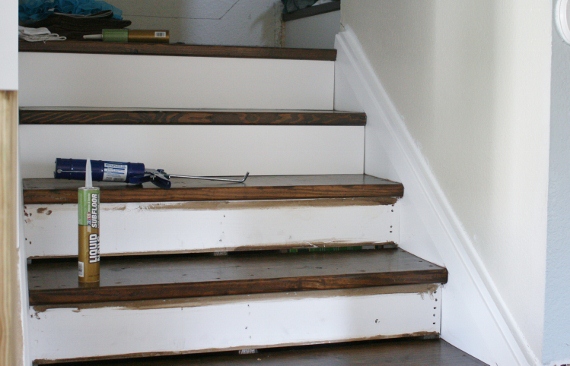
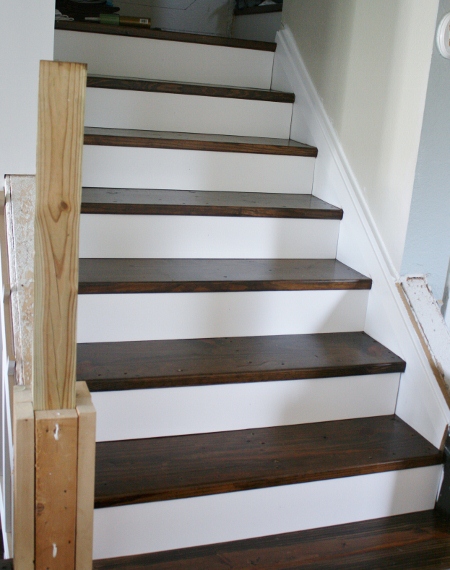
Oh my goodness it looks so much better! You can all breathe a sigh of relief!
I will hopefully be back in the next week with the newel posts. I asked Justin to build us a 3-d model so you can have instructions on how he built it, which may or may not be the proper way, but it worked perfectly in this situation!
Are you all working on any stair remodels?
If you want a chance to be featured, submit your post links so I can show them off!
In case you want to follow along, check out these posts too:
the plan
post 1: Starting the project!
post 2 : Demo & Rebuilding
post 3: More Rebuilding
post 4 : Filling the gaps
post 5 : Walnut Stain… at last!
post 6 : Adding the Stair Risers, Finishing the Runners
Post 7 : Custom Built Newel Posts
 Remodelaholic is written by Cassity and Justin. Cassity has a degree in interior design and Justin is a landscape architect, so we adore everything that makes up a HOME! We love to share home remodeling ideas and projects we’re working on. From huge kitchen renovation ideas to small bathroom remodels, there isn’t anything we won’t try to tackle (at least once!). We are in the midst of our third whole home renovation, (check out house 1 and house 2 as well, so there should be a lot more inspiration coming your way. We hope that you will stop by often for home design inspiration, tutorials, interior design tips, delicious recipes and what going on in our family life.


 Remodelaholic is written by Cassity and Justin. Cassity has a degree in interior design and Justin is a landscape architect, so we adore everything that makes up a HOME! We love to share home remodeling ideas and projects we’re working on. From huge kitchen renovation ideas to small bathroom remodels, there isn’t anything we won’t try to tackle (at least once!). We are in the midst of our third whole home renovation, (check out house 1 and house 2 as well, so there should be a lot more inspiration coming your way. We hope that you will stop by often for home design inspiration, tutorials, interior design tips, delicious recipes and what going on in our family life.


Love all the step by step pictures. We just got a “new to us” house. I might be referring to your site quite a bit.
Thanks
Melissa
Great tutorial! Two questions for you, as I think we have similar stairs under our carpet. 1… How did you round the she’s of your stairs? Ours are squared off. And 2… What did you use for the risers? Just wood cut to size? How thick? Did it take away from the bullnose effect? Thanks! And great job and great blog!!
Ann, We have about ten posts on the stairs, go here for all of them if you wanna see the pictures… but to answer your questions really quickly- we removed each stair and routed them. Then we replaced them, and made sure they stuck out a little more than they were originally placed, so that when we added the 1/4 inch plywood risers on it still had a nose, but not quite as deep as I might have liked! Hope that helps!
Okay, SO I LOVE all of your house and your post. I will be copycating you as I just bought a new home, my first home. I will be asking a ton of questions. My first for this one is, what type of flooring did you use in your living room? Was it already there or did you have to find a stain to match the the stairs with the rest of flooring?
Jamie, We got the flooring from lumber liquidators, I posted about it here: https://www.remodelaholic.com/2011/04/installing-a-floating-wood-floor-living-room-update-part-6/ Then we just tested out a Walnut stain that matches, the whole process is here, I think I wrote the name of the stain I used on the stain post, I can’t think of it off the top of my head! But you can check out the whole process here: https://www.remodelaholic.com/tag/park-house-stairs/
GOOD LUCK with your home! It is a fun adventure for sure!
hey cassity, did you use mdf to wrap the 4×4 used for the newel post. I am getting ready to start my newel post but couldnt figure out what material you used to wrap the 4×4. thanks
Mike, Yep we used a 4 x 8 sheet of MDF cut to the right size. They held up really well, but if you are worried about it you could always use a solid wood of your choice, poplar pine or harder woods. We love MDF because of the cost and the fact that it doesn’t warp!
The stairs look awesome. How did you build the balusters? Did you need to buy a special railing?
Here is a link to how we build the balusters. And the railing was the old railing cut back to the shorter length. There was no need to buy any special railing. 🙂
How did you do the landing of the stairs? I have an unusually large landing area and that has been my issue – figuring out how to lay the wood so it looks uniform. Right now it is just plywood.
Jennifer, we had two large landings too. We used teh scraps from our living room flooring, and you can see what we did in this post: https://www.remodelaholic.com/2011/08/walnut-stain-at-last-stair-update/
Wow!! What a great job you two have accomplished!
I have 10 years in this house, so I think is time! I would love to start doing some changes around…
I read your posts from start to finish… I am making my list and I have a few doubts, I hope you can help me with!
keep in mind ..I am a neophyte!
First To make the nose for the landings, did you guys, carved (sanding) the 2×6 to build the nose?
2nd: What kind of floor you glued to the landings, hardwood? laminate? and what kind of glue you used it?
3rd: and last What kind of paint did you use for the risers?
I hope you can help me with my doubts.
Thank you so much for your posting, you guys make it look easy.
Congratulations!
Pat.
Pat, great questions. First, yes we did use 2×4’s and shape them for the nose. Second, we glued down engineered wood flooring that we used in the park house living room. Third, for the risers we used a latex white paint with a semigloss sheen.
I’m curious as to how you are going to get your “Christmas boxes” out of storage from under your stairs.
What did you use for your risers??
1/4″ plywood glued on