Table Saw Fence Upgrade on Our DIY Workbench


Ready for a table saw fence upgrade? See how I added a new 50″ table saw fence system to my Delta table saw and DIY workbench to give me precision cuts up to 50″ wide.
Want to build your own table saw workbench like mine? See the details and plans here and read my 3-year review here.
This post contains affiliate links. Learn more and read our full disclosure policy here.
Upgraded Table Saw Fence on My Workbench
One of the most asked questions about our table saw workbench is which fence I use on my table saw.

I have an older model Delta saw, and until now, I’ve just been using the fence that came with the saw.
When I built the workbench, that meant I had to disconnect the fence at the back to accommodate the table — and that was working just fine for cuts up to about 24″ wide.
But with a big workbench area like I have, I wanted a better fence to allow for longer cuts.
And oh boy, was this new fence an upgrade!

If you’re wondering how to make your table saw cut better, or how to make your table saw more accurate — a table saw fence is a must and this table saw fence upgrade has been amazing!
All About My Table Saw Workbench
Why I chose to upgrade to this Vega Table Saw Fence System
This Vega Utility 50 Saw Fence is a great aftermarket table saw fence! From the manufacturer’s description:
The Vega Table Saw Fence System locks parallel to the table saw blade, includes accurate measuring scales, maintains alignment and allows for fine adjustments. It’s designed for quick mounting by using existing mounting holes on Delta Unisaws and contractor saws, Powermatic Model 66 saws, most Sears 10″ table saws and most other table saws with fence rail mounting holes 8″-9″ on either side of the blade (other saws may require drilling two or four mounting holes.) The table saw fence system includes slotted front brackets to allow vertical and horizontal adjustments and jacking plates to help with leveling the fence rails. Available with 26″ or 50″ rip capacity to the right of the blade and 8″ to the left.
Lots of great features, and I ultimately chose this for my table saw fence upgrade for a few reasons, which for me, make this the best table saw fence:
- wider rip cuts — up to 50″ which will be amazing when I need it!
- install on my current setup without making major changes to the workbench
- amazing reviews — almost 250 reviews with an average of 4.5 stars means it’s a well-tested and trusted accessory
Note that this table saw fence system is also available in a smaller 26″ system if you prefer.

Installing the Table Saw Fence System
As you can see in the video, it was a pretty straightforward process to install the new Vega table saw fence system and upgrade my workbench and workshop.
…Even if I did have to drill a couple extra holes a couple of times! (Be sure to pay attention to the diagrams in the instructions 😉

I was mostly able to follow the manufacturer instructions (included with the fence system and viewable here) with just a couple of adjustments to fit my saw and setup.
Like any custom precision install, the fine-tuning and adjusting to square were what took the most time. But that time ensures I get accurate cuts, so do not skimp on those adjustments!
To install the upgraded table saw fence, I used:
- Vega Utility 50 Saw Fence Kit
- Hammer Drill with 3/8″ Metal Bit (to drill a new hole where needed in my table saw; not required for all installations)
- Allen wrench set
- Lubricant/oil to help drill through the metal plate
- An extra 1/4″ x 1 1/2″ bolt, washers, and nut (again, not required for all installations)
- An few extra washers to adjust the rails and fence to be square and level
- A couple of felt furniture pads for the fence (since I am not using the back rail)

Note that with the setup of my table saw workbench, I did not attach the back rail. This means I did NOT use all the parts of the system (as shown in the video and below). Because this is a T-square fence, it doesn’t require both reail

How I attached the Vega table saw fence to my workbench
Remember, since I have a wide table saw workbench surface, I did NOT install the back rail. Follow manufacturer instructions based on your installation needs when you upgrade your table saw fence.
Step 1: Level
I needed to level my table saw workbench. I had moved garages since I first built the workbench and this new location has a floor that is much less even.

Step 2: Remove old fence
This didn’t take long — I just removed the hardware to remove the old fence from the table saw.
Step 3: Take inventory
Lay out the table saw fence pieces to determine which pieces I needed.
Remember, there is no back rail for my setup, so I showed in the video which pieces I wasn’t using in this install: the back rail, brackets, and accompanying hardware.

Step 4: Dry fit
Dry fit the pieces on my workbench to check fit and location.
Drill new holes in the table saw, as needed, to fit the front rail hardware.

Step 5: Attach brackets
Attach the brackets to the table saw and level. This is where I needed the extra 1/4″ x 1 1/2″ bolt, washers, and nut — but not all installs will require that.
Following the manufacturer instructions (which you can see in the product listing at Rockler), the brackets are ~1/8″ below the surface of the table saw workbench.

Step 6: Attach the front rail
Attach the front rail/bar to the brackets.
There are two sets of holes to allow for some adjustment here.
(And this is where I had to drill another hole in my table saw apron to get the placement right.)

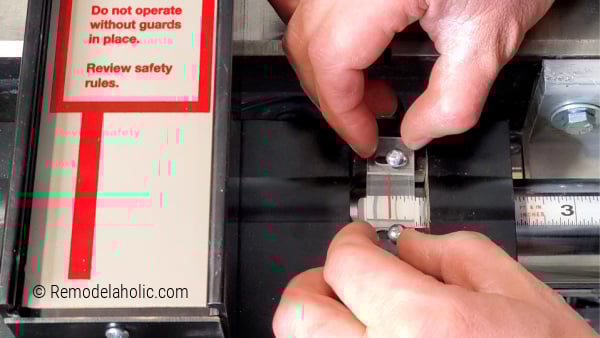
Step 7: Assemble and attach the fence
Assemble the fence and attach it to the front rail/bar.
This step was very simple — see the process at about 5:40 in the video.

Step 8: Adjust for square
Adjust the front rail and/or fence to ensure they are square.
I made some adjustments here by adding a couple washers to get the front rail exactly square to the edge of the workbench surface, so the fence was square to the blade all along the length of the front rail.

Step 9: Secure the front rail
Attach the front rail to the table saw workbench in a couple extra spots for stability and accuracy.
I used the provided brackets, 1/4″ bolts, and some additional wood scraps to keep the rail level and secure.

Step 10: Adjust the fence
Add the furniture foot pads to the fence to allow it to slide (since I’m not attaching it to the back rail with the fence supports).
Here I needed to make a few adjustments to the rail again, so that the fence was a uniform 1/16″ to 1/8″ above the work surface.

Step 11: Fine-tune
Measure and adjust as needed to fine-tune and ensure the fence is level, even, and zeroed with the surface of the workbench and the table saw blade.
After all that fine tuning, I cannot WAIT to work on my next project!
Table Saw Upgrade Questions
Questions? Leave a comment here or in the comments on the video.
What do you like about the Vega table saw fence?
The strong steel and aluminum construction has held up well, and the locking system clamps in place securely while allowing for micro-adjustments — so rather than tapping the fence to get in just the right spot, I just have to twist the adjustment knob. The added precision makes ripping sheets of plywood or other projects SO much better.

If you’re dying to take your new table saw fence for a spin, try these rip-cut plywood projects:
- outdoor plywood sectional sofa
- waterfall plywood console table
- easy rolling one-sheet plywood box
- half lap stacked plywood bench
plus more plywood projects and plans here.


