The ever-amazing Jenny is back again today to share a beautiful and brilliant project: this interchangeable treat box would be perfect for gifting treats for Valentine’s Day, Christmas, teacher appreciation, birthdays, or just because.
It’s not a pie box! It’s not a cake box! It’s an everything box! Interchangeable inserts make this treat box suitable for gifting and transporting all kinds of treats—cakes, pies, cookies, cupcakes, brownies, and more!

And the box couldn’t be easier to build—no miter cuts, no dados! All straight cuts! You could use a handsaw, a table saw, a miter saw, a jigsaw, a circular saw—whatever saw you have will get the job done.
Just take a look at the versatility of this treat box . . .
This treat box can be any size you’d like it to be, really. I chose to make a large square box that can easily hold up to a 10″ cake or pie. The interchangeable inserts can be configured to accommodate a wide variety of other treat combinations, as well.
Let’s get started!
How to Make a Wood Treat Box
with Interchangeable Inserts for Cookies, Cakes, Pies, and More
Click Here to Get a Printer-Friendly Version of This Building Planhttps://remodelaholic.lpages.co/leadbox-1518009270.js
This post contains affiliate links for your online shopping convenience. Learn more and read our full disclosure policy here.
GATHER YOUR SUPPLIES:
I chose to use
Purebond Plywood because it’s formaldehyde-free, which seemed like a good choice for a food box, but you can find suitable sheets of wood in assorted sizes at most craft and hobby stores, as well as at your local hardware store. To create one 12.5″ x 12.5″ box (with assorted inserts), I used two (2′ x 2′) sheets of 1/4″-thick plywood and one (2′ x 2′) sheet of 1/2″-thick plywood.
I chose to work with a 2′ x 2′ board for ease of handling and because I could easily arrange the cuts of my pieces to maximize the available space.
MARK YOUR MEASUREMENTS + MAKE YOUR CUTS
Fat Board: Immediately below are the measurements for the cuts I made out of one 2′ x 2′ board that was 1/2″ thick. I used the thicker board for the sides of my treat box and the sides of my lid.
Thin Boards: Immediately below are the cuts I made out of two 2’x 2′ boards that were each 1/4-inch thick. I used the thinner boards for the top of my lid, the bottom of my box, the interior pieces of the box which form the ‘lip’ for my lid, and all of my interchangeable inserts.
Here are some additional visuals to help you picture how the treat box pieces go together . . .
When drawing out the lines for your cuts, be sure your lines are
square.
Make as many inserts as you’d like. The inserts are designed to fit snugly in the box so that they will hold firm without being permanently attached, thus making them interchangeable. However, you could choose to secure them to the box to make them permanent.
SAND + FILE
I used an
orbital sander to sand all the edges and surfaces of all of my cut pieces before assembling.
For the slots, I used a
file to clean up the edges.
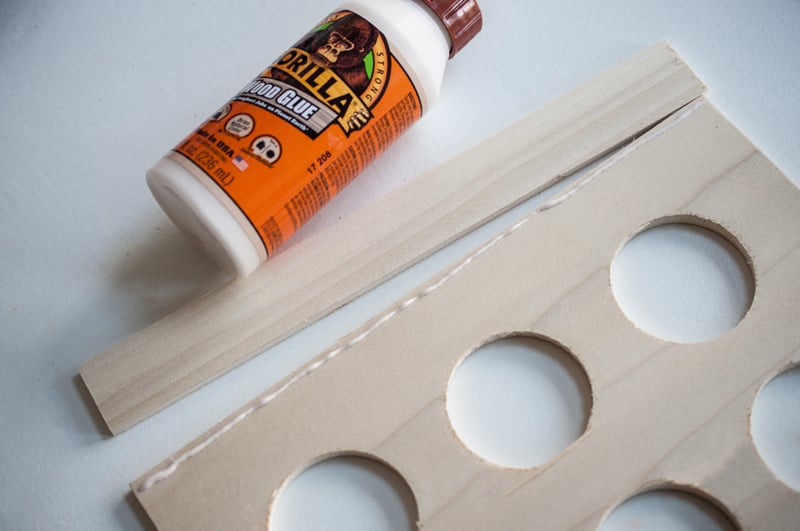
Be sure to thoroughly wipe down the pieces to remove all dust before assembling with wood glue. (A
tack cloth can be helpful.)
GLUE + CLAMP
I used only
wood glue to assemble my treat box. Because I was able to clamp all of my pieces while drying, I feel very confident about the bond. If you do not have
clamps to hold your glued pieces together while they dry, or if you’d simply prefer some additional reinforcement, you could use finishing nails,
a staple gun, or a nail gun to reinforce your joints.
DO a dry fit of all of your pieces BEFORE gluing and clamping. You may need to trim an edge here or there or sand a piece down a little. The lid should fit snugly—not too tight or too loose. The interchangeable inserts should stand up independently when positioned in the box, but not be so snug that it requires tugging to pull them out.
Assemble the sides and bottom of your box first and then glue in the pieces that will become the lip for the lid last.
I found it awkward to use a clamp when attaching the two legs of the cupcake insert, so I glued the legs on and then gently stood them up on a tabletop (ensuring that the legs were perpendicular to the insert top). Then, I placed a larger board across (and extending beyond) the top of the cupcake insert and stacked several heavy books on top (spaced evenly for even weight distribution) to apply the necessary pressure to ensure a tight bond while the glue dried.
If you wanted your treat box to have a permanent insert, go ahead and glue the insert(s) in, as desired. However, the inserts are designed to fit snugly so that they will hold firm when interlocked and are thus interchangeable. Many different arrangements are possible so that you can maximize the utility of your box.
ARRANGE YOUR TREAT BOX
—————————————
More ways to gift treats for birthdays and holidays:
Build a drink caddy (or fill it with treats instead)

Serve a treat or breakfast in bed on a DIY patterned tray

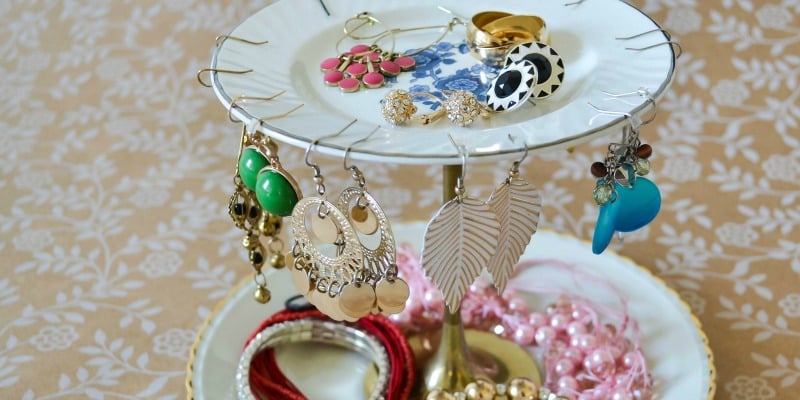
Customize ceramic dishes for jewelry or candy dishes
or serve brunch for the whole gang with this easy bagel buffet!
Related
We love hearing from fellow Remodelaholics, so let us know what you like about this and leave any questions below in the comments. If you've followed a tutorial or been inspired by something you've seen here, we'd love to see pictures! Submit pictures
here or by messaging us over on
Facebook.


This is such a beautiful plan – both to use and to give. We have a bake team at our church. This would make such a wonderful thank you gift for those who bring treats every week! I can just see a line of these boxes filled every week with homemade goodies to share! Do you have any idea what one might cost to build in supplies? I’m tossing the idea of making a dozen of these to give to our team members. Thank you for the plan and all the beautiful pictures that leave my mind spinning with ideas 🙂
What a lovely idea! I’m sure your bake team would be delighted to be gifted with a treat box. Assuming you already have the tools necessary to build with (i.e. a saw, measuring tape, etc.) and need only the materials for the box itself, you’re looking at less than $4 for an 8-oz. bottle of Gorilla wood glue (I’m guessing you would need 2 bottles to build 12 boxes, so about $8 total for glue). That leaves the wood, which is a more variable cost depending on where you buy it and what kind you buy and how many inserts you make to go with each box. For my box and inserts, I used two (2′ x 2′) PureBond Poplar Plywood Project Panels in the 1/4″ thickness at a cost of $6/each (so $12 total) and one (2′ x 2′) PureBond Poplar Plywood Project Panel in the 1/2″ thickness at a cost of $7.75 (for a grand total of $19.75 for wood, before taxes, S+H). Since you’d be making multiple boxes, you’d be able to maximize your cuts from each piece of wood, so that might lower your wood costs a bit. Keep in mind that you can find less expensive pieces of wood that would work very well for these boxes. You don’t need to use the same materials I did. You could also purchase a ready-made box from a store and make the custom inserts yourself—that could potentially be more economical, but I’m guessing the box wouldn’t be as solid and sturdy and high-quality. Good luck!
Amazing project! Your photos and cut images are so helpful. Thanks for all the effort put into doing this and writing it up.
So dear of you to take the time to leave such a kind note. Thank you! And “Happy Valentine’s Day!”