DIY Concrete Vanity {with integral sink}!

My blog focuses on thrifty DIY renovations and I am here to share with you one of my favorite DIY projects that I have ever tackled! You may have seen DIY concrete countertops all over Pinterest (and here and here on Remodelaholic!). You can pour them yourself into forms, but the easiest way to do DIY concrete countertops is by using a product called Ardex Feather Finish to apply on top of a stable surface, such as an existing laminate countertop. I did exactly that in my laundry room and was thrilled with the results. It was easy to do because the stainless steel sink in our laundry room popped out of place while I worked on the countertop. You may have even read about it over here on Remodelaholic when I guest posted about my high style, low cost laundry room renovation.
Unfortunately, our bathrooms are full of cultured marble counter tops with integral sinks that were oh so popular in the early 80’s. Not my favorite look. It was not in our budget to replace the vanity top in our powder room, so I had to get creative. I took a risk and decided to attempt the DIY concrete look in the powder room. I bet you are wondering…BUT HOW CAN YOU DO IT WITH AN INTEGRAL SINK?! Buckle your seat belts. I am about to show you how I did it.
DIY Concrete Vanity Instructions
Materials Needed to Create a DIY Concrete Vanity:
- Ardex Feather Finish {which can be hard to find} OR Henry’s Feather Finish {which is also made by Ardex and can be easily found at Home Depot}
- 14 inch Drywall tray
- 6 inch metal Drywall knife
- 2 inch plastic putty knife
- An electric sander {makes some of the sanding work easier, but you CAN sand by hand if you don’t have an electric sander}
- Latex gloves
- Acrylic concrete sealer
- 150 and 220 grit sandpaper
- A large sponge
Steps to Create a DIY Concrete Vanity:
1) Remove your faucet and drain stopper.
 2) Sand your counter top and sink. This will dull the finish of the cultured marble and make it easier for the concrete to adhere.
 3) Mix your concrete. I simply pour some of the dry mix into my drywall tray, add water and mix it with my small putty knife. You want to mix it to the consistency of pancake batter. After mixing it, let it sit for a few minutes and then mix it again. Now it is ready to work with.
 4) Apply your first coat of concrete to the entire cultured marble countertop and any backsplash. You want to apply a THIN coat–do not strive for full coverage on the first coat. It will look like a hot mess, but don’t get nervous. It will be gorgeous, I promise! I use my large drywall knife to apply it to most of the counter top surface and I use the smaller putty knife to apply it to the small backsplash piece. Use your fingers to apply it to the corners and top of the edges. You may get some on your walls in the process, don’t worry, it wipes off fairly easily even after it dries, but you may wind up with some minor paint touch up work.


5) Now, apply it to the sink basin. You have to do this with your fingers. You should protect your skin with gloves. Spread it around as best you can. Again, it will be messy and you will see finger marks. That’s okay!
 6) Allow it to dry. It dries fairly quickly, but I allowed each coat to dry overnight because I was working on it at night anyway. Once it is dry, give it a light hand sanding. NOTE: If you applied your first coat too thickly and there are significant imperfections, you may be better off using an electric sander.
 7) Repeat steps 4- 6 until you achieve the coverage you want. I was happy after 3 coats, but I am fairly experienced using this product and am able to apply it fairly smoothly. If you have more imperfections, you will probably require more coats to get it nice and smooth. The photo below is a photo I took while the second coat was drying {which is why it looks all splotchy}.

When you put your second and third coats in the sink basin, it helps to smooth the ridges left by your fingers out with a sponge AFTER the concrete has dried a little bit. You want it to be just firm enough to smooth out the ridges–if it is too wet, you will wind up wiping off the concrete, which you do not want. This requires a little bit of trial and error, but I would say as a rule of thumb, you can smooth it out with a sponge about 10 to 20 minutes after you have applied it. {Do not try to smooth out the first layer–it will wipe right off. Only do this with subsequent layers!}

8) Once you are happy with the coverage, you will want to do a final sanding of the entire vanity surface. I do it by hand to ensure that I don’t remove too much of the concrete, particularly on the edges and corners. But again, if you have significant imperfections, you may need to break out the electric sander.
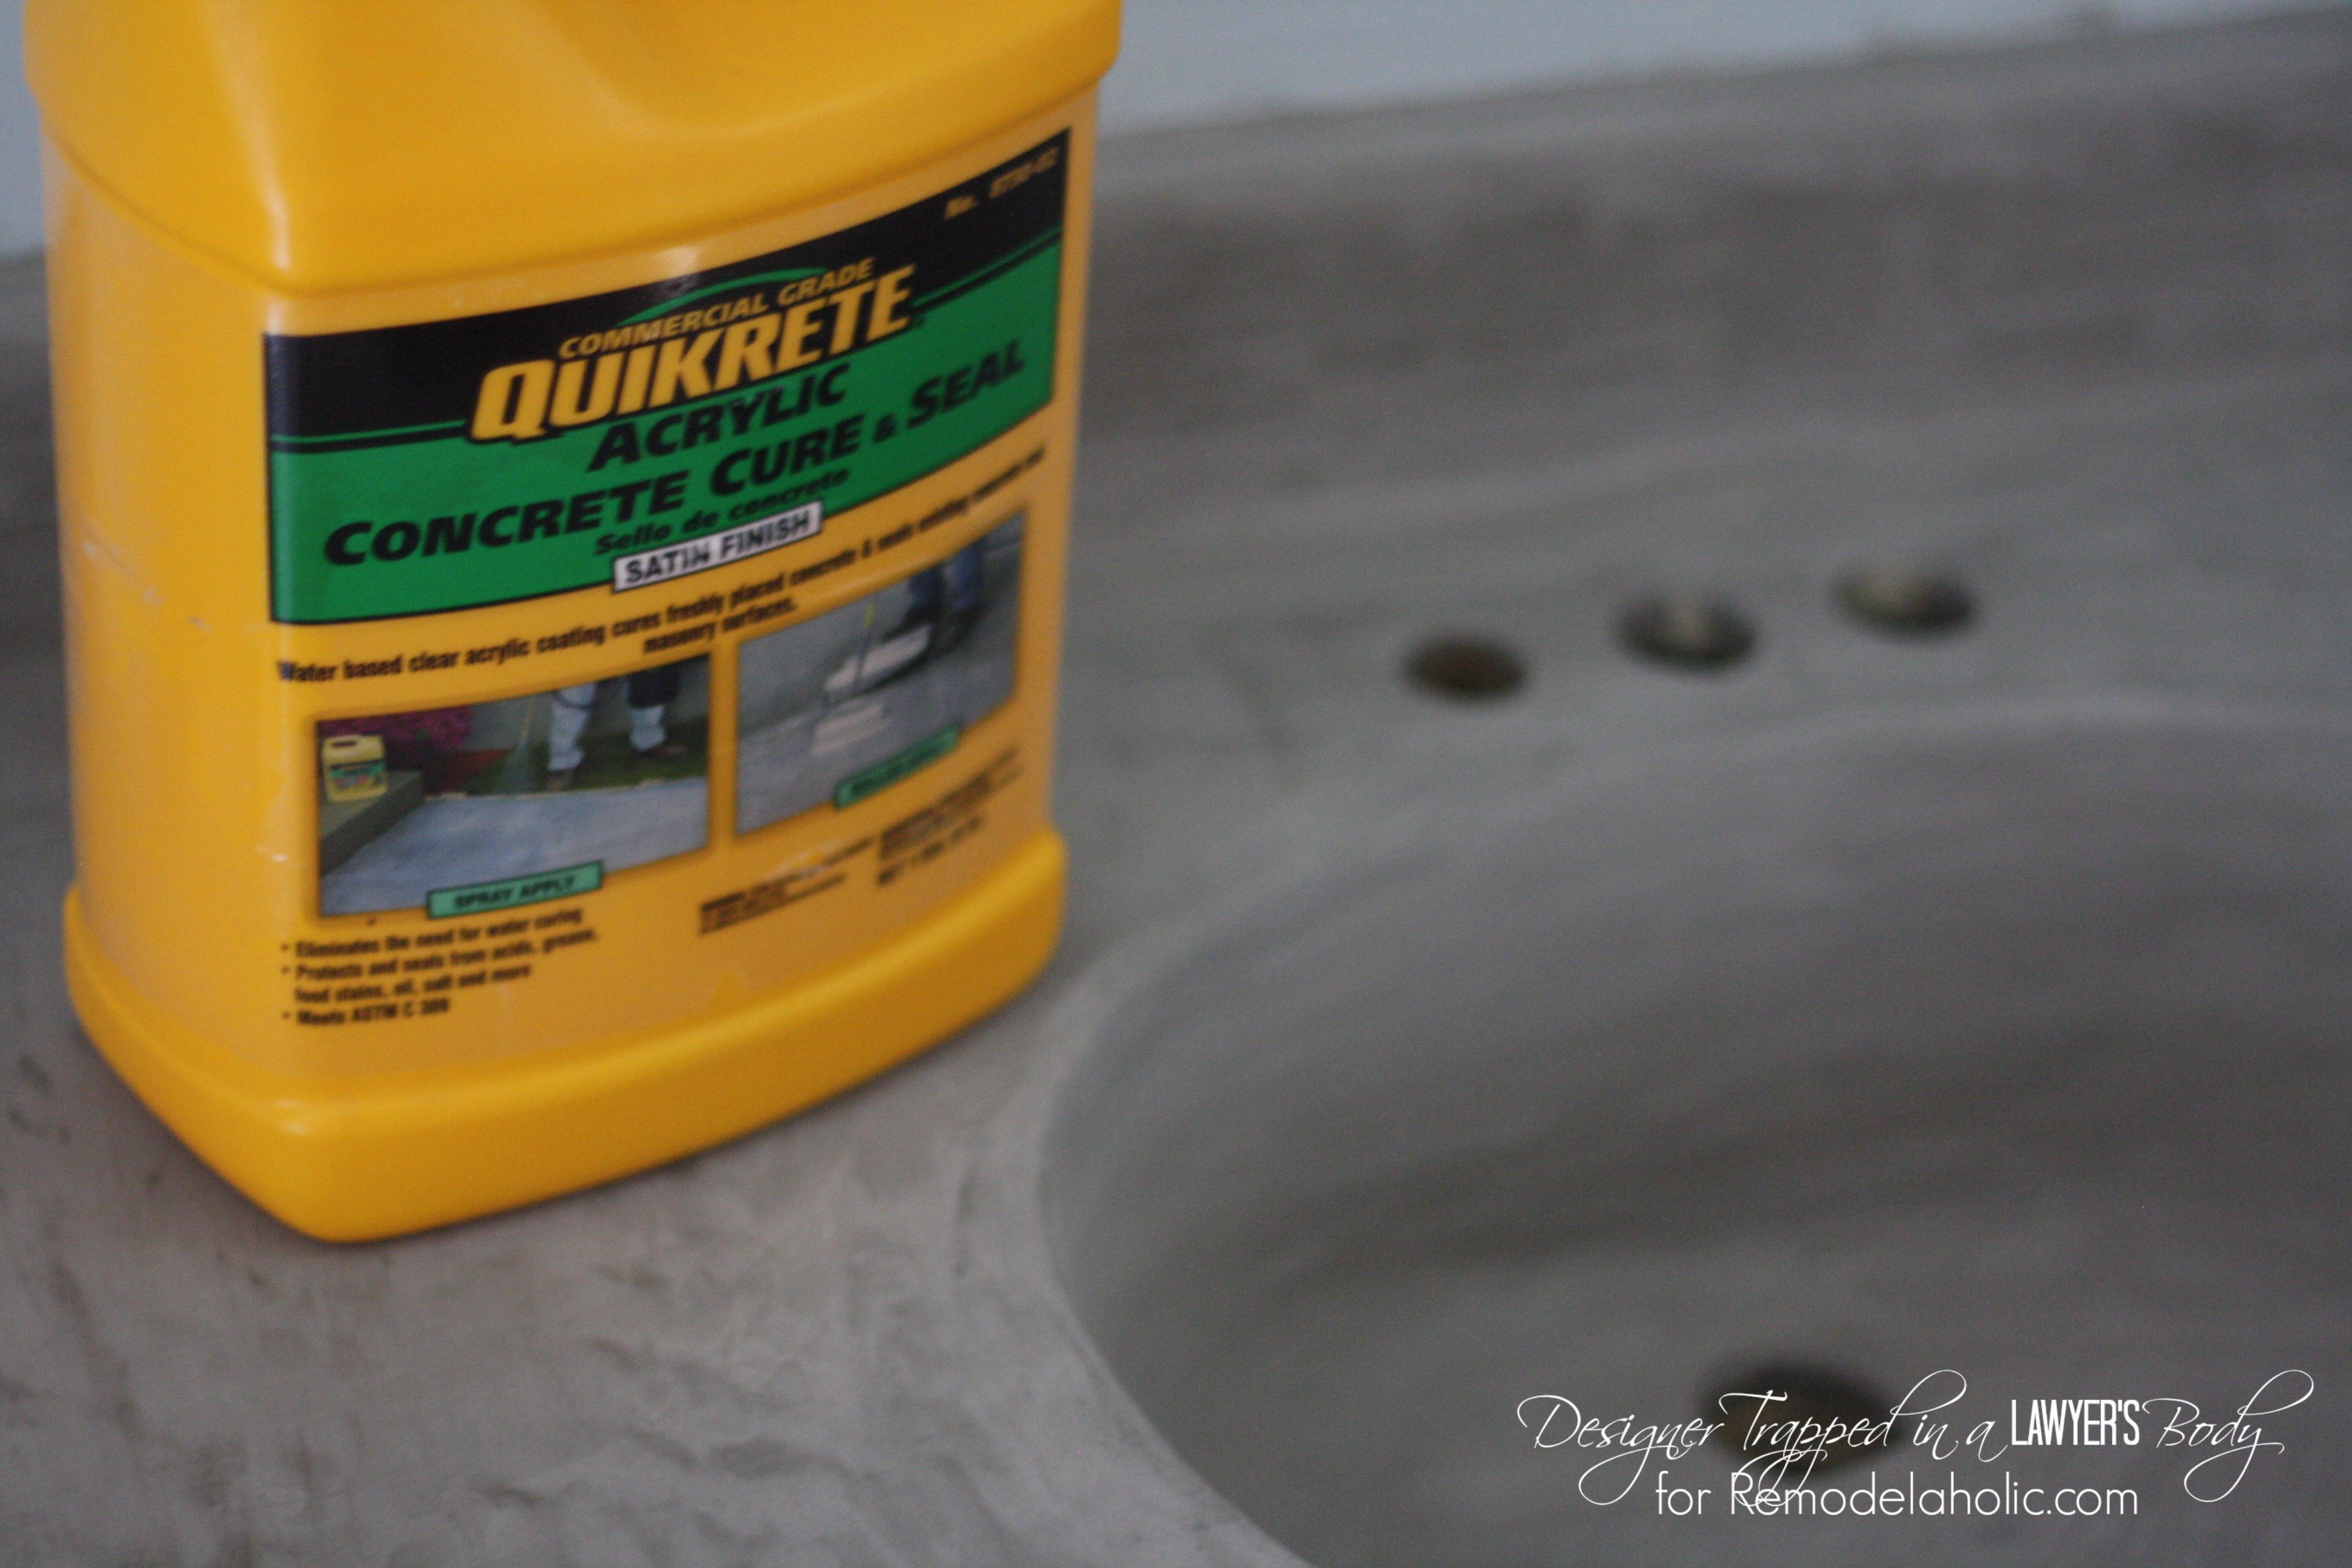
9) Your last step is to apply a sealer. I recommend using a water based acrylic concrete sealer in satin finish. It gives your concrete a nice, smooth finish with a slight sheen. It also darkens the concrete up a bit, which I like. You will notice in the second photo below that the sealer has a milky appearance when it is applied. Don’t worry, it dries clear. Follow the directions carefully–do not apply the sealer too thick and/or leave puddles. Also be sure to smooth out any air bubbles. I applied two coats. Also, take care to apply sufficient sealer around the inner edge of the hole where your drain will sit, otherwise water may seep into the concrete, which you do not want.

10) After the sealer dries, install your new faucet {or reinstall your old faucet}. That’s it! Can you believe how easy that is?
Time and Cost Involved to Create a DIY Concrete Vanity:
Each coat/sanding cycle took me only about 30 minutes. Including the sealing step and removal and reinstallation of the faucet, this project took only about 2 1/2 hours, spread out over several nights after work and getting my girls to bed.
The cost was very low, coming in well under $20.00. We purchased our Henry’s Feather Finish for $16.00 for the box and used less than 1/4 of the contents. We already had the sealer left over from when I used this same technique in our laundry room. And, since we are frequent DIYers, we had all of the other supplies on hand. Even if you had to purchase the sealer and some of the other supplies, you would still spend far less than what you would spend on a new vanity top!
Check out the final result!

Not bad for an amazing transformation, huh? We just love it!
I would love for you to head over to my blog, Designer Trapped in a Lawyer’s Body, to explore some of our other thrifty renovation projects, like how we totally transformed our kitchen for less than $700 or how we created a stunning herringbone plank wall FOR FREE using an old, ugly fence! If you love concrete as much as I do, you may also enjoy our DIY concrete fireplace! I hope to see you over in my corner of blog land soon!
UPDATE: To answer the questions about how this cement refinishing coat holds up and how to clean it, Tasha was kind enough to make a short video for you. Thanks, Tasha!


————————————————–
Looking for more ways to update a vanity?
Paint it

Remodel it

or build it!


Love it Tasha! What an inspired idea!!
Thank you, Heather!
Can the concrete be stained any color?
I believe so, Terri, but I have never tried it.
It can be stained any color you want. You can actually make it look like granite. I watched it on the home renovation show. It’s what i’m planning on doing on our kitchen countertop
Ooooh, I would love to see how it turns out! Email me photos to tasha@designertrapped.com when you are done 🙂
I wold love to see, too! hello@remodelaholic.com, if you don’t mind sharing 🙂
Yes. I’ve used a little bit of latex paint, which is a lot cheaper than concrete stain, and it helps the concrete to adhere better. I even overlaid my shower with concrete.
Did you, mix the latex paint into the concrete mix????
Tasha – Way Gorgeous! Have you ever tried the concrete technique on a fiberglass walk in shower? I would assume that it would work if following same process. Maybe add a primer ?
Hi Angie! Honestly, I wouldn’t recommend it for a shower BUT I think it would work, I just don’t know how durable it would be over time.
Love it! Brave to tackle something like that and it’s perfect!
Thanks so much, Jake’s A Girl! I was a bit nervous, since I wasn’t sure how it would turn out, but it turned out just the way I wanted! Have a great weekend.
This. Is. Genius.
Why thank you, Rachel!
Hi, I love this idea and would love to do this in our bathroom. I was just wondering how the concrete in the sink looks/acts with the water from the faucet. Does all of the water bead off and just drain into the sink? Or will the concrete stain and become darker in the places where the water has splashed?
Thank you for the idea!
Hi Alice! Because the concrete is sealed, it does not darken at all where the water splashes. You have to seal the sink basin really well, particularly around the hole where the sink drain gets inserted. So, the short answer is the water beads off and drains into the sink. We used an acrylic sealer. I am not sure how it would behave with a different sealer. I hope that helps!
Wow! I would have never thought to makeover a vanity sink like this. What a great idea – and what a difference it made!
Awww, thank you so much, Carrie!
Looks nice! Next time try a little concret color it’s sold buy the concret and comes in different colors for like 5 bucks.
I was just wondering about this very thing. I have beige grout in my tile floor and want to match it. THANKS!
Awesome! I love it, Tasha! And I love the color of the cabinets. Great job!
Thanks so much, Sarah 🙂
Love how the sink turned out!! The concrete looks amazing. Great job!!
Thanks so much, Crystal!
VERY interesting! I’m intrigued with the idea. We have an acrylic counter-top too, plain white on a dark espresso vanity. I actually looks pretty good,.. at least it did. After making a slight adjustment to a door I was installing, I discovered that setting a still-spinning Bosch power planer on the counter-top, makes it look substantially less “pretty good”. Incidentally, it also leads to a surprising amount jaw strain, whilst forcibly suppressing a tirade of positively filthy language from escaping in the vicinity of young ears.
I’ve been looking for some kind of patching ideas to repair it, but this complete concrete overhaul might just do the trick. It’s a neat look. Nice job!
– John
Thanks, John! You should give it a try. It’s fun!
What kind of concrete mix do I buy?
Just kidding I skipped over the supply list
very innovative! Would this work on a tub/shower that is not cultured marble?
Hi Julie! I have only used this product on cement board (for my fireplace), laminate countertop (in my laundry room) and now on this cultured marble vanity. It has worked well on each surface. That said, each surface was in great condition (no cracks, chips, etc.). So, there is no reason it shouldn’t work on a kitchen counter, but without knowing the specific material, it’s hard to say. If it is tile, it should work as long as the tiles are not shifting, cracking, chipping etct. The underlying surface has to be completely stable. Hope that helps!
yes, I’ve seen it done on laminate counters and full showers as well.
I would love to see Michelle’s project on the shower floor. I have used a similar product on laminate counters and it turned out well. I have a discolored acrylic bath tub I would love to try this on, just dont know how it would hold up to constant water exposure. I’m curious to know if Michelle or anyone has tried it on a shower floor or bath tub?
I suspect that on a plastic tub or shower where the weight of an adult may cause flexing of the plastic, it may flake/pop off. If it’s a non-flexible surface (cast iron, thicker PVC) you might get away with it.
This looks great and would totally fix up my kitchen counters! Have you tried adding a colorant to any of your projects using this product? Or maybe color flecks or glass? It doesn’t look thick enough for glass shards, but maybe with more layers of the concrete? I’d love a little color in there – any suggestions you have would be great!
Hi Kathleen! I actually ADORE the natural color of concrete, so I have not tried any colorant, but Ardex does make a product that can be tinted. It would not be thick enough for shards of glass, though. This product is intended to be applied in thin layers. Hope that helps!
Used the same on my kitchen counters and then acid washed! Love them. You’ve now inspired me to do my bathroom. My husband will be thrilled…I’m telling him it was your idea!! Haha! Beautiful!!
Thank you, Tracy! Happy to take the blame for you 🙂
Would this work on a kitchen counter?
Inquiring minds want to know: will this work in the Kitchen? Is it food safe? Also, thoughts in how this would work on TILE countertops?
Hi KT! I have only used this product on cement board (for my fireplace), laminate countertop (in my laundry room) and now on this cultured marble vanity. It has worked well on each surface. That said, each surface was in great condition (no cracks, chips, etc.). So, there is no reason it shouldn’t work on a kitchen counter, but without knowing the specific material, it’s hard to say. If it is tile, it should work as long as the tiles are not shifting, cracking, chipping etc. The underlying surface has to be completely stable. As for whether it is food safe, I cannot really answer that. I know other bloggers have used it on their kitchen counters, but I have not done any inquiry into whether it is food safe or not. My guess is that it depends upon what type of sealer you use. Hope that helps!
Just wondering how easy it is to clean….
Jana — Tasha updated the post with a video showing how it wipes up just like any other countertop finish. It’s at the bottom of the post.
Thanks for reading!
I LOVE this idea! While we just finished remodeling our bathroom a couple of moths ago, we are preparing to tackle the kitchen! We are moving to an open cupboard concept, recycling old silverware for drawer pulls and resurfacing our existing counter with a dyed concrete (looks like I found your article just in time!) and refinishing the beautiful hardwood floor that the previous homeowners covered with plywood and self stick tiles. Do you think we’d be able to use this technique on the existing backsplash as well?
That sounds fabulous, Ladean! This should work on a back splash, so long as the underlying surface is stable, not cracked, chipped, etc. It works well on vertical surfaces. We covered our entire fireplace in it (over cement board). Hope that helps!
I love this! How do you think this would work with laminate counters?
Thank you, Jessica! I actually used this same product on the laminate counters in my laundry room with excellent results! As long as the laminate counter is in good condition, not cracked, shifting, etc., it should work for you, too! Good luck!
Hi, Tasha! We just found this article and we are so thrilled! We now can try to “cement” over the mauve laminate bathroom vanity the previous owner had. Since neither the hubs nor I are fond of tile or granite in bathrooms, this may be just the answer. But to echo a previous poster, are there any “dyes” one can add to the concrete to prevent that grey “concrete” color?
Also, going off topic a bit, do you have any kind of DIY solution of “modernizing” a shower stall that has that horrid “contractor grade” brass trim, outside of replacing the entire glass stall? We’ve already installed a new vanity (replacing a pedestal sink, and the rest of the “brass” hardware, except for this dang shower stall! Thanks so much for your article, and we will be reading your other articles to see how we can incorporate your “skills” into our DIY projects!!
Hi Brooklynne! I believe Ardex makes a very similar product that you can add color to, but I have not used it and do not know the name of it. You should be able to Google it! As for modernizing your shower stall, I have seen other bloggers spray paint the brass part of the door a dark, oil-rubbed bronze and it looks GREAT! I hope that helps 🙂
Do you still like it and how is it holding up? I really want to try this to update our bathrooms! We are currently adding a room under our 440 sf deck and don’t really have money for an additional bathroom remodel right now! And, yup, we’re doing that ourselves too! It looks great and IF I can do this in the bathroom, I saw the other on the countertops and that will be next. Figured I would start small!
Hi Julie! I LOVE how it is holding up. We have had absolutely no problems whatsoever. I plan to post a detailed update about how it’s holding up at the 6 month mark. Hope that helps. Have a great weekend!
Hi, love what u did to the bathroom!! I’m wondering if the cement could be put over an old bathroom porcelain sink&countertop. Have a white porcelain sink and laminate countertop that has been painted. Would love to do thison them. In the other bathroom I used pieces of contractors paper glued, stained and sealed to look like marble. I love it just want something different in 2nd bath. Would love any suggestions you might have.
Hi Cindy! I have only used this product on cement board (for my fireplace), laminate countertop (in my laundry room) and now on this cultured marble vanity. It has worked well on each surface. That said, each surface was in great condition (no cracks, chips, etc.). So, I can’t think of any reason it shouldn’t work on a porcelain surface that is in good, stable condition, but again, I haven’t tried it myself. Hope that helps!