DIY Vintage-Inspired Corbel Building Plan & Pattern
Hi, it’s Amy from Hertoolbelt back again with another build project. If you missed last week’s project, check out the cute divided bookcase. I have been searching for the perfect corbels to add to my kitchen island (like Justin and Cassity did here). I want a corbel that is more decorative than the basic designs, but not so decorative that it looks like it belongs in a palace. Layla over at The Lettered Cottage found the coolest salvaged corbels for her farmhouse kitchen remodel.

These salvaged corbels have me drooling with envy, check out those curves!!! The great thing is that they are a totally do-able DIY project, so we asked Layla if we could pretty-please use hers as our inspiration. So, with her permission, the following plans are for an inspired representation of these beautiful corbels, not the actual measurements from The Lettered Cottage’s corbels. Our DIY corbels are about 9″ wide or deep x 12″ tall x 3″ thick.
How to Make a DIY Corbel
Materials Needed
- 2″ x 10″ board (actual 1 1/2″ x 9 1/4″) length depends on the number of corbels desired.
- 1″ x 8″ board (actual 3/4″ x 7 1/4″) length depends on the number of corbels desired.
- wood glue
- 1 1/2″ – 2″ brad nails
- wood filler
- sandpaper
- paint/primer or stain
- corbel patterns (included in the printable plan here)
Step 1
Download and print the patterns, included in the printable here. When printing the PDF documents, make sure the print settings are on 100% and not ‘fit to page’. Line up the patterns and tape together, the papers will overlap a lot. Cut out the pattern for the outer corbel pieces and the inner corbel piece.
Trace 2 outer corbel pieces, for each corbel, on the 1 x 8.

Trace 1 inner corbel piece, for each corbel, on the 2 x 10.

Step 2
Cut out all of the corbel pieces with either a scroll saw, jig saw or band saw. Sand the cut out corbel pieces, smoothing/removing any unwanted striation marks left by the saw.

Step 3
When assembling the 3 corbel pieces, the top of the 2 outer pieces will be flush with the top of the inner pieces. The flat vertical edges near the bottom of all 3 will also be flush.
Apply a bead of glue to one side of the inner corbel piece.

Make the tops flush with each other. Offset the outer piece about 1/4″ over the inner piece.
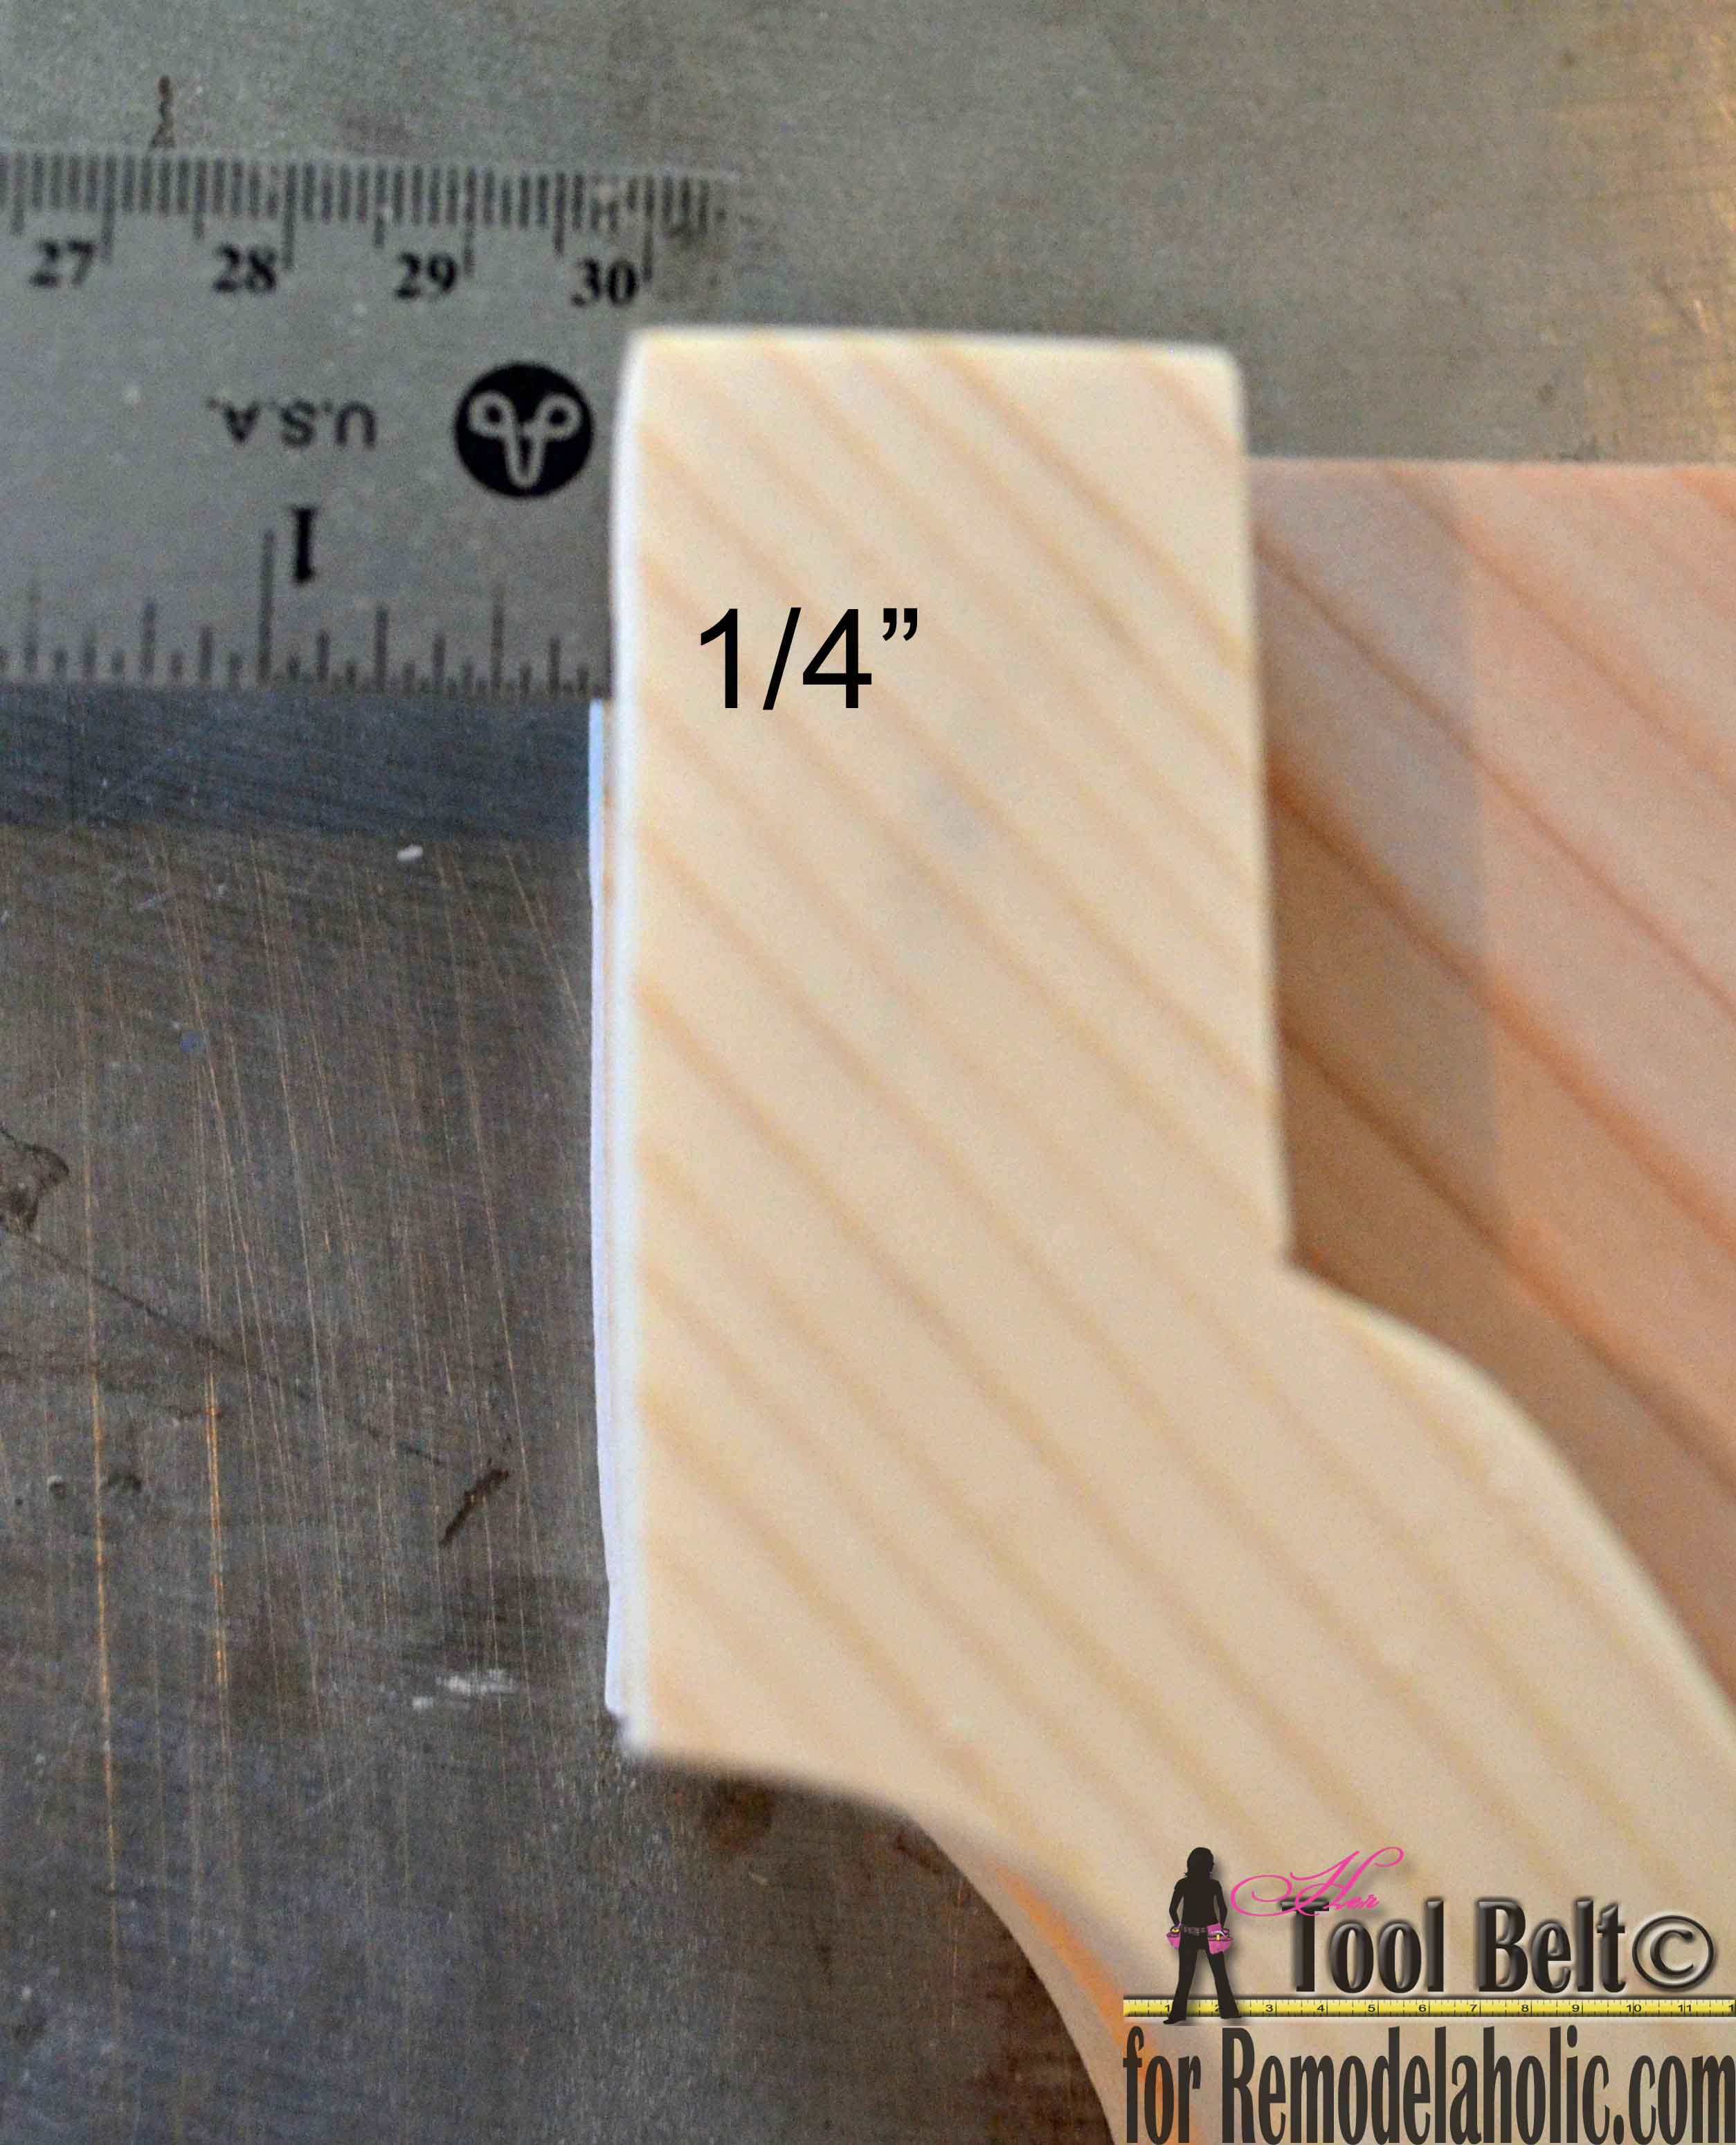
Use a 1 1/2″ or 2″ brad nails to secure the top in place. Make the lower vertical straight edges flush and secure with a brad nail. Nail a few more places to secure the outer piece to the inner piece.

Flip the corbel over and repeat the same process for the other outer piece.
Step 4
For each corbel, cut 2 pieces of wood that are 3/4″ x 1″ x about 8″. Trim the length to fit. It will run flush with the top of the inner piece. Glue and nail the straight pieces to the top of each side of the corbel. Remove any excess glue and allow the glue to dry.
I am super excited about how these turned out!


Step 5
To finish the corbels, fill the nail holes and blemishes with wood filler. After the filler is dry, lightly sand the wood until smooth. If staining, apply wood conditioner and stain as directed. If painting, prime and paint with your favorite color. Apply a top coat.
For an alternative look, The Lettered Cottage stripped the old paint off of their salvaged corbels and left them bare wood (protected with wax) with hints of chippy paint, I love the look.
(A huge thanks again to Layla for both inspiring us and for letting us use a couple of her photos here — and if you don’t already know and love Layla and The Lettered Cottage, head over there and say hello!)

Use these DIY corbels to add pizzazz to your kitchen island, fireplace mantle or under your upper cabinets. Get the look of Restoration Hardware by mounting 2 corbels on the wall and placing a thick glass shelf on top.

Get the printable tutorial and corbel pattern here

——————Reader Update, February 2019——————-
One of our readers, Brandi, used our free pattern and tutorial to build her own corbels and look how they turned out!
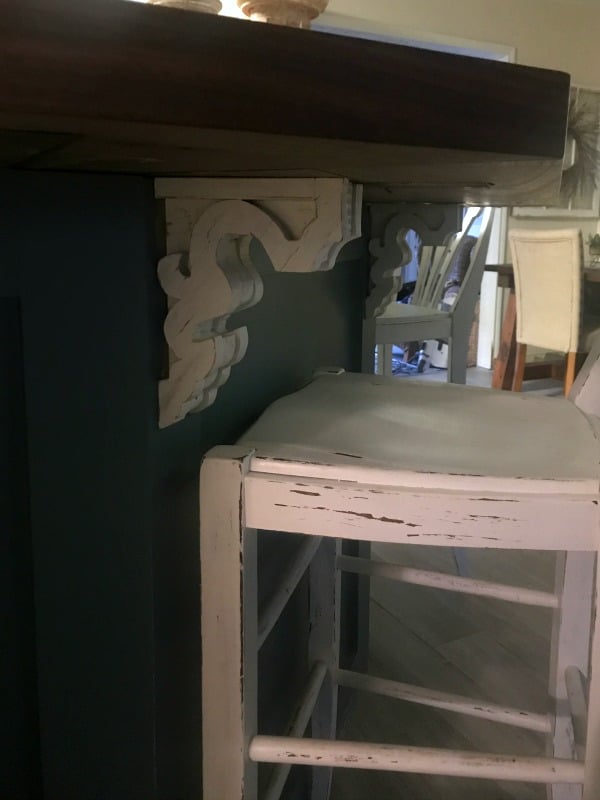
Brandi shared with us that she thinks they are “so stunning” and we agree! What a beautiful addition to your kitchen! Thank you for sharing, Brandi!
————————————————————————————————–
Add some curvy appeal with these other DIY woodwork projects, too!
DIY Curvaceous Headboard Plan + Pattern


AWESOME! Thanks so much for the pattern!
xox
These are absolutely beautiful.
Thanks to all of you for sharing these patterns!
These are really beautiful! Might be a dumb question but how do you install them?
A couple of options. When I had the granite counter tops installed at my house, the granite guy said that he always installs corbels with liquid nails, and clamp in place until the glue is cured. Another option is to use screws long enough to go through the corbel and into a stud or cabinet. Either use self tapping screws or drill pilot holes with countersink.
thank you for the instructions Amy. These are lovely. But as DeElla asked, what do you use to install them with?
A couple of options. When I had the granite counter tops installed at my house, the granite guy said that he always installs corbels with liquid nails, and clamp in place until the glue is cured. Another option is to use screws long enough to go through the corbel and into a stud or cabinet. Either use self tapping screws or drill pilot holes with countersink.
thank you for the info. Wouldn’t liquid nails pull the drywall paper (paint and paper) off with a heavy shelf? Long screws sounds more stable for heavier shelves.
I’m sorry I should have clarified, the liquid nails option is if you are installing the corbels on the kitchen island. Yes screws are best for a wall shelf.
Love how they turned out but how did you attach them?
I love your corbels. How did you get that great finish on the ones used with the glass shelf?
I haven’t achieved that look yet. They are awesome. I can’t wait to try them out. Thanks for posting this. I found you on Pinterest.
Thanks, Lizz! The photo with the glass shelf is from Restoration Hardware, but luckily we had a guest share with us a great tutorial for getting a Restoration Hardware style finish! I’d test it on some scrap boards to get the right blend of colors, first, before diving in on the corbels though. https://www.remodelaholic.com/2015/02/achieve-restoration-hardware-weathered-oak-finish/ Thanks!
You got me wishing the heat was over so I can get to building these for my living room. I have 9 1/2 foot ceilings! I have built items from Ana White with my favorite tool the Kreg jig…now I have added yours to that favorite person ideas to build!!! Thanks
Oh, thank you Rhonda! Being in company with Ana White is a very good place to be! 🙂 We’d love to see pictures of what you build!
What a great idea!!!! Love these!!!!
What a great Tutorial!! Thank you so much!! How Big do these end up being… So excited to make these!!
Thanks again for sharing!!
Hi there,
Can you please be more specific about the tool you used to cut all the corbels the same? Thanks a lot and all the best!