DIY Kids Adirondack Chair Plans


Ready to build a children’s lounge chair? These easy DIY kids Adirondack chair plans show you how to build a small outdoor chair for toddlers and little kids. Just 4 boards to build, or use free reclaimed pallet wood boards like I did.
You can also build a full-size DIY Adirondack chair with cupholders, and the matching Adirondack bench.

Get the Kids Adirondack Chair Plans Here
DIY Kids Adirondack Chair from Pallet Wood
Last week, I shared our original adult Adirondack chair and matching Adirondack bench woodworking plans. They are a great size for us grown-ups, teens, youth, and tweens.
But I’ve also got a mini-me toddler who wants her own Adirondack chair. And a stack of wood planks I’ve reclaimed from pallets.
Read our tips for picking good pallets and the fastest, easiest way to break down a pallet.
Put those all together and — I’m proud to introduce our new addition, a DIY kids Adirondack chair plan!
Adirondack style furniture is a simple project that is attractive and comfortable with the slanted seat and reclined back. Great for building your own outdoor furniture for the porch, patio, or deck.
That’s why we’re so excited about the adult version of the chair and double chair bench plans!
I took the idea a little smaller and designed a simple and easy kids version of the classic Adirondack chair that I want to share with you today.
Our toddler loves to play outside. This children’s outdoor lounge chair is just the right size and will be perfect for her comfort to sit on and relax during her play time on our covered back patio.
And building it from pallets means spending $0 on lumber! Talk about budget friendly – a free project!
More reclaimed wood pallet projects: Outdoor Coffee Table with Drink Trough
Even if you need to buy new cedar lumber, you’ll need only (4) 1×4 boards, so this is a very affordable way to build outdoor furniture for your kids or grandkids.
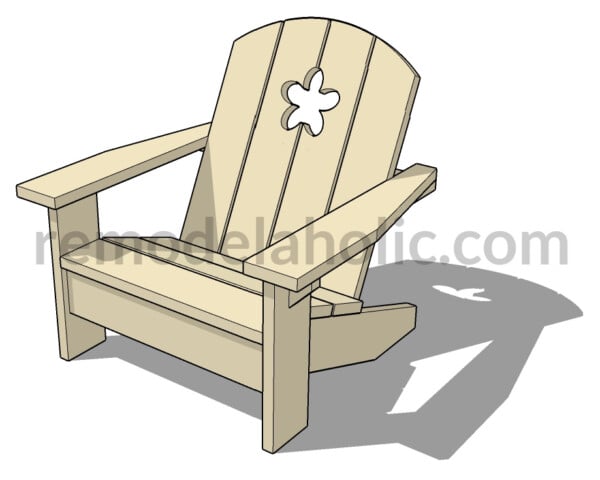
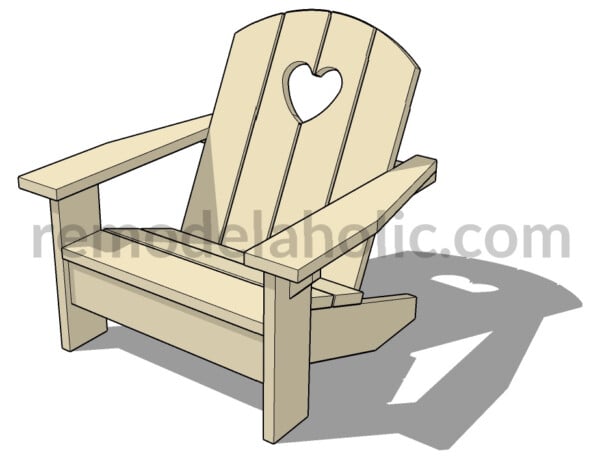
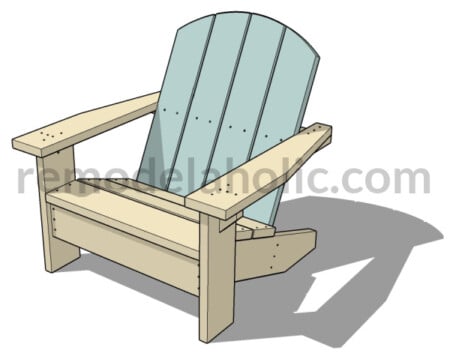
The children’s Adirondack chair plans feature a traditional curved top with an optional shape cutout detail.

The woodworking plans include templates for the curved back as well as back cutout shape templates for star, moon, flower, and heart shapes.
Build your own family outdoor sitting area for your porch or patio! See all Adirondack furniture available sizes here.

DIY Kids Adirondack Chair Plans
Purchase the printable PDF file plans to build this kid-sized Adirondack chair here or by using the button below to add to your cart.
The printable PDF beginner woodworking plan for this small kids Adirondack chair includes
- Detailed materials list and cut diagrams
- Step by step assembly instructions and diagrams
- Cut templates for the curved chair back
- Cut templates for the cutout back designs: heart, flower, star, and moon
This post contains affiliate links. Learn more and read our full disclosure policy here.
Materials
To build a toddler child size Adirondack chair, you’ll need
- (4) Cedar 1×4 boards or (9) 40″ pallet boards or cedar fence pickets
- (24+) 2” Exterior Screws
- (36+) 1 ¼” Exterior Screws
- DAP Wood Glue
- Sandpaper 120 and 220 sheets
- Paint and Primer of your choice
- Wood Stain
- Clear Coat Finish
We recommend weather-resistant wood like cedar or redwood lumber for outdoor furniture projects, but it’s hard to beat the cost of using reclaimed lumber and building from pallet wood!
If you choose to use cedar fence boards (like you’d use for a picket fence), be sure to choose the best boards from the pile. You’ll also likely need to do some extra work sanding to get a smooth finish.
When using pallet boards, cedar fence pickets, or pine lumber for outdoor projects, be sure to give the finished piece a coat of paint (exterior formula) and/or a coat of sealer meant for outdoor use.
Even using the higher grade cedar boards, you can still build a wood Adirondack chair for your child cheaper than buying one! Plus you get a fun weekend project you can do together.
Buy or DIY? See our favorite DIY plans and premade furniture choices for outdoor lounge chairs, indoor/outdoor hanging chairs, and outdoor rocking chairs.
Recommended Tools
- Table Saw (optional)
- Circular Saw
- Miter Saw
- Jigsaw
- Drill
- Sanding Block
The straight cuts for this woodworking project can be cut on any type of saw — a miter saw is the easiest.
The angled cuts needed to build the kids’ Adirondack chair can be cut on a table saw or with a circular saw, miter saw, or jigsaw.
The detailed woodworking plans show all the dimensions and angles to make this an easy weekend project for you.

How to Build a Child’s Adirondack Chair
The printable premium woodworking plan includes the full cut list for all pieces and angled leg and arm pieces, plus detailed assembly instructions.
Add the woodworking plans to your cart
Step 1: Assemble Legs
Attach the angled back legs to the front legs. (Cut lengths and angle details in the printable plans here.)

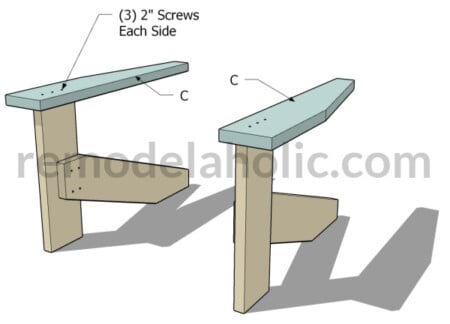
Step 2: Attach Armrests
Attach the angled armrest pieces to the tops of the legs.
Step 3: Attach Armrest Supports
Attach the armrest supports through the leg pieces and through the armrest pieces.

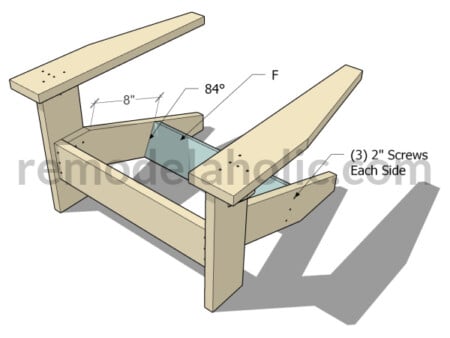
Step 4: Attach Front Support Trim
The front support trim fits right in front of the angled back leg piece.
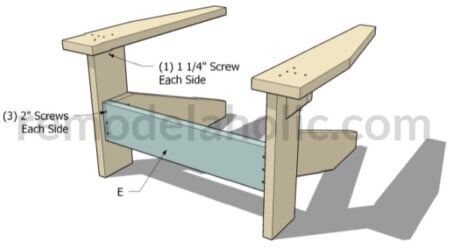
Step 5: Attach Bottom Frame Support
The bottom frame support is angled to provide the correct angle for the Adirondack chair reclined back and sloped seat.
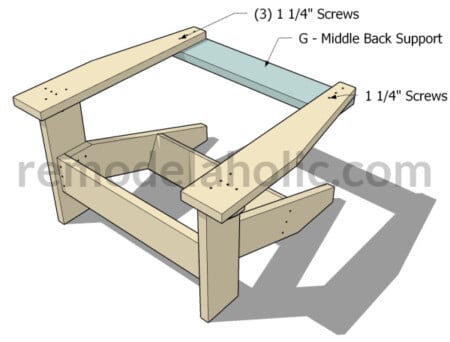
Step 6: Attach Middle Back Support
This will support the back rest, so be sure it’s secure.
Step 7: Attach Back Slats
Be sure these back support pieces are sanded very smooth.

Step 8: Attach Seat Slats
The front slat is level with the front of the legs and the other 2 seat slats are spaced evenly between the front seat slat and the backrest slats.

Step 9: Cut Back Curve
A printable chair back curve template is included in the plans.
Step 10: Cut Seat Back Detail Cutout
Printable templates for heart, star, moon, and flower cutouts are included in the plans.

Click here to purchase the detailed printable woodworking plans
More outdoor furniture ideas:
- Reclining Lounge Chair with Storage
- Buy or DIY? 25 Best Outdoor Lounge Chairs
- IKEA Goes Out: Our Outdoor Dining Area Makeover


