Update a Dome Ceiling Light with Faceted Crystals


How to Update a Flushmount Dome Ceiling Light with Chandelier Crystals
by Emily of My So-Called DIY Blog
and building new pieces from scratch, like this faux fireplace and cabinets.
Today I’ll be showing you how to transform your builder’s grade “boob” lights into some elegant DIY Pottery Barn Mia Faceted-Crystal Flushmounts!
I was longing to replace the lights in my hallway and stairwell, when I noticed that the structure of those lights looked just like the Mia Flushmount from Pottery Barn. The wheels started turning in my brain and I realized if I removed the domes and added some holes, I could attach strands of crystals on the lights I already had.
Materials Needed:
This post contains some affiliate links for your convenience. Click here to read our full disclosure policy.
- Boob light (if you don’t already have one in your house, you could probably find one at a Habitat for Humanity Restore or thrift store. They are also at Wal-mart for $15-$20)
- Can of oil rubbed bronze spray paint ($13; I was able to use this for all 4 lights that I redid)
- Nail and Hammer or Dremmel tool with metal drill bit
- Garland of acrylic crystal (I used some from Amazon for about $13; 30′ worked for 2 lights)
- Measuring tape or ruler
- Optional: yarn or string to help measure circumference
- Optional: Sharpie
Cost: Since I already had the lights, I only spent $26 and had enough material for 2 lights
Time Needed: This went pretty fast, but it took about 2-3 days for one light. There was wait time for the paint to dry. I also had to take several breaks to get all the strands looped through the drilled holes (it makes your fingers get sore pretty fast).
Step 1: Make sure to turn off the electrical breaker going to your light. Unscrew the knob at the bottom and remove dome. Remove light from ceiling.
Step 2: Remove the foil reflector piece. I used some Goo Gone to clean off some glue stuck to one of the lights. Tape off the inside of the light bulb socket.
Step 3: Measure the circumference of the light using a string. Divide that number by the number of crystal strands you want to attach (I used 20). I made 20 holes 1.25″ apart. You can cut your string to 1.25″ and use it to mark along the circle with a Sharpie where the holes will go.
Step 4: Use a hammer and finishing nail to hammer two rows of holes around the base circle. You need two rows to loop the metal part of the crystal strands through. It helps to put it on a hard surface, like cement, when you nail the holes in.
Step 5: Next you need to put holes in the smaller circle on the light. It helps to trace the circle on a piece of paper to help you figure out how to space things. Since I was making 20 holes, I could divide it by 5 and make a pentagon (the black dots). Then I divided each side in half (the red dots). Then I divided that space in half (the blue dots). Then I could more easily mark on the actual piece where I was going to put the holes. You only need to do one row on this piece because the wire on the acrylic chain will loop around the outside edge.
Step 6: Once you hammer all your holes, you’ll want to spray paint the fixture. I made the mistake of spray painting before making the holes. The metal dust got stuck in the newly painted surface and there was a little bit of chipping that had to be touched up afterwards anyway.
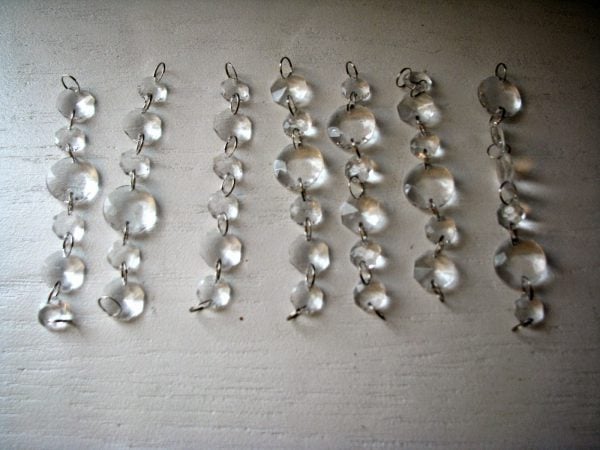
Step 7: Once you’ve given the paint plenty of time to dry, you can start attaching the crystal strands. I divided my garland into strands with 6 crystals each. I had some varying sized crystal garlands from a different project, so I used them on one of my lights. On my other 3 lights I used crystals that were all the same size.
I attached them to the smaller circle first.
Then I slid the small circle on the light and started to attach the outside pieces.
Step 8: Screw the round knob on the end and when you flip it over, gravity creates the nice rounded dome look.
 Working in between the crystal strands, you can then reattach it to the ceiling and add a pretty bulb.
This one has varying sized crystals
Happy lighting!
———————
Thanks so much for sharing with us, Emily! Such a simple innovative update to a basic light!
Visit My So-Called DIY Blog for more from Emily — be sure to check out her kitchen makeover and how she adapted her cabinets to hold her beautiful farmhouse sink!

Lorene has been behind the scenes here at Remodelaholic for more than a decade! She believes that planning projects and actually completing them are two different hobbies, but that doesn't stop her from planning at least a dozen projects at any given time. She spends her free time creating memories with her husband and 5 kids, traveling as far as she can afford, and partaking of books in any form available.


Very cool! I’m always eyeing those at Pottery Barn and since I have 3 “boobs” in the house, this could be the perfect way to update! Thanks!
Awesome!
That’s so cool! I’ve got a couple of those lights in my bedroom, but it’s a rental house. Despite giving us carte blanche to do what we want with it, I doubt they’d be cool with me putting in that lighting. Such a shame, because it’s what my room needs.
i rent also ,i,m going to try a pretty shade. taking off the boob part decorate an old shade ,put it up instead of the boob.
This is such a great idea! I think I am going to do this in our bathroom, we already have the boob light so all I need is the crystals. Thanks for sharing!!!
Great idea!!
Thanks so much for having me as a guest today!!
Thank you so much for being our guest today, Emily! Such a great update!
Genius! Simply genius!
Thank you for this. I thought I was the only one who had “that” problem with these lights. In fact, my husband didn’t notice until I showed him this article and oh how we laughed! We have two of these, evenly spaced in the family room. Yuck. Now that I know it’s not just me, we are definitely going to do something about them.
It’s definitely not just you! And it’s one of those things that once you see, you can’t un-see! We’d love to see what you end up doing!
This is absolutely amazing!
It looks great. It’s funny how you called this light fixture a boob. LOL
I really love this idea. I have several of these in the house. I have a question…Mine all have 2 lights in them. Did I miss something? Can I still do it with 2 lights?
Thanks
I’m sure you can, Patti! Just a little bit different setup but it should be fine. Thanks for reading!
I’m sure you can! The crystal reflection might be greater with two lights, so you might want lower lumen bulbs, though.
Wow! Very creative and classy looking light. I am going to pin this. 🙂
Thanks, Julie!
Removing the foil reflector would cause a fire hazard. It’s there as insulation to reflect the heat from the lights away from the back side of the fixture. If it becomes hot a fire could result. Homeowners insurance would not pay for damages caused by a light that has been tampered with like this.
Thank you for the info, Donna! Safety is important!
The fire hazard is mostly a concern when the light has the shade on it, effectively trapping the heat from the light bulb inside. When the shade is off, there is more circulation and the heat hazard is no longer a concern. It would be a good idea to use a lower wattage of bulb when taking out the foil, but since heat can’t get trapped, it is not a big concern.
I love this light! I have a few polished brass boobs in my house that so need updating. Definitely going to give this a try!! Thank you for sharing!
I did this to one of my boob lights and it turned out Great! Looping the crystals through the holes were the hardest and time consuming. Thanks for sharing!
Thanks for letting us know, Tee — we would love to see a picture! https://www.remodelaholic.com/share-brag-post/
Fantastic! And, yes, you definitely have to give your fingers a break during the process.
Wonderful idea and beautiful work! I have a question and a suggestion. My question is how exactly do you remove the base from the ceiling? Does it involve wires? I am so not electrically saavy! My suggestion is you can buy strands of crystals and the wire rings for clipping into the holes from craft stores and even Ballard designs. Do you think those would work just as well? Unfortunately, the house we are buying has boob fixtures in nearly EVERY room!
Yes, those sound exactly like the crystals I used! To remove the fixture, I turned off the power breaker and then unscrewed the fixture from the ceiling. Then I separated the wiring from the fixture and the wiring in the ceiling. It’s really a lot easier than it sounds. There are probably many youtube videos on how to do this safely. Good luck!
Awesome idea! Down with boob lights! Is there any way you can do a close up of the small circle? I’m unsure how those links of the crystal connect and are supposed to look. Thanks!
I’m not sure how to upload a picture in the comments section, but the crystals are connected with thin metal rings similar to a key ring. I just put the metal links through the holes like I was adding a key. Hope that makes sense!
Hi Emily — our comment system doesn’t allow for photos, but if you want to email us, we can add it to the post to clarify. Thanks!
Wow! I love this project. I wish I saw it before I just bought a chandelier for my room! Hate the regular “boob” light!!! haha
LOVE this!!! I was actually going to purchase 2 pottery barn lights to replace my “boob” lights in my hallway!!!!! Im trying this first!!!
I have two of these lights in my living room & plenty of crystals that I have been saving for years. I knew they would come in handy one day!
Love this idea.
Sounds like a perfect project! We’d love to see pictures when you have finished!
It was meant to be!
I glued a wide fabric trim around the top and then painted it all Heirloom White before adding lavender crystals. It looks vintage and feminine in my bathroom. Just what I was looking for! Thank you for the great idea.
Sounds beautiful!