Update the Color of your Brick; Stained Brick Fireplace

Hello fellow Remodelaholic readers!! I am so happy to be here today to introduce you to my blog and show you one of my favorite projects. My name is Jodi and the name of my blog is Roly Poly Farm. I am brand new to blogging, so being able to introduce myself to you here and show you something I love is so exciting to me! If you swing by my blog, you’ll see me talking about my home remodeling projects, sharing only my best tried and true recipes, showing you a DIY craft or two and dishing about all the great deals and sales that I am always on the look out for!
When we moved into our home two years ago, our family room looked like this:

We bought some new furniture and painted, but the coolness of the grey brick was like a giant elephant in the room that needed to be dealt with. My husband was against removing and painting the brick, so I had to get creative and find something that would make us both happy.
So I turned to my favorite friend Google and started hunting for a solution. After a little searching I found something that I was able to use to transform by fireplace into this:

The product I found was a brick tinting kit made by a company called Dyebrick. Yay! After I looked at their gallery of projects and read their testimonials, I knew I had found my answer. I was able to sell it to my husband because it simply stains the brick, it doesn’t change the texture of the surface like paint can sometimes.
They have a variety of colors to pick from:
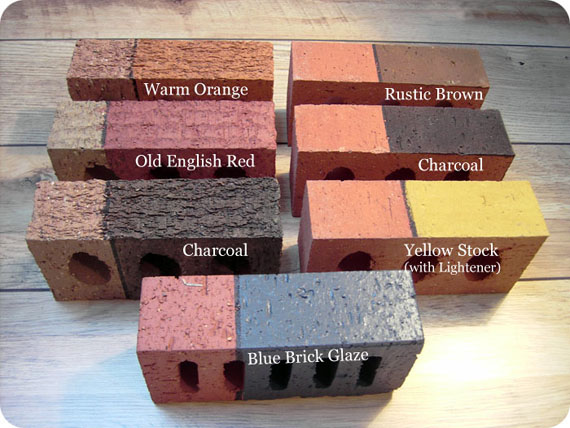
For my project, I used the Rustic Brown and Old English Red. I made two different “strengths” of the Old English Red, which gave me a total of three colors to work with overall. The company is located in the UK, but does ship to the US. I was about to order from their website when I decided to do a quick ebay search. For once in my life, I got lucky and there was someone selling multiple kits!! And better yet, at a FRACTION of the cost! Woot! I couldn’t believe my luck! I bought three kits total and this project cost about $110 total. Pretty cheap considering the impact it had on the room, I think!
From the company’s website, some features of dyebrick brick tinting kit are that its:
- Non-toxic
- Non-harmful
- Odourless
- Zero VOCs (Volatile Organic Compounds)
- Absorbs into and becomes part of the masonry
- Allows the masonry to breathe
- Can be applied to
- Brickwork
- Concrete
- Stone
- Mortar
- Render
- Blocks
- Concrete Roof Tiles
- …and more!
I wish I had taken pictures of the during process, but unfortunately I didn’t. 🙁 There’s really not much to it though. No prep of the brick, no taping off, nothing. You just mix your product and start! It has the consistency of water and really didn’t run all over and create too huge a mess of my grout. I used my faithful old Purdy brush to apply it, but if I was doing it again, I would at least try it with a foam brush to see what the result was. Dyebrick’s website has great instructions on how to prepare the product for its use and even some videos on its application.
.
So, while I say it really didn’t mess my grout up too badly, it did get on it some (or a lot in some places), but this wasn’t a big deal. I just used a flat head screwdriver to “scratch” it off my grout when I was all done. What? A little tool abuse is acceptable sometimes. I was multi purposing it! Looking at my grout now, you would never know I ever had to do that. Well, maybe if you were inches away, inspecting it. If that were the case though, I’m pretty sure we would have to have a talk about somethin’…
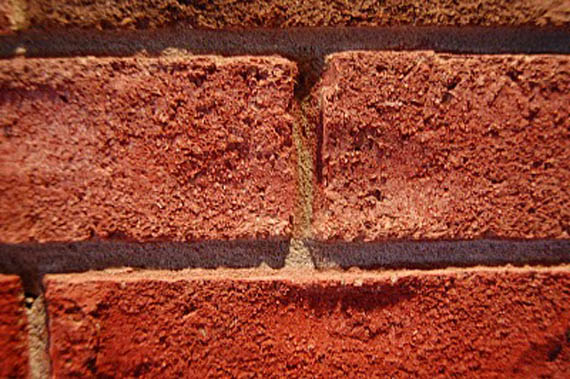
Here is a picture of where I got some stain on my grout:
And what it looks like after a little screwdriver treatment:
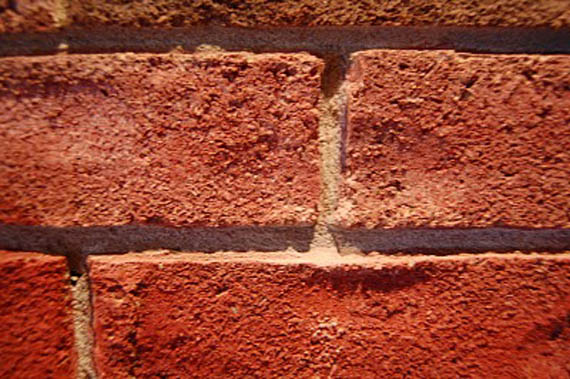
Easy peasy!
(Actually for the above picture I used my 4 y.o.’s safety scissors, but you get the idea!)
And here are some additional shots of the finished product:


And the two bricks together in the same shot:
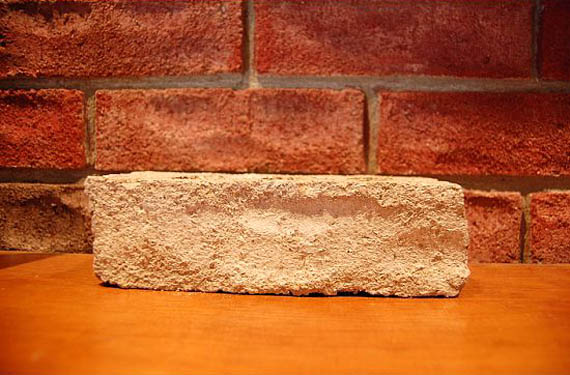
Crazy, isn’t it?! The same brick, transformed with just a little water thin stain!
It took me a few days to complete this, but I had a one year old and a three year old at the time, so I had to work when they were sleeping or otherwise occupied. Any other time I tried to work on it, I looked down and had a little munchkin climbing up my ladder to “help” me. It was very rewarding to do though and I loved how instant the transformation was. Cleanup was a breeze. I have no doubt anyone with a little patience and a paint brush would be very successful with this project!
I hope you enjoyed reading about my brick transformation! If you have any questions, please stop by my blog Roly Poly Farm!
Thank you so much, Cassity, for having me!


Looks great!
Did you seal it after? I just finished the Dyebrick application on my fireplace. A week later, the dye leaves a powder residue on my fingers when I touch it. Did you experience this?