How to Build Your Own American Ninja Warrior Training Course
Continuing today with our Holiday Guest Series, we have an awesome DIYer whose visited us here before (see her floating vanity here and pantry makeover here) — her project today is a little bit of an unconventional DIY project but so awesome we can’t wait to share it with you! Plus, it’s fun for both kids and adults, and if you’re focusing on fitness in 2017, this would be so much more fun than hitting the gym. So, without further ado, I present Lindsey and her DIY American Ninja Warrior training course! (See, I told you it was awesome and fun!)

This post contains affiliate links for your convenience. Learn more and see our full disclosure policy here.
From Remodelaholic: Please remember, this blog is for entertainment purposes only. As with ALL of our free DIY projects and tutorials, be certain to read over the complete tutorial before starting a project. Build at your own risk and be smart, be safe. We will not be responsible for any injury or damage incurred while following a tutorial from our site. None of our posts should be considered expert advice; please consult a professional when needed, read all safety and instruction manuals, and take all safety precautions. All projects performed following instructions found on this site are done at your own risk.
Build Your Own American Ninja Warrior Training Course
by Lindsey of Girl Meets Carpenter
Hello! I’m Lindsey of the blog: Girl Meets Carpenter. My blog is the on-going story of a not-so-average-anymore 1950’s ranch, a passionate-designer-girl {me}, and a ingenius-carpenter-guy {Jordan}. Over the last decade, this girl and that boy have been making crazy improvements to our humble abode. And we have successfully re-worked it into a more beautiful, functional space. We love to be authentic, original, and exceptional all while working within our budget. Check out our craft room post (enter through the hidden bookcase), our deck/pergola that is our outdoor sanctuary, and our madeover bathroom!
But today I am sharing with you our very own Ninja Warrior Obstacle Course!

We like to have a good time we like to stay active as a family but in a way that it comes naturally and without it feeling forced. What better way to have fun with fitness than by making an obstacle course? More than just watching American Ninja Warrior, we wanted to try it for ourselves. First things first, we needed a solid structure to build off from. Instead of building something from scratch, we brought home a swing set someone had offered Jordan to be used for the main support system.
(Tip: If it’s got good bones, it’s worth using! You can make it cute later!)

Next, the actual structure of the course starts to take place….

The height of this structure is 13 feet at its tallest point.

And then some beams to connect the two together. Jordan also added holes for the pegs (like a peg wall), a salmon ladder, and some rings!
The rings are adjustable so the whole family can benefit from them. We found them online (similar options here) and we bring them inside in the winter and hook them up in the basement where we can continue to use them. (Read more about that here!)

Jordan took the balls from our bocce ball set and drilled holes through them. Can you guess what these are for?!


Cannonballs!!

Jordan’s always figuring out better ways to do things: He hooked up this hook part onto his drill to more easily spin and set the balls into place.

See what I mean? (Imagine the drill is spinning and the hook is twisting the eye bolt into place. Pure genius!) The cannonballs are spaced 13 and a half inches apart.

We bought rope and braided it ourselves with a strange kind of braid, a speed rope braid. We found a braiding tutorial online.

Our kids have always been exceptional rope climbers!!

Jordan added more height to the salmon ladder since he quickly mastered it and needed more of a challenge.


All of the piping you see is 1.25in galvanized conduit and it has worked well for all of the use it gets.
For the salmon ladder, the wood is 9 inches, cut at a 45 degree angle, with three and a half inch gaps between each rung.
Jordan added many more holes on the peg wall so that he can work on his stamina of going up, across, down and even down/up the angled boards to the far side. The kids can do it for a few pegs, it’s a workout! It’s especially challenging because the pegs are staggered. If you wanted less of a challenge, you could drill the holes side by side. The wood peg holes are an inch and three quarters, the staggered distance between is 6 inches.

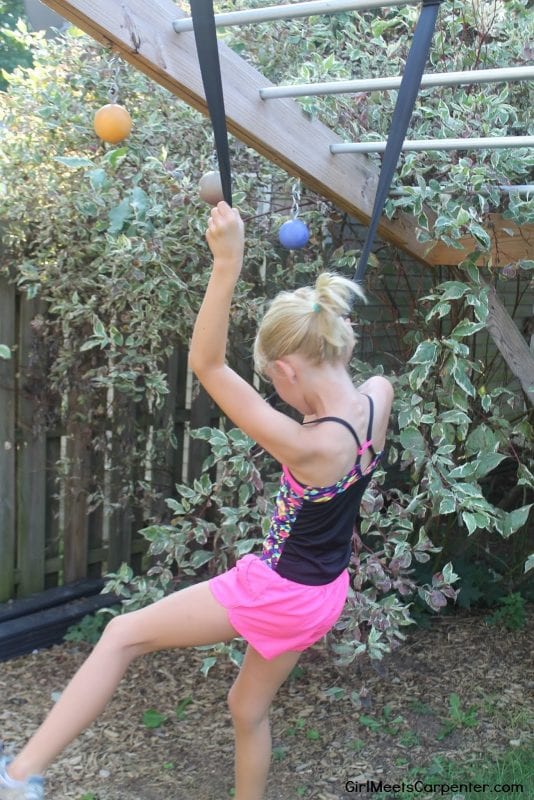
And then there are the monkey/pull up bars! Easy peasy, right?! Not for me, they TWIST! There is the option of stable bars that don’t twist but where’s the challenge in that, right?! The salmon ladder doesn’t twist so it works well for pull ups.

There are also straps lining the opposite of the cannonballs that you can swing to and fro on.
It’s a bit camouflaged so it’s not an eyesore to the neighbors or to our backyard-facing rooms!

It has been so good for our family. Our three oldest kids had the ability to climb the rope right away, (the youngest being four at the time!) and they have gained even more strength since we’ve had this built!

So far our obstacle course has peg walls, a 12 ft rope, rings, salmon ladder, monkey/pull up bars, straps, and cannonballs. We hope to add a rock wall for the kids next spring, a slack line, an even taller lookout tower on the original play structure, and a warped wall of course! It’s our custom playground with something for everyone!


Lindsey, this is SO fun — and so smart to use an existing play structure as a starter!
Remodelaholics, be sure to see more from Lindsey at Girl Meets Carpenter, or check out her work at White Pine Design on Facebook and Instagram, too.
See more creative outdoor DIY projects:

build a patio table with ice boxes

add creative and easy backyard lighting

Lorene has been behind the scenes here at Remodelaholic for more than a decade! She believes that planning projects and actually completing them are two different hobbies, but that doesn't stop her from planning at least a dozen projects at any given time. She spends her free time creating memories with her husband and 5 kids, traveling as far as she can afford, and partaking of books in any form available.


I love this! Could you tell me roughly what the cost was for this project (America ninja backyard course)?
Thank you!
-Laura Roth
Pretty cool! Looking to make something similar for my daughter and son. Do you have plans or a material list?
Would love to get some rough dimensions on this. Also wondering how deep you buried the posts.
Thanks,
Jeff
Looks great! Do you happen to have a material list? Thank you!
Do you have to put concrete in to hold the large salmon ladder posts into the ground? Or maybe I’m just not seeing the answers to the questions below?
Thanks!
It seems that your other project posts have a materials list – is there one for this? I love how you integrated so many different things into one structure. Please, please a little more instruction? (you mentioned the height of the structure, but you left off so much).
Hi Rachel,
Lindsey might be able to give you some more details, but since this was converted from an existing structure, it’s hard to give a full materials list.
it would be great to have some rough measurements and some kind of material list
thanks
Hi Mike,
Since this wasn’t built from scratch, there’s not really a good way to give you a material list or measurements. That’s the beauty of DIY, rock what ya got! 😉
Do you have blueprints and a materials checklist or approximate list?
This course is awesome!
Thanks,
Chrys
Can you estimate how much time this project took approximately?
No one is asking how much it costed you to build the sandbox, playground area, they’re asking about the ninja course addition. I’m sure we could all easily factor in the post you used to build off of. If you’re going to post diy’s you need to give more details, not saying “that’s the beauty of diy.” A lot of people have no idea where to even start if you don’t give some basic sizes of wood or anything.
Did you use 4×4’s or 6×6’s for the uprights. I am assuming 6×6.
The set looks great thanks for sharing.
This is an awesome and seemingly simple idea. Do you have a material list?
Hello. I’m building an outdoor gym and using yours as a guide. Thanks so much!!
Can you tell me how you installed the monkey bars? I can’t tell from the pictures. You said that you used 1.25in galvanized pipe but how did you install it?
Great work!
For the conduit, about how far apart are they?