
DIY Faux Wood Flooring Using Brown Paper


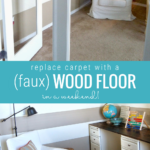
Install your own cheap faux wood flooring using brown paper and paint. Yes, you can paint your floor to look like wood using this twist on a DIY paper bag floor!
For more fake wood flooring alternatives, read more about DIY plywood flooring and our wood-look waterproof floors.

Have you ever had an idea that was just so crazy that you knew that it would either be brilliant or a big fat flop?
Our guest today is here to share a big crazy BRILLIANT idea that worked and looks wonderful: a DIY faux wood plank floor, made using brown paper and paint.
Chris’s twist on a DIY brown paper bag floor looks like hardwood! Just feast your eyes on the faux wood flooring glory:

This post contains some affiliate links for your convenience. Click here to read our full disclosure policy.
Fabulous, right? It looks like wood but costs so much less than hardwood, laminate -or- vinyl — just brown paper, paint, and stain!
Wondering about other flooring options? Read more about why we like real hardwood floors here (plus tips for installing your own). We’ve also installed luxury vinyl tile and wood-look vinyl planks for added water protection while still getting the look of hardwood.
This DIY faux wood floor is a great option to save money, whether it’s a budget-friendly long-term solution or part of renovating in phases after you rip out gross carpet while you’re waiting to install a more traditional flooring.
I’m so thrilled that Chris is here today to share the tutorial exclusively with our Remodelaholic community. Give her a warm welcome!

DIY Faux Wood Plank Brown Paper Flooring
by Chris of Freckle Face Girl
Hi fellow Remodelaholics! I’m Chris and I blog over at Freckle Face Girl and post more projects on my Facebook page. I am so excited to be a guest at Remodelaholic today!
I am a freckle face mama of 4 and a lover of projects. I think I’m a project-aholic. They keep me sane in this busy life of mine and they are how I spend my “me” time. If I’m not working on a project, I’m thinking about working on one!
Some of my recent favorite projects are the DIY Black Rubbed Pottery Barn Finish in my boys shared bedroom and my Ikea Chandelier hack with Rub ‘n Buff.
But, my absolute favorite is why I am here today. It’s got to be my craziest one yet!

This isn’t the room’s first transformation (remember what I said about liking projects?).
This is after we moved in and threw everything that didn’t have a home elsewhere, in here.

For the first makeover, I re-painted the room with stripes, painted the ceiling blue, added some DIY artwork, a new hanging lantern, and cleaned up the clutter.

But what I really wanted to completely finish the room was a dark floor.
I looked into laminate, vinyl and wood. But there really was no reason to spend so much money in one room just because I had the desire for change.
And then it happened.
I saw an idea where others had torn up builder’s paper or brown paper bags and glued it to the floor and in some cases stained it to achieve a richer color, like this brown paper bag floor tutorial here on Remodelaholic from An Oregon Cottage.

While they were beautiful, I really wasn’t wanting the leather or patchwork look for my room. I really wanted the look of a wood floor using the same brown paper bag floor DIY concept.
How to Use Brown Paper to Make DIY Faux Wood Flooring
I decided to try and create a faux wood plank by cutting strips of brown paper, adding a faux bois technique and then staining and sealing the floor.
The goal was to create the look of old, reclaimed barn wood, with imperfections and distressing.

Materials for a Faux Wood DIY Brown Paper Floor
- Builder’s Paper from Lowes $11 (or Amazon)
- 1 quart Minwax Dark Walnut Oil Stain $7 (or Amazon)
- Elmers Glue All $15 (or Amazon)
- Wood Grain Tool $7 (or Amazon)
- 1 gallon Minwax Polycrylic in Satin $45**
- Small amount of brown paint for creating faux bois technique (I used Sealskin by Sherwin Williams.)
- Small paint tray and paintbrush
- Squeegee
- Carpenters T-square (recommended)
**Remodelaholic note: Polycrylic is not recommended for use on floors because it would require more frequent recoating in high traffic areas. Instead, we recommend Minwax Super Fast-Drying Polyurethane for Floors (available at your local store or on Amazon) or Minwax Water-Based Polyurethane for Floors (also available in your local store or on Amazon).

Where to find a large roll of brown paper for flooring?
While this type of flooring is often called a brown paper bag floor, you can buy a whole roll of brown paper floor covering instead of collecting paper bags. This brown paper is called builder’s paper or paper drop cloth, and it’s available in large rolls at Lowe’s, Home Depot, Amazon or most home improvement stores.
I used Dark Walnut stain, but you can customize the stain to the color of your choice, or make your own combination.
I chose satin Polycrylic because the higher the sheen, the more obvious any specks of dirt or imperfections are.
DIY Faux Wood Planks for a Brown Paper Floor
Step 1: Cut your strips of paper.
These thick strips of paper will be your faux wood planks.
I used a piece of wood that was the width of the planks I wanted to create (5 inches). I rolled out the paper about 5 feet at a time, laid the board width wise on the paper (so at least my ends of planks would be straight).
Then I drew a line using the board as a guide. I did this over and over again and cut when I had about 10 or so planks done.
Then cut along the line.

You will repeat this process until you have enough planks.
Turn on your favorite movie (or 2) and start cutting. I got into a rhythm and just zoned out. Before I knew it, I had cut enough strips for the entire room.
I kept them in garbage bags until I was ready to use them. The more crinkled the paper gets, the more the plank looks distressed when it’s stained.
Step 2: Paint the faux wood grain pattern.
I really wanted that reclaimed wood look, so a painted wood grain was required.
You will need a garage or dedicated space for this part because you are going to use a wood graining tool to apply a faux bois paint technique to your planks, and they need space to dry.
Faux bois just means “fake wood” or “false wood”. Check out this faux bois hand-painted wall and faux bois pitcher and mug.
I had leftover dark brown paint that I used for this project (Sealskin by Sherwin Williams).
- Put your paint into a plastic container with a lid so you can stop/start without having to create more of your mixture.
- Add paint to the container and then add enough water so that when you paint your plank, the paint slides easily and quickly with no drag. It doesn’t need to be completely watery, but not as thick as normal paint.
- Quickly paint the plank top to bottom with enough paint to cover the paper but not so much that it is puddling or dripping. Just a thin coat, enough to cover the paper will do.

- Now, quickly take your wood graining tool and, using the back side with fine teeth, pull the tool from top to bottom so you have these fine lines.
Note that my paper has some small spots without paint, that is ok, perfection isn’t necessary here. The paint will dry quickly, so you will need to move fast. - Now pull the other side of the wood graining tool down over the lines you just made, slightly rocking as you go. The more you rock, the more knots you will have.

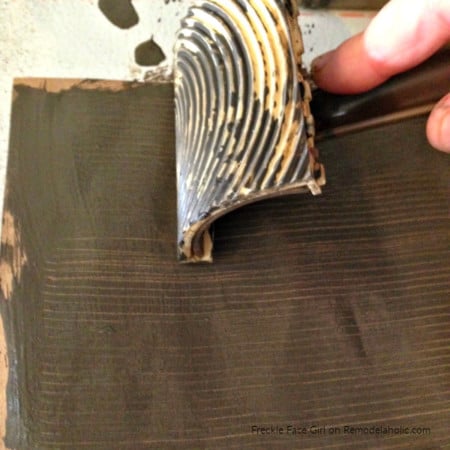

Again, there is no need to worry about perfection. This process goes very quickly. I think I finished all of my paper in about an hour.

I laid all of my planks out on my garage floor and they were dry within about 1/2 hour.
Step 3: Prep the existing floor underlayment.
Rip out your carpet, pad, tack strips and a million staples. Clean the floor really well. Be disgusted at that pile of dirt that was hiding under the carpet pad! Yuck!

Because I had OSB plywood instead of a regular plywood, I couldn’t get away with putting my planks in at this stage. I tried it in a closet and it gave a strange ripply appearance, because the paper highlights any flaws, ripples, or bumps in the floor.
I did try a practice board with a regular sheet of plywood, with the paper directly over it and that turned out great.
So, I had to cover the OSB with something smooth, and plywood is expensive.
Instead, I essentially created a floating floor much like laminate. I screwed down Hardboard Panels onto the OSB. Putty the seams and screw holes with wood filler and sand until they are smooth.
Step 4: Glue down the brown paper planks.
When you are ready to start gluing your paper down, you will need a bucket (something large enough to hold the glue mixture and a few papers while you are working).
- Add 1 cup Elmer’s Glue-All to every 3 cups of water and mix thoroughly. Make just enough of this mixture to use while you work: the papers will need to be completely submerged but you won’t be able to save it between gluing sessions.
- Mix 1 cup glue and 3/4 c water in a small paint tray.
- Dunk your paper plank into the bucket of glue/water mixture until thoroughly wet enough to soften and relax the paper.
- Only wet enough paper to work with in about 10 minutes. Lay paper on a towel or side of bucket until you are ready.
- Using a paintbrush, spread the glue mixture from your paint tray onto the floor where your plank will go. A thin coat will be fine because your paper also has glue on it.
- Lay down your plank and use a squeegee to gently press out any extra glue or water under the paper, wipe up and continue this process. This will ensure the plank is completely glued down, without wrinkles or bubbles.
It’s a messy process, so be sure to not use too much glue/water mixture and allow the water to drip off the plank onto the towel a little bit as you go. Otherwise you will have big puddles.

It goes very quickly. I was worried about the planks being straight so I used a carpenters T-square just to check every now and then. I was able to finish this part in about 1/2 hour.
Butt your boards up as close as you can when laying the planks.
You can see some small gaps between my planks, because it’s so difficult to cut a perfectly straight line. Don’t worry about those. You will take care of that later.

Be sure not to lean your hand on the paper after you glue it down, or the paper will come up with your hand!
Turn a fan on and let the floor dry for a couple of hours or overnight.
If you have any gaps between boards, this is the time to get your paint/water mixture and a fine paint brush and go dab it in the cracks.
Step 5: Stain the brown paper flooring planks.
Now you can apply the stain! I wore socks so shoes wouldn’t tear up the damp paper.
Using a rag or an old paint brush, I started staining in the corner and worked my way out from there. I gently and quickly pulled my stain and wiped with a clean rag if it looked too heavy.
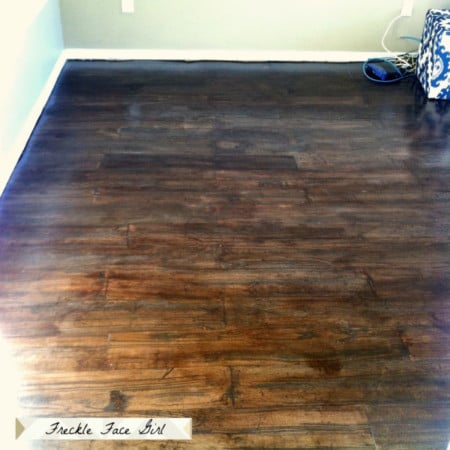
Continue until you are finished with the room. It will not dry, it will remain slightly tacky until you seal it.
Step 6: Seal the brown paper faux wood floor.
I applied my polycrylic with a brush because I preferred the control it gave me. I tried a lambswool applicator and I always got little bubbles and it was hard to control the amount applied.
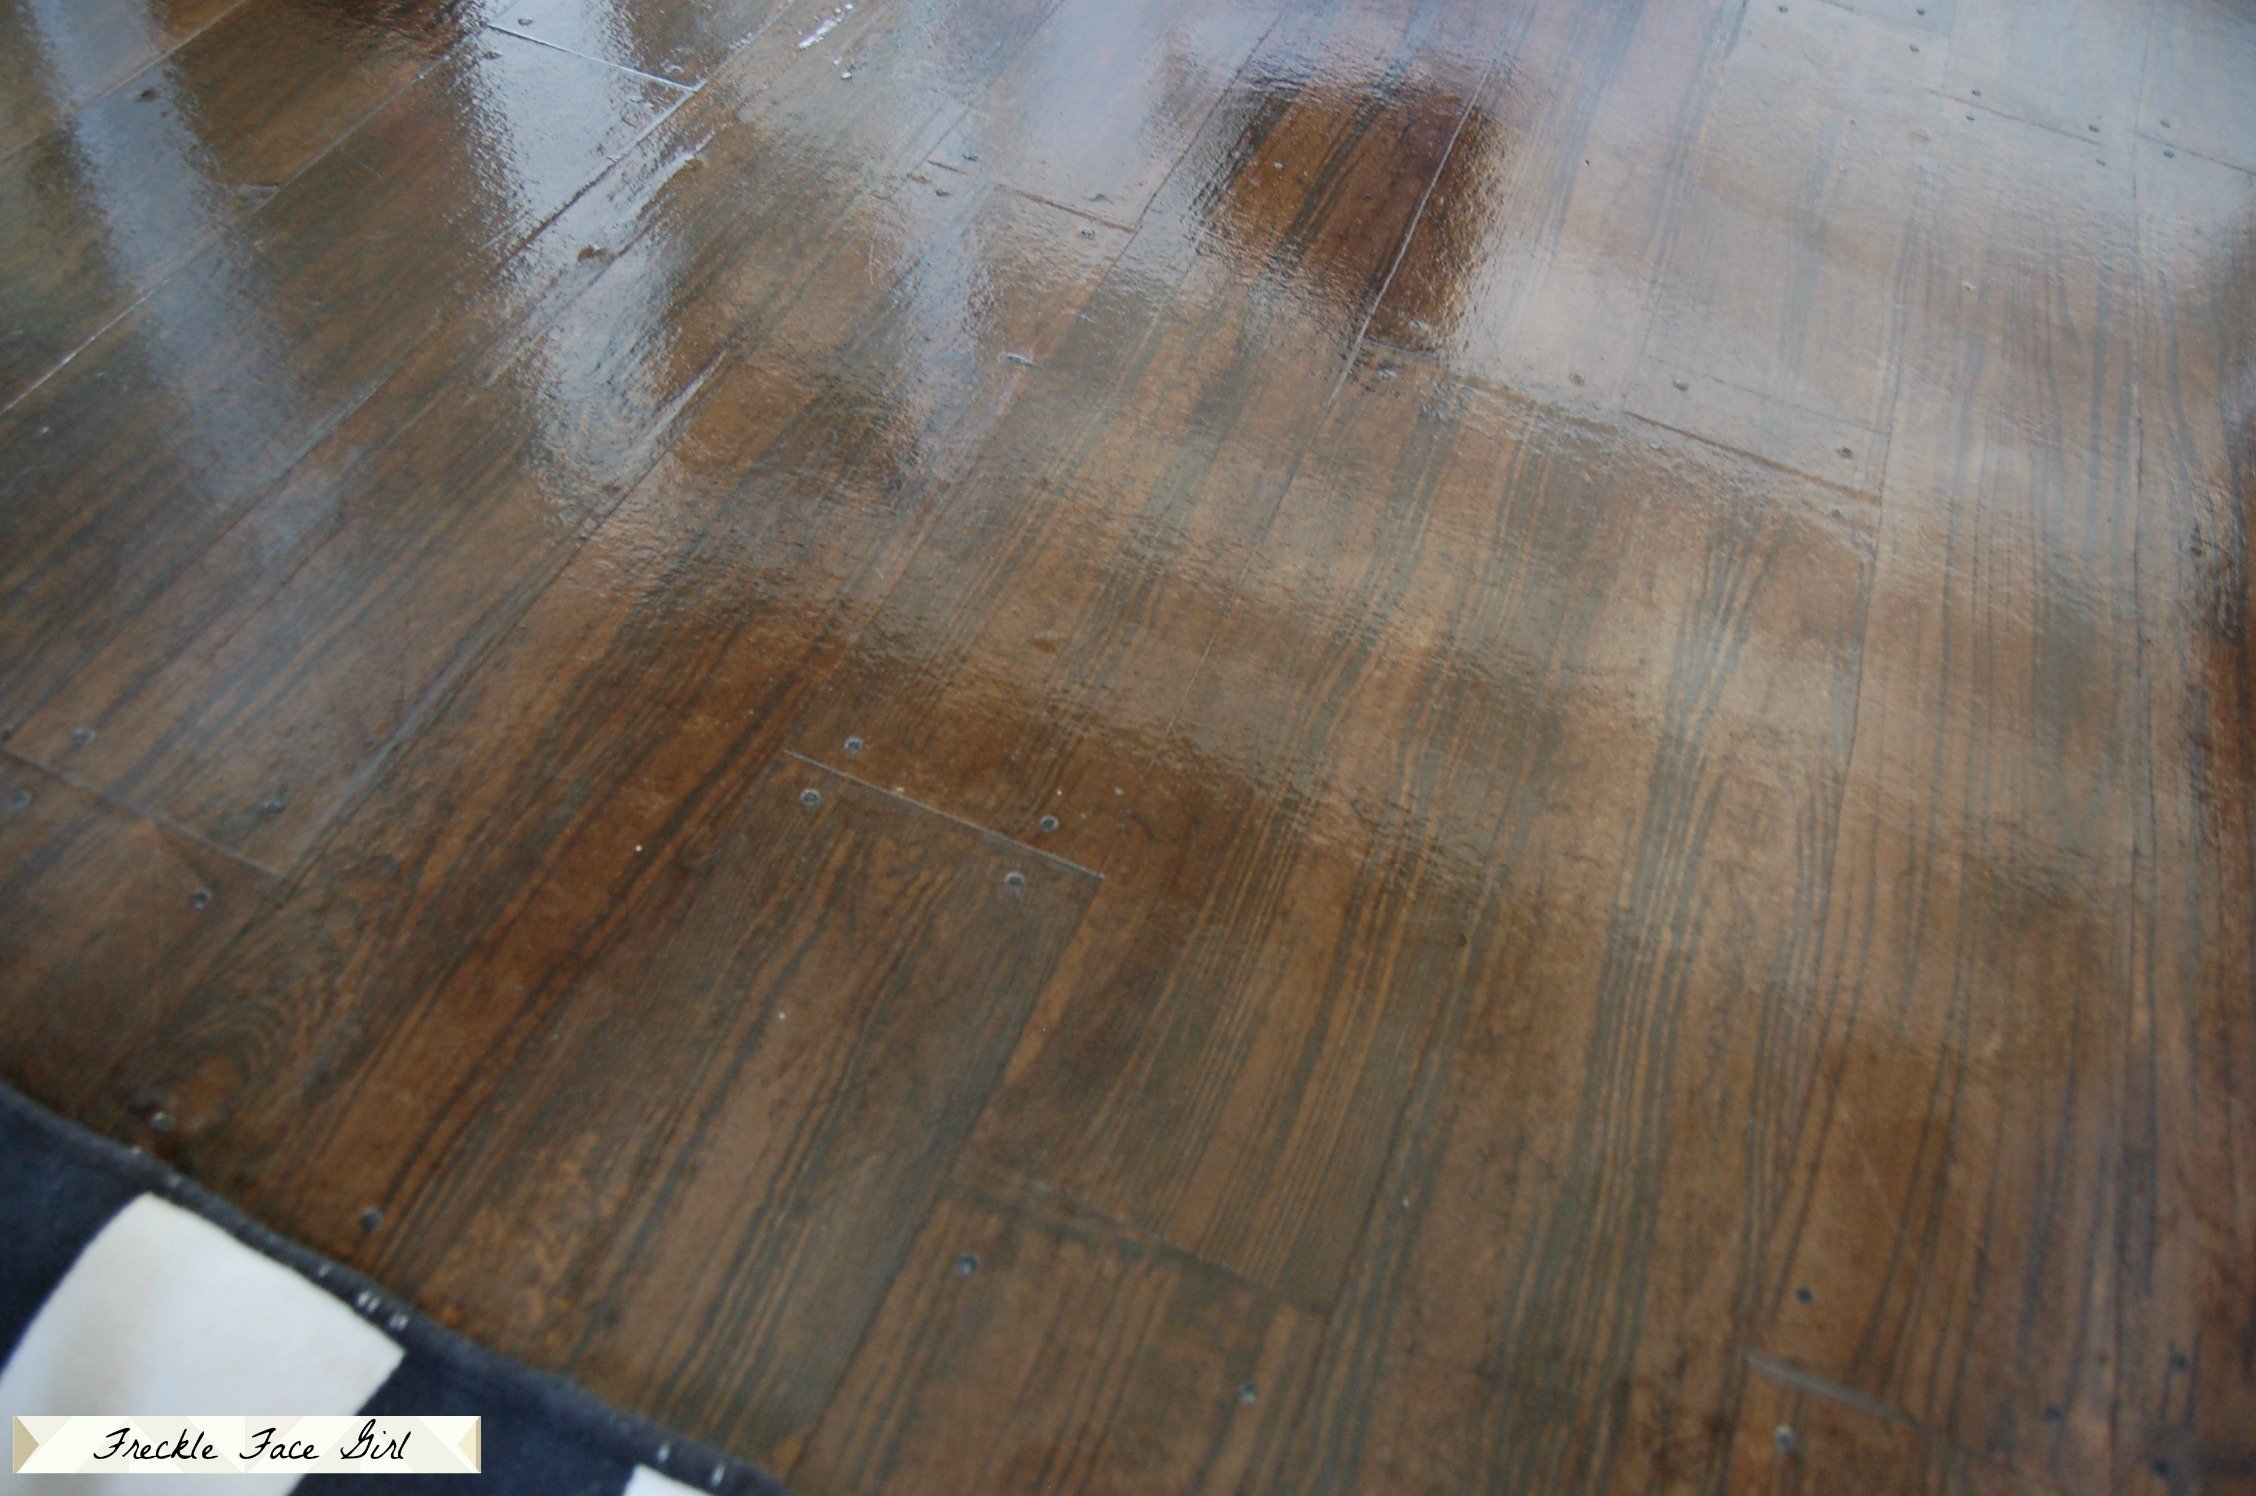
Don’t put it on too thick or it will create a cloudy effect. You will be putting down about 7 coats or more depending on the foot traffic your room gets and the floor sealant you choose (see note above).
But the polycrylic dries VERY fast. I was able to put all of my coats down in 1 day! Because this room get’s a lot of foot traffic, I put down 10 coats.
I decided to nail down small furniture tacks from Lowes that are square and resemble vintage nails to add to the reclaimed wood look.

How long did it take to install the faux wood floor?
I had already cut the paper into strips when I had time here and there.
Painting the paper took about an hour or a little longer.
The rest of the process, from ripping out the carpet to laying the final coat of poly, took a full weekend.
How does a brown paper faux wood floor compare to laminate?
It is a beautiful floor, resembling laminate in how it looks.
It feels similar to laminate, but without the hollow type sound they all have.
This brown paper faux wood plank floor is abused every day with push toys, crafts, kids and the dog. So far so good. I did put felt pads on all of the furniture.
If you get a scratch, you can wipe some stain in the scratch, and reseal.
I love it. I love that I created it. I love that it’s beautiful. How beautiful is it?

I hope you love it too! Be sure to stop by Freckle Face Girl and say hello and follow me on Facebook to see what other crazy projects I dream up.
Thanks Remodelaholic and Cassity for letting me be your guest! It’s a dream come true!
xo-Chris

————————————–
Thanks so much for being our guest, Chris — so glad your idea worked out and WOW, I love it!
Pay Chris a visit over at Freckle Face Girl and check out her fun and creative ideas, like her boys’ vintage industrial bedroom and her Busy Momma’s Guide of easy “immediately gratifying” projects, like a quick solar chandelier DIY.
Looking for more inexpensive DIY floor finishes? Try one of these:
- Painted Concrete Floor
- Whitewashed Wood Floor
- Plank Floor Using Plywood
- Leather-look Floor Using Brown Paper
- Painted Vinyl Flooring
- Grouted Peel and Stick Floor Tiles


Extraordinary! I never would have imagined this was possible. It’s gorgeous!
A-MAZING!!!! I would never have guessed this was just paper, paint & stain from looking at it! Love the nail accents – it added a lot to the realism too. Thank you for sharing this! Seriously, this is stunning! 🙂
I would like to do my kitchen floor but it has tile. I guess I could get something and level the cracks out between the tiles
So creative and the floors look so good. What a great idea!
AMAZING! I can’t imagine doing a project of that scale at my age but more power to you young people. It truly is beautiful!
I am still in awe at this amazing floor!! Love it!
Great job, Chris!!! I’ve seen it in person and it really does look awesome!!!
Thanks so much ladies for the comments! I’m really happy with how the floor turned out and am already dreaming (scheming) about doing more!
xo-Chris {Freckle Face Girl}
The best tutorial on brown paper floor I have seen. Thanks for sharing. Just wondering…can we make a white wash floor look by using white paint?
Hello! I just came across this and am so impressed! My husband and I are young and bought a house about a year ago. We haven’t really had the money to make any changes. The most I have done is tear up the gross old brown 70’s carpet, and found some gray tile underneath, but it is like the tile that is in a school and does not match. Do you think I could do this over it? How well has it kept up and is there anything that could be put over top of it to keep it safe from pets and kids(and husbands! Lol)? And do you think it would work in a kitchen or no? Thanks so much for the incredible idea!!
Incredible!! I can’t believe that the floor is painted paper! Amazing!!
I am amazed by this!! So impressed!
That is seriously impressive, wow! I can’t think up things like this so this type of stuff blows me away. Looks gorgeous!
That is amazing!!!!! I love it!
Pretty awesome! ! I Was wondering about price since you added the wood. I am debating this project!! Thanks
Hi Amanda! I did have to add the hardboard to cover up my super bumpy OSB-which the paper will highlight – ick. So my cost was minimally higher – but the hardboard comes in different thicknesses – I used the thicker one because the next room is tile and there is a bigger difference in flooring height – the hardboard was about $8 a sheet and I used 4.5 for this room- If I remember correctly, there was a thinner hardboard that was cheaper. BUT you may not have to do this step. The cost of all the supplies was about $100, but I have a lot of that product left, probably enough to do 2 more rooms. If you do try it, I’d love if you left a comment/picture over at my blog/facebook and let me know how it turned out!
xo-
Freckle Face Girl
Thanks
I’m interested in doing the faux hard wood floors with paper and the wood graining worked but is very muted the color of the paper isn’t showing through as much as yours and I wanted to know what texture of paint (flat, satin, etc) that sealskin was and what was the ratio of paint to water?
Oh my goodness, I can’t believe that is kraft paper. It looks amazing, great work!
Wow! I wouldn’t have known this was possible, or that it would turn out to be so effective!
This looks amazing! Could I do this directly on my existing lanolium floor?
Hi Julie! You CAN do it over linoleum or vinyl sheet flooring, if it’s in good condition (eg no cracking/peeling/lifting etc), BUT keep in mind, that the paper, once sealed will show a pattern on the vinyl, for example, if you have a tile pattern with grout lines, the grout lines will be obvious. Hope that helps!
xo-Freckle Face Girl
Just amazing. Any chance of a video to help understand the wood graining tool technique a little better? I think I’d cut with a rotary blade cutter to make it a little faster.
Hi Bernadette- I may do one, but in the meantime, it’s one of those things that just takes a little practice. There is no perfect way to do it, and just takes a quick swipe of the tool to make the grain. The trick is not getting too much paint on the paper, or it will be sloppy, and not letting the thinner layer of paint dry before you swipe, or you won’t see the effect. Imagine the possibility, you could paint your paper white, and let it dry, then do a brown coat with the tool and create a double paint layer, like old peeling wood! So many possibilities!
Hope this helps!!
xo-Freckle Face Girl
Any idea if it would be possible to do this outdoors? We have a covered front porch that has kinda ugly flooring. Cement would be too heavy, wood or trex are waaaay too expensive for something we don’t use a lot, just want to look a little nicer. Is there any kind of sealant that would protect enough to work outdoors? Again, it’s covered, but on the other hand, we live in Seattle and there’s enough rain & wind that it will get wet.
Hi Shannon! You know, I hate to say go for it and then it doesn’t work (although, I say go for it, what do you have to lose?!), but when I was doing my research, I DID see someone in Hawaii who had done the same process (with torn paper) on their lanai (outdoor, UNCOVERED patio) and it was beaten by the Hawaii weather and was great. If will try to post that link to my facebook page if I can track it down again! The secret is in sealing the final product. You would obviously want a sealer that could withstand moisture. And the more coats, the stronger the final product.
You would also want to make sure there was a nice smooth surface for the paper to stick too, no peeling paint. I guess I don’t have a lot of fear when it comes to these things 🙂
xo-Freckle Face Girl
Awesome, thanks so much!
Kudos! Amazing floors! Spectacular Brains!
Aside from the floor, you also gave me another great idea. The wood plank with cabinets that serve as work shelf – great!
Could you do this on concrete floors? Same tactic? I need something for my daughters bedroom floor…
Elizabeth- YES! You can – do a little bit over research online first, but during my research, a lot of people did it over concrete – just patch any cracks/holes, and maybe try it in a corner / closet first – just a patch, to see how it works. I wish I would have had concrete under my surface instead of the OSB – Good Luck – make sure you come over to my Facebook and share pictures when you are finished!
xo-Chris {Freckle Face Girl}