DIY Paper Plate Angels and Tissue Paper Dancing Ballerinas (Paper Christmas Decorations; Day 11)


This would have been the perfect 9th day, for Nine ladies dancing. I just didn’t get them done in time. And so they are now the eleventh day, so oh well. Lets just change the song to say Eleven Ladies Leaping? Huh? What do you think?
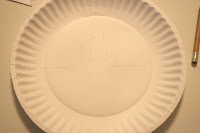
I am going to start with the angel though. I got the template and idea from Martha. Also here is a picture from their site that shows it as a table decoration. I think it is too fun!


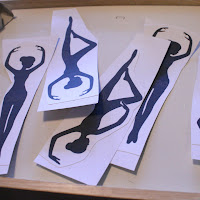
Now, cut out the silhouette.


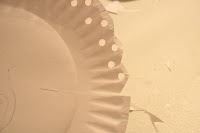
I cut out some half moon tissue paper tutu’s with pinking sheers, but I realized, a full circle would have worked too, then folded in half, which would have hidden the staples more easily. (you could also glue the tissue paper like the ornament in Day 7, to give the skirt volume) I just gathered into the center and stapled. Then I added a printed paper on top, stapled them together and glued a small piece over the staples. Lastly, glue it to the Ballerina body.


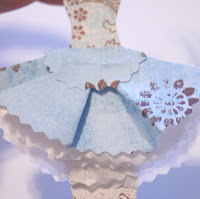

I did a single layer skirt with a decorative top, all just glued in place.
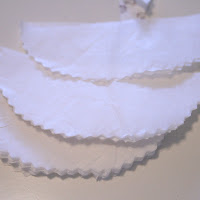
Finally I did a folded circle version of just tissue paper. And just folded it over to hid the staples and glued it in place.


>These are beautiful!
>I think the ballerinas are my favorite! The possibilities are endless
>I love the Dancing Ladies. They are so elegant.
Smiles~
Marilyn
>Hello! I think this is my first time visiting your sweet place here. I really love all of the paper ornaments you have shown!
I noticed the note at the top of your posts about a project/craft. I have made a folded paper German Star tutorial. It is a post from November so it is getting a little old. Just thought I'd mention it to you. The tutorial was part of a giveaway but that has ended. It is posted here:
https://gratefulprayerthankfulheart.blogspot.com/2009/11/1-year-blogging-anniversary-tutorial.html
I have become a follower so I will be able to visit with you often!
Kindly, ldh
>OK, I LOVE your paper ornaments! Found you throught the DIY show off and immediately became a follower. I am definately a fan of budget remodeling! Can't wait to go see all you've been up to !
Hugs
Ramsey